WyoCherokee Posted December 8, 2016 Posted December 8, 2016 Well its good to be back in an MJ. MY previous account would not let me back in (19674x4) I used to have a 88 2wd Sporttruck. Sold it to find a new truck. Here recently i had a 99 XJ that i built up extensively Link here: http://www.cherokeeforum.com/f46/project-blueberry-211258/ Just traded the XJ for a 90 Eliminator...will continue with the build thread as more things come up. I spend most of my time over on Cherokee Forum, so check there for most up to date build progress. Here is my MJ build thread: http://www.cherokeeforum.com/f46/project-patience-90-mj-dd-trail-sleeper-231553/
WyoCherokee Posted December 8, 2016 Author Posted December 8, 2016 Here are some photos. It is below zero for the next week, sop i am not able to get much done. however this weekend i will have some updates.
WyoCherokee Posted December 12, 2016 Author Posted December 12, 2016 well, got in to some wiring..cleaned up all of the PO's twisted and e-taped connections and heat shrinked them for now until i can build proper harnesses. Replaced the flasher switch to repair my turn signals. Still chasing no brake lights or reverse lights. I have power going in to the brake switch, but non out the other side. WIll just replace the switch for good measure as its on $9. No reverse lights has me thinking bad or dirty connection on the reverse sensor in the tranny. Would prefer to have them working, but i can always wire in some extra reverse lights on a switch. Found a couple coolant leaks and a PS leak.
MeanLemons Posted December 12, 2016 Posted December 12, 2016 Howdy. You may remember me as xjwonders over at CherokeeForum
WyoCherokee Posted December 12, 2016 Author Posted December 12, 2016 Howdy. You may remember me as xjwonders over at CherokeeForum Howdy! Upon further inspection of my cables, it appears the PO already upgraded them, so i won't be needed the set you quoted me :(
WyoCherokee Posted December 13, 2016 Author Posted December 13, 2016 Spent all last night digging in to my no brake lights. Turns out, the wires going into the hazard/brake flasher slots on the fuse block are so loose, that it cannot make a clean connection. As soon as i wiggled the connections, i had working brake lights. So for the mean time, i thin i am going to remove those spades and crimp on blade connectors to plug in the flasher to and let it hang. That should get me by till this summer when i can pull a fuse block from a JY and spend a day soldering connections.
WyoCherokee Posted December 20, 2016 Author Posted December 20, 2016 Got my headlight relay harness in last night. Bought it from a member over on Cherokeeforum. This version is much better than the Putco i had on my XJ. Just ordered my H4 housings and 55/60 bulbs. can't wait to get rid of these Junk HID things that pass for headlights!
WyoCherokee Posted December 27, 2016 Author Posted December 27, 2016 Got rid of the HID's and put the H4's in. Mucho Better! Check out that old tape job onthe wiring....yikes. Had a christmas day blizzard so i got to haul snow and bust open the road.
WyoCherokee Posted January 2, 2017 Author Posted January 2, 2017 Swapped in a set of 97+ 2 door XJ tilt seats. For those who are using the search function....MJ bucket mounts will not work with any other seat. You must swap tracks if your donor seats are from a early model xj. Or you must Fab your own mounts if you are using 97+ seats as the track widths are 4" wider. I used some scrap tubing i had laying around to Fab my own mounts. It took about 2 hours for 1 seat by taking my time and working on drilling holes and finding hardware. THese will work for now until i strip the interior, at which time i will re make my mounts
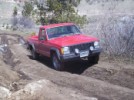
WyoCherokee Posted January 23, 2017 Author Posted January 23, 2017 Spent Sunday goofing off in the mountains
DirtyComanche Posted January 24, 2017 Posted January 24, 2017 How are those XJ seats for height with the tubing to adapt them to the MJ rails? Rather high?
WyoCherokee Posted January 25, 2017 Author Posted January 25, 2017 How are those XJ seats for height with the tubing to adapt them to the MJ rails? Rather high? Not bad at all. It is only 1" tubing. I am 5'10, and i feel like its a perfect fit.
WyoCherokee Posted February 8, 2017 Author Posted February 8, 2017 Ive been Bad about updating the build on this site, simply because its so much easier to upload photos over on CF. Most up to date is over on CF: http://www.cherokeef...sleeper-231553/ So far, i have cut the front fenders to match the newer xj lines. plugged the knock sensor back in and gained power Bent the Nates 4x4 rear bumper simply from tugging out at YJ and started on a custom center console.
Steve Gregory Posted February 10, 2017 Posted February 10, 2017 Here are some photos. It is below zero for the next week, sop i am not able to get much done. however this weekend i will have some updates. What size bulb did you use for the heater control? every LED I've used was too long for the housing
WyoCherokee Posted February 10, 2017 Author Posted February 10, 2017 Here are some photos. It is below zero for the next week, sop i am not able to get much done. however this weekend i will have some updates. What size bulb did you use for the heater control? every LED I've used was too long for the housing Those are the stock dash bulbs. Try these guys: http://www.onewaylight.com/1984-2001-jeep-cherokee-xj-instrument-light-set/
WyoCherokee Posted February 27, 2017 Author Posted February 27, 2017 Finishing up a Center Console, since i switched to bucket seats. The sloped section will house all my switches and guages.
WyoCherokee Posted March 8, 2017 Author Posted March 8, 2017 Just put my order in for a Cav-fab 3 link, hi clearance steering, RE 6.5 coils, new perches and u-bolts, 4.56 gears and a trutrac front....Let the modding begin!
Mattman6 Posted March 8, 2017 Posted March 8, 2017 Just read through your other post on the Cherokee Forum. How about show us the love you show them :yes: It's looking good so far! Keep the updates coming.
WyoCherokee Posted March 9, 2017 Author Posted March 9, 2017 Just read through your other post on the Cherokee Forum. How about show us the love you show them :yes: It's looking good so far! Keep the updates coming.Because uploading pictures here, literally takes me 3x as long. No joke. Here's a teaser of the 3 link.....https://www.instagram.com/p/BPn2NRrAf-s/and yes, that upper link joint is supposed to be like that. It will flex 12" shocks on 35" tires.
WyoCherokee Posted March 13, 2017 Author Posted March 13, 2017 Just got word that my Cav-Fab order Shipped ahead of schedule. Yea Buddy!!
WyoCherokee Posted April 3, 2017 Author Posted April 3, 2017 Alright, i braved photobucket......man i hate that site. here's some updates..... Got 33's put on it. Phjoto shows the difference from 31x10.5's to 33x12.5's. Not sure on Rim backspacing, but they rub the bed when flexing or hitting a pothole and the fronts rub the control arms at full lock. The PO welded the steering stops, so i can't turn those out :fs1: : Got my Cav-Fab Steering in: I am waiting on a couple more parts to show up: stainless brake lines, the actual 3-link and some other small stuff, then i will tear in to her :banana:
WyoCherokee Posted April 3, 2017 Author Posted April 3, 2017 Got some more goodies in....rubicon expres stuff, a diff guard, etc.
WyoCherokee Posted April 7, 2017 Author Posted April 7, 2017 Making room for movement with 33's on 4" and the 3-link. Gonna stay with the sleeper theme and stay low with droop. Some Fender Massaging. Need a new wire wheel and some paint to finish off the bare metal. Rubicon express track bar and frame brace....this is the second one ive installed, and the holes on the passenger side always need some massaging to fit. Anyone looking for a niche market? i know of only 2 companies that make these braces Steering box spacer and box brace are getting installed tonight! i need to find a good 5/8's bit or reamer before i can install the cav-fab crossover steering.
WyoCherokee Posted April 7, 2017 Author Posted April 7, 2017 http://www.cherokeeforum.com/f10/cavfab-alpha-series-3-link-231597/index6/ Page 5......Pure Fapping material right there. GUHHHH i can't wait for it to arrive!

Recommended Posts
Create an account or sign in to comment
You need to be a member in order to leave a comment
Create an account
Sign up for a new account in our community. It's easy!
Register a new accountSign in
Already have an account? Sign in here.
Sign In Now