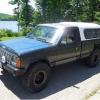
husky410ohio Posted January 1, 2015 Posted January 1, 2015 Hi my name is Richard and I am from Ohio and this is my 1988 Comanche It started 10 years ago with the truck that did not run I purchased from a friend for $100 and had towed to my house. My brother gave me the chevy 350 motor and SM465 from his old CJ-7. Advance adapter motor mounts DIY beadlocks I did a drawing in Solidworks for a new 304 stainless steel tailgate latch. Autometer gauges This is my fuel tank sending unit. I removed the fuel pump and made a pick-up tube with a fuel strainer I purchased. I used a 1/8" pipe tap and plugged the old return line. Fuel float works with a new auto meter fuel gauge. Holley spreadbore 650 CFM 4 barrel with mechanical secondaries that I rebuilt with new floats New holley floats part number 116-3 nitrophl on right Allstar Performance power steering pump with Detroit Speed Inc. pump mount Painless Performance fuse block, MSD 6AL ignition, mechanical fuel pump and Holley spreadbore 650 CFM 4 barrel with mechanical secondaries that I rebuilt with new floats, Mallory cartridge style fuel filter, 3/8 inch fuel line, new 22 gallon tank, Elelbrock aluminum intake manifold, AA headers made for the conversion, Flowmaster diamond plate off-road muffler, AA motor mounts, Novak radiator, Allstar Performance power steering pump. Lakewood bellhousing, SM465 truck transmission, AA t-case adapter, Mcleod throw out bearing, NP231 with slip yoke eliminator, Detroit Speed Inc. shifter knob, Autometer gauges. 33 x 12.5 x 15 BFG mudterrain on stock wheels modified with DIY beadlocks, Superlift 3" lift with longer lower control arms and shocks from Tyres International. Optima battery on DirtBound Offroad steel tray, DirtOld Man Emu steering stabilizer, OMC Offroad steering box brace, drop pitman arm, ZJ tie rod conversion, Canton Custom Clutch driveshafts. Single electric pusher fan mounted on front of radiator wired to a switch on the dash that I only use driving at 70 mph highway because I have a mechanical fan
kansashogan Posted January 1, 2015 Posted January 1, 2015 After ten years I'm sure there has been a lot of progress. Can't wait to see more.
husky410ohio Posted October 6, 2015 Author Posted October 6, 2015 The alternator belt has excessive wear so I got a new lower bracket mount from summit number SME-2000. The upper mount I sand blasted and had zinc plated for $10 by Nicks plating and they had it done next day. I also have a Wangler Power Products 140 amp alternator I will rebuild later.
husky410ohio Posted October 28, 2015 Author Posted October 28, 2015 I am adding a power steering filter from NAPA NAPA filter number 1622 and filter adapter base NAPA number 4764
JoeLAW Posted October 30, 2015 Posted October 30, 2015 Nice man your engine bay looks clean! :thumbsup: And I had a couple of questions on how you did the auto meter gauges, since I'm planning to do the same thing on my truck, do you have a write up, or more pics about it?
husky410ohio Posted October 30, 2015 Author Posted October 30, 2015 To install the Auto meter gauges remove the instrument cluster and disconnect the speedometer cable and the two electrical connectors. I cut off the plastic corners of the instrument cluster from the back. I then sheared a piece of aluminum sheet and hole sawed it to fit the auto meter gauges. I added the Auto meter fuel gauge after I took the pictures below.
JoeLAW Posted November 1, 2015 Posted November 1, 2015 Nice Man Thanks a lot! I will do the same thing to mine!
husky410ohio Posted January 10, 2017 Author Posted January 10, 2017 New Dana 60 Detroit Locker for the rear and Detroit Tuetrac for the front
ggcnash Posted January 13, 2017 Posted January 13, 2017 Love the build could you update the pics pls? doing my an ls swap now interesting stuff! Sent from my SAMSUNG-SM-G890A using Tapatalk
husky410ohio Posted January 19, 2017 Author Posted January 19, 2017 New G2 4340 chromoly front one-piece axle shaft part numbers GTA-97-2031-002 and GTA-97-2031-003 from Summit Racing with SPICER U-JOINT DS U-760
johnj92131 Posted January 26, 2017 Posted January 26, 2017 Looks like you took a bunch of great pictures. But, for me, more than half of the links are dead or will not load. Am I doing something wrong or are the links now dead?
dragordie Posted January 26, 2017 Posted January 26, 2017 Great looking build, I have the same issue as johnj92131 over half of the pictures are not showing.
husky410ohio Posted March 2, 2017 Author Posted March 2, 2017 NEW U-BOLTS FOR THE DANA 60 FROM WFO Concepts part number WFO 1771-KIT includes 5/8-18 x 2.75" x 8" u-bolts for 2.75 axle tube
Pete M Posted April 14, 2018 Posted April 14, 2018 same here. I can't see the MJ goodness. what host are you using? is it facebook?

Recommended Posts
Create an account or sign in to comment
You need to be a member in order to leave a comment
Create an account
Sign up for a new account in our community. It's easy!
Register a new accountSign in
Already have an account? Sign in here.
Sign In Now