Fernando87mj Posted January 10, 2021 Author Posted January 10, 2021 8 hours ago, MiNi Beast said: i hope your doing rms as well while you are there... I know I should but it’s going to have to wait
Fernando87mj Posted January 10, 2021 Author Posted January 10, 2021 Trans is in. Not to bad getting it lined up. Glad I had spent the extra for a trans jack. It really made a difference. As of now, - Trans is in - holes are tapped with the correct thread on body - old clutch line is out - new mopar cps is in (thanks to eaglescout526) - drive shaft is bolted in , had to swap yokes ( will need a drive shaft made eventually as this one is a little short) Still need too.. -get new clutch line and connect the master to the slave - buy a new trans mount for the Ax15 - get custom drive shaft made - buy new interior shift boot Since the old one was beyond torn. here’s some pics
Fernando87mj Posted January 10, 2021 Author Posted January 10, 2021 Ran the truck for a few Minutes and it sounded great.
eaglescout526 Posted January 10, 2021 Posted January 10, 2021 Engine should start up with no problem now!
Fernando87mj Posted January 22, 2021 Author Posted January 22, 2021 After 4 years of putting this off , She’s finally on all 4 again. As of now... - I still need to install my new trans mount and figure out the crossmember -bleed the clutch more , it feels to soft for my liking and grinds going into reverse if I’m not gentle. -put the interior back together -figure out how I’m going to support the exhaust -replace inner shift boot -wash the multiple layers of dirt off this thing but.......man does this Ax15 feel amazing , the shifts and the clutch feel so soft and smooth that it justifies all the little hurdles that I had encountered when I swapped this thing in. big thanks to Eaglescout526 for getting me quality parts for the swap.
Fernando87mj Posted January 28, 2021 Author Posted January 28, 2021 5 hours ago, Pete M said: that's a milestone for sure! She’s running and driving now Pete! Still not 100% happy with the clutch pedal feel but I drove it at 70+ the other day. now I need too swap in some 746 injectors since my originals are seeping at the seam and I don’t want to risk a fire
Fernando87mj Posted March 5, 2021 Author Posted March 5, 2021 Since last update I’ve gotten it pretty dialed in. - I bled the clutch once more and now it feels really good ! - installed mopar trans mount , which did line up with the old Peugeot crossmemeber - replaced fuel injectors with 746 injectors. - added supplemental headlamp harness because I don’t want any fires -replaced upper control arm bushings -replaced lower control arms old injectors were leaking pretty badly new injectors installed did an alignment and found my caster was way off finally added this harness , big difference at night and lowers the risk of fire , what’s not to like ?
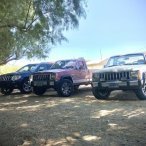
89 MJ Posted March 5, 2021 Posted March 5, 2021 Looking good! I love the chrome front end on this truck.
Fernando87mj Posted March 5, 2021 Author Posted March 5, 2021 30+ year old bushings , what could go wrong ? my advise to anyone doing the upper bushings , just buy new arms , the old arms are made of Flimsy metal and bend really easy on the press , I made it work , but less of a hassle just getting new arms. lower arms were much less of a hassle , those uppers were such a bastard to line up but I did learn a lot so there’s that ! Overall I definitely recommend doing this job , it sucks to do , but man does it drive nice. I actually want to do the same thing to my Zj now because it’s a pretty big difference!
Fernando87mj Posted March 5, 2021 Author Posted March 5, 2021 13 minutes ago, 89 MJ said: Looking good! I love the chrome front end on this truck. Thanks bud appreciate the kind words !
eaglescout526 Posted March 5, 2021 Posted March 5, 2021 I do love seeing the updates on your MJ. Doing the control arms are never fun though but I have a handy dandy broken piece of leaf spring that helps me with the turning of the axle.
Fernando87mj Posted March 5, 2021 Author Posted March 5, 2021 41 minutes ago, eaglescout526 said: I do love seeing the updates on your MJ. Doing the control arms are never fun though but I have a handy dandy broken piece of leaf spring that helps me with the turning of the axle. thanks really appreciate it , hasnt been easy but its soo worth it
Fernando87mj Posted March 25, 2021 Author Posted March 25, 2021 Realized I had updated the wrong build thread whoops replaced the track bar on this one. new arms and track bar have made a tremendous difference in ride quality and the sensitivity of the steering wheel. Super pleased with it. track bar replacement went incredibly smooth , got it all done within 20 minutes really love the turbines. Next up Is addressing the worn out tie rod ends and throwing in a new steering stabilizer while I’m at it. Also thinking about getting the steering box rebuilt Locally since I saw some fluid seepage around the input shaft seal and it’s bothering me
MiNi Beast Posted March 26, 2021 Posted March 26, 2021 replace it all and be done with it for a bit. tie a rag around the gear box itll be good.
Fernando87mj Posted March 26, 2021 Author Posted March 26, 2021 50 minutes ago, MiNi Beast said: replace it all and be done with it for a bit. tie a rag around the gear box itll be good. That’s the next step ! And Haha turns out it wasn’t the box that was leaking ,I thought it was leaving little spots on the driveway but it turns out it was my zj that was leaving those spots due to a loose hose clamp
Fernando87mj Posted March 26, 2021 Author Posted March 26, 2021 Getting ready to re do the rear brakes this weekend going to resurface the rear drums and install new parts this weekend hopefully
eaglescout526 Posted March 26, 2021 Posted March 26, 2021 Might want to get a 55 gallon drum of brake cleaner for that.
Fernando87mj Posted March 26, 2021 Author Posted March 26, 2021 Had been a while since I had cut drums , they forsure needed this done to them. a few cuts later and the first one looks good !
eaglescout526 Posted March 26, 2021 Posted March 26, 2021 I asked our alignment guy who does brakes as well was an AMC quality check tech back in the day to check my drums and what not. Said the cylinders were leaking and cut my drums for free.
Fernando87mj Posted March 27, 2021 Author Posted March 27, 2021 5 hours ago, eaglescout526 said: I asked our alignment guy who does brakes as well was an AMC quality check tech back in the day to check my drums and what not. Said the cylinders were leaking and cut my drums for free. Sounds really cool to be able to work with a former amc employee
Fernando87mj Posted March 27, 2021 Author Posted March 27, 2021 Got drivers rear assembled , had a tough time lining up the brake line with the drivers rear wheel cylinder , last thing I wanted to do was strip any threads. Got passenger rear wheel cylinder installed, which is where I will stop tonight. tomorrow will reassemble pass. Rear and bleed system.
eaglescout526 Posted March 27, 2021 Posted March 27, 2021 10 minutes ago, Fernando87mj said: Sounds really cool to be able to work with a former amc employee He’s a great guy. He said he used to do quality checks on mostly Jeeps back in the day for a dealer out here but he didn’t get into the mechanics until in the 90’s. He told me that when he saw and worked on my truck that it brought him some memories back. I usually ask him some things from time to time, mostly steering/brake related lol.
Fernando87mj Posted March 27, 2021 Author Posted March 27, 2021 both drums are done , adjusted and brakes a bled. Currently waiting for last coat of paint to dry on drums.

Recommended Posts
Create an account or sign in to comment
You need to be a member in order to leave a comment
Create an account
Sign up for a new account in our community. It's easy!
Register a new accountSign in
Already have an account? Sign in here.
Sign In Now