JeepcoMJ Posted June 9, 2007 Posted June 9, 2007 hehe, DON'T do it on a diesel first of all...it WILL do worse than backfire. second, it backfires if i do it to the 3.8, and on the 2.5. so i see no reason why it wouldn't on the 4.0. good thing is is that it's non-destructive and it'll just burn off :D
UNL1MTD Posted June 10, 2007 Author Posted June 10, 2007 looks like you started to take some of the stickers off..... how did you do this??? Thanks! I used all three techniques; chemical, heat, and physical. By far the physical method of the rubber decal remover wheel was the best. I think I had to luck with heat because my decal was not complete and had many tears in it. The chemical method worked, but way less efective then the rubber decal remover wheel. I did my pass side with Goo Gone, it worked but left a very thin film. I did my driver's side with the rubber wheel. The rubber wheel was about 4 times as fast and nothing was left on the paint. I plan on going over my pass side again with the wheel. Check out this thread. http://www.comancheclub.com/forums/viewtopic.php?t=4849
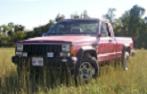
UNL1MTD Posted July 6, 2007 Author Posted July 6, 2007 Been awhile, got some pictures developed (yup developed, still rockn the 35 mm film, so I figured I would add them to my never ending thread. This is a shot of the driver's side of the jeep which I used the decal remover tool on. It looks sweet in comparison to the other side. Might be hard to tell in the pic but it really polished the paint as it removed the decals and the paint underneath is brandnewish leaving this cool faded decal look, definitely a step up from the peeling vinyl. Shot of my new interior lights. Easy project. Pic of my new higher output (100 amp) alternator. This is my fabbed up spare tire mount. My winch mechanism still worked, so I just need something to attach the cable to. I opted for a thin piece of scrap steel. Which I drilled, glass beaded and painted (along with the winch). Then put a shortish eye bolt through it with some leftover shock bushings and washers. Then crimped the cable to a double hook and clipped it on. Works great and has been holding my spare for a solid month. This pic shows off the two hook L brackets which I got around to installing along with the aux horn, which is hanging out in the background. Just recently I painted my rear bumper and addressed all of its rust, which was a lot better than it looked. I think I'm going to paint all my plastic trim aswell to match. This is the junked MJ just before it got on the flat bed. I ended up selling the front axle, so my 4wd swap took a step backwards, but I got 75 bucks for it and it was just getting more rusty. Not much of this one left, it donated a lot of parts. Even cut up the bed.
JeepcoMJ Posted July 7, 2007 Posted July 7, 2007 they were I believe, BUT it's already at the jy as stated.
rockhardzj Posted July 7, 2007 Posted July 7, 2007 they were I believe, BUT it's already at the jy as stated.That post was deleted 3 seconds after I posted it, because I realized that.... You clicked on this page too quick...
UNL1MTD Posted February 20, 2008 Author Posted February 20, 2008 I haven't posted in here forever. I finally got some work done on the truck, so why not update the thread again. The thing that should be at the top of my list keeps failing in priority ... oil leaks. I have managed to stop the oil filter from leaking, by replacing those gaskets back in September. But the Distributor leaks oil, as does the rear main, and my friend the valve cover is leaking again. I'm not sure if my cover is warped or what, but next time I'm going to look into a replacement cover and a rubber gasket. I just want to be done with that once and for all. I have the Distributor gasket in hand and plan on doing that soon. Other work thats been done is- Cleaning out the Throttle Body. She had a an idle where it would drop down at a stop light, then catch itself. It still does it after the cleaning just less frequent. I replaced the Torx bolts that hold down the intake to the TB with hex head while I had the intake off. It looked like this when I started. :shake: Installed a new set of main cables, which I purchases from Jon Kelley. B+ to starter, B+ to Solenoid. B- to Engine Block. Also switched over to marine style clamps on the battery posts. Comparison of new and old cables. Installed- I also have another 1 gauge cable to replace the factory braided ground from the block to the firewall and to add another ground from B- to fenderwell. I installed some Fog lights which I got from the site's classified. The package included Fog lights still attached to pieces of the previous bumper, harness from fog connectors to cut wires, Fog light switch cluster, with another switch (not sure what that was originally for), and the connector for that switch plus 6 inches of cable. Knowing a bit about electronic circuits I knew that I needed to add a fuse and a relay to make this a safe lighting circuit. Also I had to make sure this fog lights went off when the hi-beams went on. First order of business was getting the lights off, have to tighten the big 1'1/16" nut to the bumper, then spin off the 15mm. Then spin off the 1'1/16" nut, then the fog light falls off. Then it was a matter of running some wire. Mounted the relay near where the balast resistor should live. Tapped into a ground near by for relay pin (85), ran a wire from the battery to a fuse to relay pin (86). Ran a wire from the switch to relay pin (30). Tied the hot line to the fog lights into pin (87). Whew. Next I used the existing fog light harness in the truck and cut the middle green wire and bottom black wire. Used the black wire as a ground for the new switch, and the light green wire goes to the headlight switch, which will disable the foglights if the hi-beams are on. Added some wire loom and everything was good to go. Well the driver's side light seems to be flakly, sometimes needs a tap before it comes alive. I've already reseated the bulb which helps, might have to add some di-electric grease to it, its connector, and brush them prior to get a better connection. Relay Mount- Switch- All lit up- Future projects include doing the front brakes, adding a factory clock, chaning out the motor mounts, changing the O2 sensor and stopping the oil leaks. Just want to make this truck solid so I don't have to worry about it anymore.
hopper Posted February 21, 2008 Posted February 21, 2008 don't know but to me, that looks like a crack in the throttle body ???
UNL1MTD Posted February 21, 2008 Author Posted February 21, 2008 don't know but to me, that looks like a crack in the throttle body ??? went out and checked, the 'crack' wipped right off, so I guess it was just some built up dirt. Good eye though.
hopper Posted February 22, 2008 Posted February 22, 2008 Sorry it just stuck out to me , just thought I'd mention it. Nice project you got going there, don't need something like that messing it up. My project looks something like the one you junked, ( for now ) moneys running tight these days.
UNL1MTD Posted March 9, 2008 Author Posted March 9, 2008 Got the factory clock install yesterday. The install wasn't just plug and play, but not exactly hard either. I did just change the bulb, then try and plug it in, and was shocked that it actually did come alive, but the bulb never lit up and I couldn't adjust the time. I knew from online documentation that the clock I had was from an '89 (http://gojeep.willyshotrod.com/HowtoDashClock.htm). That being said it was wired A - Blue/Black - ground C - Red/Gray - constant 12v D - Black - ground H - Blue/white - switched 12v There was no wiring diagram available for my year truck (87). So I had to ring out my plug. A - Black - ground B - Orange/Black - ground C - Red - constant 12v F - Orange/Yellow - switched 12v (source - ignition) G - Blue - switch 12v (source - headlights) Instead of re-wiring the truck, I opted to change 3 pins around on the clock since it would be 1 billion times easier to work on. I opted to used switch power from the ignition, which means the clock will be bright when the truck is on. I changed it to. A - Black - ground C - Red/Gray - constant 12v B - Blue/Black - ground F - Blue/white - switched 12v This matched colors and function on the other side. Plugged it in, screwed it down and it was good to go. I also added the extra ground for my battery today. This gives the battery a quick ground to the chassis, instead of having to travel through the black and to the firewall.
UNL1MTD Posted March 12, 2008 Author Posted March 12, 2008 Interesting development -:wall: Clock works and is bright, but when I turn on my headlights the clock turns off completely. As soon as I turn the headlights back on the clock comes back to life at 1:00. :???: I'm guessing I'm going to have to re-wire the plug again, big fun. Maybe I messed up a ground or need to run off the headlights for the switched 12v. Any guesses? :hmm: I definitely wish I tested this prior to buttoning it all up, ohwell. edit- well I finally got around to fixing this. I ringed out the truck's clock plug incorrectly. I fixed the pinout above so that is accurate. All is good now.
UNL1MTD Posted July 12, 2008 Author Posted July 12, 2008 Finally got some time to work on the MJ, but found my self upgrading rather than fixing needed things. :roll: I'm really going to have to just break down and redo the valve cover again. But anyways, did get a full gauge cluster almost swapped in. This is the old cluster. This is the new cluster. I was a little concerned with the corrosion on the back of the new to me cluster. This is present all over the cluster, I assume it was in a moist environment. First order of business was to reattach the information pod to the cluster. It snapped off during shipping. I jb welded it back together and let it sit over night. Next was the removal of the cluster. This was pretty much easy cheese. Didn't have a problem anywhere. Then I swapped the information pod overlay from my MJ to the new pod since there was a slight difference and mine was a lot cleaner. Next I switched the gray overlay out for my black one and cleaned it up. Then reinstalled. The speedo and side pod connectors went on fine, but the main was definitely being grumpy. I think I got it snugged in. Keyed on the MJ and went through the blinkers, both the high beam and right blinker lights were out, so I swapped those blubs from my old cluster and was good to go. Or so I hoped. Next I switched out the coolant sensor and about crapped my pants when coolant came flowing out like a geyser. Definitely more than a couple shop rags were ready to handle. Then I did the oil pressure sensor. Both sensors were from the donor, which was done in an effort to save some cash. Had to remove a spark plug wire to wrench on the oil sensor and when I fired it up the first time it ran like crap. :thwak: Yup I forgot to put it back on. Did that and let the engine warm up. Immediate results were a working fuel gauge (assuming since I had a full tank), coolant gauge (read a steady 210), volt gauge (just under 14 volts), and tach. It didn't get driven so I don't know if the speedo works. The oil pressure gauge did not move the entire time. My guess is the sender isnt working right, but I'm not sure. Here is a vid. Any other ideas for the oil pressure gauge? I also got an aux fan to put in. I bolted it in place, but otherwise haven't done anything. I am going to run it to a switch on the dash (with a relay), rather than try to hook it up and it come on automatically.
UNL1MTD Posted July 12, 2008 Author Posted July 12, 2008 also some time in May I did the front breaks. When I got the truck I didnt touch the front breaks because the pads looked normal. But I figured since it had been a year I might as well do it all up with new parts. I doubt I am switching to a 4wd axle anytime soon, so might as well be safe. Did everything, rotors, bearings, seals, pads ... just not the calipers. I have break lines from my Tj which I took off after I lifted it. I'm thinking they might find a home on the Mj since its lines look to be in bad shape. I'm assuming they will bolt right up, anyone know for sure?
JeepcoMJ Posted July 12, 2008 Posted July 12, 2008 your tachometer seems incorrect. as you rev, I'm hearing 2500 rpm or so but seeing 2000...do you have a 4.0 or a 2.5, what year, and what is the cluster out of?
jtdesigns Posted July 12, 2008 Posted July 12, 2008 That cluster came out of a 4.0l... As for the oil gauge not working,,, hummm... Try to see if you get a reading at the sensor wire.. I think your looking for a change in the ohm reading... Let me know, I probable can get you another sensor if you need it..
UNL1MTD Posted July 13, 2008 Author Posted July 13, 2008 your tachometer seems incorrect. as you rev, I'm hearing 2500 rpm or so but seeing 2000...do you have a 4.0 or a 2.5, what year, and what is the cluster out of? I have a 4.0 and the cluster came from a 4.0 so I'm good there. Maybe it just sounds loud, just got a glass pack and a turn down for exhaust. What is the normal MJ idle? edit- listening to it again and again it does seem higher than shown on the tach. Not sure, I'll take it for a spin around the block tomorrow and see if it seems out of the ordinary. I might also try redoing the main connector for the gauges, just didn't get a warm and fuzzy of it snapping into place.
jtdesigns Posted July 13, 2008 Posted July 13, 2008 your tachometer seems incorrect. as you rev, I'm hearing 2500 rpm or so but seeing 2000...do you have a 4.0 or a 2.5, what year, and what is the cluster out of? I have a 4.0 and the cluster came from a 4.0 so I'm good there. Maybe it just sounds loud, just got a glass pack and a turn down for exhaust. What is the normal MJ idle? This is my truck at idle I'm thinking its around 7~8 Image Not Found

Recommended Posts
Create an account or sign in to comment
You need to be a member in order to leave a comment
Create an account
Sign up for a new account in our community. It's easy!
Register a new accountSign in
Already have an account? Sign in here.
Sign In Now