treklight Posted January 2, 2011 Posted January 2, 2011 I just bought my Just Empty Every Pocket Comanche. It had no headliner, which is a major bummer, in terms that A. Its loud enough to rattle the teeth out of your skull i.e. headache and B. Good luck finding a replacement. Well I lucked out and found a donor headliner at the local JY which was a major score. I am anal retentive, so you all will have to bear with me as I write all this up. So my goal for my Jeep is to really bring all the creature comforts of a newer vehicle. In this write up I am going to be concentrating on the process of making a custom headliner. Grab a brew sit down and buckle up because it will be a long ride. Phase one. Start with a headliner, I'm not gonna lie mine was in less than stellar condition, hopefully you're starting with something without a fist hole through it. [/url][/img]
treklight Posted January 2, 2011 Author Posted January 2, 2011 First step is to remove the old headliner. To do this remove Sun visors, the A pillar trim pieces, the rear trim pieces- remove seat belt assemblies. The headliner is held on by 4 velcro strips, 2 rectangular clips centered above the doors. The headliner should come right off and then you can do a little contortionist manuvering to get it out. Be careful in the removal process, you're dealing with something that is 20+ years old! Once you have it out, remove all the headliner material and wipe off any residue with a clean cotton cloth/towel. here's mine from my JY donor. I went back the next day to get more goodies, and they had already compacted the truck. Got lucky on that one, finding a headliner is a major PITA.
treklight Posted January 2, 2011 Author Posted January 2, 2011 I found a console I liked out of a 2000 Oldsmobile Silhouette. It has a compass and temp which I will hook up, a panel perfectly shaped for my Carling switches, a sunglass strorage, and garage opener button. I will later dye, paint, etc. to match. One problem though, a Oldsmobile console was not designed to go into a Comanche headliner. Time to carve up some foam and make fiberglass magic! I purchased some foam from Wally World used for flower arrangements. I then traced out around the console the shape I wanted and then cut it all out of the foam. After everything is cut out, started shaping the foam using abrasive like mesh material used for sanding sheetrock. There is no real science to carving, just keep everything uniform and you should be in great shape.[/url] [/img]
treklight Posted January 2, 2011 Author Posted January 2, 2011 After carving, and sculpting everything out, I wiped the headliner with some cleaner to remove any contaminants. I then drew a center line on the headliner to keep it all centered. Next step is to use some liquid nails to apply the foam to the headliner. I then used some caulking to make it look molded into the headliner. [/url] [/url]
treklight Posted January 2, 2011 Author Posted January 2, 2011 Before I began fibergalss, I remembered what happened as a kid when I attempted to paint styrofoam. It melted faster that the wicked witch of the west. I have about 20 hours into this thing so I set to find out a trick to keep the foam from being melted by the fiberglass resin. I finally settled on painting the foam with a couple coats of latex house paint. I found a quart of latex paint on the oops, we mixed the wrong color, rack at Home Depot for a couple of bucks. I allowed the paint to dry and set to laying fiberglass. This was my first time and I used the resin and fiberglass sheets, again from Wally World. I know the bondo brand stuff is crap, but I went ahead and used it. I would recommend using fiberglass materials from an automotive paint supplier. I fiberglassed the entire overhead console and feathered it out into the headliner 3 or 4 inches. It is not necessary to fiberglass the whole headliner, I just fiberglassed the OC, the large hole, and a couple of areas that had tears in them. The remaining areas, I just coated with the resin, with no sheeting. Again, hopefully you're not doing repair work. Just be patient with the fiberglass and take your time. It will take a couple of layers and a lot of sanding to get it all blended just right. Patience will go a long way with this step. [/url] [/url]
lostissues Posted January 2, 2011 Posted January 2, 2011 nice, I am looking to do the something similar. I have already glassed my headliner because it was getting a little ratty and to add some structure to it. I just need to trim it a little to make it fit again. I got an overhead console from a GM pickup and was hoping to eventually put a remote faceplate for my stereo in it. I also grabbed a rear overhead light form a newer Cherokee I am planning to mold into it. can't wait to see the finished product.
treklight Posted January 2, 2011 Author Posted January 2, 2011 Thanks. I have a good 50 hours so far. Good luck on your project. Yeah, the fiberglass really made it solid. I was worried about the weight and sagging, but it is really so much more rigid and a much tighter fit, that there are no issues. Next step is to wait for the new to me sunvisors to come in from Ebay. I need to purchase a painless wiring 7 circuit/2 Relay set up to run all the switches, get the Compass and temp display working, get the headliner and visors re-covered, and visor lights working. I'll keep up with the progress as I go. I am new to posting on forums, so if anyone can let me know how I can get larger pics for you guys to look at, would be appreciated. :huh???: I am using imageshack right now, but I think the pics may be too large?? here's what I used to sculpt the foam. [/url] [/url]
ratrapp Posted January 2, 2011 Posted January 2, 2011 my little brother took the rear speaker assembly out of the rear of an 90s model xj and molded it into the headliner of his 79 malibu wagon.it turned out sweet.i'm trying to con him into doind something similar like you did for my mj.
lostissues Posted January 2, 2011 Posted January 2, 2011 viewtopic.php?f=6&t=11077 this is a how to post pics using photobucket, I have never used image shack before so I have no idea if there is a way to make the pics show up larger. and I'm not sure what sizes the websites limits pictures to. what kind of visors are you using? I grabbed some from a newer style XJ from a junk yard. with the overhead console I have I have to find a way to shorten them a little bit.
btm24 Posted January 2, 2011 Posted January 2, 2011 nice right up thanks for that one :cheers: Brandon
treklight Posted January 2, 2011 Author Posted January 2, 2011 More pics. Hopefully with photobucket and resizing, I can get better size pics for you all. Thanks to lostissues. One side sculpted Here it is mocked up with Carling Switches
treklight Posted January 2, 2011 Author Posted January 2, 2011 I originally planned on using some visors out of a Ford Explorer, because they had the dual visors, so I could have one visor to cover the door and flip down the other for the front windshield. However it was a pain to try to get them installed, so I am opting to stay with visors from a 1998 XJ. I guess I just have so many hours into this,kind of burned out, I am going to pick my battles, and fabbing up some way to mount the Ford visors is not one I want to choose. The XJ ones fit perfect and will be lit. I pulled out the visors on my 98 xj 2 door, soon to be my interior and drivetrain donor, to test fit.
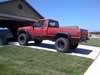
treklight Posted January 2, 2011 Author Posted January 2, 2011 here's a shot of the outside. 88 Chief- I'm Mr. Obvious on this one 4.0 ax15 and 231 swap 6.5 total lift 4.5 Rubicon Express and 2 inch spacers SOA in rear Short Bed My plans 98 swap of interior and drivetrain. Paint, Spray in Bedliner, Matching D44's locked, Rear Disc, Custom interior- New carpet kit, Sound deadening, BMW M3 seats, 05 BMW 325 auto dim mirror, Power everything, component speakers molded into door panels. Etc Etc. I know, I know :nuts:
treklight Posted January 5, 2011 Author Posted January 5, 2011 Quick Update. Tonight I masked off the pillars, glass, etc. I didn't have any rust, but just as a precaution I sprayed flat black rustoleum rust stopper in the crevices where my paint brush would not reach. I went through two cans and sprayed very liberally, as it is very hard to see. I then coated the roof with rust bullet. The rust bullet product is really easy to work with and can be either sprayed, brushed, or rolled on. I chose to brush it on for ease sake. Next step will be to put the dynamat on the roof and pillars.
treklight Posted January 5, 2011 Author Posted January 5, 2011 I've never worked with Dynamat, so if anyone has any tips or suggestions, please feel free to comment. :???: Oh, if you decide to ever work with rust bullet, for the love of God please wear rubber gloves.
cody4359 Posted January 11, 2011 Posted January 11, 2011 lookin good. are you goin to cover the fiberglass?? i looked up dynamat on ebay the other day and saw another thing fatmat, way cheaper for alot more, reviews seemed good. just did a quick search and found this link it u want some good cheaper alternatives http://forum.ecoustics.com/bbs/messages/4/124995.html
treklight Posted January 11, 2011 Author Posted January 11, 2011 Thanks man. I've got some more pics I need to post soon. Yes, I plan on taking it to get covered later this week, probably something similar to what most newer vehicles come with stock. Haven't decided on a color yet, because I want to do something with all the pillar trim pieces, I'm thinking about sanding all the trim down smooth and wrapping it in the same fabric as the headliner, like they do on higher end cars. Up the A pillar and up and around to the B pillar. I was thinking fabric down to about where the seatbelt goes down inside the trim piece. and fabing up a piece of brushed aluminum to separate the fabric portion to the lower portion which I would leave plastic. Not sure though. :dunno: Yeah, the Dynamat was more expensive, I found an alternative on Ebay called Edead. It is a .45 mil Butyl liner and it went on the roof very nicely. I have the 2 A pillars left and then I can start to button up the top of this thing.
bmxrider5255 Posted January 18, 2011 Posted January 18, 2011 i have the same console to do basically the same thing, but i also have a sound bar from a cherokee that i plan on molding in at the rear of the headliner. nice job! hope mine turns out that purty!
cody4359 Posted January 31, 2011 Posted January 31, 2011 its been like 2 weeks, wheres the finished product :D
grabber Posted March 10, 2011 Posted March 10, 2011 EBAY has a MJ replacement headliner any color for 135 shipped, I got one and looks great , problem over
Dirteatr717 Posted March 10, 2011 Posted March 10, 2011 Unless your backerboard is toast why would you spend 135 on a headliner when you can buy 2 yards of fabric for like 30 bucks and 2 cans of adhesive for like 7.99 each
90manch Posted March 18, 2011 Posted March 18, 2011 i like this headliner soon as i pick one up i gonna try this!!!!!!!!!!!!!!!!
treklight Posted March 26, 2011 Author Posted March 26, 2011 Ok, everyone. Sorry to leave you hanging. I am busy with work, but feeling motivated once again to get this project completed. Check back soon for a finished product.
treklight Posted June 21, 2011 Author Posted June 21, 2011 Alright, my headliner is at the upholstery shop as we speak. I should have it this week. and I will get some installed pics for everyone. :jump:

Recommended Posts
Create an account or sign in to comment
You need to be a member in order to leave a comment
Create an account
Sign up for a new account in our community. It's easy!
Register a new accountSign in
Already have an account? Sign in here.
Sign In Now