dasbulliwagen Posted September 20, 2009 Posted September 20, 2009 Ive decided that any Comanche with a wagoneer front end should be coined a Comanche Limited. It is a model that never existed, but should have, and I intend to build mine that way. To a point... I'm not giving up my bench seat black interior yet. Ive been posting on here for almost a year now, and have kept you guys upto date with my progress, but until now have yet to start a build thread. I intend to try to dig up my old pic postings, or to take new pics to try to recreate my progress so far. I will be updating this thread with those as I get to do them, trying to go in some sort of chronological order.
freakjeep93 Posted September 20, 2009 Posted September 20, 2009 i vote wagoneer sport it sounds kinda cool but comanche limited is awsome too
jpdocdave Posted September 21, 2009 Posted September 21, 2009 how about wood panels and call it a woodmanche? :rotf:
dasbulliwagen Posted September 21, 2009 Author Posted September 21, 2009 Ive thought about keeping the wood panels, but I just can't do it. Though I wouldnt mind having another Grand Wagoneer... that was the most comfortable vehicle Ive ever owned.
MancheKid86 Posted September 21, 2009 Posted September 21, 2009 Comagoneer/ Grand Comagoneer limited manche edittion :D
dasbulliwagen Posted September 22, 2009 Author Posted September 22, 2009 Posted: Fri Jan 23, 2009 11:49 am I finally istalled the new wheel bearings I've had in my toolbox now for over a year, I changed the tranny oil, the rear diff oil, and scored a free set of front brake pads for it ( wish I would have had these when I was doing the wheel bearings ), and adjusted the rear brakes trying to get my parking brake to work better, although I did get more at the brake pedal, the P-brake still seems soft. Guess I need to look into adjusting the cable. And just bought an 86 MJ 2.8 4x4 5 speed LB for parts or whatever, been a good week. Posted: Wed Feb 18, 2009 3:52 pm Have been working on the donor truck. Pulled the front and rear diff covers to inspect the gears before the swap. They were suprisingly clean and show little wear. Pulled the dash to get the HVAC housing to change my 87 to air conditioning....had to clean out mouse nest from housing too and then cleaned and sprayed the whole thing with lysol, lubed the blower motor bearings and tested the blower resistor with an ohm meter, all seems good to go. The wife is bugging me to get the AC swap done first so that when I'm driving around with the baby, we both don't sweat our buttes off. Theres a set of black steel 17" rims here at work I think off of a Chrysler 300. They have a 5x4 1/2 bolt pattern, I'm curious to see how they would look on my MJ. We will see.... Posted: Wed Feb 25, 2009 8:25 am Pulled the rear axle out of the donor truck, cleaned it, painted it, installed the new stainless braided brake line, cleaned and inspected the rear brakes which look like new, and then temporarily put it back under the donor, SOA.... it looks cool like that, can't wait till I do it for real! Posted: Sat Mar 07, 2009 4:15 pm Pulled the dash on the 87, to swap in the HVAC housing. Found out that the HVAC housing has its own main harness connector, which connected to the dash harness in the 87 that already has all of those other wires in it! So hoping that the next step of adding the compressor and lines, I will also be able to find the wires apready there.... wish me luck! Posted: Thu Mar 19, 2009 3:37 pm Worked more on the AC, PS conversion this week. Found out that the brackets the junkyard sent werent exactly the ones needed for my model year so the alternator I had was wrong and the Ac compressor was wrong, so I did some digging around the shop, found that the alternator from the 86 fit in place, but had bad bearings, the wrong pulley, and the wrong electrical connector. Dug around the shop some more, found that the pulley from an alternator just removed fron an 89 XJ 4.0 was the right pulley and installed it to the 86 alt and checked everything for fit. Looked up the wiring harnesses for both year alternators and decided that if I cut the connector off of the 86 and soldered it on that it should work the same as the 87's 2 wire hookup. Then I went and bought a new alternator for an 86 to put in place for good. As for the compressor, I only needed about a quarter inch to get the comp lined up, so I started grinding down the mounting bracket to set it back where it needed to be, and then wallowed out the holes for the rear mount to move it...looks pretty good! The power steering resevior I ordered was wrong, and wanting to get this done so I can drive it, I asked if the parts dept had any reseviors from a 2004 Caravan... which they did because we replace them regularly. Removed my stock airbox to have room for the remote resevior and made a bracket to mount it to. Installed the gearbox, and lines/hoses, filled it with fluid and found that in order to keep it from sucking air, I had to fill it way over the fill line on the resevior. I just hope it don't overflow after it gets hot due to fluid expansion. Added a bottle of Lucas power steering stop leak to it for good measure ( that stuff is great if you have a pump starting to growl a little). To replace the airbox, I dug up a cold air intake I removed from a Mazda 3 a couple years ago... cut the tube to the length I needed, found that the rubber boot it came with fit perfectly over the original throttle body cover. Bent a bracket to support the airtube and made sure everything had clearance. Ive yet to go on an extended test drive, but it seems Ok for now. We will see this weeked when I have to drive out into the country to work as a volunteer to clean up an overgrown county cemetary. The rest of the AC lines and receiver dryer and charging are next. Wish me luck!
dasbulliwagen Posted September 22, 2009 Author Posted September 22, 2009 Posted: Wed Apr 01, 2009 3:28 pm Pulled the front axle out of the donor truck to clean it and prep it to be painted prior to putting it into my 87. Scraped all the heavy built up gunk off of it and then pressure washed it. It is now ready for a quick brake clean bath and then some black satin rust control spray enamel. I need to clean the springs too and paint them while I have them out. I'm hoping that the 4wd front springs don't lift me in the front too much as they look like they have about one more full coil than the current 2wd ones. I guess if I have to Ill need to get some longer shackles for the back to level it if needed until I can spring for the full lift and SOA. Still need to get all the O-rings I need for the AC lines too so I can get that charged and working soon. Itll bet getting real warm here very soon! Posted: Thu Apr 23, 2009 10:10 am Vacuumed the AC system I just put in, Charged it only to find the compressor not getting power for the clutch. I now need to go throught the wiring for the ac and find where my problem lies. After I get all that working I can then start on my 4x4 conversion! Posted: Sat Apr 25, 2009 3:12 pm Took the 87 into work this morning to see if I could figure out the wiring for the AC. Thanks to the downloadable 1988 service manual PDF from one of our other esteemed members, I was able to find a better wiring harness diagram and found that I just needed to add a relay to it and have the unused pins from the dealer installed AC connector hooked to the relay, etc. etc. etc.... and viola! it works!!! Still need to add refrigerant oil to the system though, so no real tryout till next week....someone locked up the AC machine at work, and it has the oil injector I need to put the oil in. Next project... Install the 4:10 rear axle, then the front axle then the trans and transfer case. Maybe next weekend I can start on that! Posted: Sat May 02, 2009 11:38 am Drove my 2.5 on the highway today... forgot how decent it really did at speed. Its been probably a year or so since ive taken it on the highway, though the wife has taken it several times. I think the cold air tube helped a little at that speed. I did find a wheel vibration at 55 mph, so will have to re balance the wheels...still need to recharge the AC too. Posted: Sat May 09, 2009 2:18 pm Finnally got around to installing my 4:10 rear axle, bled the brakes, hooked everything up, tried to adjust the parking brake only to find I'm running out of adjustment and still don't have any. Looks like Ill have to swap the cables. I have yet to drive it because at this moment I'm recharging my AC to see if I can get it working any better. I was able to get my full original charge out of it so I don't think its leaking. Maybe I overcharged it, or it may need a new H block??? ..........have been messing with it right now....pressures arent right. I'm not sure whats going on with it...Il have to do some troubleshooting research....or maybe the HVAC housing is not closing off the heater core enough???? Time for a test drive! Posted: Wed May 20, 2009 6:41 am Installed my 4:10 rear axle, and found that the longbed parking brake cables will not adjust up to allow my parking brake to work. I will have to swap in the original ones to try to get it to work. Loaded the Buell in it to drop it off at the Harley dealer for a new rear tire, state inspection, recall and a full detail...I'm going to pick it up tonight. can't wait to see it all polished up.. my Buell that is! Ive been neglecting it lately, so Ill have to try to keep up with it this summer! can't wait to go for a ride! Posted: Thu Aug 06, 2009 3:06 pm I attempted to get my parking brake to work by adding sleeves to the main cable to take up for the longer rear axle cables that came with the 410 axle. It worked for a litlee while, but kept going loose after a few applications. I noticed that the cable where they go into the backing plates are collapsing on themselves...the outer sleeve that is. I guess its time for new cables. I also replaced my missing alternator bolt, put a new one in and then double nutted it. That should keep the alternator in place and the belt tight! Posted: Fri Aug 14, 2009 12:54 pm Cash for clunkers has allowed me to snag a few more parts for the old 87. I got a sway bar off of an XJ country. I got the rear bumper too to see if I could make it fit the comanche. I know its not a bolt on, but I like the look better than the step bumpers. I also took the trailer hitch off that XJ (XJ number 5 from our dealer that has been turned in for CFC). I also took the visors and clips, the rear overhead speaker bar. I also took a trailer hitch off of a ZJ cash for clunker turn in. I plan to see if I can make a trailer hitch between the two of them to fit my truck, at the same time as fabbing the cherokee bumper. This is all in addition to the Wagoneer front end including doors with power windows, locks and movable vent widows, chrome front bumper, radio, cig lighter, clock, seat belt ( to fix my broken one ), skid plates and overhead console. Ive got some work to do! I also bought a 2.5 longblock from the classifieds here for a future rebuild. Ive only been into the Comanches for two years now and now Ive got parts coming out my ears. History is repeating itself I guess... 10-15 years ago it was Volkswagens... everywhere! Theyre getting too expensive now, and working at a Jeep dealer I guess has its perks for my current infatuation! Posted: Tue Sep 08, 2009 10:46 am I'm in the process of making a fitted fan shround for the WJ electric fan I am installing in my 2.5 MJ. I'm using 2 seprate 2.8 V6 fan shrouds cut down and epoxied to the fan unit itself so it can mount to the original radiator mounting holes. I hope the 2 part epoxy holds up OK. I bought an adjustable temp fan controller, and plan on doing all this when I replace my leaky water pump. I'm curious to see how much of a difference it will make with no crank driven fan in there. Posted: Sat Sep 19, 2009 5:58 pm Went into work this morning just to get The MJ finished up so I could drive it back home. Its been sitting up at work for about two weeks now after the water pump went out again. So I figured I would take the initiative and convert to electric cooling fan while I was in there. Ive had a fan out of a WJ laying around for a while and it is about the size of a 2.5/2.8 radiator. I took the fan shroud from my 2.8 donor truck, and the fan shroud from a 2.8 XJ wagoneer and cut them up and epoxied peices of them around the fan to fit the radiator. This will allow me to reinstall the 2.5 fan and shroud later if needed without ruining them. I then wired it all to a fan controller. I had to make a spot in one of the heater hose lines to mount the temp sensor. It probably isnt in the best location right now, but it will work until I can figure something else out later on down the road. And during all this too, the battery went bad in my VW, so I pulled the battery out of the MJ, put it in the bug, which is being sold, and bought myslef a new Delco battery. Here is the fan I made up. Only the round center part is original to the fan. It has the right sides to two different 2.8 fan shrouds epoxied to it to make it fit over the radiator tightly, I then painted it all satin black. The temp sensor for the fan controller needed to be mounted somewhere, and the best spot I could see was in the heater bypass line to the intake manifold. I bought some brass plumbing fittings to mount the sensor in and cut the hose and clamped it in. The fan assembly mounted in place... it has at least a couple inches clearance between it and the water pump. Next was mounting the fan controller, and getting it wired up. It runs the fan by grounding it at the relay. You run the hot wire from the battery directly to the pos side of the fan, then the fan neg to the realy controller, a wire to the AC clutch power wire, a wire to ignition positve, and a ground. Plug in the sensor and it is done. And here it is all done and running! It seems to come on quick because of it being in the bypass hose, but I guess Id rather have it running than not. My next project will be installing the Wagoneer front end! And the the power window and lock doors from the same Wagoneer. What do you guys think about the project name "Comanche Limited"? As I plan to install the Wagoneer's "limited" badges during my build.
dasbulliwagen Posted September 22, 2009 Author Posted September 22, 2009 This is as good a place as any for my 500th post! Thanks Pete! I am now officially an addict!
dasbulliwagen Posted October 5, 2009 Author Posted October 5, 2009 I finally got around to installing my Wagoneer front end. I sure am glad I don't live in an area that uses salt on the roads in the winter. First I pulled the header panel off. The nuts holding it on looked pretty rusty, but they came right off. I pulled the black front fender flare off the old fender in order to put it on the new fender to replace the caved in one. I broke one stud on each of the three flare support brackets. I think if I would have taken a little more time with them, I wouldnt have broke any. But pulling the white flare off the new fender, all the nuts came right off no problem, no fight. I installed the power antenna first, then set the new fender on and lined it up to the hood. The Wagoneer header has studs built to the header itself, and my 87 has the studs welded to the fenders. That wasnt a problem with the new fender, but the original left fender had to have the studs cut off and drilled out. Swapped all the original bracketry over from the old header and the Waggy header slipped right on. The connector plugged right in and everything worked except the horns. The 87 has the horn woring outside of the header harness, the 86 Waggy header has them built in, so I just cut off the horn connector and adapted it to the original horn connector and mounted the dual horns. I notoced that the horn had two wires coming to it from the harness, and later found that one of those wires goes to the right side front of the vehicle next to the vacuum ball behind the front bumper. That wire would have been for a second horn had I known about it before I made the other modification. Oh well. After getting the header buttoned up, I put on the chrome bumper, then the XJ country sway bar. I looked at bolting up the front skid plate but was running out of time at that point. Here are the pics ... Before.... After... And my 87, my 86 donor, and the boss's 88 Olympic edition
freakjeep93 Posted October 9, 2009 Posted October 9, 2009 looks bitchin you should fix the donor up or sell me those rust free lookin body panels
HOrnbrod Posted October 9, 2009 Posted October 9, 2009 Looking good dasbulliwagen. That's the only front end conversion I'd ever consider doing if I could only find a decent donor close by - always looking too. :D It fits the MJ just right. The 97+ runs a distant second and the Chinese 2500 is hideous IMHO on an MJ. Why not keep the name simple and call it an MJ Wagoneer (vs. XJ Wagoneer) when it's done? Keep up the good work and the pics coming mate. :cheers:
dasbulliwagen Posted October 9, 2009 Author Posted October 9, 2009 looks bitchin you should fix the donor up or sell me those rust free lookin body panels Yeah I think the donor will get fixed up down the road. Maybe a bed bob, bedliner paint job? Who knows. Its too clean to scrap it out. But If I ever do, this place will get first dibs at it. Thanks Guys!
dasbulliwagen Posted January 22, 2010 Author Posted January 22, 2010 Ive done a couple of things to it this week. Monday I realized my electric fan wasnt working. Good thing its still cold outside, I checked the fuse, it was OK but the fuse holder had melted and the fuse itself was slightly melted and out of shape. So I traced out the lines and found my fan connector to the harness had melted also and was not making contact anymore. I pulled the connector housing out and put the wire ends back together and taped it up and it works again, but still not sure why. I need to re do the connections now and see if I can adjust the fan controller to come on ata ahotter temp, maybe the fan won't stay on soo much. I also installed a new Flowmaster 50 series muffler and gutted and sleeved the converter, welded everything up and it sounds almost like the old muffler. But I still havent driven it on the street under load, so I'm curious to see if the sound is any different and if I have any more power!
WBKrazy Posted January 22, 2010 Posted January 22, 2010 comanchero, but i see someone already beat me to it :dunno: :rotf:
DJM/78 Posted January 25, 2010 Posted January 25, 2010 It took me a wile , but I like the " Wanche Limited " :rotfl2: Whatever . :doh: Are you going to hook it up with some gold trim like some Limited Jeeps ? Gangsta' :thumbsup:
dasbulliwagen Posted January 26, 2010 Author Posted January 26, 2010 It took me a wile , but I like the " Wanche Limited " :rotfl2: Whatever . :doh: Are you going to hook it up with some gold trim like some Limited Jeeps ? Gangsta' :thumbsup: Sorry, no gold and no woodgrain... I want to keep it simple and clean looking, will eventually repaint it white, maybe with a silver lower two tone, who knows.
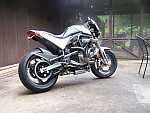
DJM/78 Posted January 26, 2010 Posted January 26, 2010 It took me a wile , but I like the " Wanche Limited " :rotfl2: Whatever . :doh: Are you going to hook it up with some gold trim like some Limited Jeeps ? Gangsta' :thumbsup: Sorry, no gold and no woodgrain... I want to keep it simple and clean looking, will eventually repaint it white, maybe with a silver lower two tone, who knows. lol.... :rotf: Truck looks good though ! I always catch myself looking at your bike . :thumbsup:
dasbulliwagen Posted January 30, 2010 Author Posted January 30, 2010 I have made progress with my rear bumper situation, though I'm not quite sure I'm happy with how it looks. Time will tell, maybe it will grow on me.... I began by taking measurements from a CFC XJ Country chromed rear bumper and seeing where and how it would need to be mounted. So I bult these brackets to bolt to the rear lower edge of the bed and under the bed into the "frame". You can see where the top edge of the bracket mounts at the back edge of the bed floor, and the horizontal and vertical supports reaching back. The bumper is now temporarily mounted to the truck. Temporary because I still don't have a license plate mount or light for it. I'm still not sure what I will do concerning this. As soon as I do though, Ill show you guys what I come up with. Let me know what you think of it. I'm still not sure about it yet myself.
Rymanrph Posted January 30, 2010 Posted January 30, 2010 Do you ever venture down to Albemarle? A guy in the parts store yesterday told me he saw a white Comanche with wood paneling. I can't imagine there are many if any other trucks around that would match that description.
64 Cheyenne Posted January 31, 2010 Posted January 31, 2010 With the options of either running a tube bumper or no bumper, I'd definitely run that.

Recommended Posts
Create an account or sign in to comment
You need to be a member in order to leave a comment
Create an account
Sign up for a new account in our community. It's easy!
Register a new accountSign in
Already have an account? Sign in here.
Sign In Now