

skidoo_j
-
Posts
988 -
Joined
-
Last visited
Content Type
Profiles
Forums
Gallery
Everything posted by skidoo_j
-
Sye Hell And Full Of Lies!!!
skidoo_j replied to skidoo_j's topic in MJ Tech: Modification and Repairs
I ended up getting an advanced adapters because tom woods only sells jb's supper short. and AA standard hd then their hack n tap. http://comancheclub.com/topic/39190-np231-rebuild-and-upgrade/ -
Cutting Down Drive Shaft Slip Yoke. Bad Idea?
skidoo_j replied to Biotex's topic in MJ Tech: Modification and Repairs
As much Slip that's there on the shaft I Doubt you'd need to trim it esp if you're adding any sort of lift. I saw you're staying SUA, but didn't see if you were changing springs or not. On another note post some pictures of your rig with the fender flares on. -
two great resources http://www.4crawler.com/4x4/CheapTricks/Driveline-101.shtml#Double-Cardan-Measurements http://www.4x4wire.com/toyota/tech/driveline/
-
Does that mean you maybe interested in Buying the remaining extra parts? PM if so. If you run a double cardon drive line you have to rotate the pinion to driveshaft to 0 degrees. As long as you keep the pinion parallel to the transfer case you can run fixed yoke with a slip shaft. So my slip is in the shaft just like a "cv" however I only have two u-joints instead of 3. And yes there is a different yoke, a U-bolt style, Tom Woods swapped it prior to shipping at no up charge. My driveline angle is about 13*, I get very few vibrations since I got a 3/4" longer slip yoke for more spline engagement. So i figure with the fixed yoke my overall driveline will be about 4" longer and bring my angle to about 8*. Ideally you want 3* so i'll get about 50% life out of my ujoint, but the angle should not be significant enough to cause vibe (so i hope)
-
Well the Transfer case is about 90% reassembled. Just waiting on the re - re- reshipment of the install kit hoping this time it comes with the inner input bearing for the correct year. My Upgrades: 1.25" Chain 6 planetary Terra 2 low Novak Cable Shift Linkage Advance Adapter HD SYE Tom Woods Non-cv shaft (I think my angles with the extra 4" are fine as I didnt want to turn the axle with shims. And I didnt want to cut and turn) THis will also allow me to in the event of sale pull and reinstall stock stuff back and sell to recoupe. Resources: NP 231 Tear down for input shaft change NP 231 Component service manual (pm if you want a copy) Advance Adapters Install Manual HD upgrade Sourcing your own 6 planet Building your own 6 planet Stus offroad If you decide to do the 6 planetary it is year dependent as they changed the cut of the gear for the input. If you do what I did and get a donor transfercase you have to get the correct spline input and gear cut. I found that you literately have to pull your transfercase to see what you have as our trucks seemed to always be in a transition year. Options were 21 or 23 spline and each has long short or medium. Novak has decent information regarding this here's a forum that goes over comparison and shows different appearances of the cuts and lengths. then difference between 231 and 242 Specialties Tools to buy cheaply from harbor freight or borrow from autozone or other loaner tool programs Bearing and Race Driver set Slide hammer Pilot bearing puller from autozone (modified to pull the bearing in the rear case half for front output. as no blind pullers would work on 1.5" and cheapest blind puller i could find was $100. ) don't go too cheap on these: lock ring pliers (these are not snap ring pliers i used lisle 44900) snap ring pliers
-
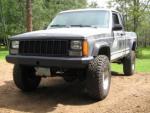
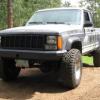
Look into napier flares. I like the looks better. The bushwackes are 5.5 inches wide whereas the napiers are 3.5. Napiers are less $$ we get a club discount. Anyways I had a set of new bushwackers for the comanche available to me at a very discounted price, when i held them up to the truck I just didn't care for how dominate they were visually, especially from the front because of their width. I have not held a set of napier but they sent me some templates and based on the fact they're wider then stock, not a foot like the bushwacker, it's what I'm saving my pennies for vs bushes. Napier Flares I think the discount code is either comanche or cherokee for 10 or 15% off. Depends what promo he's got going.
-
I recently took on the project of rebuilding an NP231 from a 97 xj sport to install into my Comanche. Biggest lessons I've learned: DO NOT PULL BEARINGS until you have the new ones in hand. Oh you ordered a master rebuild kit, it came with 6 bearings. Oh wait the fing kit doesn't come with the correct bearings. Don't remove seals until you have their replacements in hand, yet again the "kit" didnt include the seals needed. But it did have 5 seals that fit ???? Be careful when removing the snap rings because yet again the kits don't come with new ones. Get the correct tool! In 97 they apparently changed the input pilot bearing (the one that goes into the input gear that the main shaft rides on) to that of the 242. It's more of a cup style. The bearing is marked torrington DB-59856 and based on my research is timken FC66561 or jeep 83503507. The problem is nobody has the bearing, and nobody knows when they'll get one in except the dealership who wants $86 plus freight. So out of this $125 rebuild kit I've used 2 bearings and 2 seals. I'm pretty sure I've got enough bearings and seals for someone else to rebuild an older transfer case. Now that the rant is over I will post pictures of the tear down and modification of a $15 tool from autozone to pull the bearing in the rear cover for the front shaft. It maybe a few days as I'm going to probably have to wait an additional week for the correct parts.
-
Rear Driveshaft Length Question
skidoo_j replied to BillyFry4x4's topic in MJ Tech: Modification and Repairs
Tom Woods directions to measure: http://4xshaft.com/MeasuringGuide.pdf you could call them once you have that measurement and ask them what they'd suggest for a drive shaft length. They seem to know their jeeps pretty well. -
Rear Driveshaft Length Question
skidoo_j replied to BillyFry4x4's topic in MJ Tech: Modification and Repairs
with 3" of lift you should be fine with a stock length shaft matching your drive train. If you really wanted to get specific it should be 1/2" longer based on the fact that most need one 1" longer for an SOA (6" net lift) in the diy section there is a list of driveline lengths based on drive-train set up from stock. I put the link on this line if you needed it -
Not in my area. If it was a 4 cyc diesel yes there would be people fighting for it at that price.
-
What's The Proper Name Of This?
skidoo_j replied to ajohnson928's topic in MJ Tech: Modification and Repairs
splurge on the felpro gasket. You'll hate the cork if you ever use the felpro. -
What's The Proper Name Of This?
skidoo_j replied to ajohnson928's topic in MJ Tech: Modification and Repairs
No personal experience but I've read and heard of several people having issue with those prestone inline coolant flush fittings. Our system runs very hot and that plastic fatigues very easy. Just a word to the wise that it is plausible that will break and blow out on you. -
What's The Proper Name Of This?
skidoo_j replied to ajohnson928's topic in MJ Tech: Modification and Repairs
Look in the DIY forum there are pictures people have posted of the entire vacuum routing from factory. If you're maintaining your EGR there are a lot of lines that are critical for it's function. If you look up those part numbers from Cruiser54 they look like spaghetti because there are so many lines. If you look at my lines it's about as simple as you can get. You can see I have two ports plugged with red caps in the front. There is one other vacuum line that pulls off the back of the manifold that goes to the heater control and your axle disconnect controller. Any vacuum leak will cause this thing to run at a very high idle. Your resting Idle should be below 900 rpm. -
What's The Proper Name Of This?
skidoo_j replied to ajohnson928's topic in MJ Tech: Modification and Repairs
So much for using the "spoiler" function to try and keep the post clean. Cruiser I'd already posted your exact post as a spoiler earlier. -
#3 on mine is the vent line for the transfer case.
-
Vacuum Hose On Back Side Of Valve Cover
skidoo_j replied to kbusch18's topic in MJ Tech: Modification and Repairs
Cruiser54 since you're handing out part numbers how about a part number for the hose that goes into the throttle body to the MAP. I've not been able to locate one yet. -
What's The Proper Name Of This?
skidoo_j replied to ajohnson928's topic in MJ Tech: Modification and Repairs
part numbers are listed on these two forums. The way I did it was way better in my scenario in my opinion then the stock boot that went there as I eliminated all the egr and was looking for clean. The way I fixed it: The proper part numbers are listed here: -
What's The Proper Name Of This?
skidoo_j replied to ajohnson928's topic in MJ Tech: Modification and Repairs
Crank case vent or emission hoses or vacuum harness depending on retailers. I'll get you part numbers In the following post. Also based on how nasty that valve cover looks on the exterior and what little we can see on the interior you may want to remove it and clean it up inside and out. -
vacum disconnect + and - 's
skidoo_j replied to 1990 Pioneer 4x4's topic in MJ Tech: Modification and Repairs
I can get an axle shaft for $10 and a seal for 10-15 and it's done. A spare piece of metal with some holes drilled for cover plate. It's not ruled out as an option yet. If i came across a '96 or newer with the bigger joints for $100 i'd jump on it but then again my upper control arm bushings are new aswell as the carrier and pinion bearings, and uni hubs. -
vacum disconnect + and - 's
skidoo_j replied to 1990 Pioneer 4x4's topic in MJ Tech: Modification and Repairs
I have the posi loc so the locking is not the issue. I'm not worried about eliminating the CAD because of the possible broken shaft replacement difficulties. It's 1000 time easier to locate and swap a single shaft. When I go out with people they carry spares for their rigs and if someone gets in a bind we all help each other. Last trip 2 people popped u-joints and had to replace shafts, I've yet to damage mine but right now i'm the only one with the cad split shaft. So it's more getting the rig in a more swappable scenario. -
Dual Diaphragm Brake Booster On An '86 Mj
skidoo_j replied to onlyinajeep726's topic in MJ Tech: Modification and Repairs
the 86 and 88 should be the same. The year it got more streamline is 91 or 92. In those years you didnt have to bore the hole in the push rod and grind the flat spot for the switch. You may need to make a spacer for between the firewall and booster if you want your pedals level. If you acquire the pedal and the brake switch it eliminates the need to do the grinding/ drilling. -
vacum disconnect + and - 's
skidoo_j replied to 1990 Pioneer 4x4's topic in MJ Tech: Modification and Repairs
he used a " kit from rusty's -
vacum disconnect + and - 's
skidoo_j replied to 1990 Pioneer 4x4's topic in MJ Tech: Modification and Repairs
Was that seal used by the carrier or in the vacuum housing? I've been searing forums through naxja and stu's offroad and come up with seal numbers: NOS11800 **NOS 11343 NOS11777 ** 2x NOS 11771 NOS 18050 Some are refering to an inner and out seal like the warn kits. One referenced using two 11771's most seem to reference 11343 as the one at the differential. -
vacum disconnect + and - 's
skidoo_j replied to 1990 Pioneer 4x4's topic in MJ Tech: Modification and Repairs
I know this is a few years old, but do you have a part # for the seal? -
Used some harbor freight ratchet straps spanning the trees and hauled the '99 4.0 to it's new owner along with my cherry picker. The cherry picker weighs way too much for one person to lift, as it is it's in about 10 pieces. I guess I could have used it to put the motor in and the straps and electric hoist to put the cherry in, but this way seemed much safer for my truck.