


pizzaman09
-
Posts
1506 -
Joined
-
Last visited
Content Type
Profiles
Forums
Gallery
Everything posted by pizzaman09
-
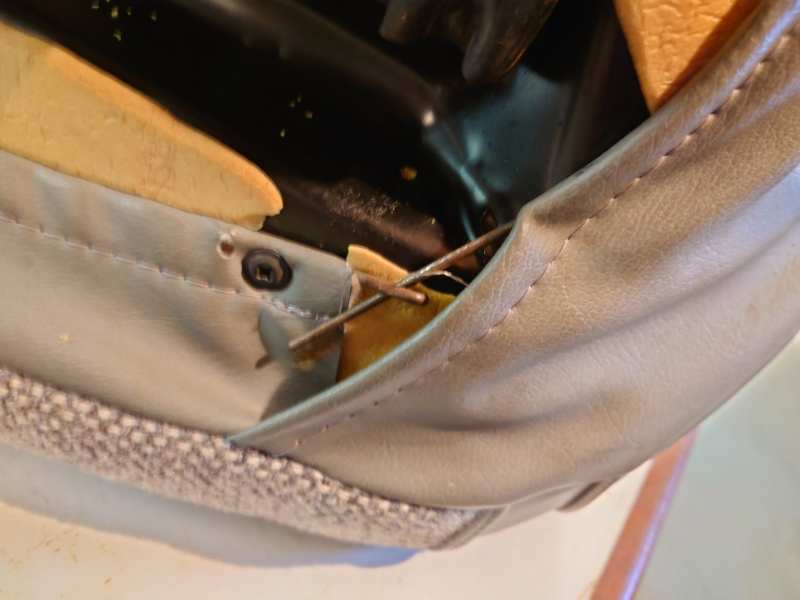
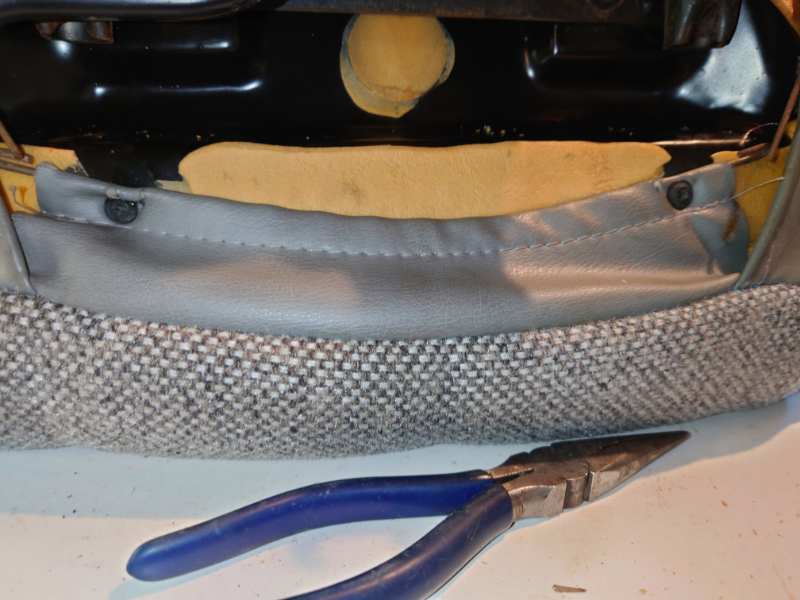
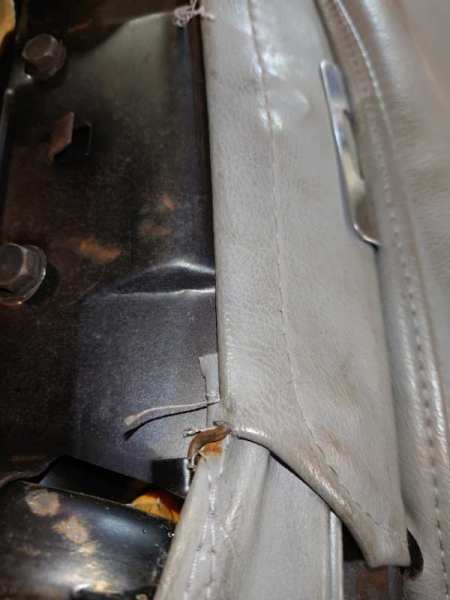
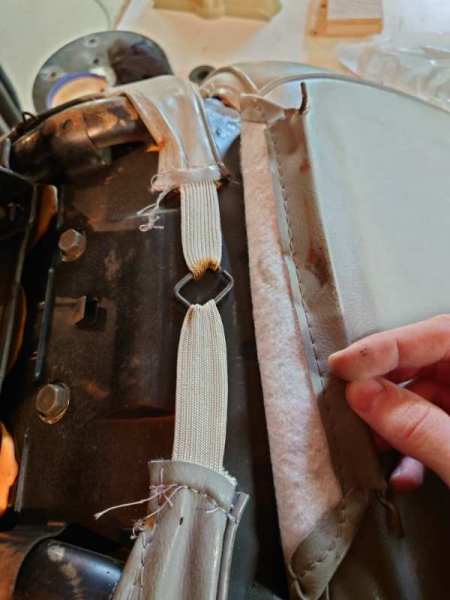
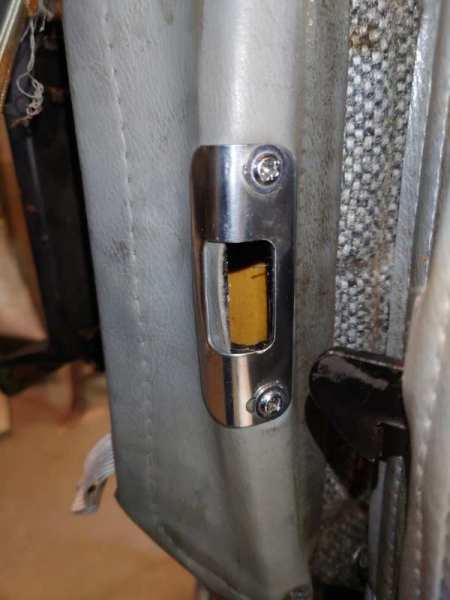
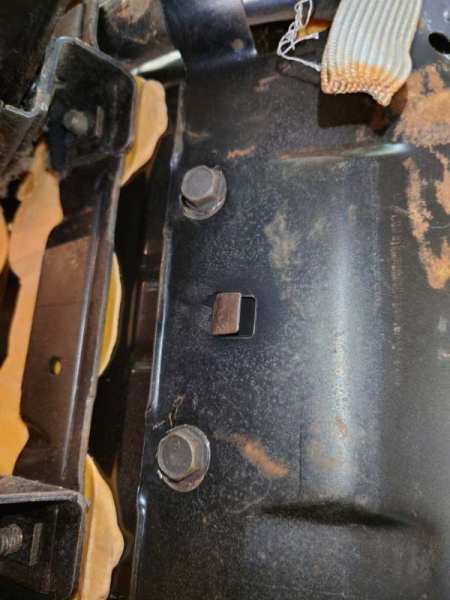
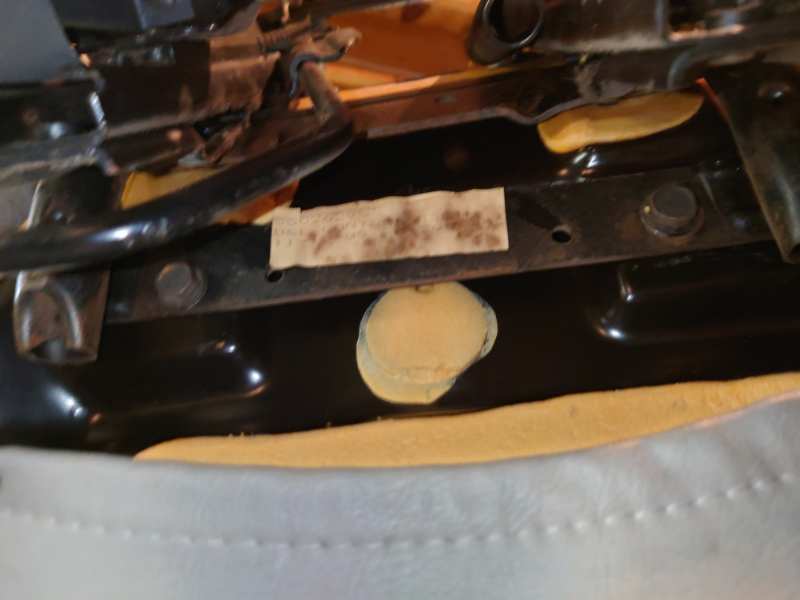
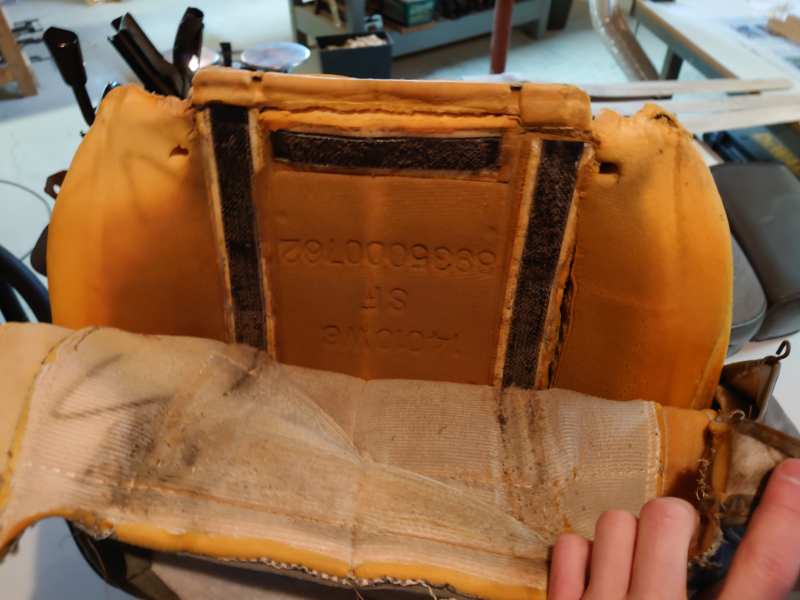
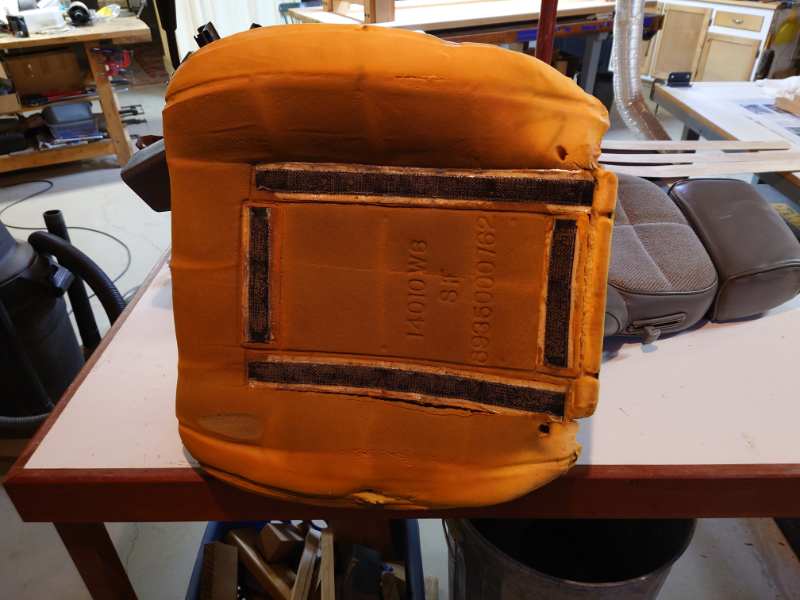
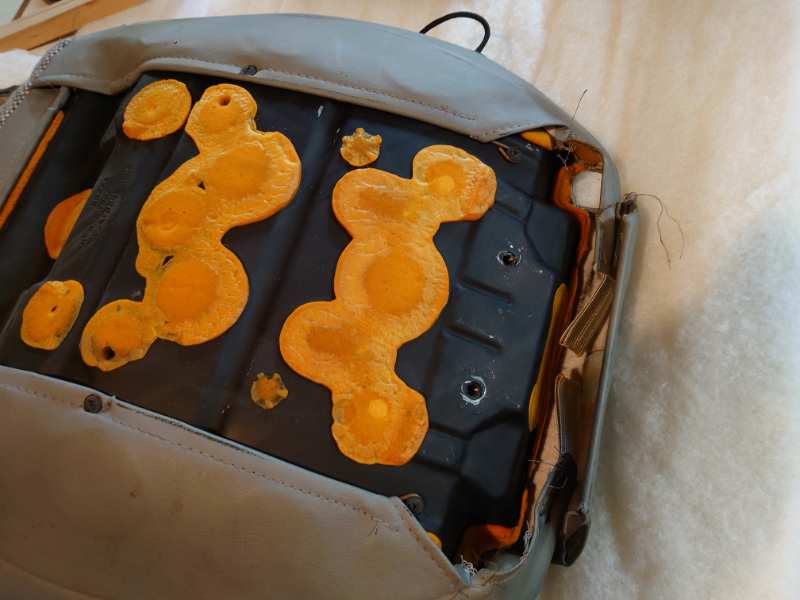
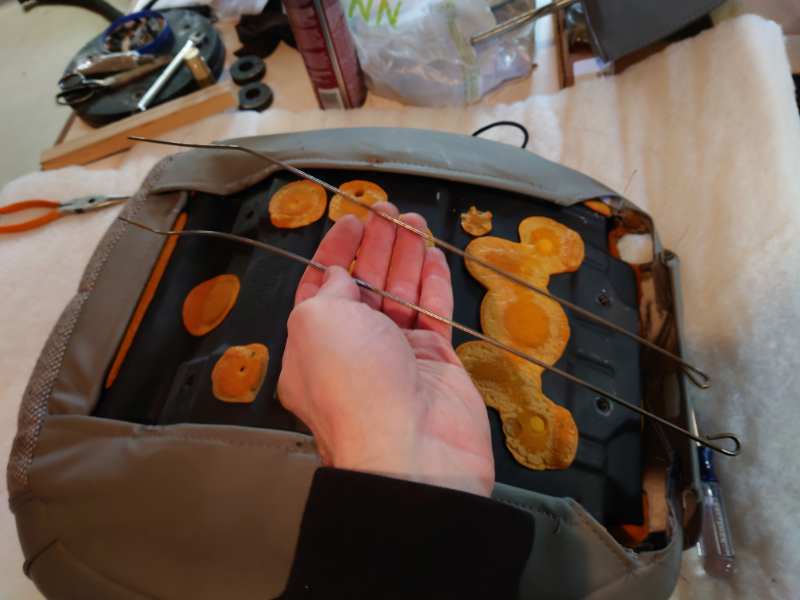
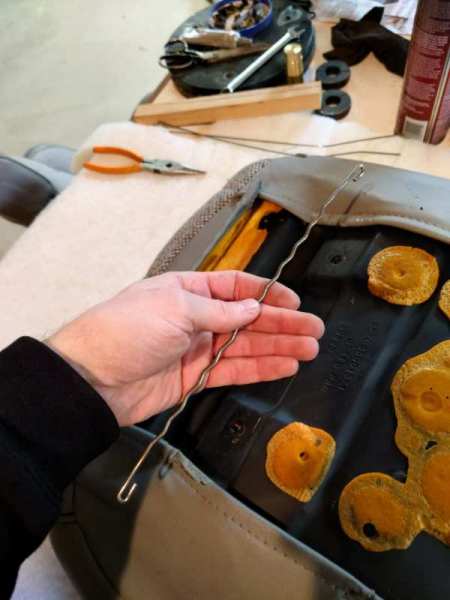
I've had a dream of fixing up my very worn out seats and upgrading them to have heat. This post goes through the work of tearing down the seats, putting in the heated seats pads and putting nicer upholstery on, thanks @fiatslug87! The heated seats kit I used is this one, it's a perfect fit including the rocker switches for the dash next to the cigarette lighter. https://leatherseats.com/shop/seat-comfort/seat-heaters/rocker-switch-seat-heater/ The very worn out starting point. To remove the bottom seat upholstery there are a few screws and wires to remove. At the front the wires cross through each other. Remove the two screws on the front tie down flap. On the back of the bottom seat cushion there is a pin that hooks to the slider bracket. Just pop it out with needle nose pliers. Under that rear flap is a set of elastic straps, wiggle them out of the square loop to disconnect. The chrome latch plate hold the rear flap down too. Remove that. At this point, unbolt the bottom seat from the frame. There are four bolts with 13mm heads, two at the front and two at the back. Apparently my drivers side cushion was missing 4 screws that hold the side wires that hold the sides of upholstery the bottom cushion in place. Photo of the passenger side here shows two black Phillips head screws at the center and two at the back holding the wires in place. Remove them. After removing the 4 screws slide the two coat hanger like wires out the pack by pulling. Needle nose pliers may help here. The wires look like this. The front flap has a wire too, remove it. With the bottom seat loose one can peel off the upholstery. There is Velcro holding it quite well to the cushion. The cushion with the cover removed. Next post, upper seat disassembly.


-
1987 Comanche AKA Ghost
pizzaman09 replied to HuntinHopin's topic in Member Projects: Your Comanches
Turning out to be a nice Jeep! Lucky kid too. -
Project 'Uncle Lou' 1988 Jeep Comanche 2.5L manual 4x4
pizzaman09 replied to Heath's topic in Member Projects: Your Comanches
This is an awesome and fast moving project, the weather must be good where you are at. Looking forward to Uncle Lou's new paint job. -
Bought my second and hopefully last mj today
pizzaman09 replied to Aidenmoreno3's topic in Member Projects: Your Comanches
Glad that you made the best of an unfortunate situation. It's stories like this that makes me happy to live where I do. Your Comanche looks great, white with a black grill is one of my favorite combos. -
This is very interesting, I just cadded up some of the lever trim pieces the other day, was planning to mill them out of aluminum.
-
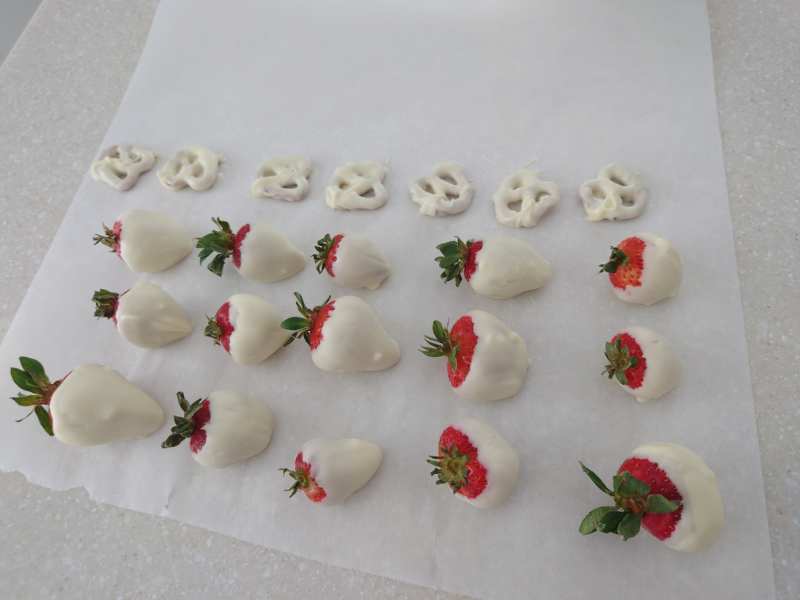
Did some white chocolate covered strawberries today. Crazy delicious was the verdict.
-
Actually I frequently take my old Austin Healey up to valve float and then grab the next gear... For the Comanche, typically I shift all over the place, 1500 is a shortshift, 4500 is the end of the world. In the end it's driving a manual, you have the power to choose how and when you shift. I've driven my Comanche like a big rig hauling a heavy trailer, with slow deliberate shifts, on the flip side I've raced it up to speed as quick as I can banging shifts out.
-
I've been eyeing up the idea of making a guard for that gap for a while. Haven't put any pen to paper yet but if really like to make some rear wheel well liners.
-
RENIX utilizes a MAP sensor instead of a MAF. That said, vacuum leaks are not helpful to either.
-
I think the product you are looking for is named DeoxIT. There are a couple of different varieties so you may want to do a bit of research.
-
bucket seat base trim
pizzaman09 replied to watchamakalit's topic in MJ Tech: Modification and Repairs
Most parts stores have rotating racks of these sorts of clips. The rivets on the seat trim are very similar to these BMW plastic rivits which are super inexpensive. I was planning to use one of these to hold the plastic trim on my seat in the refurbishment I'm doing right now. https://www.fcpeuro.com/products/bmw-fender-liner-rivet-51161881149?ads_cmpid=21608260482&ads_adid=164927063021&ads_matchtype=&ads_network=g&ads_creative=715103588145&utm_term=&ads_targetid=pla-2338160550696&utm_campaign=&utm_source=adwords&utm_medium=ppc&ttv=2&gad_source=1&gclid=Cj0KCQiA_NC9BhCkARIsABSnSTaSTWzMcPyftG-9Os8OR32t8SbJBBeEq0Ln_TVeaV9ykPFMxomiKsYaAvW3EALw_wcB -
I love it. Awesome, color, awesome drivetrain, and a heavy suspension.
-
Cruise control switch/stalk, can't find one
pizzaman09 replied to knever3's topic in MJ Tech: Modification and Repairs
Well, the connection in the bottom is easy to find. This thread has photos of the two connectors. The thin one comes from the stalk, the blocky connector goes to the cruise system. https://comancheclub.com/topic/54804-cruise-control-stalk-connector-connects-to-what-connector/ -
Cruise control switch/stalk, can't find one
pizzaman09 replied to knever3's topic in MJ Tech: Modification and Repairs
The broken end is probably in the steering column, but the other connection end is under the dash and accessible. It is challenging but one can fish the new wire down the column. -
Cruise control switch/stalk, can't find one
pizzaman09 replied to knever3's topic in MJ Tech: Modification and Repairs
That is the wire for the cruise control. -
Cruise control switch/stalk, can't find one
pizzaman09 replied to knever3's topic in MJ Tech: Modification and Repairs
If you get another stalk to try, just put it in under the dash to try before going through the fun process of fishing a wire down the steering column. The stall was the issue my cruise control has, it just had a worn out cruise switch. -
I can't say I blame you for swapping the wheels. The gold was sharp but I remember they were basket weave style, and rose are the worst to keep clean. Yeah, BaT isn't technically any better than any other website for buying and selling cars other than you get a lot of eyes on the vehicle and people comment about what they see. It's still buying a vehicle long distance sight unseen. Hopefully sorting it out hasn't been too much trouble. My Comanche purchase wasn't much different, was supposed to be rust free and clean, it took me 5 minutes to find a softball sized hole in the drivers floor pan and a squirrel near in the air box. That said it too has cleaned up to be an amazing truck. Enjoy yours!
-
January 2025 - The Orange MJ and The Truggy
pizzaman09 replied to 89 MJ's topic in Comanche of the Month (MJOTM)
There is a lot of serious off road capability here. -
Was this truck on Bring a Trailer? It's beautiful, I followed the auction closely.
-
Putting the long bed to work I see. Very nice. I love seeing Comanches used as trucks. Check also the little vacuum actuated valve right behind that, it is plastic and gets brittle with age. I actually watched mine explode when investigating cooling issues.
-
Montana Manche Restoration
pizzaman09 replied to Montana Offroad's topic in Member Projects: Your Comanches
Those lights are wonderful. -
Cruise control switch/stalk, can't find one
pizzaman09 replied to knever3's topic in MJ Tech: Modification and Repairs
I purchased this, works great. Only complaint is the mist function doesn't spring back all the way without a little help as it's a decently tight assembly. I assume it will wear in with use. https://www.amazon.com/dp/B00BPHV18C?ref_=icdp_ba_mweb_mb_pd_bap_m_grid_rp_0_1_ec_ppx_aw_ya_bia_gf&clientRefMarker=pd_bap_m_grid_rp_0_1_ec_ppx_aw_ya_bia_gf&heartsTeamIdentifier=buyagain&psc=1&heartDisabled=true -
Dielectric Grease as Belt Treatment
pizzaman09 replied to AnotherOldJeepGuy's topic in MJ Tech: Modification and Repairs
Brake clean won't do much to remove silicone oil. At work we use silicon oil in some products, MEK and Acetone work well to remove it. Isopropyl alcohol doesn't touch it. -
I have a hard time with these fake videos of vintage vehicles made new, they seem very prevalent. I suspect they would do a two door Gladiator first so as to not stir up the controversy of another Indian tribe name. However I would be down for Jeep to do a remake of the Comanche with a useful two door cab and decent length bed.
-
Just size, I replaced the missing stud and nut on mine with a grade 8, 3/8-16 bolt from the hardware store.