


ghetdjc320
-
Posts
5079 -
Joined
-
Last visited
-
Days Won
1
Content Type
Profiles
Forums
Gallery
Everything posted by ghetdjc320
-

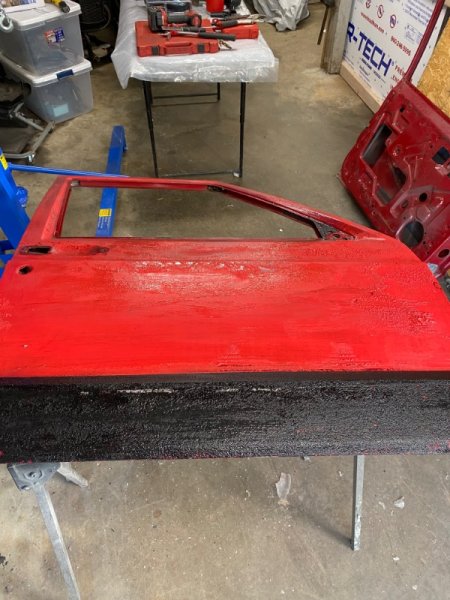
Project “Tomahawk”
ghetdjc320 replied to ghetdjc320's topic in MJ Hardcore Tech: Epic Journeys to Greatness
First coat of Raptor is on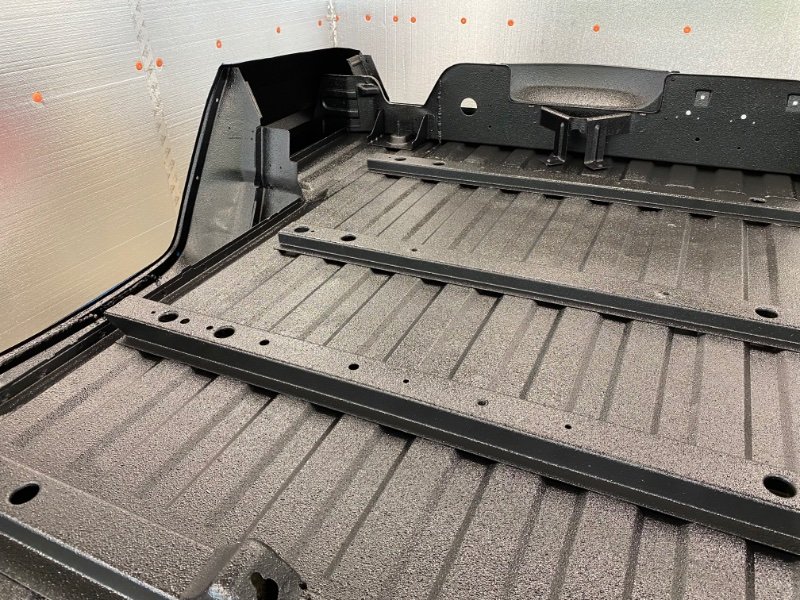
-
Comanche Dawn
ghetdjc320 replied to Limeyjeeper's topic in MJ Hardcore Tech: Epic Journeys to Greatness
This is the pump I ended up grafting onto the sending unit.
-
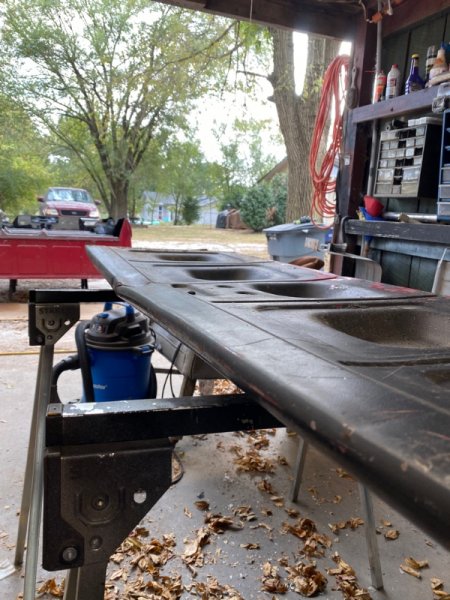
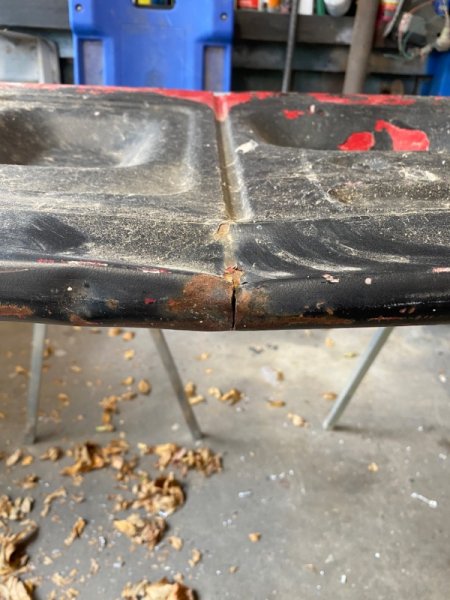
Project “Tomahawk”
ghetdjc320 replied to ghetdjc320's topic in MJ Hardcore Tech: Epic Journeys to Greatness
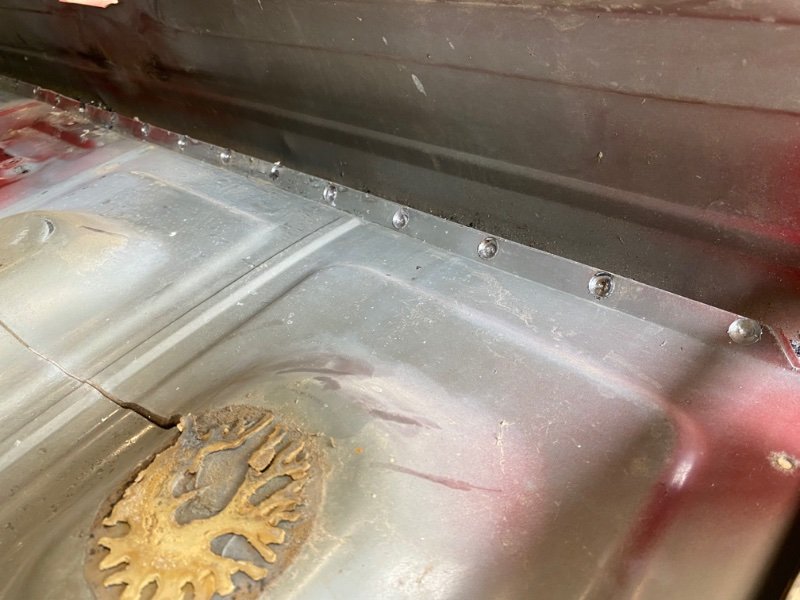
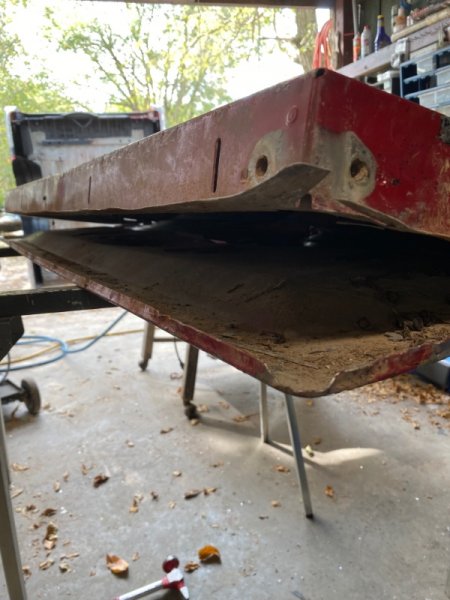
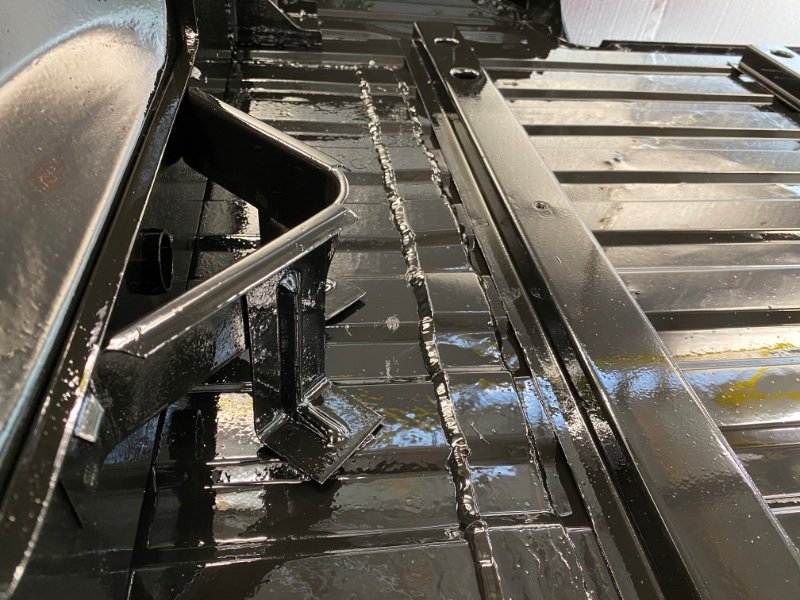
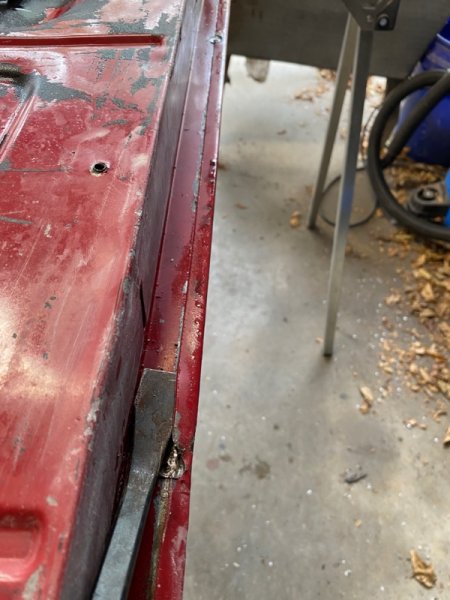
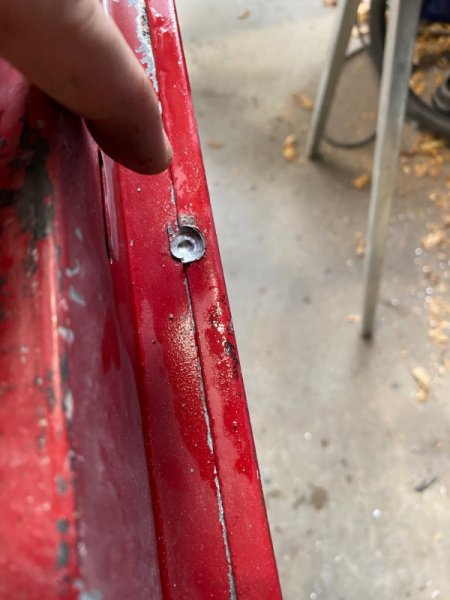
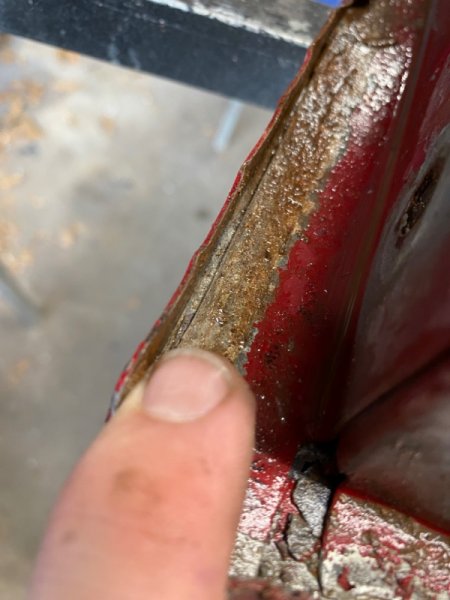
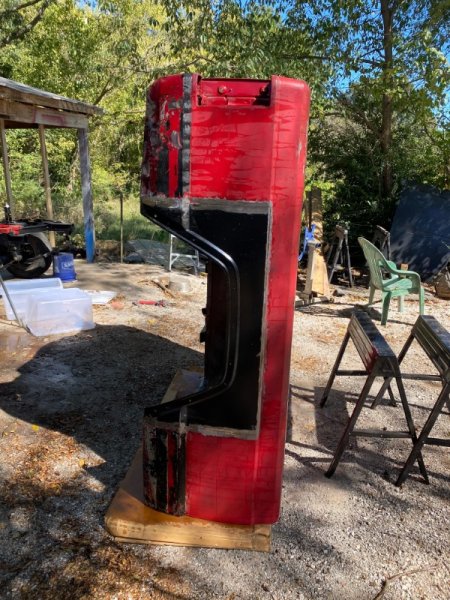
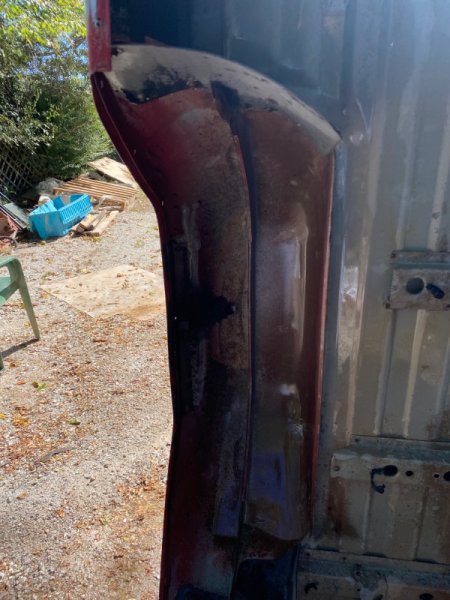
Tailgate has been disassembled. Very tricky to straighten this one but I’ll take the time to get it done right. Added some pics of disassembly so you know what is needed if you decide to do it yourself. The entire underside of the bed has now been POR15’d with 3 coats plus 5 coats in the wheel wells. Rhino lining will be next. Will let that cure fully before flipping the bed over to do the rest. All the patch panels in the wheel wells and bed have been seam sealed with 3m heavy bodied 2 part sealer.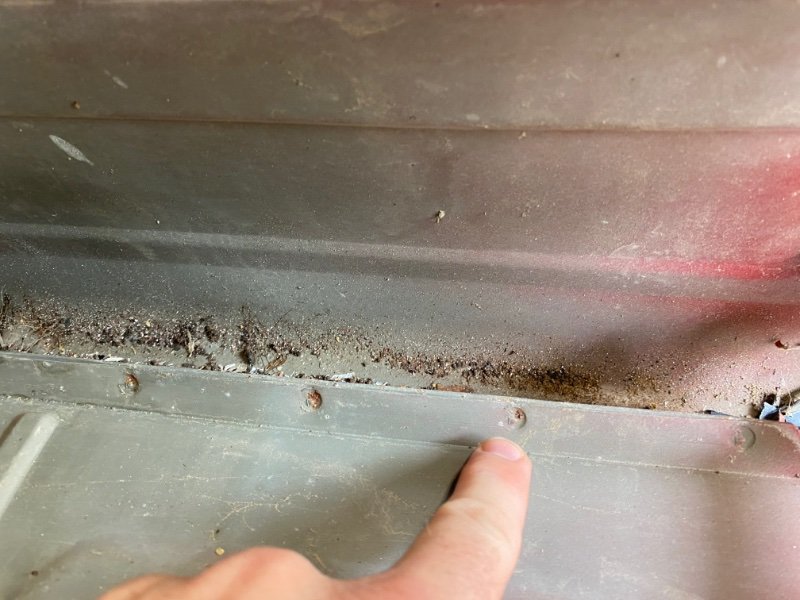
-
Project “Tomahawk”
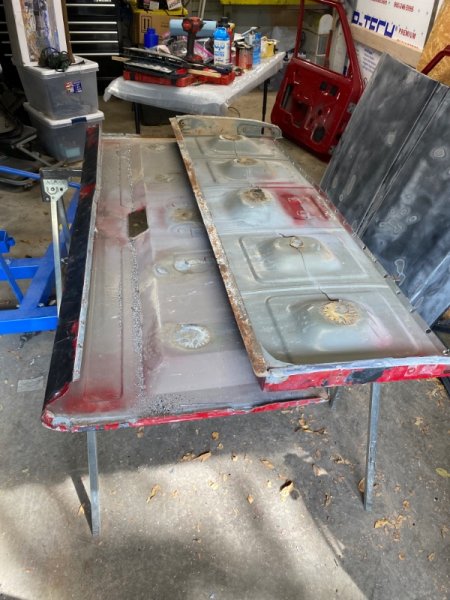
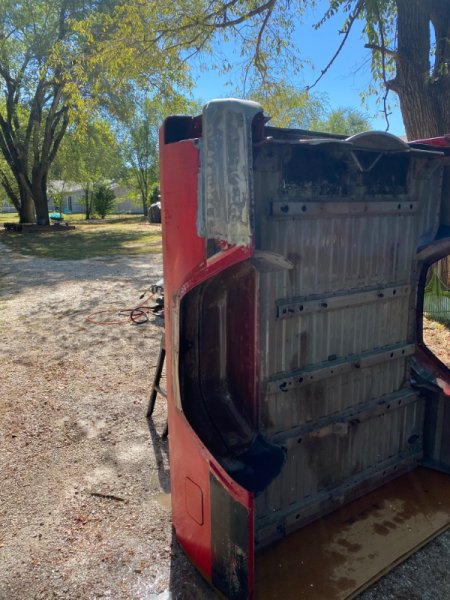
ghetdjc320 replied to ghetdjc320's topic in MJ Hardcore Tech: Epic Journeys to Greatness
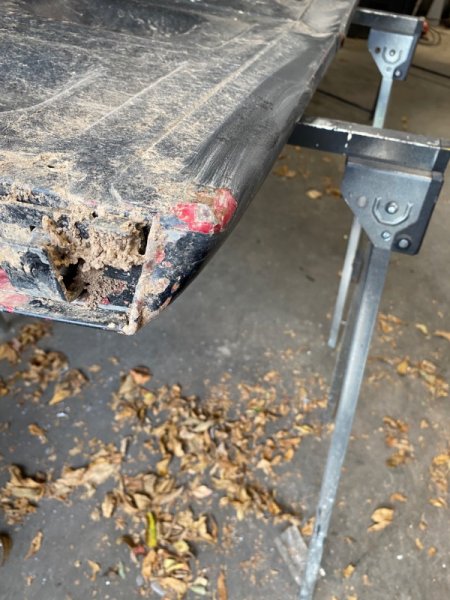
Finalizing some details on the underside of the bed before lining. Had to straighten many seams and dents from years of abuse. Wire brushed the whole underside and use a red scuff pad as far as I could into the wheel well areas then water blasted it all. Por15’d all the problem areas and will let that cure overnight before lining the underside. Once that cures it will be flipped over and the top side will be worked on. Also started disassembling the tailgate and separating the shell. This one is in seriously rough shape but I’ll see what I can do.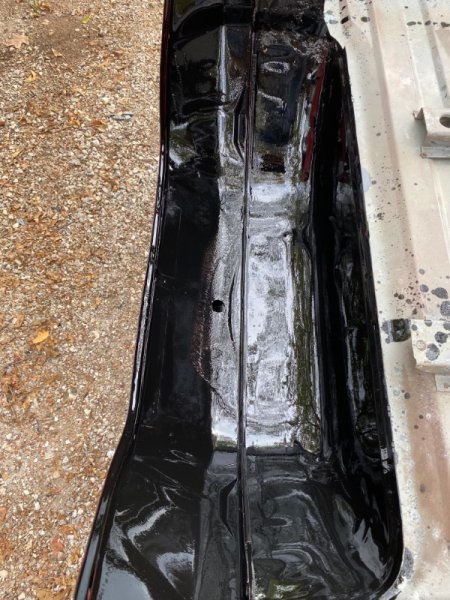
-
To me, the bed corners are a problem point for off-roading much more than the bedsides. Proper installation will avoid any rust in that area. After all, almost every single pinch seam on these rigs is an unfinished, water trapping rust point.
-
Yeah, that’s a good old D35. If the knuckles on the front axle are pre 90’ I’d grab those. Lots of good parts still there from what I can see
-
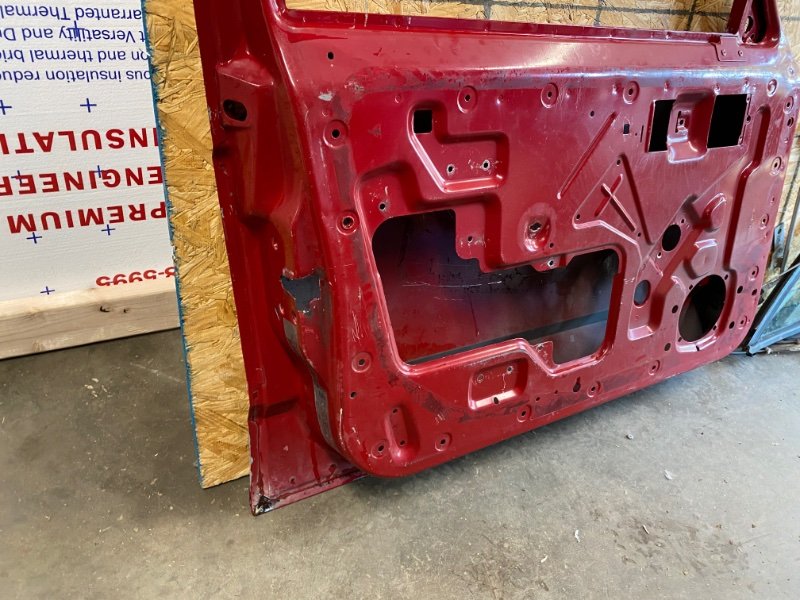
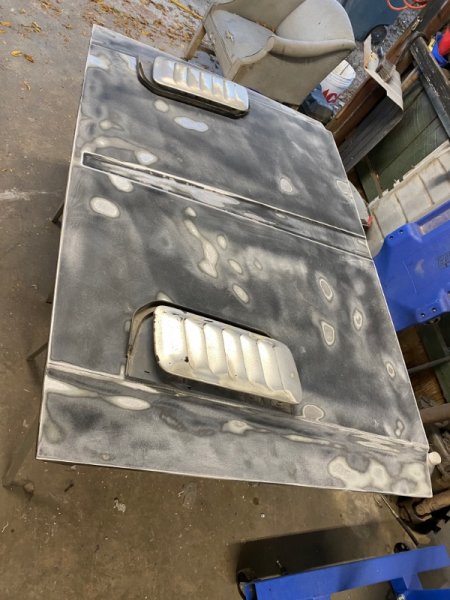
Project “Tomahawk”
ghetdjc320 replied to ghetdjc320's topic in MJ Hardcore Tech: Epic Journeys to Greatness
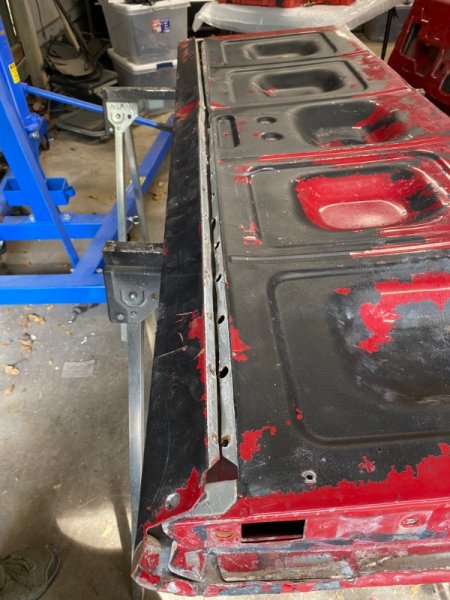
Body work has started. Doors have been stripped of absolutely all hardware down to the factory shell. Going to be running full size windows in these to delete the factory stationary vent window and give me a full size window for once. Also doing electric locks and windows. Managed to strip off the old bedliner paint that someone had shot over the eliminator graphics. That stuff is nasty to remove. Here is also a small sample of what to expect for the hood. And yes, those are original 98 5.9 ZJ louvers. Going to play around with fitment as the ones I’ve seen installed seemed too far forward. Further back is a bit more agressive. Seems like they were trying to avoid the hood support structure but I don’t mind modifying that to get just the right look. By the way, if anyone needs a set of manual window regulators that work I have two to get rid of.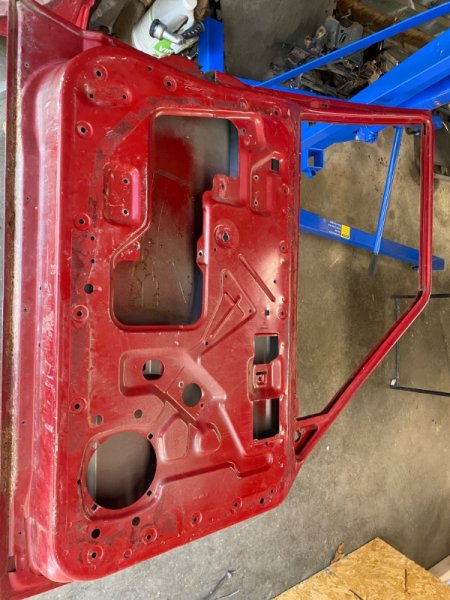
-
Replacement Cab Heat shield
ghetdjc320 replied to Salvagedcircuit's topic in MJ Tech: Modification and Repairs
I’d just recommend steering clear of the mass backing from acc. Mine turned to crumb in about 3 years and was an absolute mess. -
Project “Tomahawk”
ghetdjc320 replied to ghetdjc320's topic in MJ Hardcore Tech: Epic Journeys to Greatness
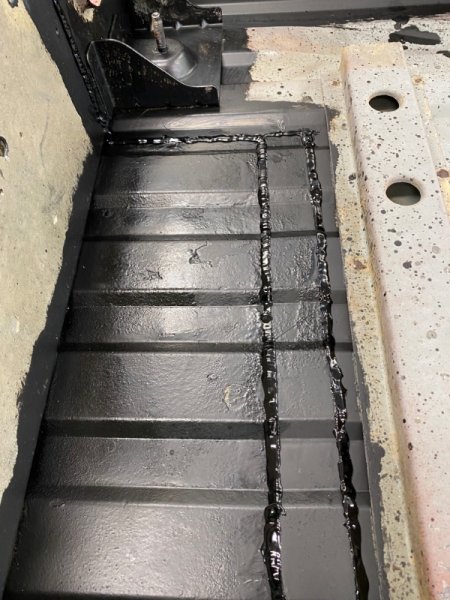
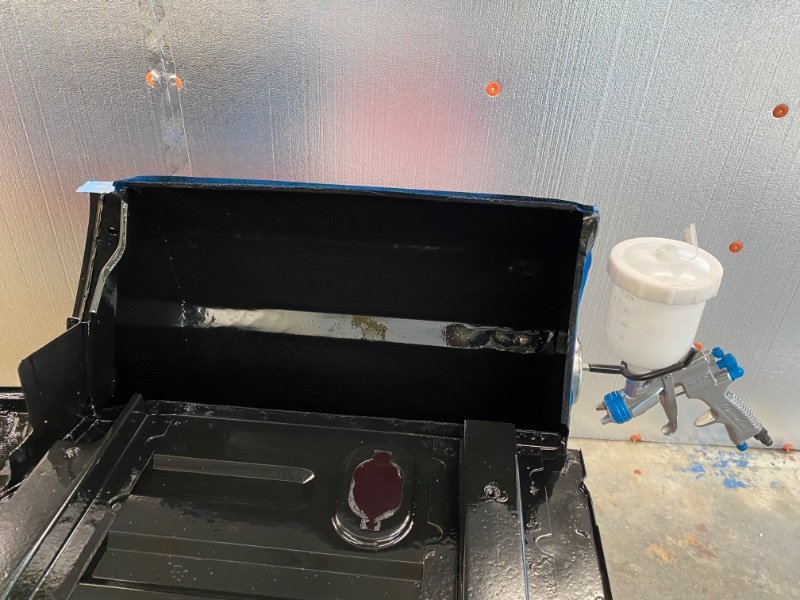
Getting all sealed up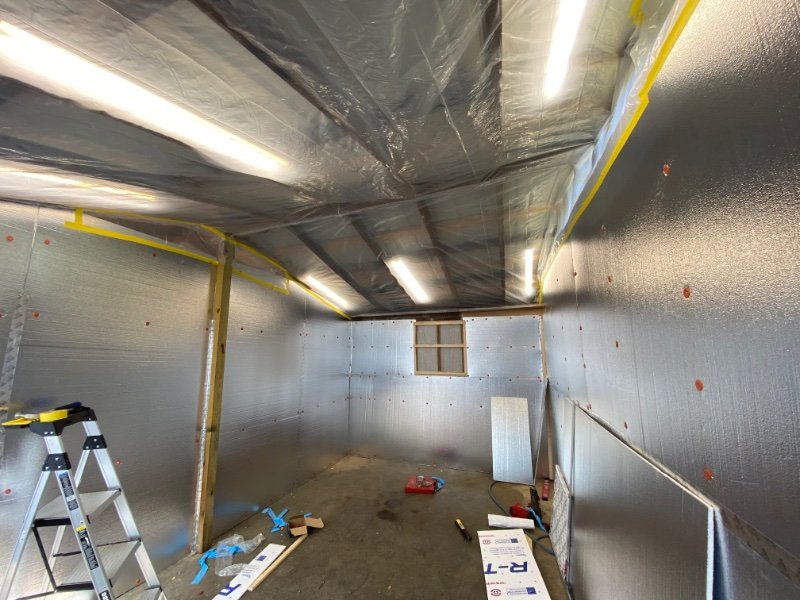
-
Project “Tomahawk”
ghetdjc320 replied to ghetdjc320's topic in MJ Hardcore Tech: Epic Journeys to Greatness
Had to pause to build a paint booth. Should be complete in a day or so.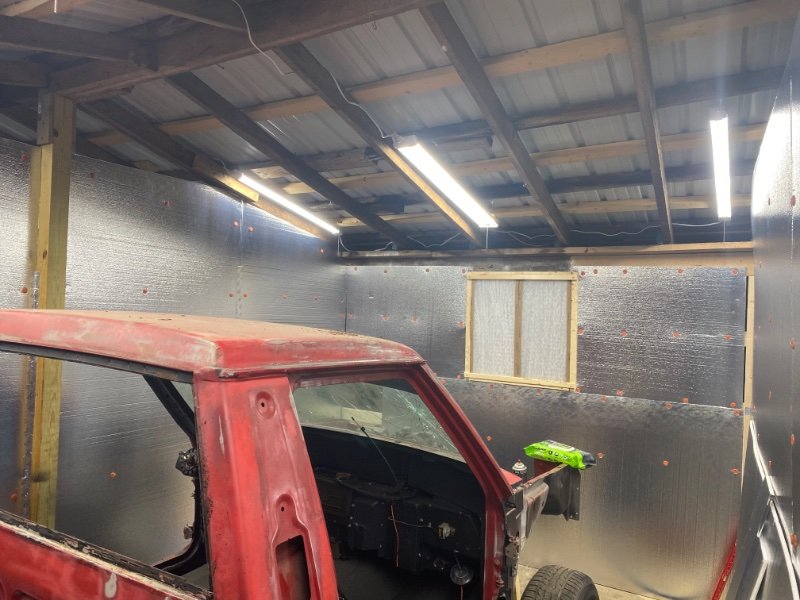
-
Replacement Cab Heat shield
ghetdjc320 replied to Salvagedcircuit's topic in MJ Tech: Modification and Repairs
I used dynamat followed by 3/4” dynaliner. Looks to me like that’s going to do the trick and work great -
Also curious. I like the idea of that corner armor as well
-
Anyone working on reproducing splash guards/mud flaps?
ghetdjc320 replied to ghetdjc320's topic in The Pub
I was thinking of something similar. With a good front and rear trace out, I could trim it from a generic mud flap -
Anyone Done a D44 ARB Locker Install?
ghetdjc320 replied to AdroitKirby's topic in MJ Tech: Modification and Repairs
I’ve done a few -
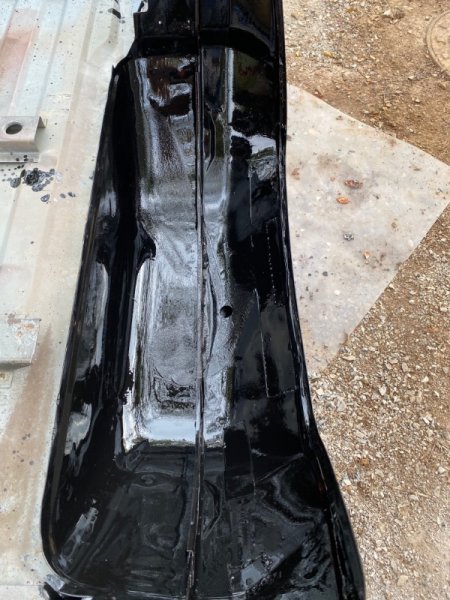
Project “Tomahawk”
ghetdjc320 replied to ghetdjc320's topic in MJ Hardcore Tech: Epic Journeys to Greatness
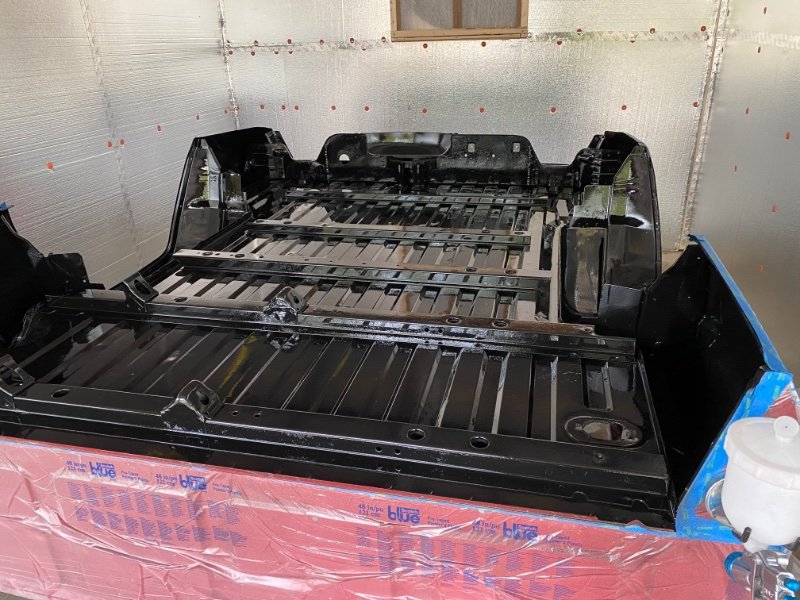
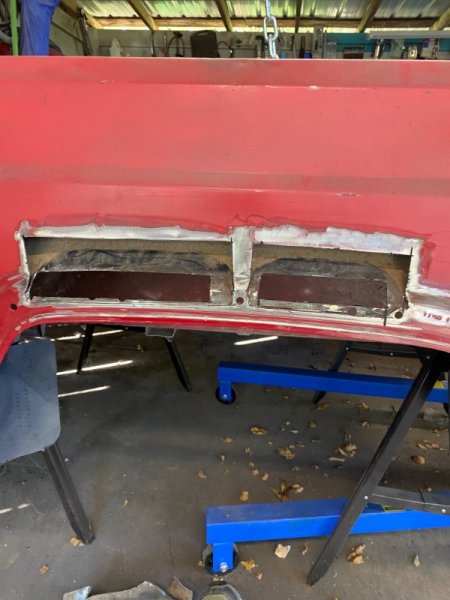
Bed cleaned up. Lots more body work left but the major pieces are all in.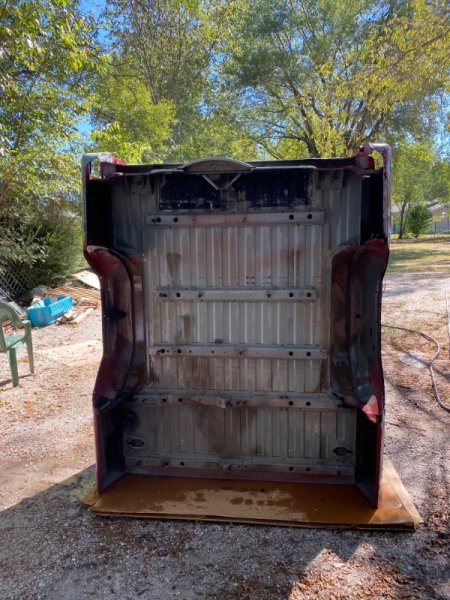
-
If the top of the shackle points forward to the TC 10* as they’re suggesting that would be great. As it is, it’s pointing approx -25* if their statement is to have any logic.
-
Anyone working on reproducing splash guards/mud flaps?
ghetdjc320 replied to ghetdjc320's topic in The Pub
That’s like saying there is still gold to be found. If you know where they are please let me know -
Anyone working on reproducing splash guards/mud flaps?
ghetdjc320 replied to ghetdjc320's topic in The Pub
True but royalties to bare the logo are a tiny percentage of the cost and relatively easy to apply for. -
Bump
-
I haven’t heard any updates for some time but was wondering if anyone has this project on their radar. We could really use some and it doesn’t seem like it would be that difficult to reproduce. I do recall there was a member making the brackets for the rear splash guards. This post is somewhat self serving as I need some myself
-
Project “Tomahawk”
ghetdjc320 replied to ghetdjc320's topic in MJ Hardcore Tech: Epic Journeys to Greatness
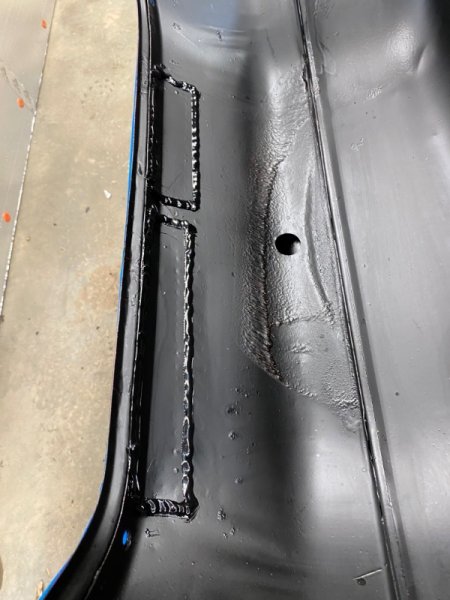
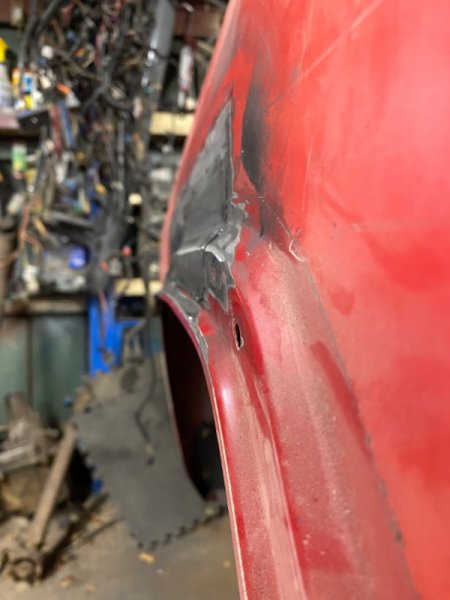
Just knocked out what I hope to be the last of the patch panels. I’ll sand down the hole bed and shoot it with epoxy primer before adding some evercoat fibertech over the weld joints followed by Rage then a glazing compound as a skim coat. Bottom of the bed and inside will be raptor lined. Some strategic use of seam sealer and adding better drainage is in order as well.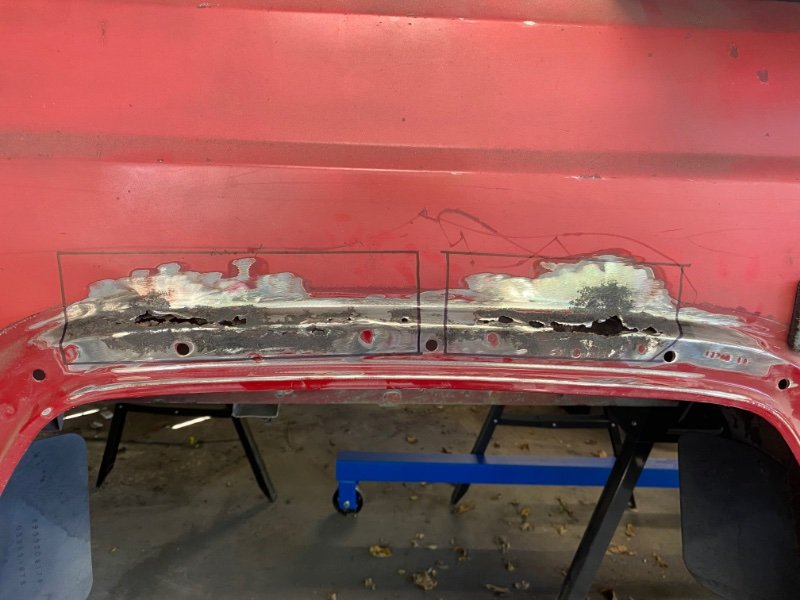
-
Project “Tomahawk”
ghetdjc320 replied to ghetdjc320's topic in MJ Hardcore Tech: Epic Journeys to Greatness
Yep that’s it! Got mine at Morris 4x4. Took about maybe 2-3 weeks to ship. I still have it all wrapped up in the shop along with a ton of other things. The D ring version of this bumper adds some cost but that’s because they add significant bracing for those d ring mount points. It’s a very nice bumper for sure. Was planning to go with the Hanson rear MJ bumper (not advertised but they will make them upon request) as it matches nicely but I also have an oem bumper and hitch I could use if need be. -
Need a quick measurement
ghetdjc320 replied to ghetdjc320's topic in MJ Tech: Modification and Repairs
Could just be some slight variances in the flare mounting holes. They do have some play in them -
Need a quick measurement
ghetdjc320 replied to ghetdjc320's topic in MJ Tech: Modification and Repairs
Perfect, thanks! -
Hello all, my MJ is all apart so I can’t get this dimension but I need the space between the front and rear flares for stock flares on a short bed rig. The back edge of the front flare to the front edge of the rear flare. TIA!