
coolwind57
-
Posts
992 -
Joined
-
Last visited
-
Days Won
6
Content Type
Profiles
Forums
Gallery
Everything posted by coolwind57
-

Junkyarding today. Needs/ideas?
coolwind57 replied to coolwind57's topic in MJ Tech: Modification and Repairs
Yep that's it. No luck today. But I already have a back up that I found last year in the same yard. I just check for more each time I'm out on a yard. Crazy that 98% of them look like the one in your pic, HOrnbrod. -
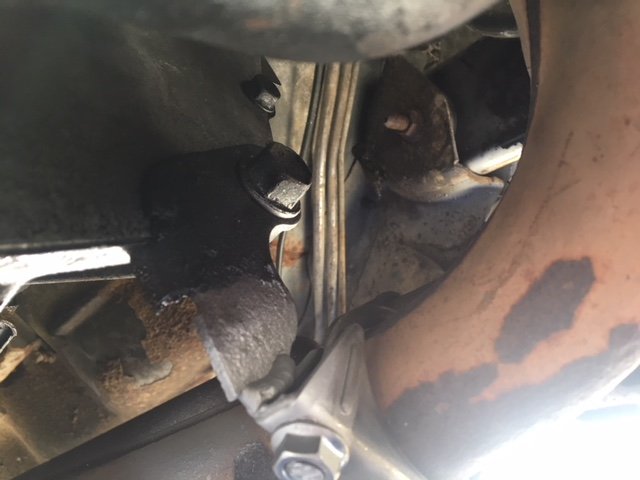
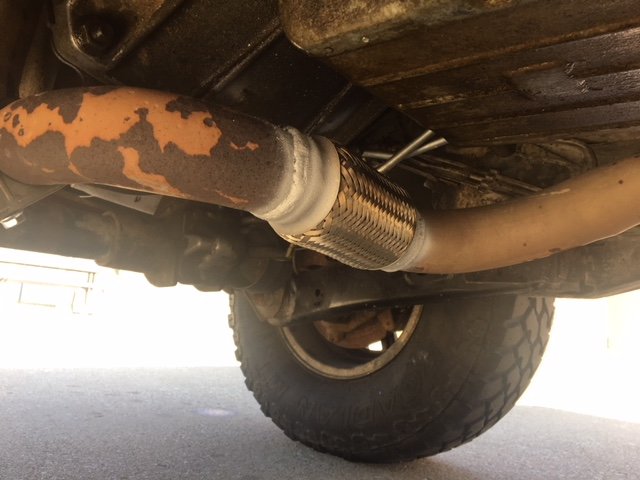
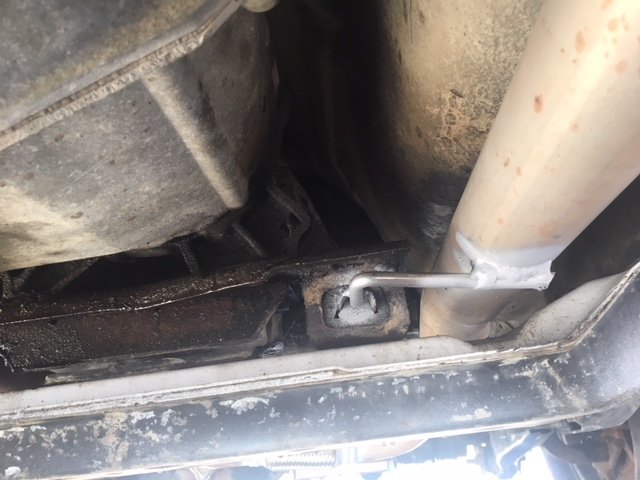
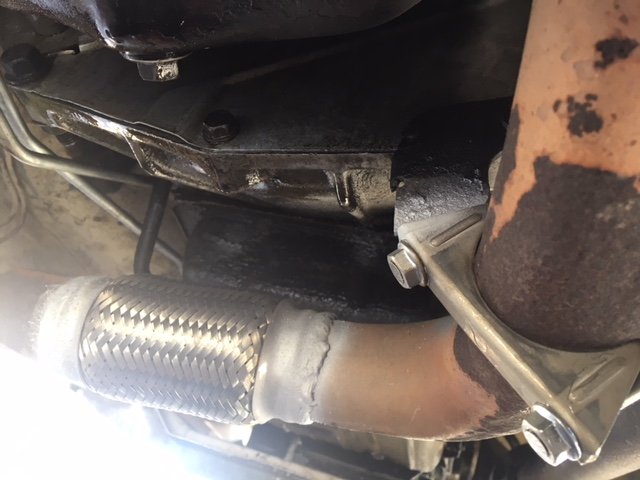
So today I stopped by the exhaust shop. Got some pics. Now that I'm back up and running, I am concerned about my exhaust header cracking again. I had welded the cracks on my header when I had it out of the vehicle and even welded on a gusset between the last two primaries. Upon advice from the forum, I had a 6" flex pipe welded on my header pipe. Also, I wanted to address additional support (hangers) with the shop and I asked them to put an additional hanger at the bellhousing. I had to ask what the tab bolted onto my bell housing was a few weeks ago because it did not appear to attach to anything. Well, the guys welded on a clamp, giving the front of my exhaust system some additional support: Additionally, a shop guy said that I was probably suppose to have one at the transmission mount. I had no idea that there was suppose to be one there. A PO had deleted my CAT so perhaps that's why I didn't know that anything mounted there. Anyhow, he corrected it by installing this: So, I feel much better about hitting bumps and flexing my truck now. He charged me like $30 for parts and I think $80 labor, which I didn't feel was too bad. I have a flux-core welder and can get by with minor welding, but I was really ok with giving this job to a pro. I feel it paid off as I learned a thing or two from them today. Funny how they used high heat paint on their welds.....I guess to make some customers feel better about the rust that will begin to show up within an hour or two I suppose.
-
Junkyarding today. Needs/ideas?
coolwind57 replied to coolwind57's topic in MJ Tech: Modification and Repairs
Yes, THAT! Sent from my iPhone using Tapatalk -
looks like I'll get the opportunity to visit Louisville's Pull-A-Part today on company time! One of our girls had busted up a company Kia Rio brake light lens and I'm going over to get a replacement. Only thing coming to mind MJ wise would be finding a blue headlight module for an upgrade. Racking my brain on what else I might need. I want to go with a one-piece axle to replace the CAD setup eventually, but I'm not so sure I could justify the time required to pull it today. I'd also eventually like to upgrade my tierod to the beefier V8 WJ some time soon too. Also, I always look non-cooked heater console pigtails whenever I go (I did score a holy-grail, non-burned one last time there). i want to see their selection of Dakota 40-20-40 benches too. BTW, looks like Louisville has only three XJs listed as available on their website: a 96, 98 & 99. Anything I can check out for you guys while I'm there? Anything I should look for? Have a need that's easy to pull that I can grab for you?
-
Ford Ranger bed on Comanche?
coolwind57 replied to AzraeL's topic in MJ Tech: Modification and Repairs
For sure, document your project and take tons of pics. Especially curious of how to best mount to the MJ frame Bolts, holes and mounts lining up would be too good to be true. -
Ford Ranger bed on Comanche?
coolwind57 replied to AzraeL's topic in MJ Tech: Modification and Repairs
I'm sure he doesn't cringe as bad as we do when he backs into something and destroys a tail light lens. -
Ford Ranger bed on Comanche?
coolwind57 replied to AzraeL's topic in MJ Tech: Modification and Repairs
Wow, that's actually kind of decent looking. To each his own, but not bad. -
Woke up to 5-6" here in Southern Indiana. 2nd day of "Spring".
-
Most guys are replacing the radiator, which I didn't want to do unless I had to. Their mod would also include replacing the water neck if memory serves me right. Seems like there was another small hurdle with the electric fan or something too, I can't remember. My method, which I read about somewhere on the net, was much simplier and certainly less costly. I have no regrets at all. Hey man, when you get some extra funds, buy this: https://www.amazon.com/Lisle-24680-Spill-Free-Funnel/dp/B00A6AS6LY/ref=sr_1_1?s=automotive&ie=UTF8&qid=1521546998&sr=1-1&keywords=Lisle+24680+Spill-Free+Funnel That was a great $20 tool investment. Works great and gave me piece of mind that I was helping to eliminate any hotspots.
-
Just removed all vac lines related to the EGR along with the solenoid. Then plugged the EGR vacuum at the port on the top of the manifold.
-
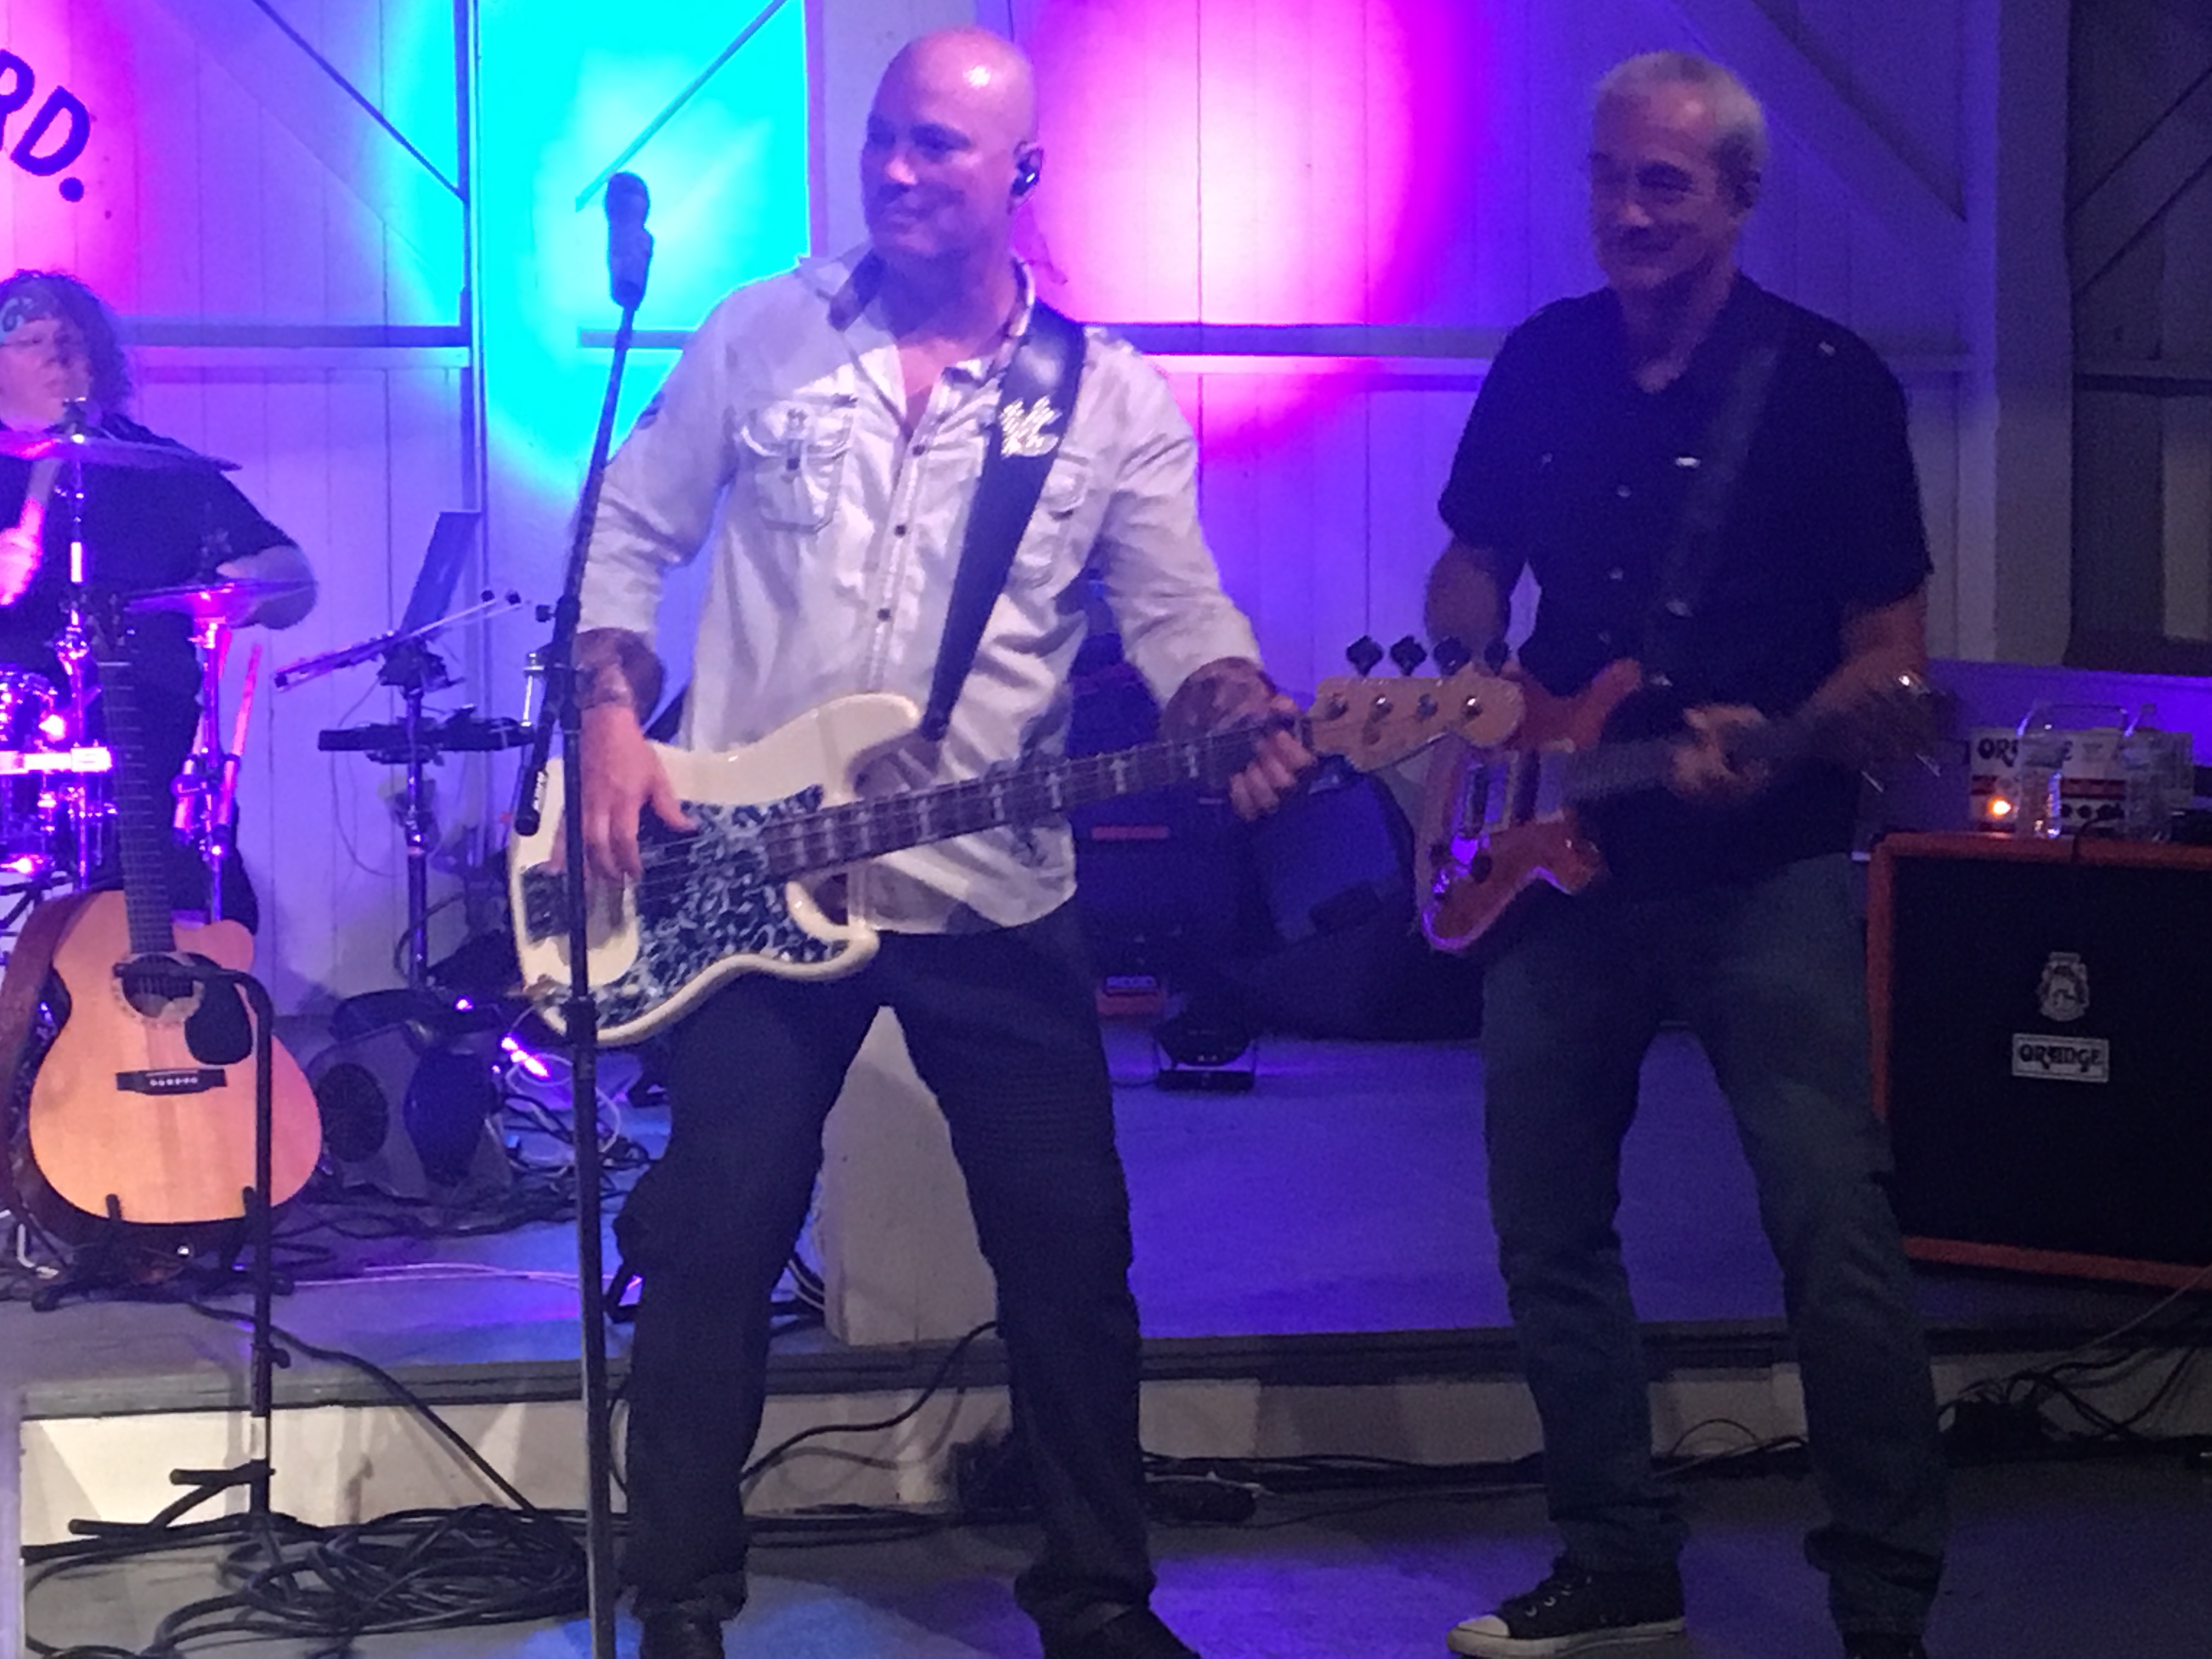
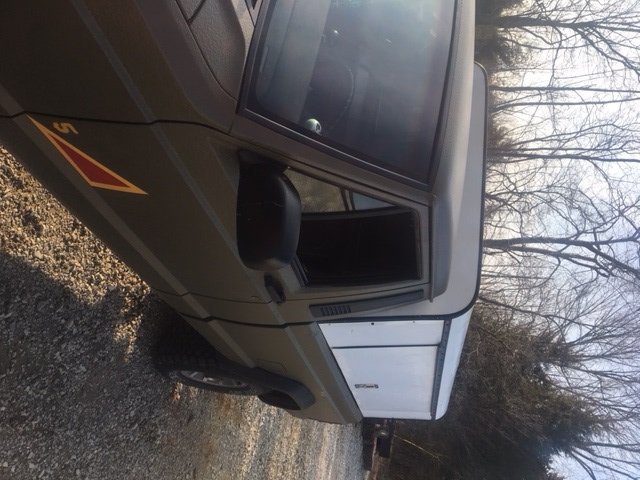
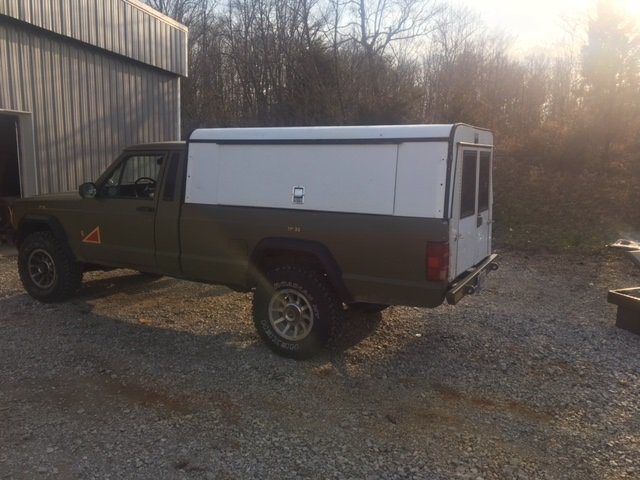
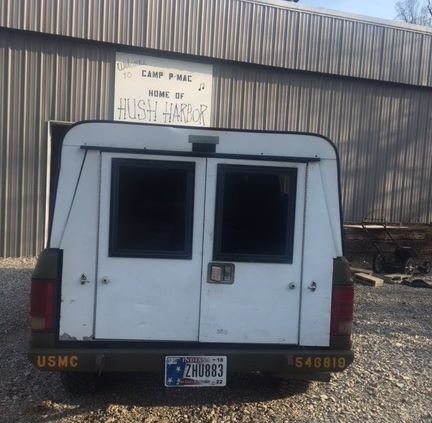
Check out my new topper. So, my band has an out-of-state performance in Ohio this weekend, 4-1/2-hour drive. Looks like I've been appointed the "Merchandise guy" until we can acquire another person to manage (and haul) this stuff (concert T-shirts, coffee mugs, necklaces, other goodies). Anyhow, I've been able to either dodge bad weather or stuff my instrument equipment in my wife's Nissan Sentra--a VERY tight squeeze. Now that I got my truck back on the road...and now that I have more than doubled my gear to haul, I decided that it was time for a topper. So this is what I came up with. I paid a whopping $30 for it, but I had to drive about an hour to get it. It needed some repairs, which I did most all last night. I had to beat some dents out and replace some fasteners and reinforce an area or two, but overall i kind of like it. The fit is acceptable for it's purpose: To haul gear on occasion. I'll have this thing back off 98% of the time. Good thing is this: It is tall and quite light in weight---more lightweight than it looks. I can carry this myself when I slide the back doors off. I get under it and grab it by the roof rafters on into my bed. Place it, snug it down with clamps, then slide the rear door assembly on. The dude I bought it from claimed it came from an S-10 long bed. After checking measurements over the phone, i made the trek to pick it up. Hey man, 30-bucks and I can haul stuff dry now. Maybe will use it as a camper this Summer.
-
Ha!
-
Ticking after engine shut down
coolwind57 replied to coolwind57's topic in MJ Tech: Modification and Repairs
That sounds like a reasonable theory. As I've said, it's running the best it has ever run since I've owned it now. I'll run with this thought. Thanks fellas. -
Driving me crazy, I can't find a very recent discussion on this. Now that I have my truck running again after manifolds removal, I am hearing ticking coming from under the hood after I shut my engine down. I remember glancing over a recent post concerning this but cannot remember what you guys said. Injectors? Something about noise echoing in the intake or something? The funny thing is that i never noticed this in my engine before my manifolds removal. Engine runs better than ever, but this ticking is quite noticeable--not really a "engine-cooling-down" tick, but sounds a little more mechanical than thermal. i don't think it is a relay ticking kind of noise either, but I'm not sure. Sorry i can't seem to find the post, but can you guys share your thoughts on this topic once again.
-
Dakota Seats to stock Comanche mounts
coolwind57 replied to GrayWolf's topic in MJ Tech: DIY Projects and Write-Ups
Same here. -
I did that when I put my brand new CPS in a couple of Months ago. I also did Cruiser's CPS advance mod to it as well, found here: http://cruiser54.com/?p=127
-
After I had my bench seat out, I slid a custom cut piece of office carpet protector--you know that clear thick vinyl sheeting that sits under office chairs to help protect carpet? Slid it up under the springs, which was quite the challenge. Worked like a charm and totally corrected my bench sag. I guess those springs work their way deep into the foam padding, causing the sag.
-
Proportioning Valve Swaps
coolwind57 replied to ShortBox88's topic in MJ Tech: Modification and Repairs
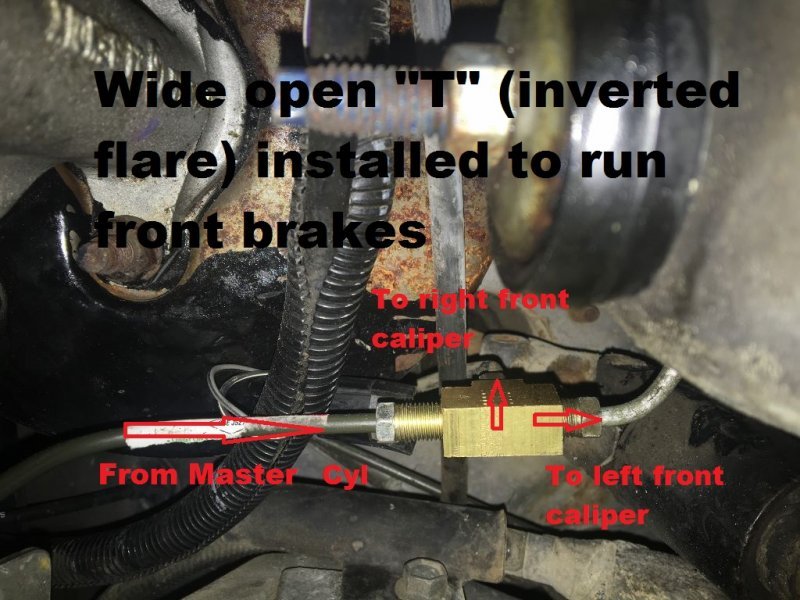
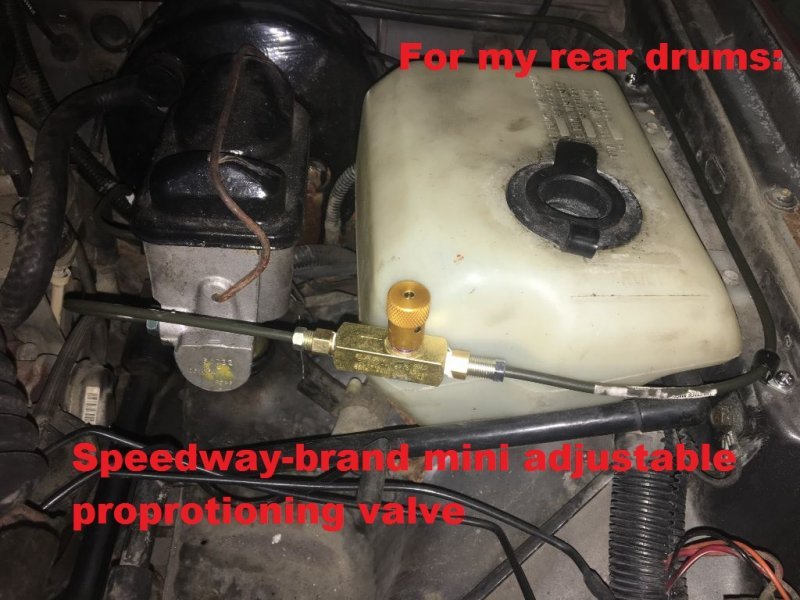
I'll answer/clarify some of your questions at the bottom of my response but I thought I'd share my original write-up first. I've cut and pasted applicable and usable parts and comments here: "MY SITUATION: Original front disc and rear drums. Height Sensing Valve (HSV) half-assed deleted by PO. Still had 2 old crappy brakes lines running to rear. Acceptable brakes as a whole, but redoing it all because I already have the truck apart anyway and didn't like the rusty, brittle looks of things. Plan is to renovate brake system for added reliability and maybe even get some added performance as a bonus. I chose to start things off by trying Cruiser54's front Proportional Valve (PV) trash and replace procedure. This seemed logical as a way of simplifying things and perhaps improving front brake performance.. Plus He's got real-world experience doing this and it has worked for him multiple times. I figured at least to me, that the MJ PV was designed to work a system that included the additional second brake line to the rear (to be used in cases of front brake failure) AND a system including a well-working HSV. Since I now have neither, the MJ PV is no longer being used exactly according to its design with those two aspects missing. The MJ PV meters the front brakes down considerably after the brake line run into it from the master cylinder. Just look up some of Cruiser54's pictures of those tiny little orifices in there. Remove entire PV and then T-off to your front calipers, using an inverted flare brass T. You should get better braking because the small orifices of the prop valve to the front brakes are eliminated. You're now running near-full opening size of the hard brake lines that are coming off direct from the master cylinder. Makes sense to me so I did it: and here's a view from side/bottomp: Now technically I should experience slightly better front brake because I have larger interior diameters running from the master cylinder on through to the calipers. Because I am eliminating some front and rear "bottle-necking" I used to have at the now-removed PV, I agree with many others here that an Adjustable Proportioning Valve (APV) may be a good idea FOR THE REAR BRAKES. This should eliminate any rear brake lockup that I may experience if I am running a heavy payload. The original intent of this thread was to see where other guys were mounting their APVs. I ended up deciding on mounting mine under the hood after all. Even though TJ1 had a cool location on his rig, I ultimately sided with HOrnbrod's opinion of not having brake lines inside my cab. Mounting near the rear of the bed would likely affect longevity and stable function due to full exposure to elements. I completely eliminated my two old hard rear brake lines and ran a new single line back there the the axle. So here's where I ended up mounting my APV: I chose the Speedway APV because it is compact and appears to be simple and tough. Another cool feature is that it allows for full shut down of fluid to the rears, which can possibly come in handy when working on your brakes. REMINDER: If you've read much on the topic of HSV deleting/PV deleting/running a single line to your rears, keep in mind that you'll lose that safety feature that allows full braking to the rears in cases of front brake failure. Speedway didn't have comprehensive flow specs on that mini APV that I show in the picture. it shows gpm and max psi and states that it can be completely shut down whatever line it is controlling if desired. I was curious of flow characteristics during "fully open" setting. FYI for the benefit of anyone interested in this particular device, I sent them a message and here's their response: Perry, I just spoke with one of my techs and he stated that it will not be fully open when the valve is fully open, there will still be some restriction there. Thinking around 20% restriction, so it'll flow 80% of the fluid that a straight line will. As far as I know, we do not offer a proportioning valve that will flow as if there is nothing there while fully open, however the purple proportioning valve might flow a little better as it is not a complete shutoff valve while fully closed, there will likely still be a bit of resistance there. https://www.speedwaymotors.com/Speedway-Purple-Adjustable-Brake-Proportioning-Valve,23498.html My brakes ROCK now! Got my MJ running last night and took her for a spin. My brakes were not so bad to begin with. But now they are excellent! Feels like I have 4-wheel disc brakes. Many thanks to Cruiser54 for the advice on ridding the front proportional block. I have killer good brakes, and I now have the ability to adjust the rears (or shut them down if I choose to)"" Ok, that's pretty-much the write up. Here's to clarifying and answering some of your questions: 1. It looks like I may had used the factory lines that I now have coming from my added "T" running to each of the front brake calipers. I think I simply screwed the 30+ year old brake line threads into a new inverted flare "T". BTW, It took some active shopping around to find the correct sized fittings/adapters to use stock flare fittings and MC orifices with new....I didn't want to have to cut double flares on new and factory brake lines, so I had to use my brain a bit during shopping to avoid cutting/flaring. 2. By design, I certainty now have isolation of from and rear brakes, for sure! Front and rear have two different and very separate paths. They obviously already have two different reservoirs inside your master cylinder. My system continues from there to NOT cross paths with each other. As I had mentioned in my original comment on this thread above, there are advantages and disadvantages to nearly anything you do. I'm pushing full volume to my front brake calipers now instead of dealing with a factory bottle neck. Overall, front-and-back, I can say that I've got superior braking ability compared to what I originally had. And at great cost and time savings. Disadvantage is that I may lose some "fail-safe" capabilities, if you will. I weighed perceived consequences, and then decided on my course of action. This method works for me, no regrets. 3. If I lose my front brakes, I still have rear brakes, although the addition of the aftermarket adjustable prop valve doesn't give me full 100% use of the brake line ID. I do not know to what degree my rear brakes assist my stopping if I suddenly lose my front. In my 35+ years of driving, I don't recall ever running into the loss of brakes of either end, so I'm not too worried. I also do have my emergency brake as a back up. Of course, nearly any valve installed on a brake line will add some restriction. I can also shut down my rear brakes totally if I want to. If you like to show off and do burn-outs, then this is a nice feature! This isn't me, but I give it as an example. Shutting down rears is also nice if you're working on your rear brakes and want to shut off fluid completely. Weigh your decision. Many ways to skin a cat. Again, Cruiser54 has done front prop valve deletes on multiple vehicles. You can now add me to the list who's done it and is happy with it.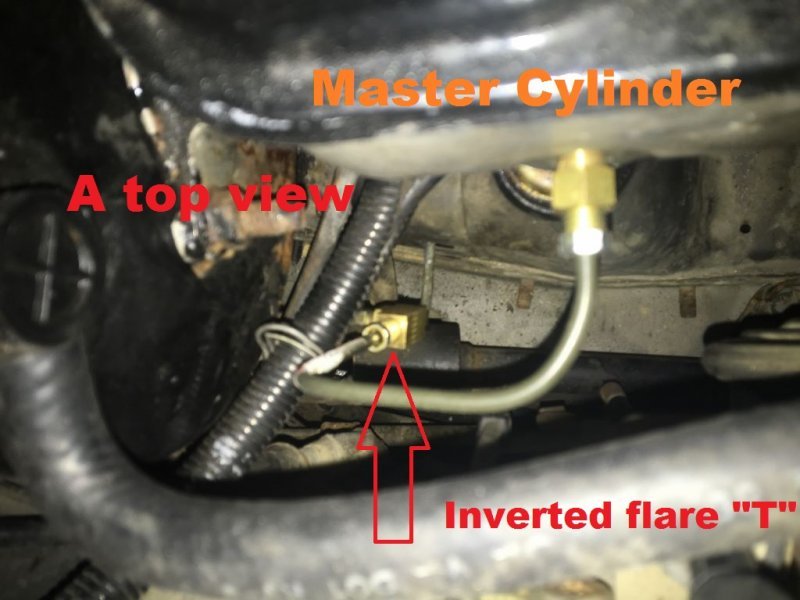
-
He's replaced both CPS and Coil, both of which seem to occasionally have heat-soak issues for others. Is there a cause for heat-soak for CPS, other than a bad part? Exhaust leak, maybe?
-
I feel your pain, brother. i had a bad idle problem and it took me many weeks to solve it. Good thing that came out of it is that I learned what those critical components do and I learned how to test most of them...and certainly learned how to replace many of them. Analogy-wise, I went from Kindergarten to 10th grade in less than a year, as I've got only 7-Months of total Renix MJ ownership. And I feel that sometimes there's no shame in lock-n-loading the ol' parts cannon. Check battery/starter cables if you hadn't already. Mine were a mess and I replaced. Pull them to inspect, as I couldn't even see some of the worst areas of mine without doing so. I hope you promptly find that it is something simple. Hang tough. And by all means, please share when you find your solution.
-
I'm worried for 2018. Louisville's Pull-A-Part had at least 15 XJs and one MJ last year. A couple XJs i think were Renix. I wish I had taken advantage of this more than i did because now they have only 3 XJs,: a 96, 98 & 99 model. Hoping they move more in this Spring as i love this place. Could spend hours there. Deep down, I'm afraid that this may be a sign of the times, however.
-
Proportioning Valve Swaps
coolwind57 replied to ShortBox88's topic in MJ Tech: Modification and Repairs
I'll toss this at you, just as a different approach. I read all I could about brake upgrades. I went the inexpensive and simplest route and I'm quite satisfied with vastly improved braking. Started with stock brakes--booster, master cylinder, etc. PO had bypassed load sensing valve. I removed all brake lines and I removed my stock proportioning valve. Installed a single "T" to run the front brakes, so no restrictions. Ran a single line to rear with an adjustable proportional valve (located it under the hood). Removed all existing load sensing valve components. I have hauled stuff just a few times, and so far I've had no need to adjust my adjustable proportional valve. Rear brakes have not been "touchy" in my experience and that's probably because there is somewhat a restriction due to the addition of the adjustable prop valve installed in line. And again, I've not pushed the limits yet on payload. Front brakes have no real restriction as they did before I eliminated the stock prop valve. Advantages and disadvantages on anything you do. Folks here are passionate on their opinions and approaches. I just thought I'd share my approach, which I credit to Cruiser54. He had done this mod to more than one vehicle, I believe. He explains this on this thread, first page: I've got pics of what I did on here somewhere if you'd like to check it out just for giggles. -
Yes, I did the metric to SAE filter adapter (on page 1 of this thread). Thanks for the complement.
-
YITAMOTOR 746 injectors?
coolwind57 replied to coolwind57's topic in MJ Tech: Modification and Repairs
It was one or doing all of the below things: 1. Welded mildly cracked header and closed the very bad leak at the collector pipe. I also welded a small gusset between the last two exhaust pipes of the header for added strength, by the way. 2. Replaced my O2 sensor. 3. Replaced my water temperature sensor (the one down towards the bottom of the block, driver's side). 4. Eliminated my EGR. Did this while I had my header off. Removed tube connecting header to intake/EGR. Sealed with weld. Cut off EGR diaphram and other parts from it's cast iron housing. Replaced iron housing with sheetmetal sandwiched between it and the intake manifold. My guess on which had the most likely impact would probably be the O2 sensor replacement but I'm only guessing. I had to do all of this together at once, so I didn't have the opportunity to try each individually to test each one. Maybe a combination of them all, who knows. I had done all of the above work while I had my manifolds off replacing freeze plugs. A month or so prior, I had tested my MAP sensor and fuel rail pressure. During this time, I had also replaced my CPS, TPS, IAC, and distributer cap (with one that has all copper contacts) and cleaned/reset my throttle body. It was somewhat of an parts cannon. -
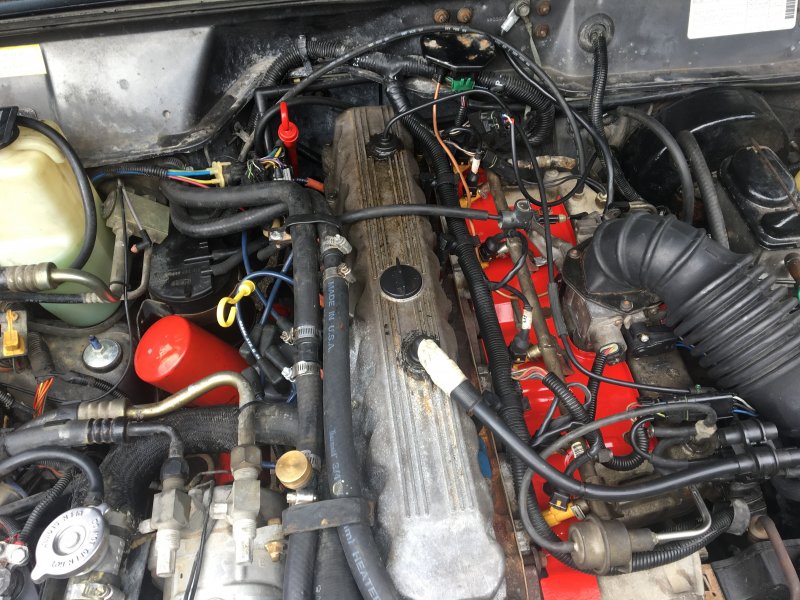
And a shot of top of engine. I spun on a Balwin BT-251 gigantic, monster-sized oil filter. It's factory red, so I didn't have to paint it! I also shot my new motor mounts and transmission dipstick and tube red too while I had them off. Now I feel guilty that I hadn't yet cleaned up my valve cover.