

Airborne Janitor
-
Posts
481 -
Joined
-
Last visited
-
Days Won
1
Content Type
Profiles
Forums
Gallery
Everything posted by Airborne Janitor
-
I think results weren't popping up for you because you have an 86. Does the 86 have different mounting points/brackets than the 87+? I know some of the unibody frame is different around the front of the vehicle. The brackets you may need are 97900, but you may be able to use your factory hardware....
-
 Install a lightbar and have cheap LEDs pointed towards the dash!
 -
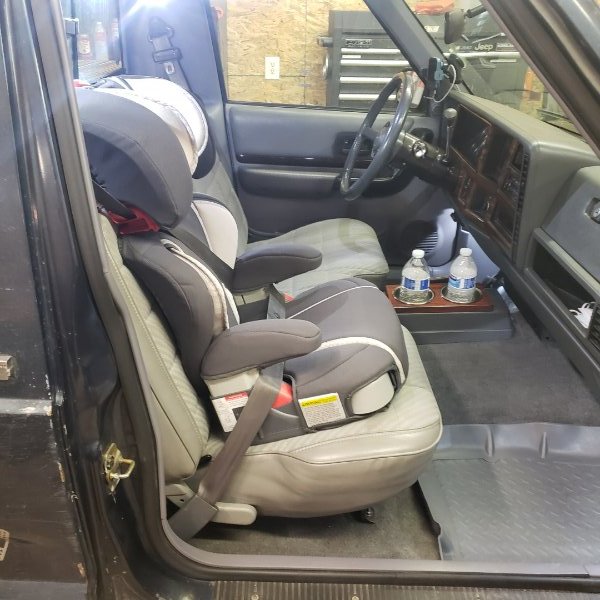
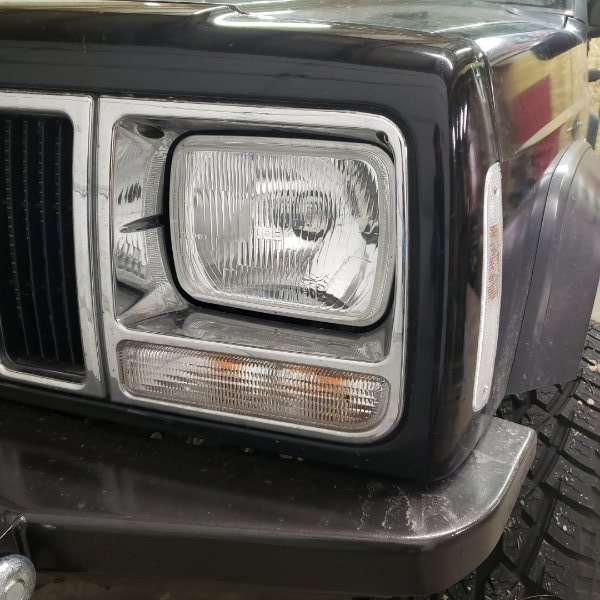
Added grounds to the fuel pump and taillight. Installed a Graco booster seat so my 4 year old can ride with me. Also swapped over the Husky Liner floormats from my XJ since you can't find them in gray anymore. These things are like 20 years old! Removed the crappy Sylvania headlamps finally, and put in a proper set of IPF 280H headlamps with Hella 100/55w H4 bulbs. Plenty bright now! Replaced the reverse lamps with these 1156 LED ones from Auxito. Easily 10x brighter than the older bulbs! Swapped in a 2001 XJ wiper motor and transmission. Pretty much bolt in, but you do have to splice the electrical pigtails. Happy to report they "wiper" 2x faster than the Renix models. Also added a ground wire to the wiper harness. Finally, some replacement fan warning stickers from @SoCalJeepComanche Here's some links to my YouTube videos: LED reverse bulbs 2001 XJ wiper swap:


-
A man of culture I see!
-
I think it was maybe 94-95 when they got the performance upgrade, but can't go wrong with a 97+ for sure.
-
No one looks at DIY :-(
-
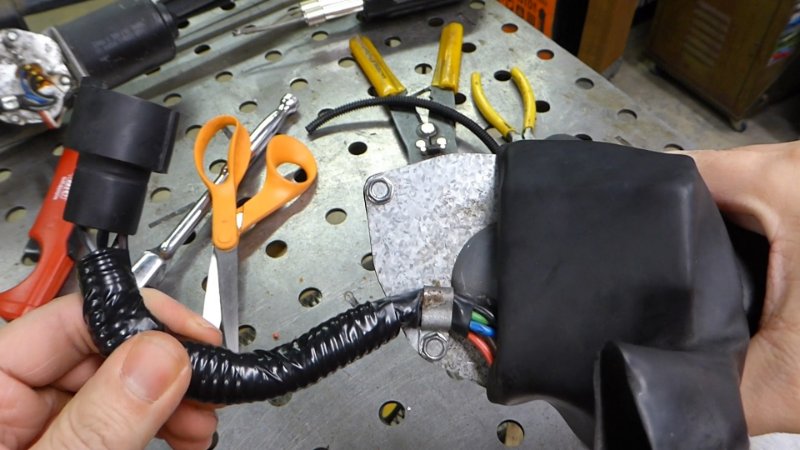
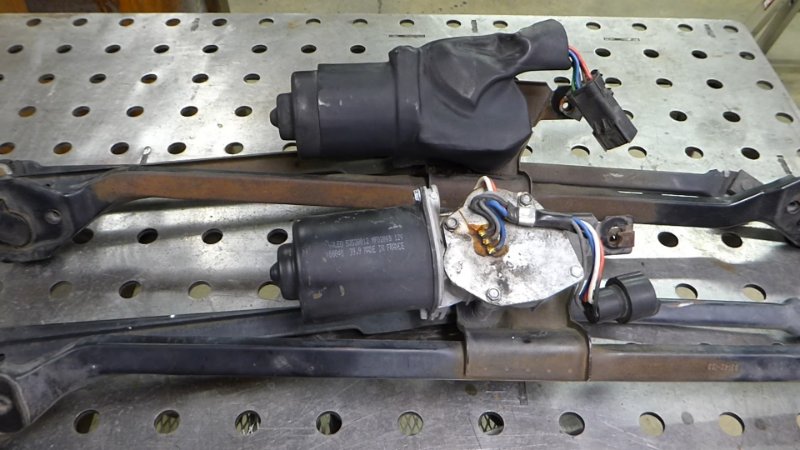
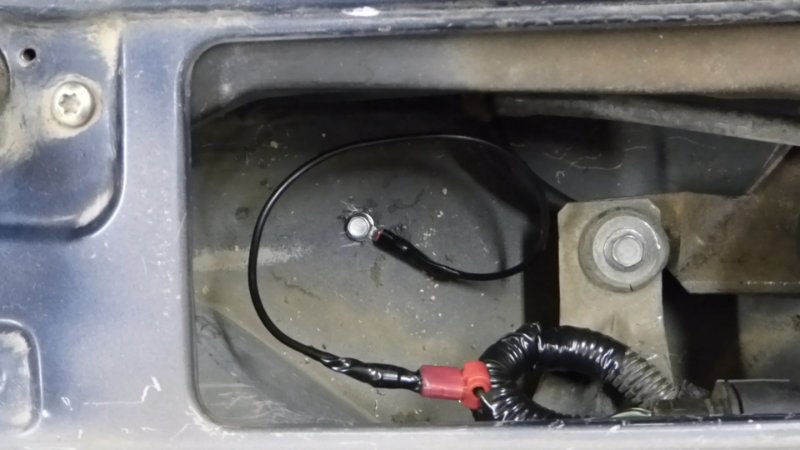
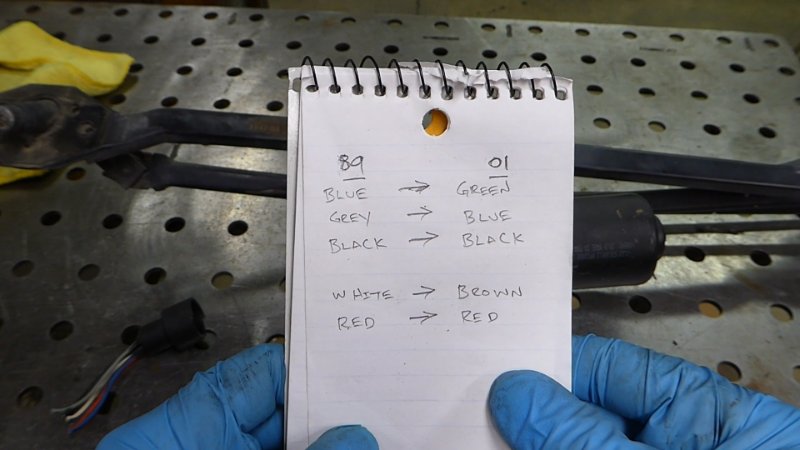
As almost all of us know, our stock MJ windshield wipers suck. The last few years I've done a few upgrades, from installing a reman motor, a NOS motor, replacing the bushings on the transmission. Each one only offered minimal improvement. Now I've "heard" a few guys say that you can swap over a late model XJ motor if you splice the pigtails, and I'm happy to report it does indeed work, and it makes the wipers "wipe" twice as fast! Comparison of the 01 XJ (top) and the 89 MJ wiper assembly. They are identical, except for the pigtails on the motor. I cut the pigtail off a spare 89 motor I had and spliced it onto the 01 motor. Here's the wiring: I also added an additional ground wire to the harness end of the wiper motor wiring inside the cowl. YouTube link of the procedure below. Skip to 25:37 to see the results. Everyone should do this upgrade to their rig!

-
You should buy them and run them with 2"+ wheel spacers. Add as many cheap LED aftermarket lights on your rig as possible, there's lots of real estate to mount awful lights that blind oncoming traffic. Then put some "angry eyes" on your headlights, simple black electrical tape will do. Now you're a real Jeeper. J/K, save your money and get the tires and wheels you want the first time. Buy once cry once.
-
https://www.phoenixgraphix.com/jeep.php Of course they have nearly every kit but the one you're looking for. Maybe get in touch with them and see if they'll reproduce the HO SporTruck?
-
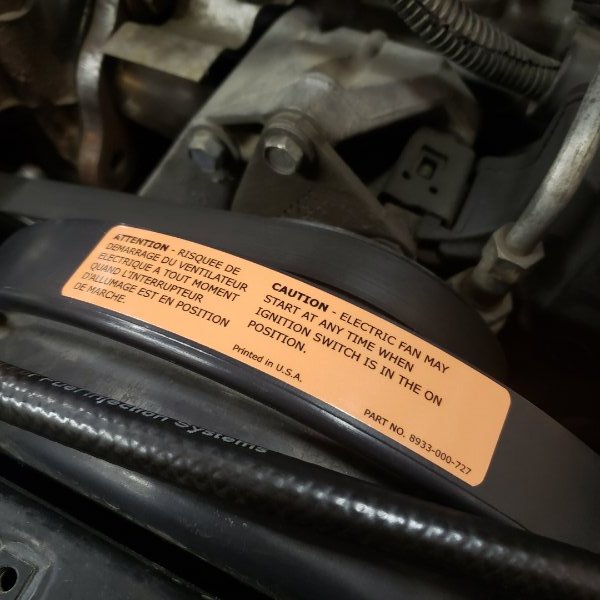
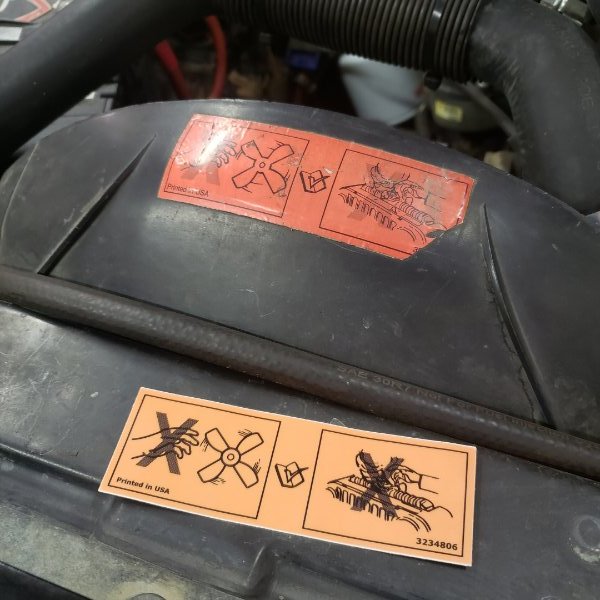
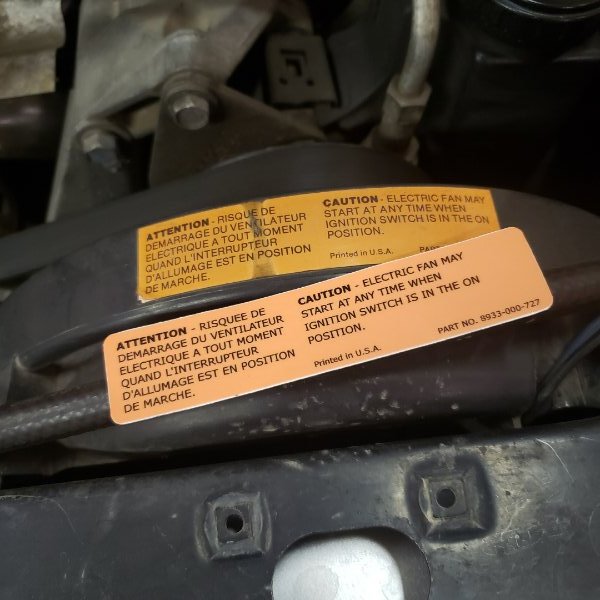
Got mine today. The door vin sticker is in the safe with a bunch of other NOS emblems, waiting for the day my truck gets a paint job. The fan warning stickers are great, look to be very good quality. Definitely better than what I had. Now I need a new yellow oil filter sticker, my MJ has an HO block so it has the later style filter adapter.

-
Find a welder that knows that they're doing. A lot of that rot can be cut out and plated and repaired. Frame stiffeners can also help add strength back to those sections. Most of that looks to be on the inside of the "frame". What does the driverside around the powersteering box look like?
-
I started my own YouTube channel this year. I'm always in my shop working on something, so I figured I'd start filming it into a "DIY" series of sorts. Mostly MJ projects for the next month, then some really cool ones: Building your own PVS14 night vision goggles, building and MJ bed offroad trailer/camper, and a fun one I'll just title "3rd world welding lenses - put to the test". https://youtube.com/@angryasianfab
-
Thanks....I hate it.
-
I've got a set of these I'm going to install in a month or so. LEDs are generally low draw, it appears these don't require relays, and I think it will be easy to tap into the factory switch. https://amzn.to/3XRzRFu
-
At least 6" and some fender trimming. More trimming if you want to do it with less lift. All the front XJ suspension + steering parts are interchangeable with your MJ. The rear is not, axle widths are the same but the perches are not the same width distance from XJ to MJ. You're better off buying new rear spring perches from a place like Barnes4WD than to try to cut and reuse the old ones. Actually keeping the old ones on there are a good way to clamp your new plates into place and get your angles right, that's what I did.
-
My plan is to use the factory bed light switch to activate LED strips in the bed.
-
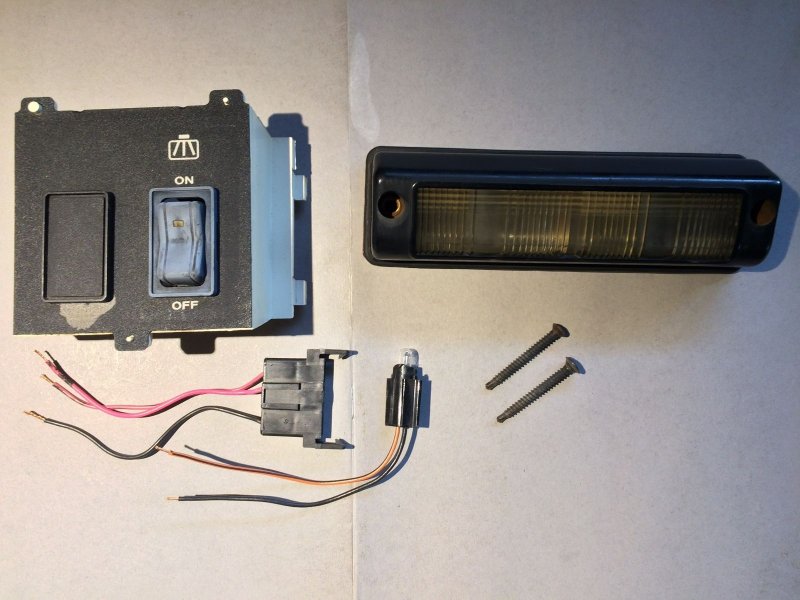
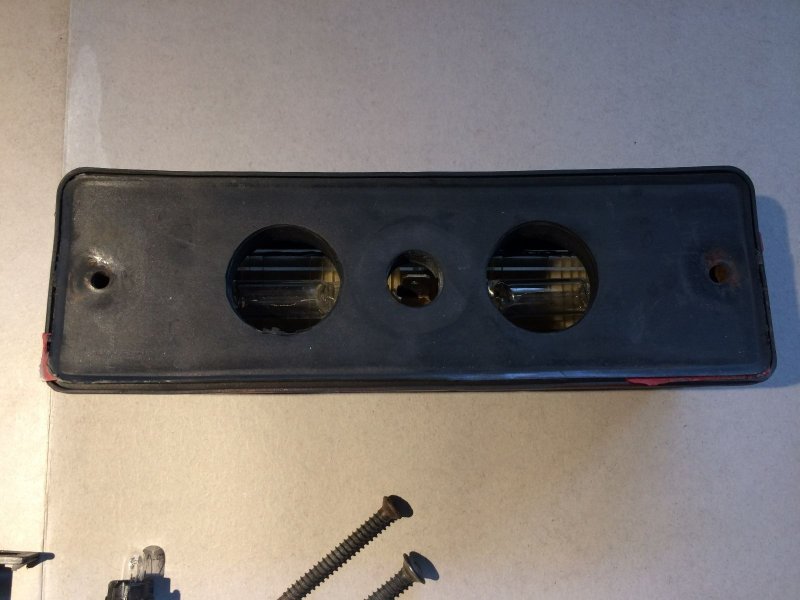
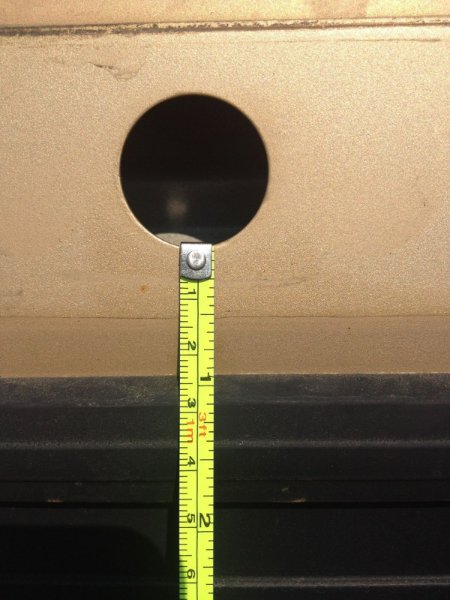
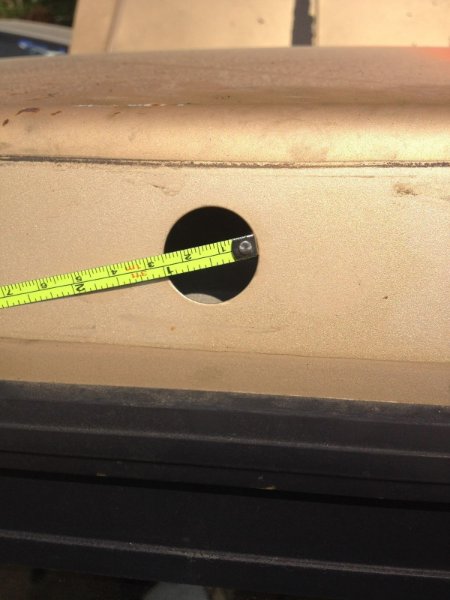
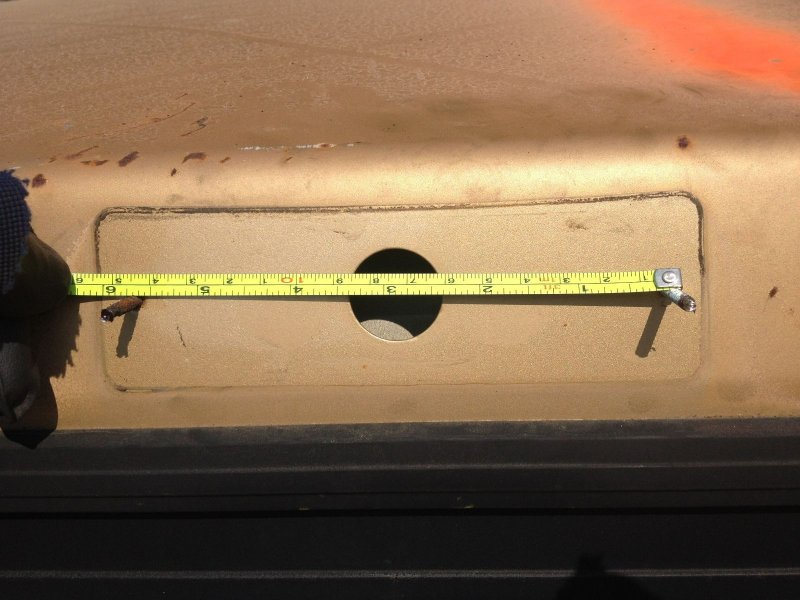
Was scrolling though my photos and found these photos with notes. They may be useful to anyone who plans to install the factory bed light on their MJ. This is a factory cargo bed light and switch with panel for a Jeep Comanche. It will fit all years, and up to 1990 or so, the wiring for it will already be present. For some 1990 and later, it will have to be wired in. The last three pictures show some measurements of the factory mounting holes in the back of the cab for the cargo light. The hole for the power wire is 1" in diameter, with the bottom edge of the hole 15/16" above the back glass mounting rubber. The screw holes are about 5 5/8" apart. The rubber mounting gasket could be used as a template for the screw holes.
-
Cruise control wiring question
Airborne Janitor replied to 90comancheman's topic in MJ Tech: Modification and Repairs
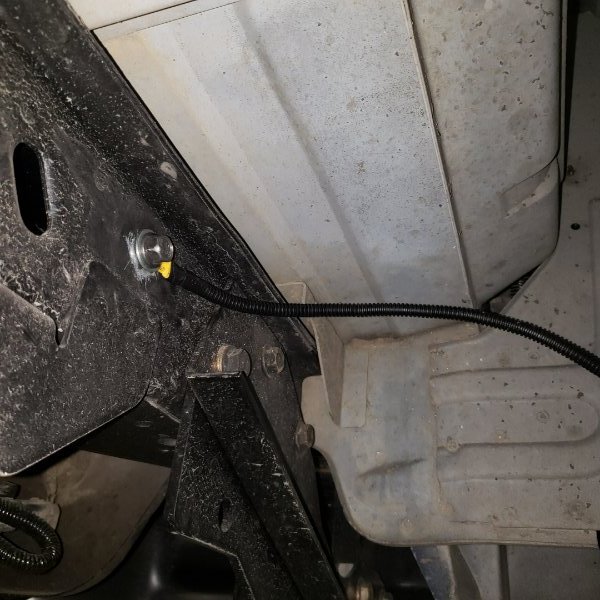
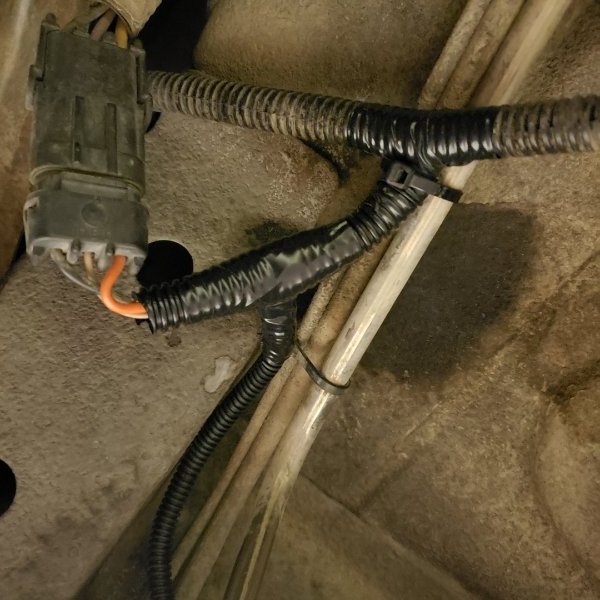
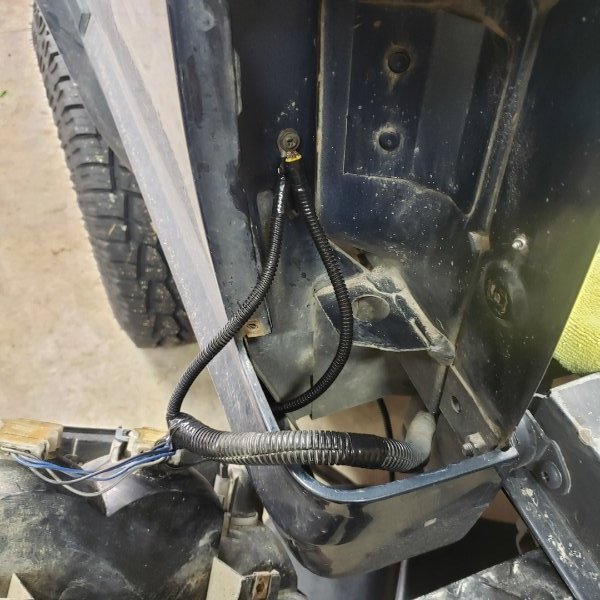
You need to make a jumper from your "new" pressure switch to your brake light switch. The cruise control leads don't have any power unless it's connected to the brake switch with the old connector plugged in. If you jumper power from your "new" pressure/brake switch to the old prongs on the brake switch, it should work fine. Just make sure you have the correct polarity, if you don't your brake lights won't turn off. I had to do something similar when I was wiring up my CC kit. This was a temp fix. I'm not using the stock brake switch at all, rather a GM/TCC switch with the oem CC pressure valve switch. The brown connector on the bottom of the pic is from the CC, it's what is usually connected to the brake switch, along with another identical brown connector for power to the brake switch itself.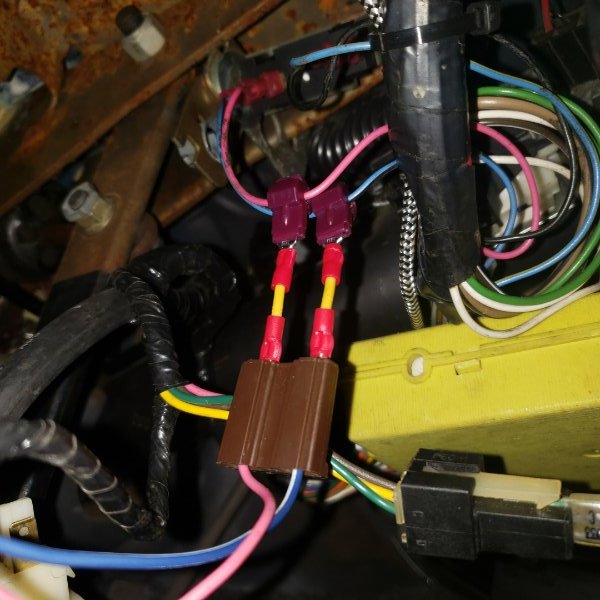
-
Cooling System Upgrades
Airborne Janitor replied to 89 MJ's topic in MJ Tech: Modification and Repairs
The later model model XJ fan was redesigned, you can tell by the fan blades. I want to say they started this in 97 XJs, but maybe earlier? The pigtails are different compared to the Renix fan, but nothing a soldering iron can't fix.
-
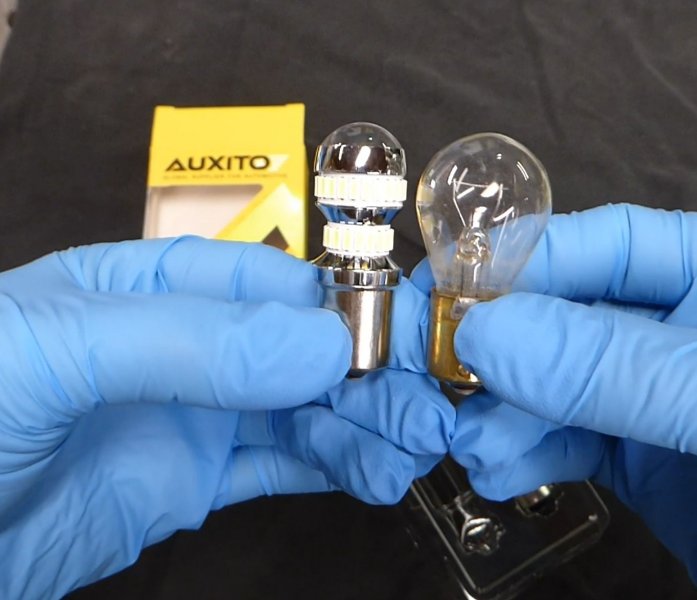
As most of you know, the stock reverse lights on our MJs suck. The original 1156 incandescent lightbulbs are pretty obsolete especially with today's LED technology. Since LEDs come in many flavors, shapes and sizes, I took some time and narrowed down my choice to the AUXITO 1156 LEDs for $17/pair off amazon https://amzn.to/3WIUcLQ They seem to be very good quality and easily 10x the light output as the original bulbs. Video install and review here. Skip to 3:30 to see the video comparison.
-
Thanks for the support.
-
BTW I was born and raised in Richmond VA, spent most of my life there. You still in VA Beach?
-
Thanks! So I was an Army (Airborne) Ranger a decade+ ago. I served as an infantryman, but the joke is I felt like I spent more time behind a broom than I did a rifle. Hence Airborne Janitor.
-
Nice. We just had another little girl six months ago. Was kind of hoping for a boy so we could have one of each, but at qty2 I think I'm DONE.
-
These kids are pretzels I tell ya. If I try to "fix" her and put a pillow under her head she gets all pissed off at me, so I leave her be!