

Airborne Janitor
-
Posts
481 -
Joined
-
Last visited
-
Days Won
1
Content Type
Profiles
Forums
Gallery
Everything posted by Airborne Janitor
-
 Pulled the carpet/interior on my 89 MJ and was pleasantly surprised to find nothing but surface rust. Floorboards passed the "screwdriver puncture test" with flying colors. I plan to wire wheel, vacuum, soap & water, then POR-15 to treat the floors. The headliner area is a little different issue: The roof is little more rusty than the floorboard, but I plan to do the same treatment: wire wheel, vacuum, soap & water, then POR-15. The big issue is the area behind the roof where it meets the back of the cab (outlined in red). There is severe surface rust inside the channel that is impossible to get to: What are the recommendations for treating this area? Would also appreciate any additional advice/tips in regards to prep/repair of surface rust. Thanks.
 -
Headliner removal question
Airborne Janitor replied to pitbull4x4's topic in MJ Tech: Modification and Repairs
Those a-pillar trim pieces are a pain to remove. The headliner can be removed without uninstalling the trim, I just let the trim hang down towards the center of the cab and then maneuver the headliner out of place. -
Part 2 - Sensor Swap. Since your old cluster just had on/off lights for the coolant, oil pressure, and voltage, you have to swap out a few sensors, specifically the coolant temperature and oil pressure sensor. Only place that had them around me was AutoZone, PS133 for the oil pressure, TU108 for the coolant temperature: The oil pressure sender is on the backside of the oil filter housing. It has an electrical spade connector on one side and threads on the other. I don't know what size the old sender is, but neither 1" or 1 1/16" inch worked for me so I'm assuming it's metric. I ended up just using a big @$$ pair of vice grips to remove it. New sensor on top, old sender on the bottom. Obvious size difference: New sensor installed: The coolant temp sender for the gauge is on the back driver side of the block, right next to the valve cover. 13mm deep well helps here: New sensor on top, old sender on the bottom: New sensor installed. The connector on mine was loosey goosey when installed on the new sensor, so I used some pliers to slightly crimp down the terminal for a tighter fit. Reinstall your gauge cluster and you're done!
-
References used: http://www.jeepforum.com/forum/f11/how-gauge-cluster-swap-odometer-recalibration-lots-pics-424209/ http://comancheclub.com/topic/47867-how-to-cut-out-for-prndl-indicator-for-column-shift-full-gauges/ DISCLAIMER: Please note that this swap is for an 89 MJ. I included some details regarding other year MJs, but this swap is specific to my 89 so your mileage may vary. (if any of my info is inaccurate please let me now so I can update it!) ------------------- If your MJ is like mine and it came with the dummy gauge cluster, you may want to swap to a full gauge cluster. I also have a column shift AW4, so some modification is involved on the tachometer gauge if you want tor retain the PRND31-2 indicator. The first step is to find a donor cluster. You will want to find one close to your MJ's year, 84-86 or 87-90 or 91-92. Here are some images of the 84-86 (bottom) vs 87-90 (top) clusters, sorry for the dust: A better view of the 84-86 cluster. There are some obvious differences from the 87-90 cluster: gauge font/face, circuitry, speedometer cable retainer (metal clip), and the trip odometer reset is in a slightly different position (found this out when I tried to swap the plexiglass). The trip odometer on the older models also have a cap that is threaded, versus the 87+ ones which just pop on and off. This particular gauge I pulled off what was marked as an 89 Wagoneer, but it must've been an earlier model, full loaded leather/power...but had a 4 banger under the hood. Pulling the cluster can be a pain in the @$$. Remove the screws holding the plastic dash trim piece, then remove the screws that hold the gauge cluster in place. There are 2 electrical connectors, one behind the lights on the left and one in the center of the cluster, and the speedometer cable is behind the speedometer gauge. I removed the grommet on the engine side of the firewall for the speedo cable, to give the cable a little more slack. Also removed the clock/dummy cluster to the right of the gauge, and the cigarette lighter for some more access. The 84-86 speedo cable retainer is a metal clip, that can be pushed in towards the cluster to unlock it. For the 87-90s, you probably have one of these 2 plastic retainers: Double clip: Single clip: Squeeze the clip and pull the cable out of the gauge (easier said than done). If you have a column shift, there's a cable for the gear indicator that is attached to the steering column collar. Easiest thing to do is to pop the clip off the collar, see location (clip already removed): Alternatively you can remove the plexiglass then also disassemble the giant fuel gauge and remove the indicator while the cluster is still installed (2 screws). Either way the indicator will have to come off the old cluster if you want to retain it for the swap. You should have the cluster out now. Remove the four screws (5.5mm hex screws on the 84-86) that hold the plexiglass in place and remove it. Ok, now your donor cluster probably has a different odometer reading that what your rig has. You can roll it back if it's a pre-91 cluster. Remove the speedo gauge from the cluster, one screw in the bottom right corner of the face and two on the back. Once the gauge is removed you can see the inner workings of the odometer on the back. There's a tiny gold c-clip on the left of the odometer that has to be popped off. I used an x-acto knife and put the tip on the inside of the "C", then pried up enough to create a gap to put a pick in. Then I pried the pick to pop out the clip. Easiest way to adjust the numbers is to face the gauge towards you with your fingers operating the backside. Start from right to left, opening up space between each number enough to rotate the digits. Once you've got the odometer set, pop the clip back in and reinstall the gauge. COLUMN SHIFTERS: if you want to retain the gear indicator you'll have to cut the donor tachometer gauge face. Remove the tachometer from the cluster, 5 screws on the backside, 3 on top, 2 on bottom. I used the old fuel gauge that already had the cut out as a template for drawing the cut out on the new gauge. I used some tin snips to cut the fuel gauge so it would fit flushly against the tach before I traced my lines. Once my lines were good I drilled some holes in each of the four corners, then used a dremel to connect the dots. For the small vertical cuts I just swept the cutting wheel side to side until it was flat enough to finish with a file. After cutting I used a file to smooth out the edges, then used a black sharpie to paint over any bare metal: You will also have to cut a small square in the gauge cluster box to run the gear indicator cable through. I used a dremel: Now screw the gear indicator into place and run the cable through, hopefully your donor already has the correct place to drop it in. 91-92 MJs will require modification. Reinstall the tachometer gauge: ALTERNATIVE CUT METHOD: if you don't have the steady hands or the tools to cut a clean cut out for the gear indicator, I had a back up plan. I took the old fuel gauge with the cut out and cut a straight horizontal line about 1/4" above the top of the cut out. I used my metal cutting band saw, but tin snips will cut the gauge face like butter. Just be careful, it's sheet metal, and will bend/distort if you get too over zealous on it. Use a file to clean up the cut edge and a black sharpie to paint the bare metal. I kept the lower "mounting tabs" in case I decided to screw this piece onto the tach, but I think super glue/JB weld would be better for a flush fit. You can cut the cutout for the tach any way you want, just don't go too crazy. Attach the cut-out piece to the cut-out tach and reassemble: Now you can attach the plexiglass piece. I had 4 different pieces laying around and all of them were pretty dirty/scratched up. My original cluster plexiglass was in the best shape, but I had to drill a hole for the trip odometer reset. I used another plexiglass with the hole in the correct location as a template. If you do this be careful, it's just plastic and it can/will crack. Don't forget to retain/swap the rubber grommet. Since my plexiglass was in rough shape I washed all the dirt/dust off and used Meguire's headlamp restore kit to bring it back to life. Wet sanded with 1000 then 3000 grit pads, then polished in the PlastX and headlight protectant. End result came out pretty good I think:
-
broken coolant temp sensor
Airborne Janitor replied to omega_rugal's topic in MJ Tech: Modification and Repairs
Thanks for the correction! -
broken coolant temp sensor
Airborne Janitor replied to omega_rugal's topic in MJ Tech: Modification and Repairs
Does it look like mine? -
January 2017 recap: Still cold here, but finally got a torpedo heater in the shop, so that helps. Ended up having to thaw out the motor: Look like the previous owner didn't have the coolant mixture correct. Water froze to ice and popped the freeze plug out. Another thing to replace soon. Got the battery cables from Mean Lemons. Great quality, just wish they were a little shorter, but no big deal. Pulled the front bumper off and found some unibody/crossmember damage: Tried to use the winch on the XJ and liberal use of wheel chocks to try to pull the frame straight. Supervisor was present to make sure we were meeting safety standards. Got the crossmember pretty straight but no luck on the side/frame rail/bumper mounting sections. Kept pulling the vehicles closer together when engaging the winch. Will try again with another vehicle behind the MJ anchoring it. Was also to put the hammer and dolly to use and straighten out the bent passenger inner fender. Further tore down the interior and was pleasantly surprised to find floorboards with just surface rust, no holes. There does appear to be water leak on the passenger side, blower motor I suspect? All my XJs have leaked here too. Also picked up a wrecked 97 XJ that runs great despite the obvious damage. Guy drove it to my house an hour from here haha! Will be transplanting the tranny, t-case, passenger door, and fenders to the MJ.
-
Transfer Case Linkage
Airborne Janitor replied to JeepFanactic's topic in MJ Tech: Modification and Repairs
Not really. The junkyards around here are not great. BTW where are you in VA? I just moved from Richmond and there are 3 pick-n-pulls and quite a few traditional yards that I've had good luck with. -
Transfer Case Linkage
Airborne Janitor replied to JeepFanactic's topic in MJ Tech: Modification and Repairs
I use a Novak linkage on my XJ with an NP241OR swapped in. Takes some dialing in initially, but haven't touched it since. Yes, it is pricey. Yes, it works. I have no first hand experience with this one (heard good things), but I'll probably put one in my MJ when it's time... http://www.azzysdesignworks.com/store/jeep-np231-transfer-case-linkage-kit -
Rebuilding the front end
Airborne Janitor replied to That_Creepy_Guy_In_The_MJ's topic in MJ Tech: Modification and Repairs
What parts specifically? For most of the front axle it's hard to beat OEM/Dana-Spicer parts. MOOG's reputation for steering parts has been decreasing over the years. rockauto.com and ebay.com have been great places to score parts for decent prices, at least for me. Although this is technically a TJ Wrangler site, their front axles are mostly the same as an XJ/MJ, lots of write-ups regarding the front axle and steering there: http://stu-offroad.com/axle.asp -
Progress has been slow the past month. Temperatures have dropped a bit and I don't have heat in the shop yet, so its hard to work on the MJ for very long. Found out I have a loose freeze plug so I'll be pulling the intake and exhaust manifolds and tackling that job in the near future. Will probably install a new exhaust at the same time. Here's how she sits right now: The parts pile has gotten much larger though! Lots of projects for the next few months. And because I could, some motivation for the build: Will try to keep this thread updated once a month with progress.
-
Thought this was interesting and wanted to share: http://www.ebay.com/itm/1989-Jeep-Comanche-/172454156058?forcerrptr=true&hash=item282711971a:g:escAAOSwnHZYWsUq&item=172454156058
-
Check the length of your shocks fully extended, and compare it with the distance from the upper and lower shock mounts The shocks may not be long enough for the amount of suspension lift/flex required. If so one decent offroad trip will tear the eyelet right off the shock body. I did that in Moab in my XJ. It kind of looks like that axle is an XJ axle, or has XJ-style shock mounts on it. Edited to add: improper size/lack of bumpstops can also contribute to this type of failure.
-
Pictures would be helpful. Whenever you buy a modified vehicle from someone you don't know you always get some type of hack-together crap holding it together. Dealing with that myself.
-
Turn Signal Switch Replacement
Airborne Janitor replied to AMC86Kid's topic in MJ Tech: Modification and Repairs
Factory service manual. I picked one up on ebay on CD-rom and it comes in PDF searchable format. I even put it on my smartphone in case I ever need it in a pinch. http://www.ebay.com/sch/i.html?_from=R40&_trksid=p2050601.m570.l1313.TR0.TRC0.H0.Xjeep+comanche+service+manual.TRS0&_nkw=jeep+comanche+service+manual&_sacat=0 -
As the title states, I'm looking for some first hand input on the quality of aftermarket fenders. I've found that that some say they're inferior and fit poorly and/or are manufactured of thinner gauge steel. Others say they fit great with no issues. I'm doing the 97+ swap to my MJ which was involved in a low speed front end collision that crumbled the header panel and fenders. I already have an OEM header panel and driver side fender, just trying to decide on waiting for a reasonably priced OEM one to show up at a nearby junkyard, or purchasing an aftermarket locally for $65. Their part number is #CH1241209 for what its worth. Thanks.
-
Nice work hassyfoto! Here's a very helpful thread I've been studying for when it comes time to patch up my MJ. http://www.garagejournal.com/forum/showthread.php?t=53534&highlight=patch+panel
-
Comanche Limited
Airborne Janitor replied to dasbulliwagen's topic in Member Projects: Your Comanches
Looks great, I like the 16" JK rims on there! -
Thanks for the replies everyone! fiatslug87 your post/pictures were very helpful. Apparently the previous owner tore out all the EGR related items, including the EGR valve: Took a look at the heater core, which I assume is not working: So I have some items to replace in the near future, in addition to vacuum lines/hoses/harnesses. I made a diagram to what I believe to be accurate for what I will need to replace: Also, the plug on the driverside fender near the header panel is not for the electrical fan as you can see that one is plugged in:
-
Replacing stock air box + filter
Airborne Janitor replied to Airborne Janitor's topic in MJ Tech: Modification and Repairs
Yes I want to put the old/oil box back in haha. I don't like the aftermarket k&n-style filters, they let fine dust in without running a filter sock, and at the point you're back to where you started anyways. Looks like the previous owner of my MJ took out the EGR valve and all associated vacuum lines with it. However I see no where to run the lower air box hose to on the exhaust manifold. I'm going to replace the EGR valve and all the hoses/vacuum harness as well. Although I don't have to do emissions for this rig because of its age I still want the motor running the way its supposed to. I guess I will just pull the lower hose from the air box and plug it up. -
Replacing stock air box + filter
Airborne Janitor replied to Airborne Janitor's topic in MJ Tech: Modification and Repairs
No I only grabbed the box. Thanks for the diagram that's really helpful. I made another post in regards to where certain vacuum lines go and it seems the previous owner plugged up those EGR lines that go to the box. I'll have to go check out the motor with that diagram in hand in a little while. -
My 89 MJ (rebuilt) 4.0 came with this stupid after market cone air filter set up. It's not even secure and flops around like a horse's wang. I want to replace the stock air box and picked up an airbox from a renix 4.0 at the local pick and pull, but it seems like I got the wrong one? Don't renix motors have a lower airbox hose that goes to the motor's exhaust? My MJ's motor does not have this, and although I thought the motor was rebuilt I'm beginning to wonder if it was swapped in? Any ideas? Also what exactly is supposed to be hooked up to this air box? Most of my experience has been with HO 4.0L so I'm having issues on this renix motor.
-
Recently purchased an 89 longbed MJ as a project. Whoever owned it previously tried to turn it into some type of budget wheeling/mud truck I believe. It looks like they converted it over to the open cooling system since it has a radiator w/ a cap and a coolant overflow bottle from a later model XJ. Anyways, I started peaking around the motor and found a few unplugged/open vacuum and electric plugs that I need help identifying: Appreciate the help!
-
If I had to speculate I think this truck was most recently owned by a teenager/younger person who wanted to use it as a budget mud/wheeling truck who didn't clean up after playing with it. The carpet will be replaced along with the headliner, I'll have the bench seat and steering wheel reupholstered, and some 97+ XJ parts swapped over to make it pop. The first official mod was a new battery since the one it came with didn't have a charge. Sweet battery tray: With an even sweeter tie down: Finally pull out what remains of the stock tray to find: If I had to guess it looks like the passenger tire threw something up into the fender well which blew a hole through the sheet metal and probably busted the stock plastic battery tray and shifted battery, hence the plywood tray fix. Some massaging with a body work hammer and I was able to flatten the metal out. A new Costco Interstate battery and tray from JCR fixed that and now it starts right up.
-
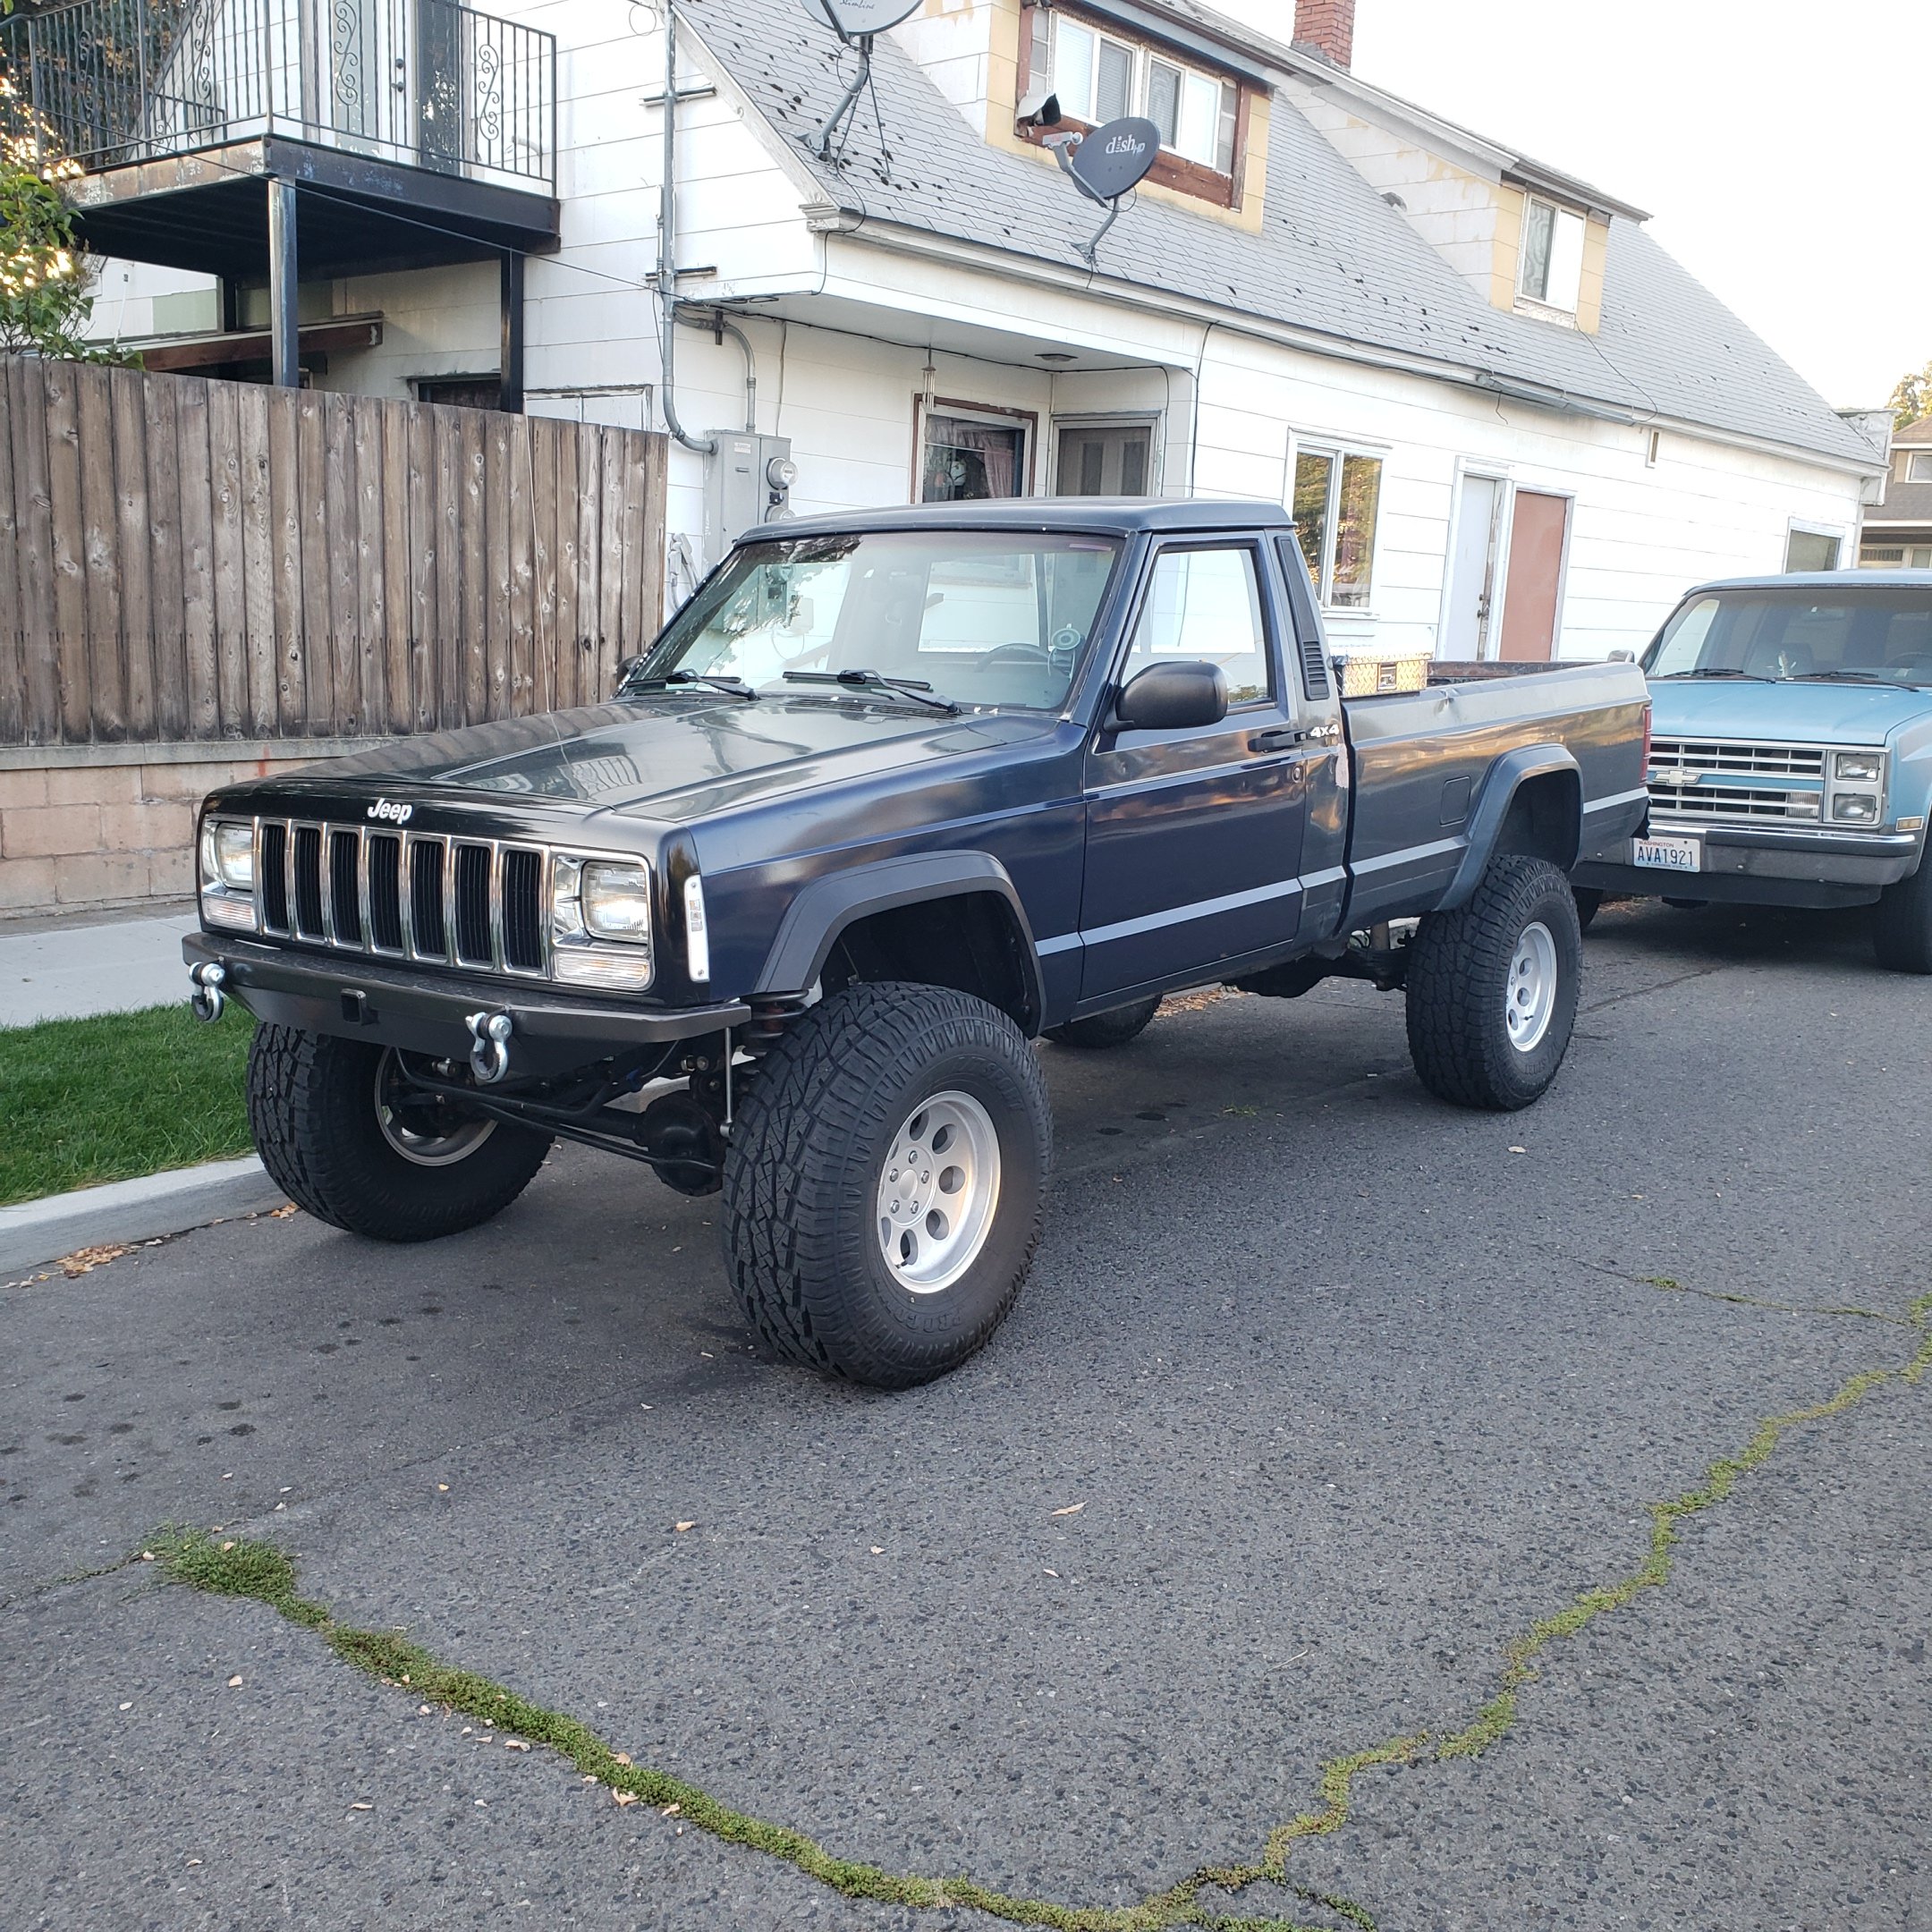
Hi everyone. I recently moved from Richmond, VA to Spokane, WA to start a new chapter on life and to open up a metal fab shop in my backyard. One of the things I'll need for the business is a decent, hardworking pickup truck to haul steel, scrap, and projects. I ended up buying an 89 Comanche a few weeks back that needs a lot of TLC, but I see a lot of potential in it. http://i.imgur.com/mnfTnqd.jpg Although this is my first MJ I am no stranger to XJs. My first car was a 92 XJ back in 1999, which I sold after purchasing a red 98 XJ in 2003 which I still drive to this day. I am new to Comanche Club, but have been active on Jeeps Unlimited, NAXJA, and even XJ Forum in the past. Anyways, down to the details of the MJ: built in February 1989, 4.0L, column shift AW4, NP231, Dana 30 front, Dana 44 rear. 7 foot bed, maybe "metric ton package"? Rebuilt title. 198K miles on the odometer. Motor was rebuilt within the past couple years, runs ok. Transmission has issues: no reverse, and it feels like only 2nd gear works. No shifting occurs until 35-40MPH then it shifts into a non-functioning gear and coasts like neutral. There's no exhaust after the manifold/header so its loud as hell. Front end was involved in some type of collision: header panel and fenders are from an XJ. Every body panel is dented in some way, shape, or form. Previous owned plastered bondo on the door and rear cab corner. Interior is falling apart and the steering column is loosey goosey. It has a spring over lift in the rear and I'm guessing 6" coils in the front, its tall as hell riding on 31s. It looks like a pile of $#!& and my family thinks I'm crazy for buying it, but us Jeep guys know a diamond in the rough when we see one. https://www.youtube.com/watch?v=T8sy7_X6bjc It starts and stays running once started. Someone converted the cooling system over to the open-style with radiator cap. Frame looks decent from what I can tell with minimal rust. The worst of the body is the doors and fenders and header panel, so I plan to do a 97+ XJ parts swap. The bed has dents but I think I can smooth out the worst of it. It drives surprisingly well on the road provided you don't go over 40 or the tranny takes a dump. I've always wanted to restore and paint a vehicle and this will be my first undertaking. http://i.imgur.com/FF3GsVc.jpg http://i.imgur.com/MBi8daf.jpg http://i.imgur.com/DwdEOsH.jpg My plans are to get it completely running and street legal first. Drop the lift down to 3" and keep it on 31s. Other than a possible regear I will be trying to keep this rig pretty stock. My XJ is heavily modified, and although I love driving it that way I have a different vision for this MJ. I want it to be a clean daily driver and work rig that retains a classic MJ look but with a late model XJ feel...if that makes sense. Would also like better than 14MPG. I wanted to start a thread dedicated to this rig and it's build in the next few months, as a reference for myself and others.