
Dzimm
-
Posts
3580 -
Joined
-
Last visited
-
Days Won
11
Content Type
Profiles
Forums
Gallery
Everything posted by Dzimm
-

Best Subwoofer Ground Location
Dzimm replied to Me&my86MJ's topic in MJ Tech: Modification and Repairs
Awesome. -
Best Subwoofer Ground Location
Dzimm replied to Me&my86MJ's topic in MJ Tech: Modification and Repairs
Usually the sub remote wire has a tag on it. It will either be solid blue or blue with a white stripe. If there is both, just switch them and see what it does before putting it all back in. -
I had some time before work so I did most of the ground refreshing steps from Cruiser's tips. The only things I have left to do are add the extra ground cables and do the ground under the dash. When doing the taillight ground I found at some point the taillight got the old 3" construction screw treatment. The two inner holes have screws with the wrong thread busted off in them so I need to get new clips. Currently there is a 3" screw running between the clip and plastic to hold the light on. The outer holes were in good shape but only had one factory screw. I went ahead and installed a DIY tailgate lock to deter theft and replaced the old ball style wiper arms with some newer u-clip style arms from a 98 XJ that had a good pair of beam wiper blades on them.
-
It was pavement and at about 30-35. I've just never had one make that noise when in 4H on pavement. I would never use it that way other than to test it, but supposedly the factory thinks they can be. These cases are designed to engage 4H at like 55mph (owners manuals say it can be engaged at any legal speed). I would imagine an NP231 would wear out much faster regularly driving on dry pavement in 4H.
-
Best Subwoofer Ground Location
Dzimm replied to Me&my86MJ's topic in MJ Tech: Modification and Repairs
Double check your remote wire. I'm wondering if you have it hooked to a powered antenna lead and not the actual remote wire. -
Good to know the noise is normal. It's an electric driven speedo so I'll double check the plug and pull the sensor back out just to make sure it didn't chew up the gear or something.
-
So I just got the t-case in the XJ back together after replacing the Nylon shift fork pads and the chain. I took it for a quick drive to make sure everything worked. It shifts fine and seems to work but it's got a bit of a whining/whiring noise in 4H at speed. Is this normal after having it apart? I'm leaning towards it being just new parts wearing in but I wanted to see if any of you guys have experienced anything like it. The other thing Ive got to figure out is that now my speedo doesn't work. I marked the location on the case where the sensor was clocked but it's not working. Is it that sensitive that it has to be perfect?
-
Best Subwoofer Ground Location
Dzimm replied to Me&my86MJ's topic in MJ Tech: Modification and Repairs
That's interesting. I've never seen something like that happen. Does your radio have multiple audio output plugs on the back or just the two? Try using a flash drive with mp3 files on it in the USB port. -
Well I went for a longer test drive this morning. As I drove the pedal kept getting harder and the truck started to struggle to accelerate. I got it home and the front brakes were billowing smoke... Did some googling and came to the conclusion it was a problem with the master cylinder. I pulled it all apart and rebled the master, then all 4 wheels. I'm guessing when I had the leaking connection at the distribution block, it sucked some air into the master or something. Couple hours later, I got it all put back together and did a really good, long test drive. I was really hard on the brakes and everything is working now. Pedal is much better and no more problems.
-
Only 97+ XJs have the TCU under the drivers side, like Eagle said, the TCU on older XJs and MJs is on the passenger side. I'm curious if the person who did the swap also swapped the wiring harnesses and computers, or if they took the easy way out and just swapped the bare essentials to get it running.
-
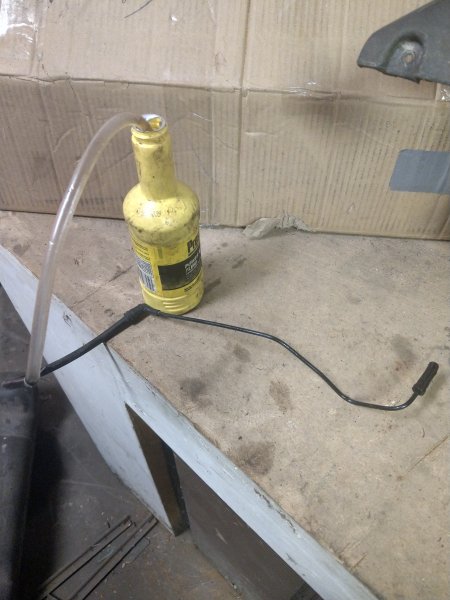
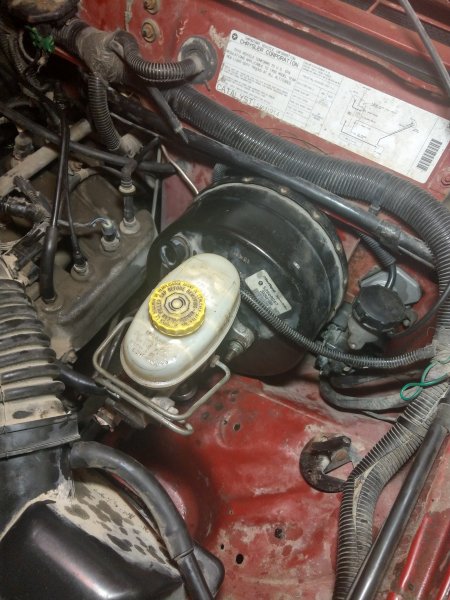
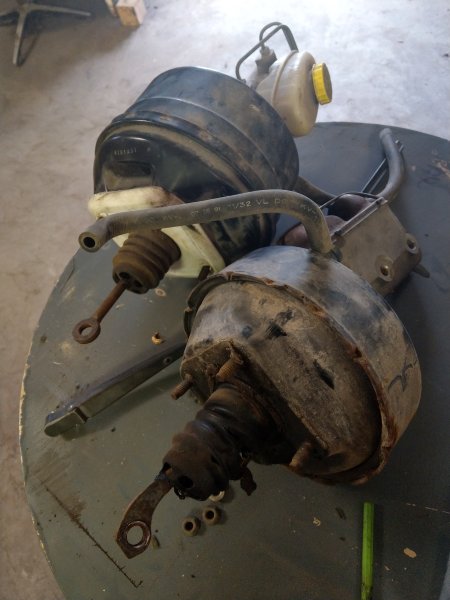
Finally done! Has a new booster and distribution block from a late model XJ, as well as all brand new Copper/Nickel brake lines. Took all day but man was it worth it, brakes are now fantastic and lock up at low speed on wet pavement. It's dark and raining so I'm not going to go do a full test drive until tomorrow but so far so good. The bleeding process was a one man show since nobody could lend a hand I made a one man bleeder setup with an old power steering fluid bottle, a clear hose from a gear oil bottle, and some vacuum line I had laying around to adapt everything to the right sizes. Not the best way to bleed brakes but worked well enough. There were only two problems I encountered for the whole project. One was a bad flare on the underside of the distribution block, which sucked to cut and reflare down between the booster and intake manifold. The other was the front driver bleeder screw won't budge at all, even with vise grips. I bled it the best I could through the brake line fitting for now but I sprayed it with some pb blaster to hopefully get it out. I'll spray it a few times over the next few days then pull the wheel off and try again. Worst case cenario, I get a new set of front brakes and calipers. Anyone else looking to replace their brake lines, this is a nice kit and was one of the cheapest I could find that was copper/nickle. The 25ft roll of line is just enough to do an MJ if you remove the rear load sensing valve. If you retain the valve, you'll need another 10-15ft. I ended up with a handful of fittings left over and about 3" of brake line. https://www.amazon.com/dp/B01801G45A/ref=cm_sw_r_em_apa_WcxSBb8A5TG1C I also bought these rubber clamps but ended up only needing one since all the factory mounts were in good shape. https://www.amazon.com/dp/B003BZQ7EE/ref=cm_sw_r_em_apa_iixSBbVHYHT9T
-
That is a good tip. I actually ended up using a socket to break the bleeder screws loose.
-
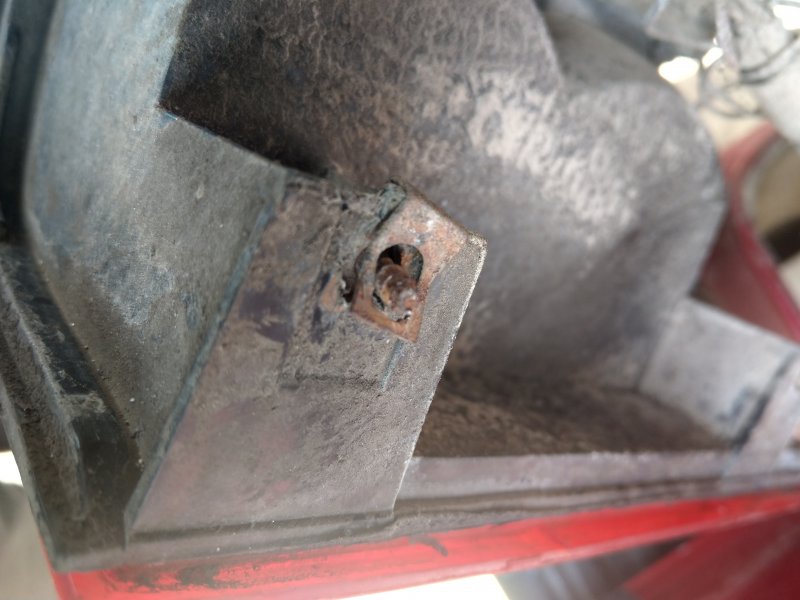
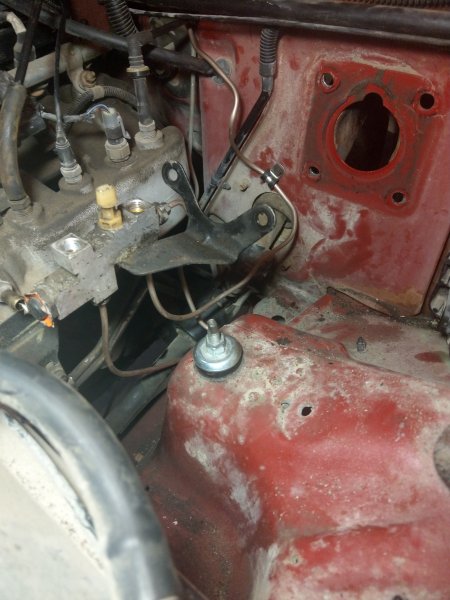
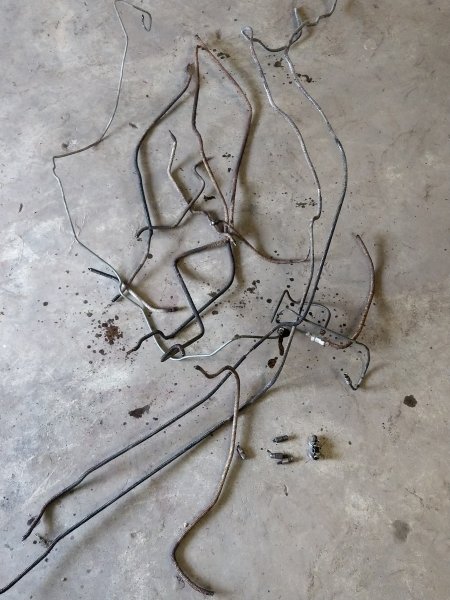
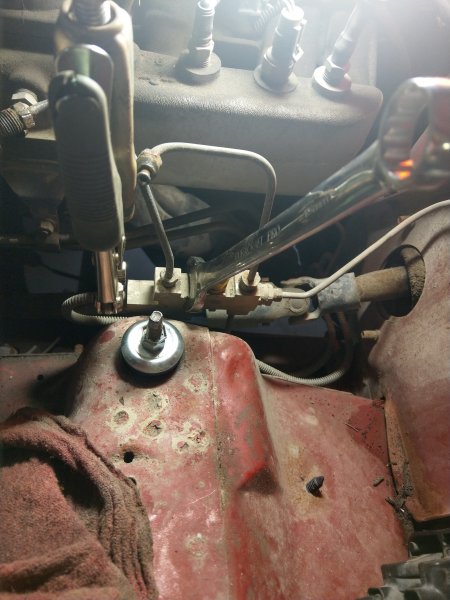
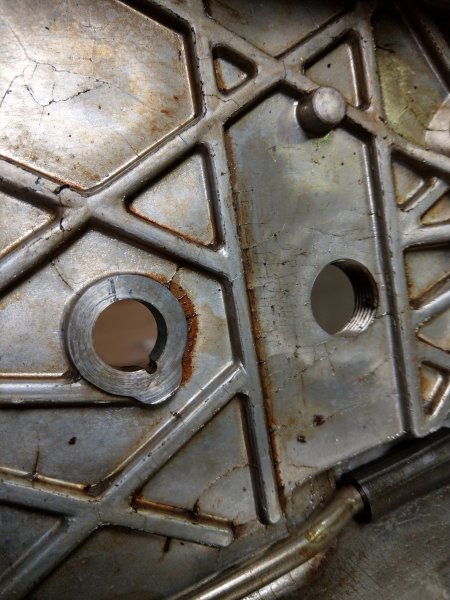
I've been working on the brakes today and stopped for lunch so I figured I'd post where I'm at. I've got all the brake lines ripped out. Everything broke of course. I didn't even bother trying to use wrenches, I just went straight for the vise grips and still managed to round a fitting off. Had to use a cutoff wheel to grind it back flat for another try. This is what a pile of factory MJ lines looks like after years of road salt. A little trick I found to remove the lines from the distribution block is to use a 19mm wrench to hold it. I am happy that I don't have to modify the brake booster because the truck has the newer brake switch. Everything I've read said all Comanches needed to have the flat spot added to the booster but my 92 had the newer style brake switch pictured below (maybe HOs have this new switch?). This required no modification to the booster, I just had to take the aluminum spacer off the mounts. Currently I got the booster/master removed, all old lines removed, load sensing valve removed, and the new front brake lines ran. After lunch I'll install the rear lines and the new booster/master.
-
Are you shifting manually? Was this truck originally a manual? Check to see if they ever put in the trans computer.
-
Thieves should be hanged..
-
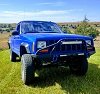
Holy cow that's quite the upgrade!
-
This^^ I had to use 6* shims on mine to get the proper angle. They came with my Rusty's Offroad lift kit. Shims are available from many online offroad parts stores in various angles.
-
Awesome. Thanks!
-
So I tore the transfer case apart on the XJ today because the chain is worn out and I need working 4wd for winter. Anyway I pulled the case apart and everything is in good shape aside from some cracking all over the inside of the case. None of it goes all the way through the case and it's only on the rear half of the case. It really just seems to be in the top layer of the aluminum. Has anyone else had this and is it anything to worry about? This jeep is really a pile and it's just used for winter commuting so I'm not really wanting to spend the money on a new case if I don't have to.
-
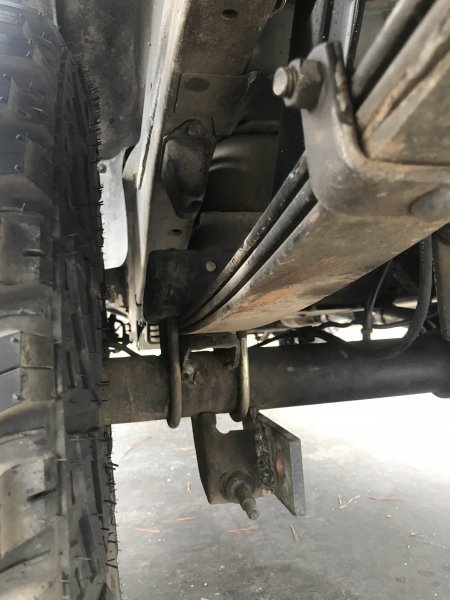
This will help. OP's truck. Ubolt hole is cutout and ubolt is moved over. Stock XJ
-
Ah good catch.
-
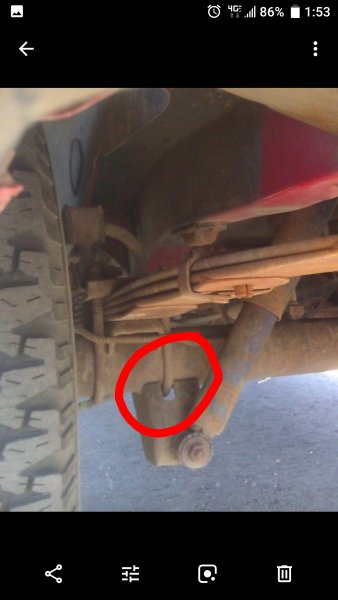
C8.25 is close to a D44 as far as strength. I've never heard of one breaking. You really need to get a cheap dial angle indicator to find your pinion angles. From your pictures it looks like your pinion is pointed at the transfer case, which is incorrect for a slip yoke style drive shaft. Digital angle finder: https://www.amazon.com/dp/B078JNS7V6/ref=cm_sw_r_em_apa_d.yRBbD3RA163 Dial angle finder: (this is the one I bought and used for my axle swap). https://www.amazon.com/dp/B00004T807/ref=cm_sw_r_em_apa_qazRBbBS4VEJJ Since you are spring over, you will need to get shorter shocks since the shock mount is now on top of the axle. You could also make a tab on the axle to get longer shocks in there. That hack job of a mount on the bottom of the axle should be cut off. Check out some spring over axle swap threads to find what others have done for shocks.
-
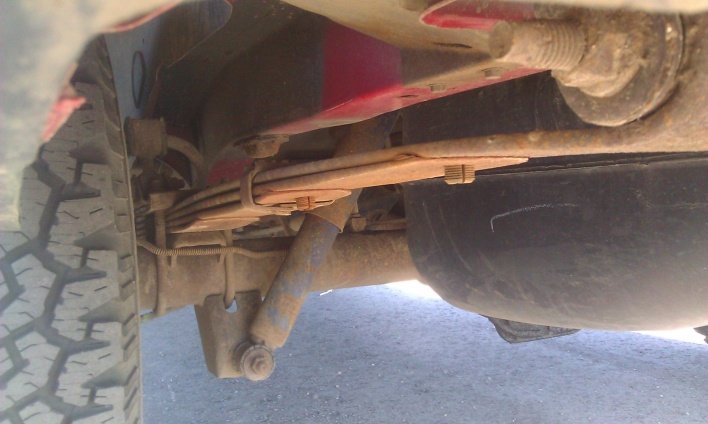
If you look at the factory XJ shock mounts, you can see the cutouts for the u bolts have been widened to accommodate the new ubolt location. Looks as tho the PO also welded on tabs to act as lower shock mounts off the side of the XJ mounts. Factory XJ
-
Yes that is a C8.25 from an XJ. No reason to swap it, plenty strong. Luckily whoever did the swap moved the spring perches. If I were you, I'd cut those lower shock mounts off so they don't get caught on anything. Given the axle was swapped by a PO, I'm guessing they didn't assemble something properly causing your issues. You should go through and make sure all the bolts are torqued properly and make sure they got the pinion angle correct. My best guess without seeing the inside of the diff is that they got the spring perches at the wrong angle and caused a bad pinion angle, especially since it was spring over swapped.
-
Best Subwoofer Ground Location
Dzimm replied to Me&my86MJ's topic in MJ Tech: Modification and Repairs
The subs work with radio tho? Does the radio have separate bass settings for the aux input?