Dzimm
-
Posts
3580 -
Joined
-
Last visited
-
Days Won
11
Content Type
Profiles
Forums
Gallery
Everything posted by Dzimm
-
You could pull the harness back out and lay it on the ground and use a factory wiring diagram to go through it and repair anything that's been chopped up. Even just looking at it you should be able to see what isn't factory. Otherwise yeah a harness that's not hacked up to begin with would help.
-
That's a big sign someone messed with the wiring at some point. From what you describe for issues I am willing to bet the wiring is jacked up because of the missing remote start and not being put back to factory.
-
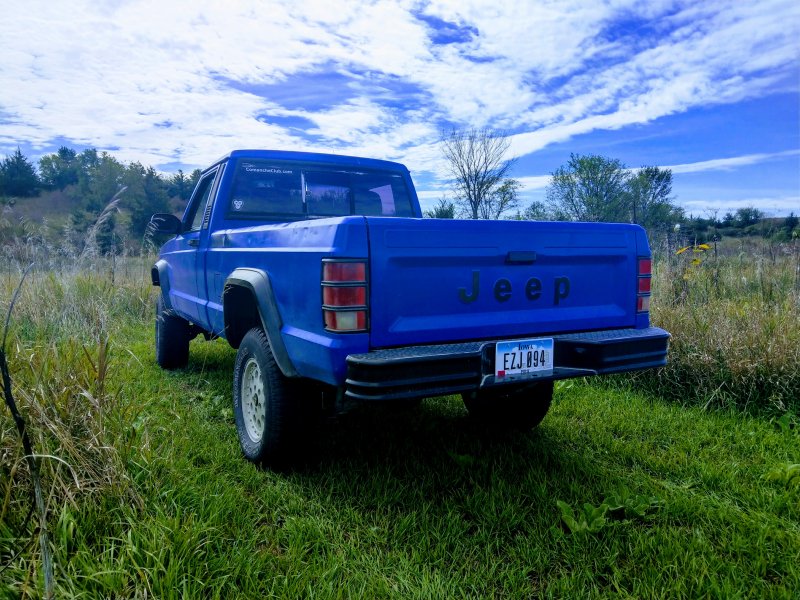
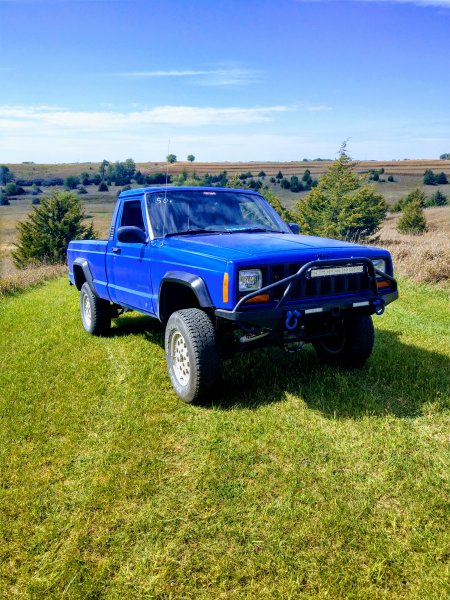
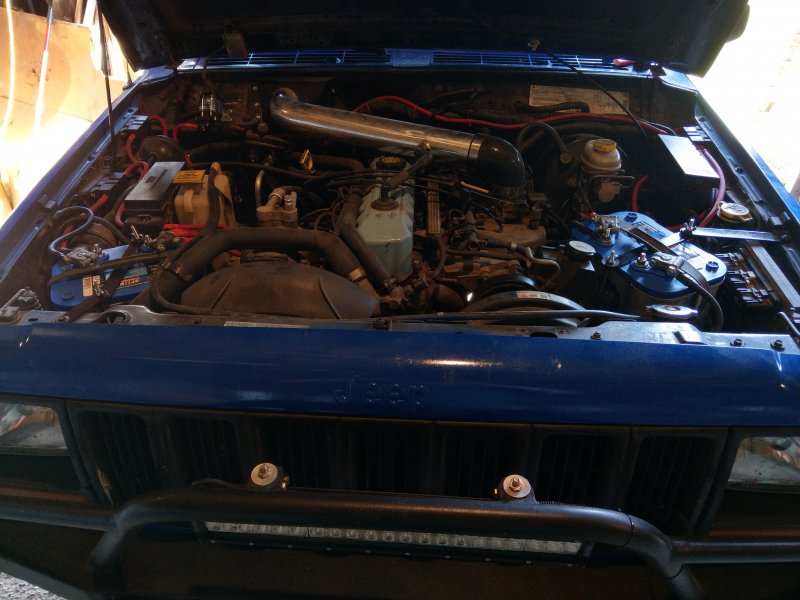
Welcome scroll through the members projects page and you'll come across some really good build threads of 97+ swaps. Not sure what all you want for ideas but here's some things I did and a couple pictures of mine. Full swap, dual batteries with upgraded cables, dual factory fuse boxes for auxiliary power, 4.5" lift, cowl intake, Dakota 22.5 gallon gas tank, C8.25 rear axle from an XJ, all lights were upgraded, reflective marine grade decals, ect. Click the build link in my signature for more info.
-
That's the correct ecu but is that dirt or rust? And what did the rest of the xj look like if that's all rust?
-
Continuity tests are done when the key is off. You put one probe on each end of a wire to test if the wire is broken in between or not. This is the test you should do in this case, on any wires you see a pinch, nick, corrosion, or aren't getting the proper power through. It tests the wires themselves to help narrow down any open circuits. The engine harness on XJs and MJs is susceptible to a lot of heat, vibration, dirt, oil, ect. I have rarely seen a harness that didn't have wires exposed or correded and since your harness came from an unknown Jeep, you should be checking those wires with a fine tooth comb after you triple check all the grounds and plugs.
-
In that case, check the wiring again. The chances of a bad computer are slim. Trace EVERY wire, remove ALL connectors and clean them, remove and clean ALL grounds. Especially important are the grounds on the drivers fender, firewall, engine block, and the drivers footwell. Inspect all the wires you can find to look for any nicks or corrosion, use your multimeter to test continuity on as many wires as you can. It's a tedious process but you have to be 100% sure your wiring is good. There is a lot of places you can easily nick or pinch a wire while doing the 97+ swap.
-
The front has more of a mean look than the rear but wow does it look way better.
-
Was the XJ running that you pulled the parts from?
-
Did you check all your wiring like mentioned in your other post? Did the parts come from a running XJ? Don't start replacing parts if you haven't checked the items you know you messed with. In this case, that's the wiring. The chances of the computer being bad are slim. The chances of a loose connection or bad ground are high.
-
Agreed. In my driving test the only "control technique" that was taught was recovering from hitting the gravel shoulder. The instructor had us steer into the gravel and then recover.
-

2WD Spindle Style Brake/Wheelbearing Replacement
Dzimm replied to Dzimm's topic in MJ Tech: DIY Projects and Write-Ups
Yeah I just read through your thread. Sounds like you had a fun time with that one. Good you got it figured out though, that would have sucked to be there permanently. -
2WD Spindle Style Brake/Wheelbearing Replacement
Dzimm replied to Dzimm's topic in MJ Tech: DIY Projects and Write-Ups
Thanks and yes actually. The ones I pulled off and the ones I put on are that way but it's hard to tell without putting them side by side. I accidently grabbed two outers and couldn't figure out why it wouldn't go on the inside. Had to compare to the old pads to figure it out. At least with these, you physically can't put an outer on the inside because it won't go in at all. I would add pictures of the difference but I the old pads are already gone. I know with the 4wd pads they are attached to the caliper and that's what in used to, it was different to have them essentially attached to the rotor with this setup. -
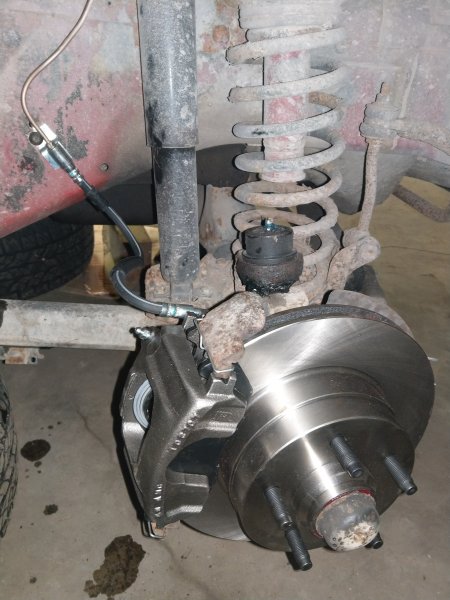
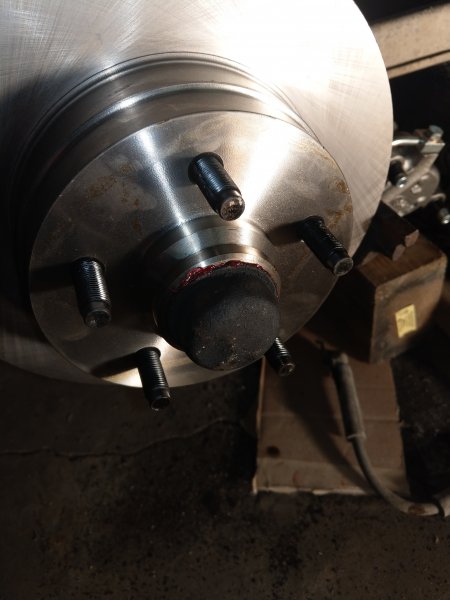
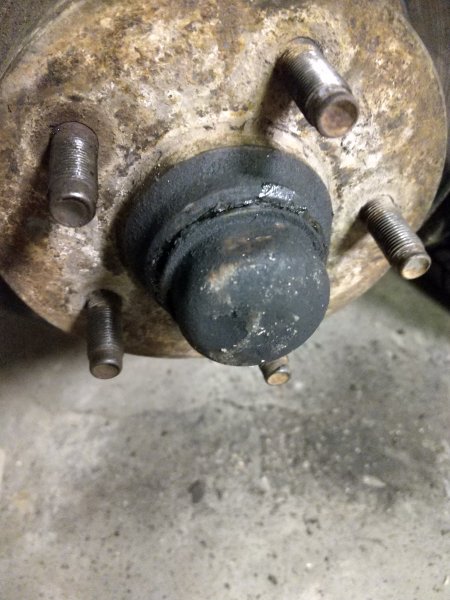
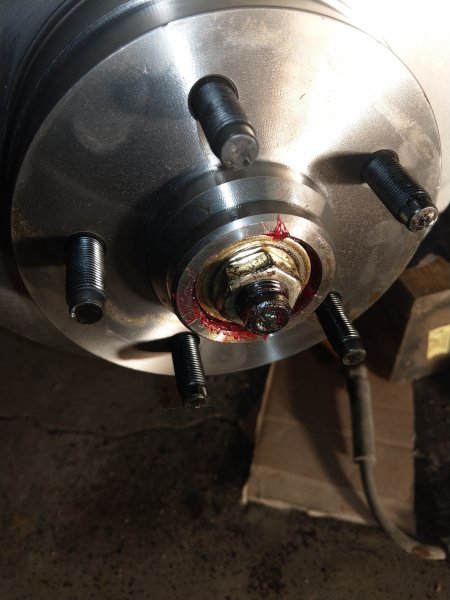
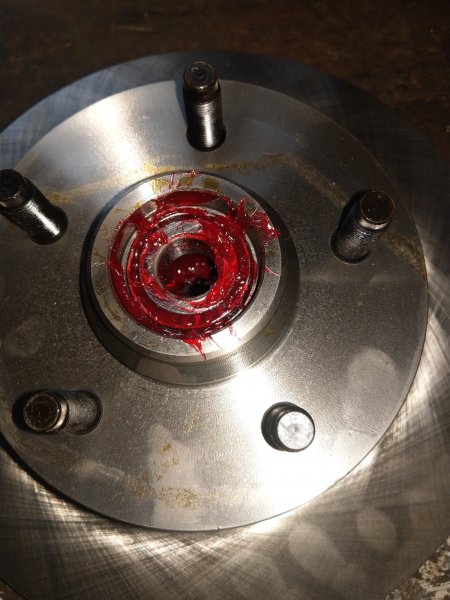
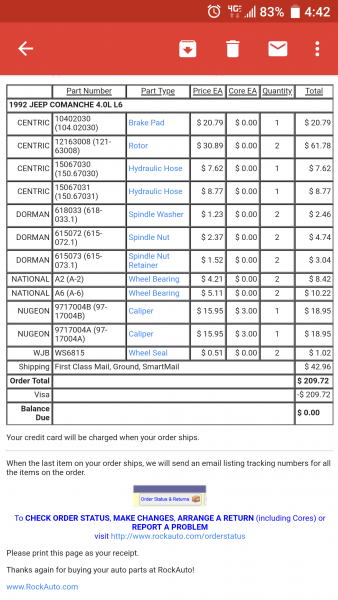
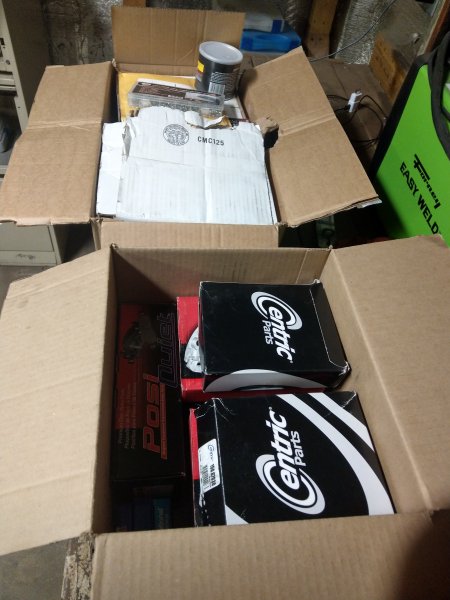
I had a hard time finding info on the brake swap for my 92 2wd MJ so I figured I'd do a writeup on it to make it easier for others. This applies to only the spindle style 2wd brake setup that was phased out in 1993. So any XJ or MJ up to 1992 that is 2wd should have this setup. If anything is incorrect or you have anything to add, feel free to say so and I'll fix any mistakes. I'd also like to say thanks to the members here who helped answer my questions when I was figuring this out myself. Parts needed per side (all are 2wd specific): - Brake pads - Brake hardware - Hub/Rotor - Inner wheel bearing - Inner bearing seal - Outer wheel bearing - Thrust washer - Nut - Nut retainer - Cotter pin (5/32" fits nicely) *optional* - Soft brake line - Caliper This is the parts I used with the part numbers and prices as of 10/2018 from RockAuto. Unfortunately there are no "performance" brakes for this spindle style setup so I went with the cheapest I could find. Tools needed: - Lug wrench - Jack - Jack stands - H7 Allen socket or 7mm Allen wrench - 1-1/16" socket (1-1/8" will work for this and also fits the yoke nuts) - Torque wrench - Needle nose pliers - Wire cutters - Block of wood - Hammer - Wheel bearing grease - Bearing grease packing tool *optional* *If replacing brake line or caliper* - 3/8" line wrench - 9/16" socket - T40 Torx bit Removal: - Start by breaking the lug nuts loose on both front wheels, then jacking the front up and placing on jackstands. - Remove the lug nuts completely and pull off the wheels. Place the wheels under the frame rail for safety. - Take the Allen socket and loosen the caliper bolts on the back of the caliper. - Pull the caliper off and either hang it from the coil spring, lower control arm, or set it on the tire that is under the truck. - Pull the brake pads and hardware off and toss them. - Knock the dust cover off the hub/rotor - Straighten the cotter pin and pull it out and pull off the nut retainer. - Use the large socket or pliers to loosen the spindle nut and remove it. - Pull off the hub/rotor. - Use a paper towel to clean the spindle and inspect it for any wear or damage. If changing calipers and/or brake hose: - Use the 3/8" line wrench to disconnect the hard line. - Use the Torx bit to remove the soft line mount bolt. - Toss the old line and caliper unless you prefer to rebuild the old caliper. - Prep the new caliper and hose by installing the new hose while the caliper is on the bench and lube up the caliper slide bolts. - Bolt the new soft line mount to the truck and attach the hard line. Set the caliper back on the tire or tie it up so it's not hanging by the hose. Installation: - Set the hub/rotor on the bench with the lug bolts facing down. Check to see if it came with bearing races pre-installed. If not, you will need to press in the bearing races on both the front and back of the hub/rotor. - Take the inner bearing and pack it full of grease with the proper tool or by using a gloved hand to pack it. (Tons of how to videos online about packing bearings). - Place the bearing into the back of the hub/rotor. - Take the inner bearing seal and place it over the bearing and use a block of wood and hammer to tap it in evenly. Take your time and be careful not to damage the seal and make sure it goes in evenly. - Flip the hub/rotor over and pack the outer bearing with grease. Set the outer bearing in place. - Use some brake cleaner on a rag to clean the friction surface of the rotor to remove the oils from the factory. - Slide the hub/rotor onto the spindle. - Place the new washer onto the spindle. - Thread the new spindle nut on until it's snug. - Use a torque wrench to tighten the nut to 20 ft/lbs while turning the hub/rotor to seat the bearings. Then loosen the nut by 1/2 a turn. Finally, torque the nut to 19ft/lbs while turning the hub/rotor. - Slide the nut retainer on and align the cotter pin hole with a slot in the retainer. The spindle nut can be loosened just enough to line up the hole. - Slide the largest cotter pin you can into the hole and bend the legs around the spindle in opposite directions. - Tap the dust cover back into place. - Clean and place a little brake grease on the caliper bracket arms where the pads slide. - Install the brake hardware and brake pads. - Set the caliper back into place and tighten the caliper bolts. If reusing the old caliper, the caliper piston will need to be pushed back with a c-clamp. Open the brake reservoir to make that process easier. - If the brake line or caliper was replaced, the brakes will need to be bled. Start at the rear passenger, then rear driver, then passenger front, and last is driver front. - Put the wheel back on and tighten the lug nuts. - Pull out the jack stands and drop the truck. - Tighten the lug nuts the rest of the way. Test drive!


-
If you go into the bios does it show up? I imagine it would since you found it recognized in windows but I'm curious if the mobo actually recognizes it as a drive, boot drive, or if it recognizes the full capacity or just a partition. If the HP SATA controller drivers don't work, it's possible either the drive is dead or just won't work with windows 7 for some reason.
-
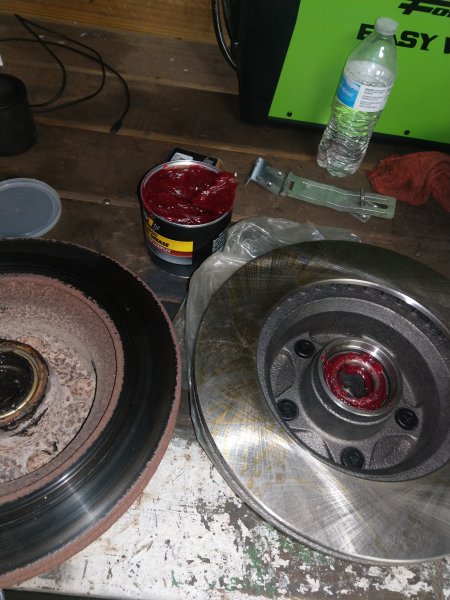
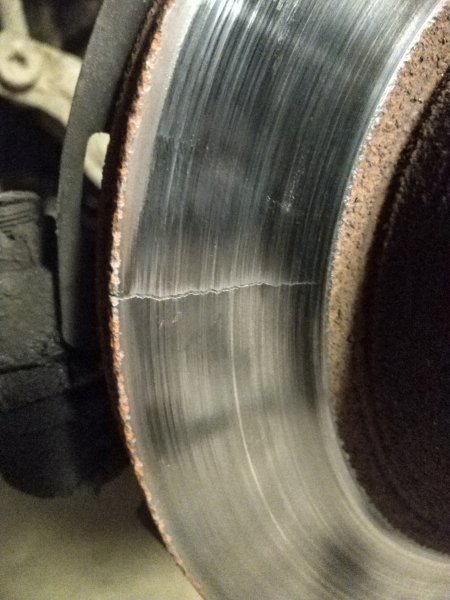
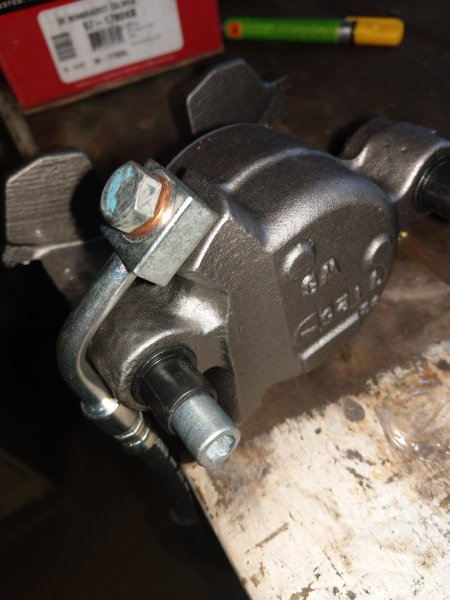
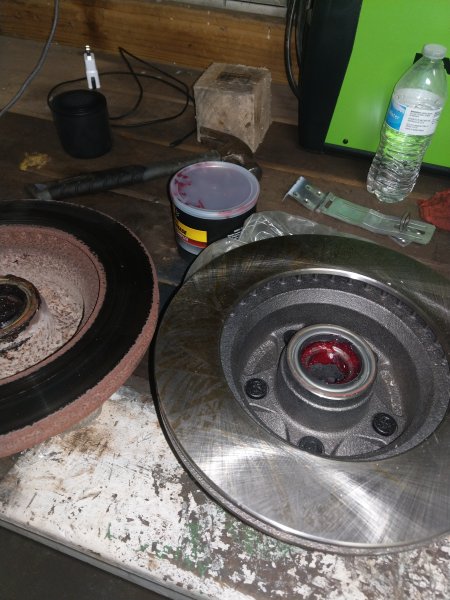
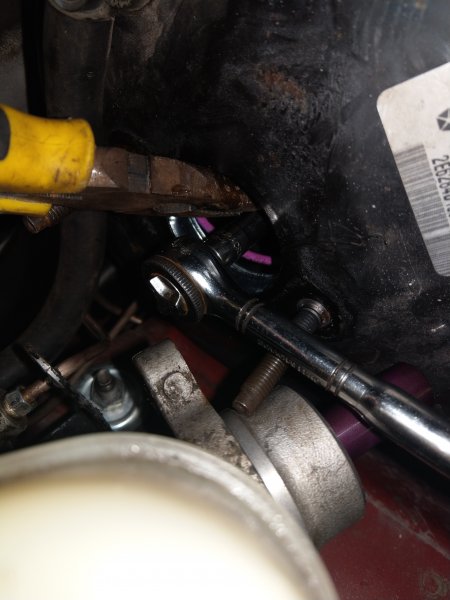
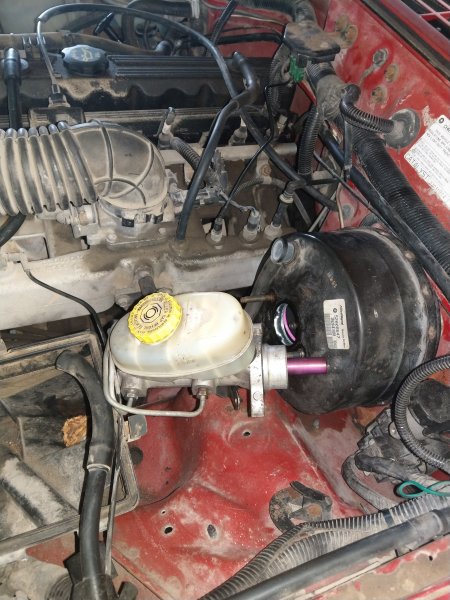
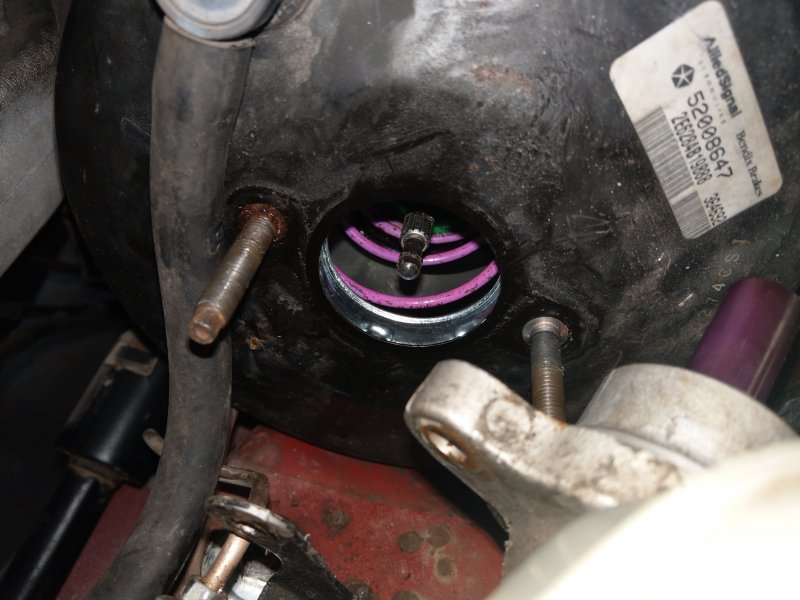
After thinking my brake issues were fixed I continued driving the truck to work over the last couple weeks and still had some strange things happening. The rotors ended up being warped from the brakes locking up after the first round of brake work. Well at first it only seemed to be affecting braking so I knew I needed new brakes but not necessarily immediately. But the first time I drove it to work I started to get a really bad shimmy in the front end about 10 mins into my drive that would either go away on its own, or go away after I pulled over and took off again. I figured the shimmy had to be due to the warped brakes so I ordered new rotors/hubs, pads, calipers, bearings and seals, and soft lines for the front. When the parts arrived I got the work done over last weekend. Started by tearing everything apart and found the drivers side spindle had some wear in it. This will get replaced eventually but it's gonna have to do for now since I had to do way more brake work than I had anticipated. I also found that rotor to be cracked. First step of install was to swap over to the new calipers and hoses. I attached the hose to the caliper while it was on the bench then attached the hose to the truck. Packed the bearings with grease and got them in the hub and tapped the new outer seal into place. After the rotor/hub has greased bearings and rear seal I slid it onto the spindle, put on the new thrust washer, new nut torqued properly thanks to HOrnbrod and his FSM, new nut retainer, and new cotter pin. Replaced dust cover, installed new pads and retainers, and bolted up the calipers. Bled brakes and reinstalled the wheels and all seemed well. Did a long test drive and everything seemed fine until I drove to work a couple days later... 10 mins into my drive I started to lose speed for seemingly no reason. Down shifted to fourth and I was able to accelerate back up to 70mph and shifted back to 5th and had no issues the rest of the drive. This happened every day after 10 mins of driving down the highway. Fast forward to yesterday when I finally had the ah-ha moment. The booster and master the I used were the ones that came in the blue truck when I bought it. I never took the master off the booster because I assumed it was a matched pair from the factory. I was wrong and found the push rod to be too long and not allowing the master to return completely causing brake drag. Since the push rod is recessed inside the booster it's kind of a pain to adjust but with a small socket and long needle nose pliers it can be done. Grip the shaft with the pliers and use the socket on the end of the push rod. After some trial and error I found that 3 threads shorter than what it was at was perfect. I didn't use any special tools, I just pushed the master on and felt for engagement between the master and push rod. The pedal feels so much nicer now and after a trip to work I had no issues. Finally!!


-
Don't use windows to update it, use HPs website and download it from there. I don't think I've ever had windows able to update a driver and always had to pull it from the manufacturer website.
-
Try going to HPs website, put in the laptop model number, and search for a SATA controller driver for the laptop. This may allow Windows to recognize the drive properly. HDDs themselves don't have a dedicated driver to operate, its actually a driver for the SATA controller that does it even tho almost all manufacturers list it as a separate HDD driver. I'm wondering if updating your HP SATA controller may cause it to be recognized properly.
-
Ok this is making more sense now. Have you tried contacting Toshiba customer support?
-
Are you putting the hard drive model number into Toshiba's site or the laptop model number?
-
Do this, windows is dumb when it comes to drivers. If you can easily get the hdd out to see the manufacturer and model numbers do that. You can find this in software as well, right click on the drive, click properties, click hardware id's, and it will display the ID numbers for the manufacturer. Plug the number into a database website like PCI Lookup and it will spit out the manufacturer info.
-
Wow I'm surprised it boots into windows being that the motherboard is different. Usually they are locked to the board. Older OS use a master/slave system so that hdd may be considered the master. When you boot the computer, hit whatever key it says to get to the boot menu, usually f10 or delete. Then boot your ssd. This will allow the hdd to show up like a flash drive in file explorer. Pull the files you want to keep onto the new ssd temporarily, then format the hdd. After formatting it, it will act like a secondary hdd. Unless the laptop or the old hdd has some weird boot priorities this should work.
-
Yeah that's what I was afraid of.. It's got newer upper and brand new lower ball joints so I was hoping not to have to take it completely apart but I guess I probably should.
-
97+ swap with weird electrical issues
Dzimm replied to 1988manche's topic in MJ Tech: Modification and Repairs
Yeah you have to be missing an electrical connection somewhere. A random ground is the easiest to miss so you'll just have to start checking. -
97+ swap with weird electrical issues
Dzimm replied to 1988manche's topic in MJ Tech: Modification and Repairs
Have you started or driven the truck at all yet or is this just the first time you had power going to it? Sounds like you missed a ground somewhere or don't have a plug completely seated. You should have a couple wires grounded under the drivers kick panel, I believe there is 3 that ground to the fender on the drivers side behind the computer, I'm pretty sure there is one under the center console, and then the various grounds to the engine block on the passenger side. My best guess is something under the dash or on the drivers fender since it's both the main computer and trans computer not being read. Other causes to the problem could be plugs not completely seated, various sensors, computers themselves but from all the symptoms you describe in guessing it's a ground or plug somewhere. -
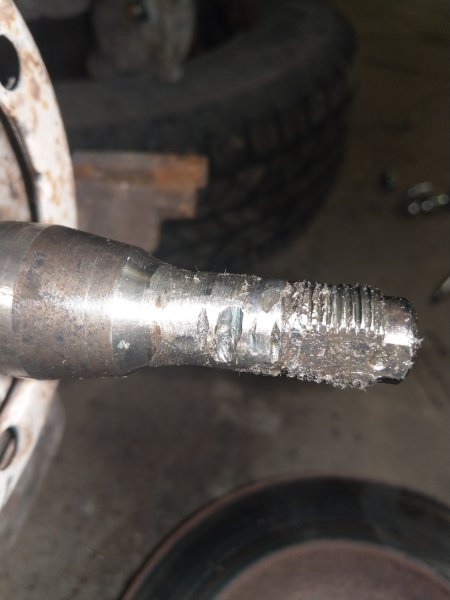
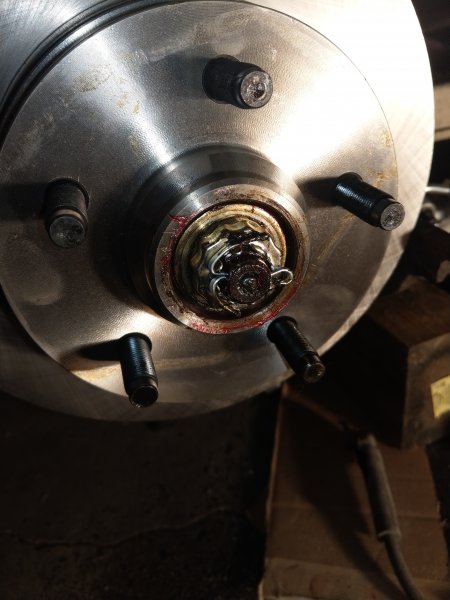
So I got the brakes finished up last night and everything went well. I am a little concerned however because it looks like someone went crazy with a grinder on the drivers side spindle. There were no metal shavings in the hub when I removed it so it's not the bearings causing it but I don't want the thing to snap off on me. The cuts aren't very deep but I can't imagine it wouldn't affect strength in some way.