
Dzimm
-
Posts
3580 -
Joined
-
Last visited
-
Days Won
11
Content Type
Profiles
Forums
Gallery
Everything posted by Dzimm
-

Comanche with 1997 4.0 bogging issues
Dzimm replied to Eric sicca's topic in MJ Tech: Modification and Repairs
Yeah fixing other people's work is a pain. I cleaned up the list so it makes more sense, was clustered up before. You'll want these injectors: 96-1999 53030778 Grey 49psi 23.2lb/hr -
Comanche with 1997 4.0 bogging issues
Dzimm replied to Eric sicca's topic in MJ Tech: Modification and Repairs
The injectors are standard size, different flow rates. Here's info and part numbers I pulled from another forum. The following is a list of the injectors used on the 4.0L since 1987 along with their rated static flow:Model Year Part Number Color Fuel Pressure Static Flow 87-1990 53003956 Black 39psi 18.6lb/hr 91-1993 33007127 Brown 39psi 21.0lb/hr 94-1995 53030343 Tan 39psi 21.0lb/hr 96-1999 53030778 Grey 49psi 23.2lb/hr 99-06 04854181 Blue Tip 49psi 22.5lb/hr The injector flow rate varies as the square root of the pressure drop across the injector. The stock '91-'95 4.0 injectors are rated at 22lb/hr @ 43psi fuel pressure, so at 39psi they flow ( sq. rt.(39/43) x 22.0 = 21.0 ). -
Comanche with 1997 4.0 bogging issues
Dzimm replied to Eric sicca's topic in MJ Tech: Modification and Repairs
You put a vacuum line on the fuel regulator correct? It should work just fine with the fuel regulator and the MJ pump. Should never have been setup returnless with the MJ pump. Did a PO or someone other than you build this truck? -
Comanche with 1997 4.0 bogging issues
Dzimm replied to Eric sicca's topic in MJ Tech: Modification and Repairs
So the exhaust is hacked up currently? I'd go take the cat off and see what it does. Or punch a hole in the front of it with a screwdriver. This is assuming you have a welder or way to fix it after the test because it will be loud. It does sound like that's a false code with your fuel pump wiring, but check your spark plugs for signs of flooding and check fuel rail pressure just to know for sure. -
Comanche with 1997 4.0 bogging issues
Dzimm replied to Eric sicca's topic in MJ Tech: Modification and Repairs
How old is the cat converter? -
Comanche with 1997 4.0 bogging issues
Dzimm replied to Eric sicca's topic in MJ Tech: Modification and Repairs
Does it bog during acceleration and going up hill? How fast can you go? Possibly a clogged cat -
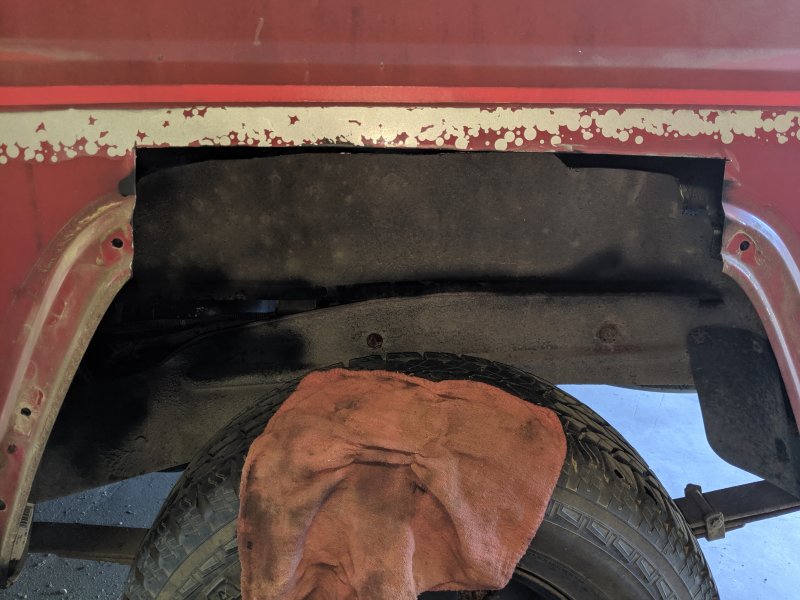
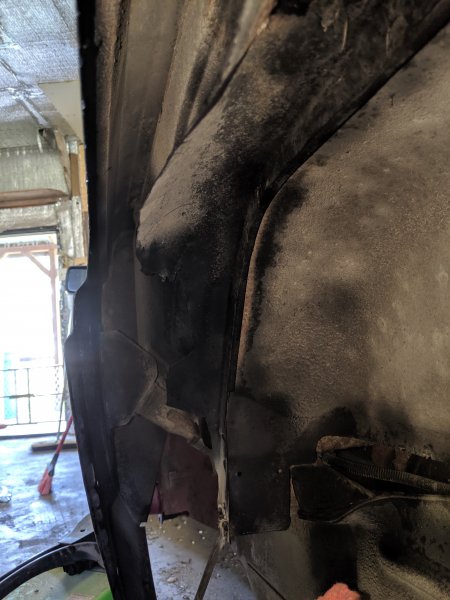
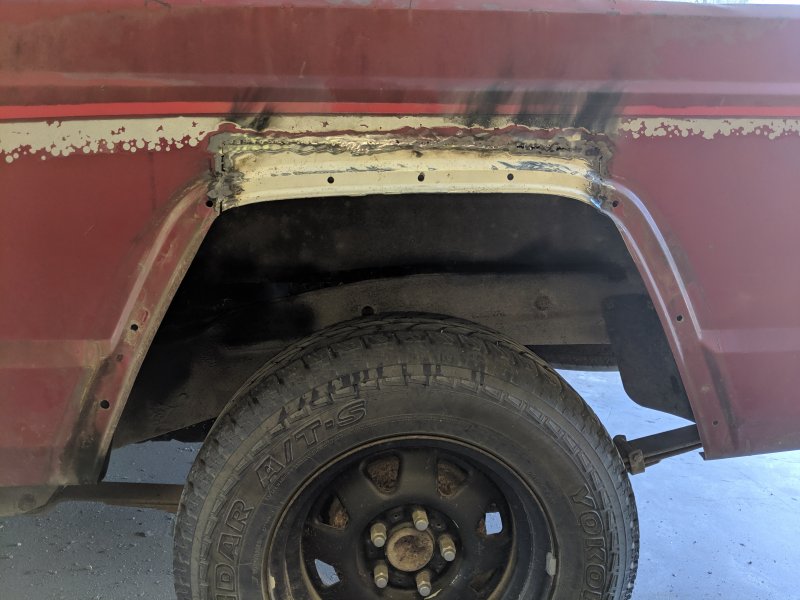
Decided while I was on this side of the truck I'd just pull the rear fender flare off. I could see some bubbling around the top. The bedside had been replaced at some point so I figured it wouldn't be too bad. Well the inner fender was absolutely toast. I didn't take a picture of it for some reason. I had to cut out basically the entire outer portion of the inner fender. I decided to not replace it since it would have been a stupid amount of work and it really isn't necessary. I just added a support brace to the bottom of the bedside just forward of the wheel well to keep it steady. This is the inside showing some of what I cut out. All the bad rust is gone, the surface rust I was able to get off with a wire brush and coat with rust reformer and paint. The rust on the actual bedside wasn't bad. New piece tacked in. Used a front fender again for the arch. Didn't line up as well using less of the fender but still works just fine and the flare will cover any imperfections. Driver's side has no rust now!


-
500 bucks and I’m back in the Comanche game
Dzimm replied to dustytony's topic in Member Projects: Your Comanches
Pretty slick truck for $500! -
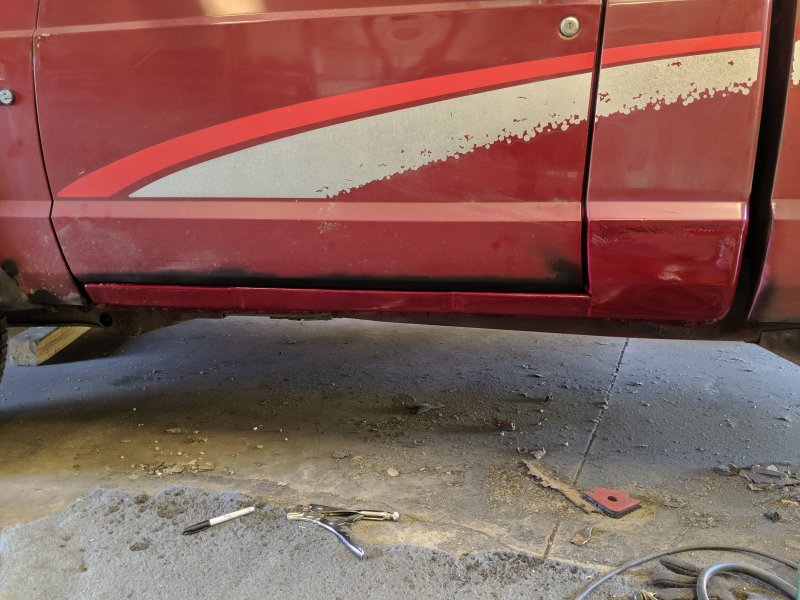
It's all in on the driver's side. Body filler will be here tomorrow to clean up the seems and so will the sander for the hard to reach areas. Paint just to see it one color.

-
Did it do any other damage? Is the bed shoved forward or any other visible movement underneath? I'd be finding the true extent of the damage before deciding on a repair path. But definitely as stated, don't total it. It may seem like you will lose money on the surface but like Jeep Driver said, there are other costs to consider going the rebuilt route. May even be cheaper not to file a claim at all. $500 could pretty well fix the visible damage if you do the work yourself.
-
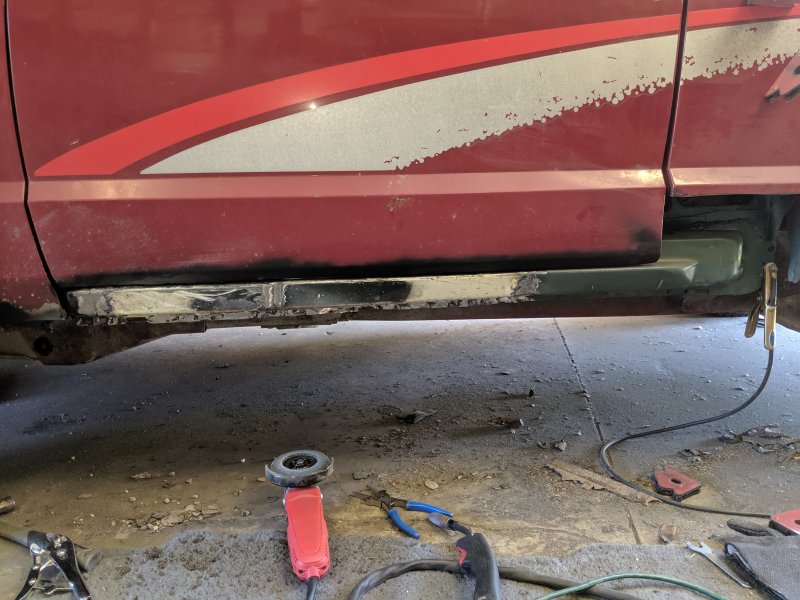
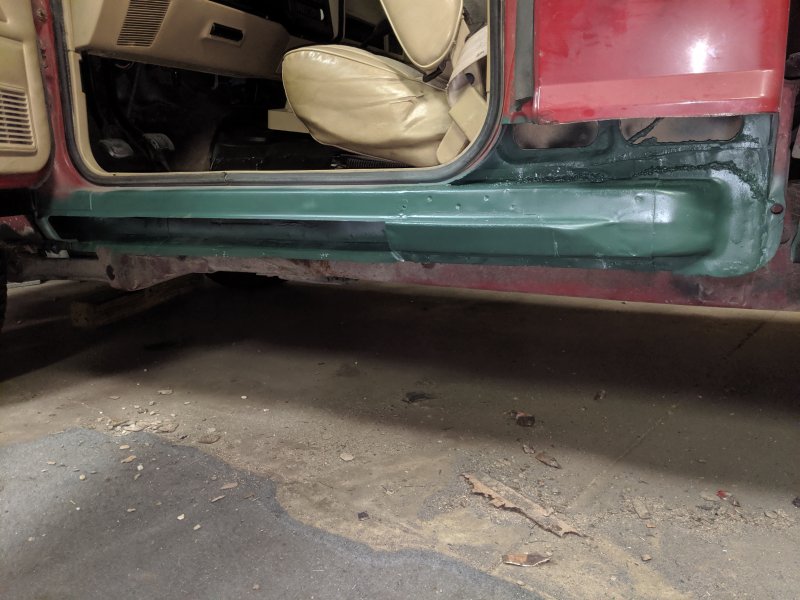
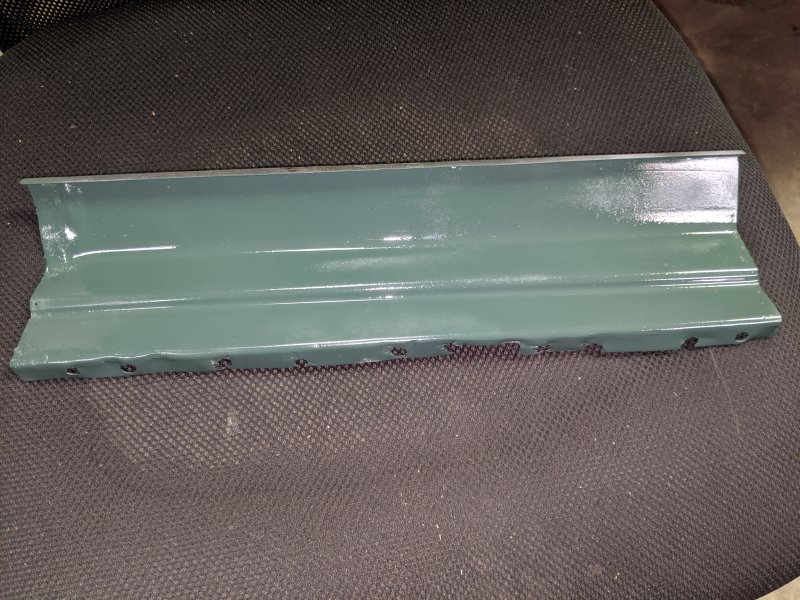
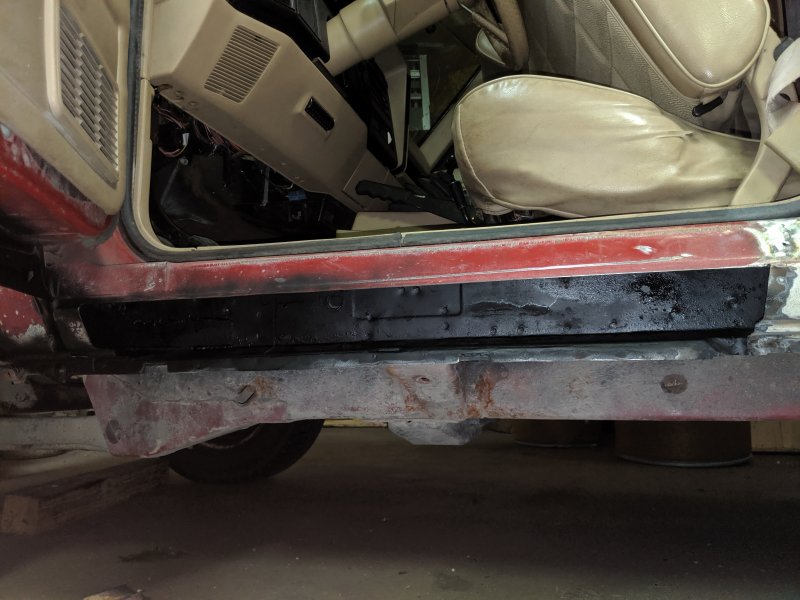
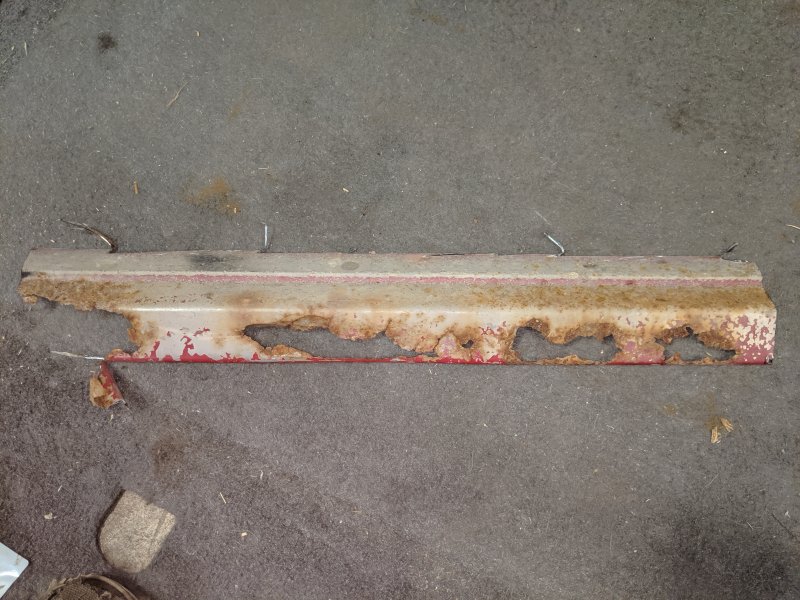
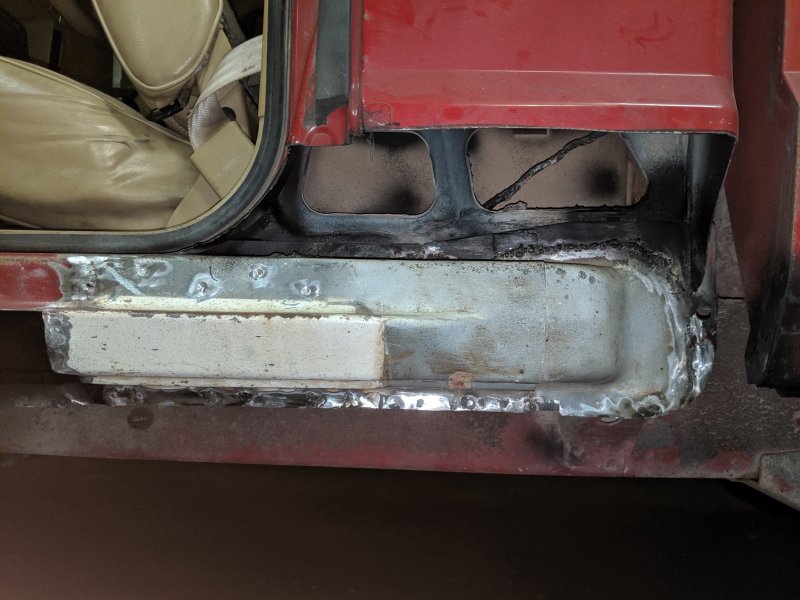
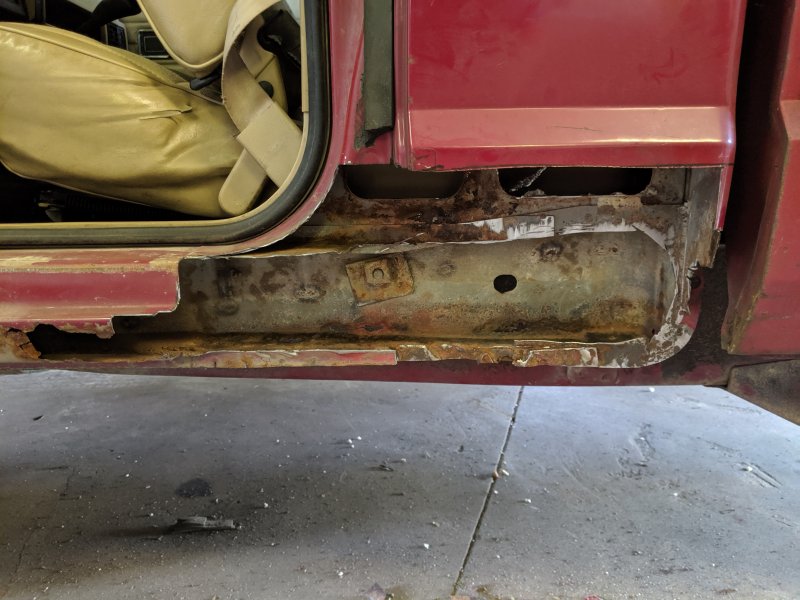
Got home early enough to get some work done. Of course as my luck would have it, as soon as I started welding the battery died in my helmet so it wouldn't darken. I learned I really should have a standard helmet on hand. Luckily the fiancé had gone to run some errands so she grabbed me a new one on her way back. Got the internal corner stitched in. Forgot how much I hate sheetmetal work. Rocker cut out, not that bad honestly. Somehow to side rusted out, the bottom is spotless inside and out. Cleaned up and rust treatment/reformer Threw some paint over everything before sealing it up. Don't mind the color, just using what I've got. Next section of rocker is cleaned up and ready to go in tomorrow. It's cut into smaller chunks since it was shipped halfway across the country so I've got 3 pieces to weld together per side.
-
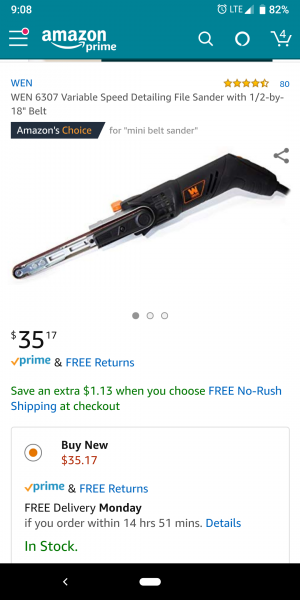
Well today I got woken up early to go to a Barn Hunt trial with the fiancé so no real work will get done on the truck unless we get home early enough. It's dogs hunting rats, don't worry the rats are perfectly safe, and actually enjoy the interaction with the dogs. It's one of the many dog sports she does with our dogs. The down time I have today is useful for thinking out how exactly I want to blend in the new corners. Ideally I'd pull the bed but I really don't want to do that if I don't have to. I might do it when I repaint the whole truck, I need to undercoat it too but the paint is in good shape between the cab and bed so pulling it at all is still up in the air. I think I'm going to try cutting the corner in a way that I can weld the tight spots from the inside so there is minimal work to be done between the cab and bed. I will use a file sander to reach in the tight gap and clean everything up. The reviews of this one says use 40 or 60 grit for welds but if I weld the inside I shouldn't have much to take down on the outside. Some body filler and it should look pretty good in there.
-
I like the colors on it. Hopefully we get a new member.
-
Got it all cleaned up and rust reformer everywhere I could reach. Tomorrow will be assembly and then the rest of the rocker.
-
Definitely will thanks Pete. I'm splicing the bottom of the rockers at the pinch seam so it will maintain the factory holes.
-
My 98 XJ had Fram filters on it for over a decade and never had an issue. The 4.0 will be down with whatever you put on it. I'd use something better if I could but if you've got to use Fram, use it. Idk why people hate Fram so much, I've yet to see actual proof of a Fram filter causing issues.
-
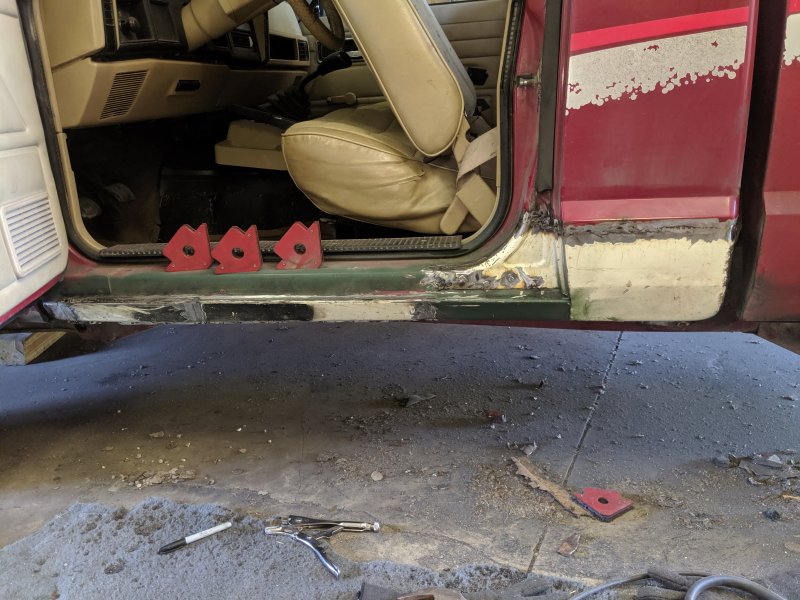
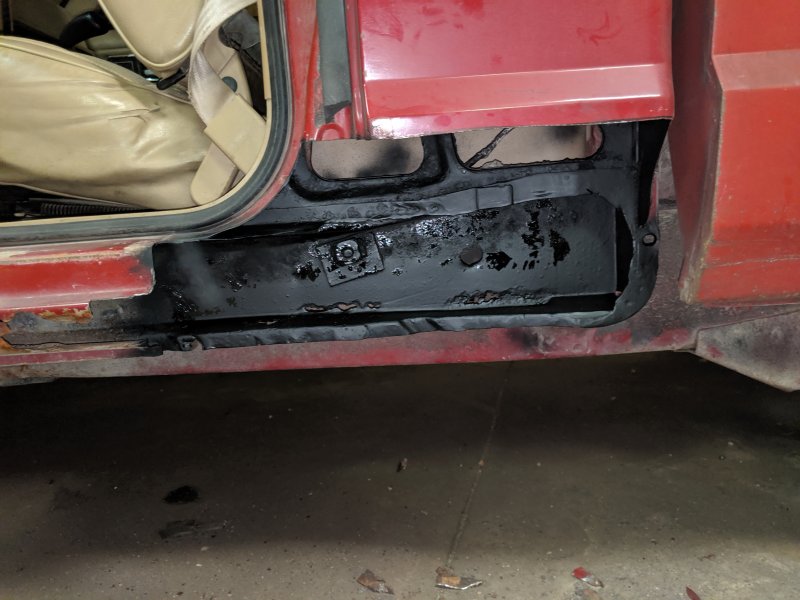
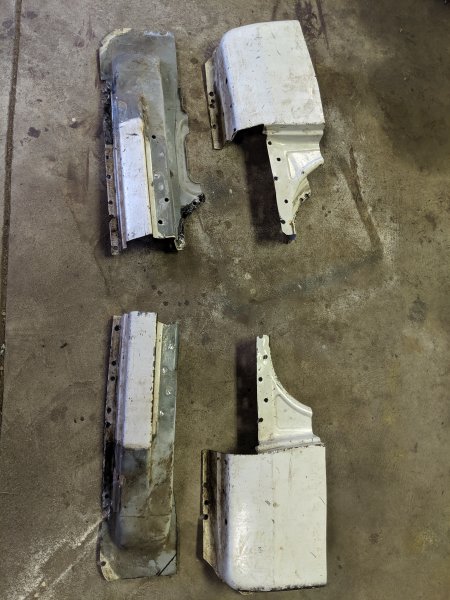
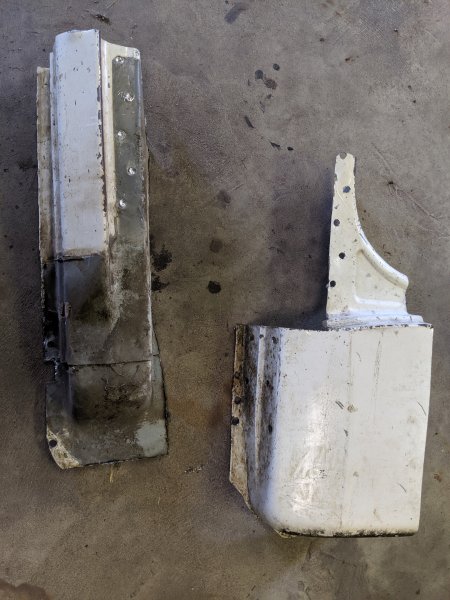
After finishing the cab I started cutting out the driver's cab corner. I got all the really bad rust cut out and ready for final cleaning with a flap disk. There are some holes in the back side of the rocker but I will just use body filler on those since they are small and hidden. I decided to really take my time with this so I drilled all the spot welds on my replacements to separate the inner and outer corner. I'll weld in the inner then come back and do the outer skin. Unfortunately my grinder threw the motor bearing so I'm currently waiting on the fiancé to come home with a replacement so I can get this cleaned up and lay down a rust reformer over anything left over so it can dry overnight.
-
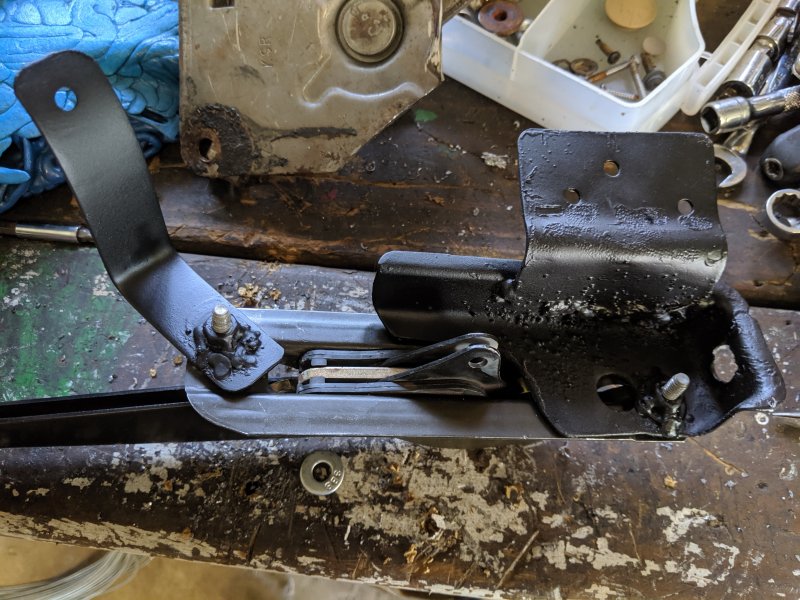
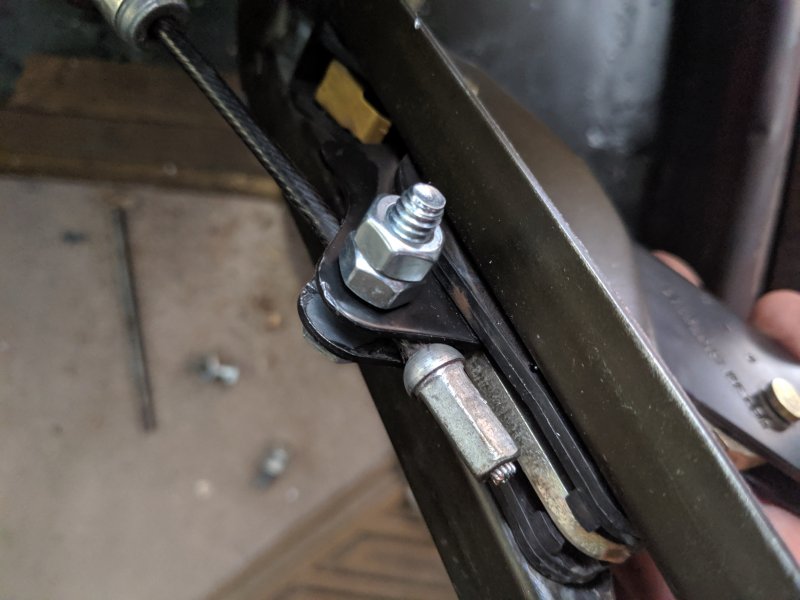
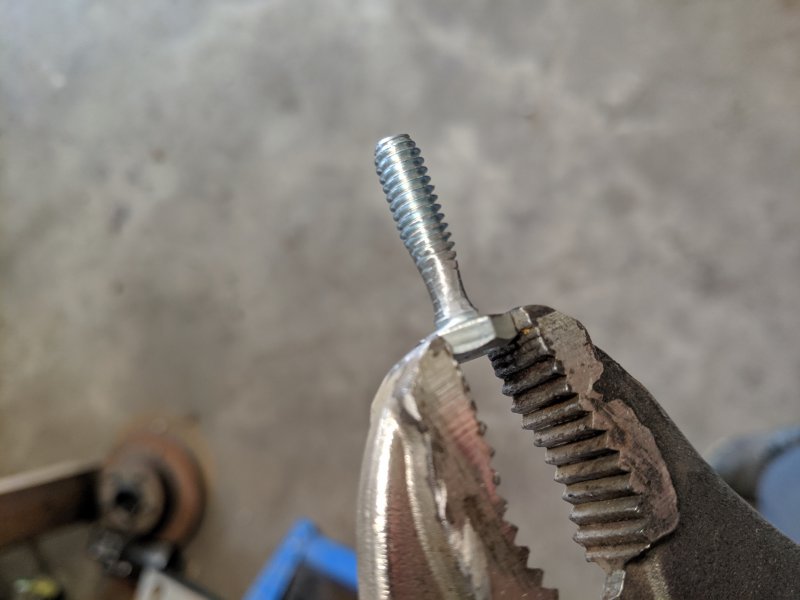
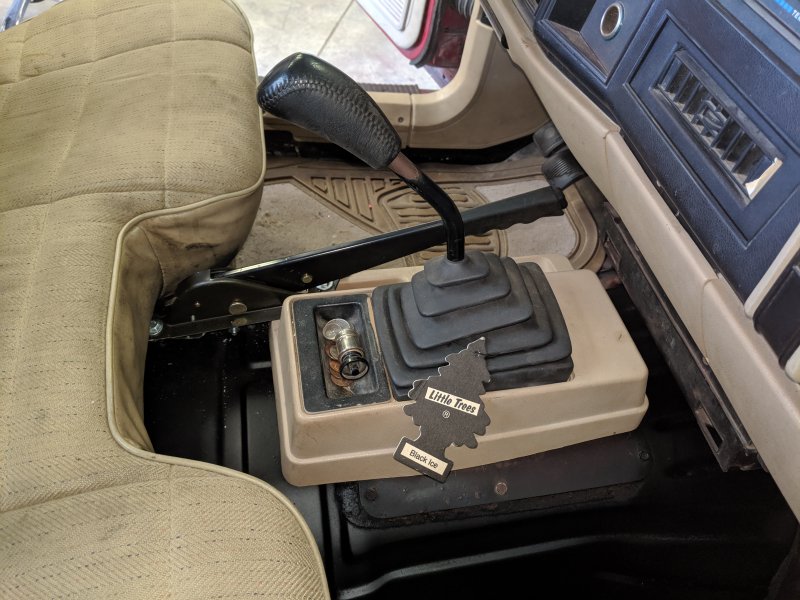
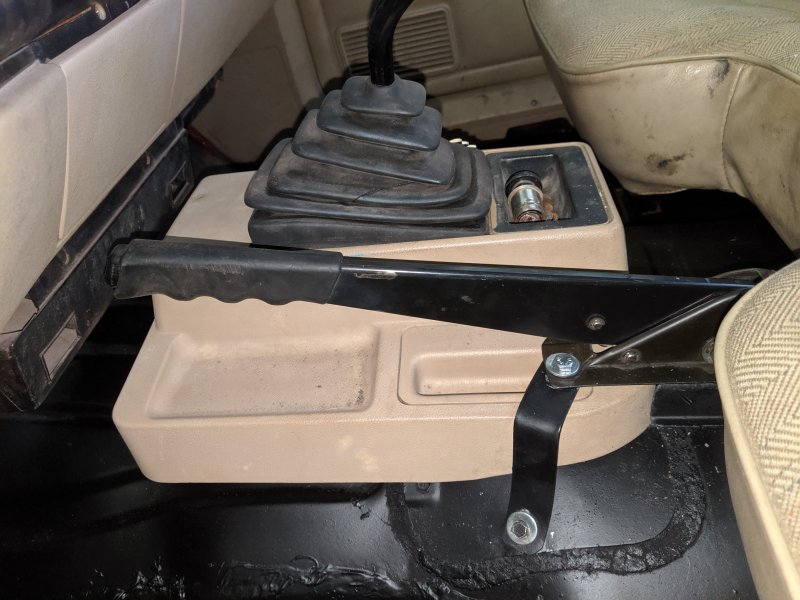
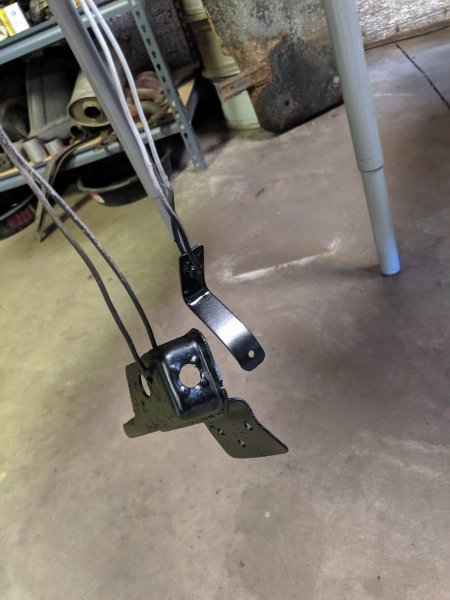
This morning I got the brake handle assembled and installed in the truck. The cable end was different than what the handle was designed for so I ran a bolt through the holes to squeeze the cable enough it can't slip through. I also ground the threads off the bolt where it will contact the cable to avoid any chafing. I welded the nuts to the bottom of the brackets so it's just a bolt to tighten from the top. I used nutserts in the cab floor. The fit in the cab is good. It is pretty darn straight with the console but it doesn't sit level like I wanted. I had to sag the back end so the cable would fit under the seat frame. Its also a lot easier to reach being slightly up. When it's engaged it doesn't interfere with the shifter at all but it's close enough I'll notice if I forget to release it. Unfortunately I think my rear cables are seized, I tried adjustments and I can't get them to move at all. I pulled a wheel off to inspect and it was installed properly. For now I left it loose and I will be getting new cables at some point. Oh and I got the cab put back together.
-
XJ Cruise Control Experts Needed
Dzimm replied to AZJeff's topic in MJ Tech: Modification and Repairs
Since you've already traced everything out I would do more research into the buttons. I don't know all the details off the top of my head anymore but I recall people having similar issues due to the different years of buttons. Id imagine your experiencing a compatiblity issue of some kind -
XJ Cruise Control Experts Needed
Dzimm replied to AZJeff's topic in MJ Tech: Modification and Repairs
There is something funky about the buttons having to be from the proper year. There are I think 3 different versions of the buttons that send different electrical signals depending on the years which I believe are 97, 98, 99+. Did you get everything from one donor or multiple? -
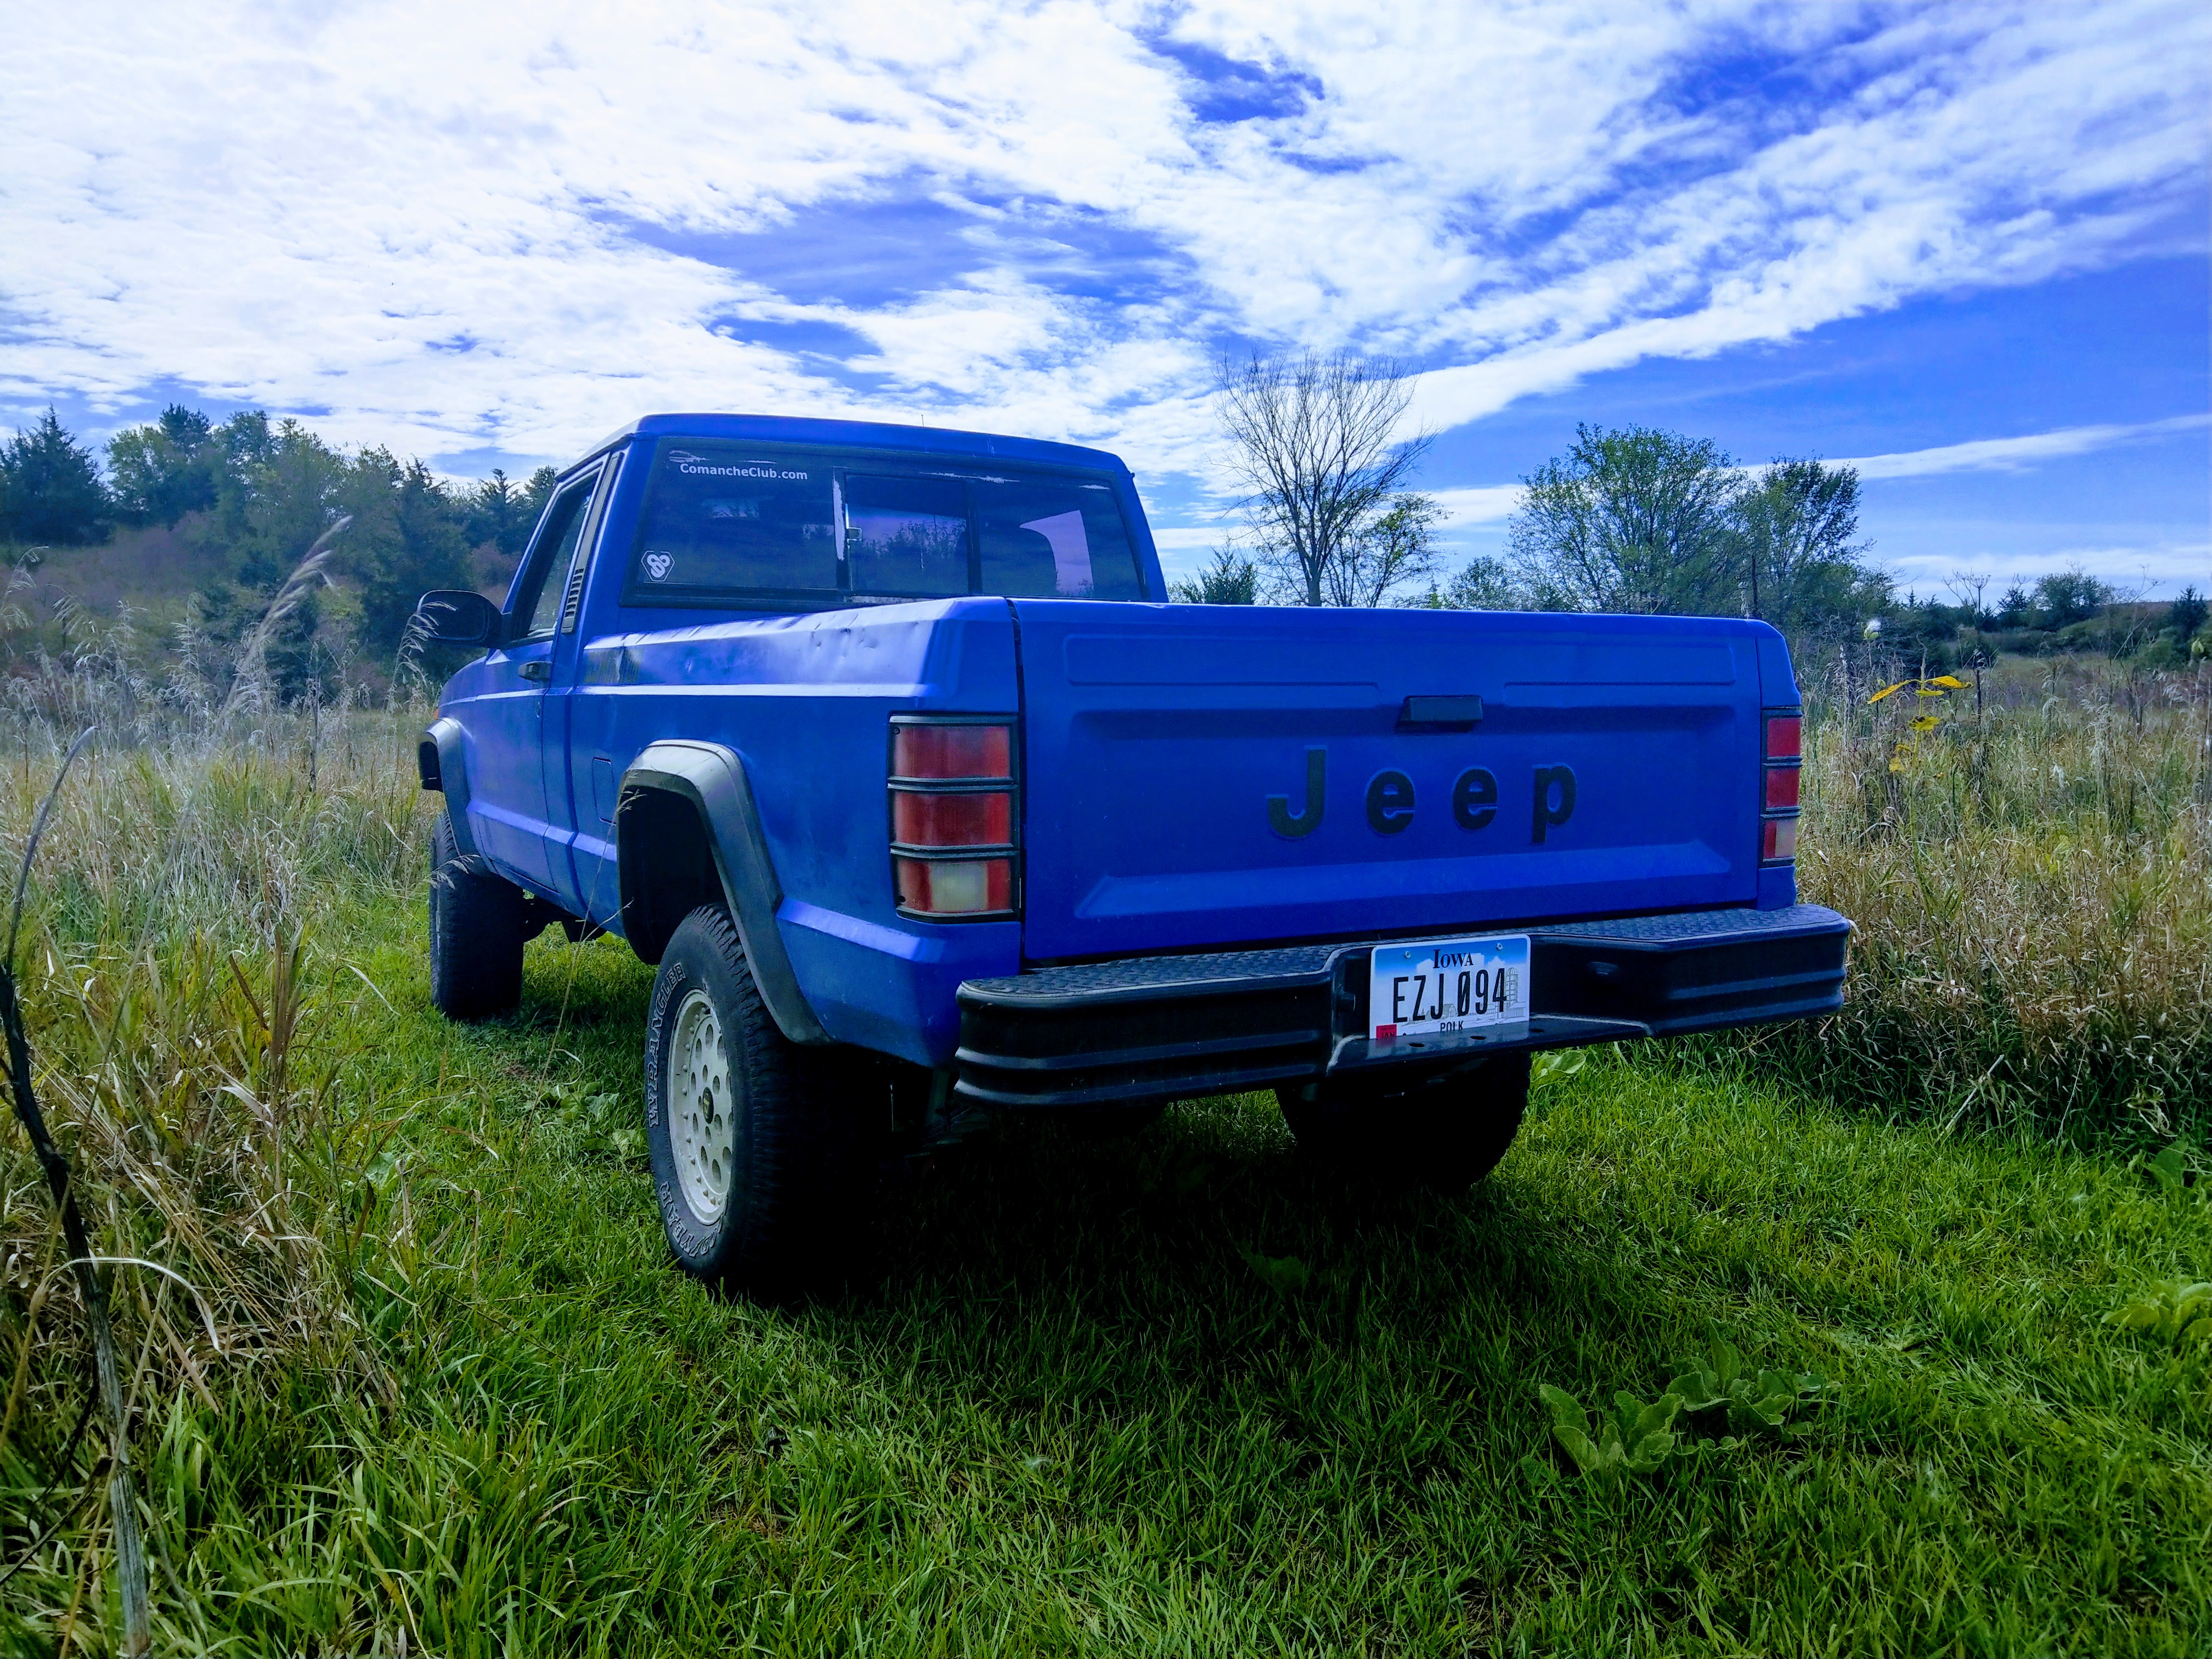
I'll trade you ha. My blue truck is an Iowa truck and was rust free, although it sat for a while in a garage.
-
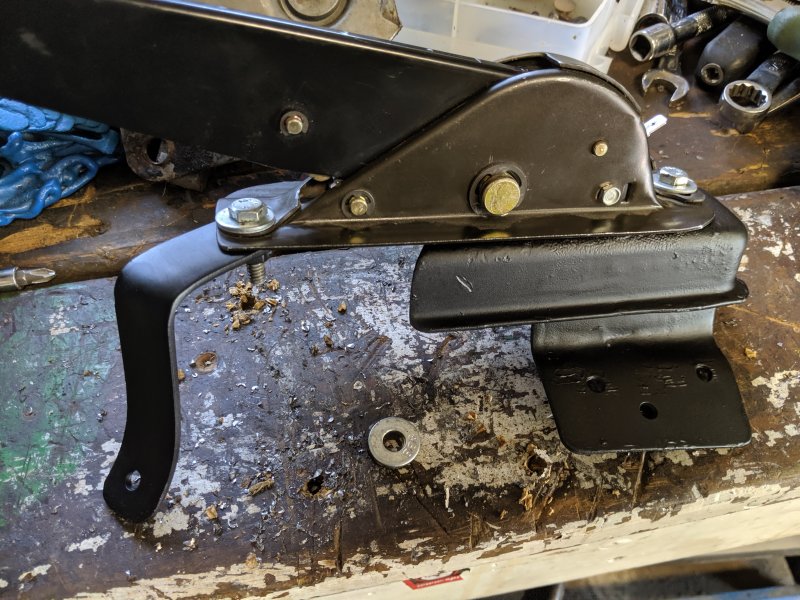
A little more work done today. Got the seat and console back in for mock up. I didn't realize the console would sit so high off the floor after removing the carpet. There is a good 3/4" gap under it now, I may have to figure out a way to drop it or fill in under it somehow. I got the brackets built for the brake handle and I think I figured out how to attach the cable to the handle. The cable has a different style end on it than Jeeps normally do so it won't sit in the slot properly. I did end up cutting apart the MJ brake bracket due simply to the fact I didn't have a drill bit the correct size for the cable to lock into and rather than buying a new bit, I just cut apart the bracket. It also provided a nice support for the handle. The mounting brackets are drying so tomorrow I should be getting it all installed. I made the brackets so the brake handle will sit above the console without having to drill any holes or otherwise damage the console. Hopefully it all goes together easily.
-
If I run into a part I can't get to clean up and paint such as the inside of a rocker, I will paint the backside then install it with the paint still wet and keep everything as cool as possible. It will inevitably melt some of the paint but will protect the majority of it and doing sheetmetal work you have to keep it cool and go slow anyway. By doing it with the paint still wet, it has to dry out the paint before melting so it tends to keep more of the paint intact from my experience. Still not a perfect process. If there is a gap somewhere near the end of the work, it's always good to get as much paint everywhere on the inside as possible.
-
That's an upgrade!
-
Yeah it's a mess. Up inside it all came out completely, it's just around the edges that's still stuck on so I'll probably just cut the rust out now. I've got a fire extinguisher in the shop in case it goes up.