
.jpg.656da889d755ca56e7786a97857dd75e.jpg)
Comanche SS
-
Posts
712 -
Joined
-
Last visited
Content Type
Profiles
Forums
Gallery
Everything posted by Comanche SS
-
.thumb.jpg.809559baf7c47f3daaed1622c0992004.jpg) Here's a photo Sent from my Pixel 3 using Tapatalk
Here's a photo Sent from my Pixel 3 using Tapatalk -
Yeah, I opted for all stainless hardware, hex button head 1/4-20 with washers and a washer nylock on the back, I cut the entire old bedside off along the outer line of the upper bed rail and used the stock bedside rail to mount them. ALong the bottom I made some brackets that mount to the frame in existing holes for the rear bumper and other random holes. I didnt wanna add any holes if possible along the frame. Depending how wide your stance is you might not wanna run the rears. Check out the ZONE MJ in the epic section on the forum. They ran 44's and even at that width on I think the 39s they had some figuring to do with the clearances. These bedsides are designed to allow tires to tuck inside the wheel well moreso. here's the link to the ZONE MJ Build:
-
Bingo, the prices are listed in hanneman website. Sent from my Pixel 3 using Tapatalk
-
It's inside the rear wheel well now. Sent from my Pixel 3 using Tapatalk
-
Potentially. Satofab made a sweet one years ago which I had on my old ls Comanche, but since they've come back in business it's doubled in price. Rear is likely gonna get a spare hanging out the rear of the bed to act as a bumper Sent from my Pixel 3 using Tapatalk
-
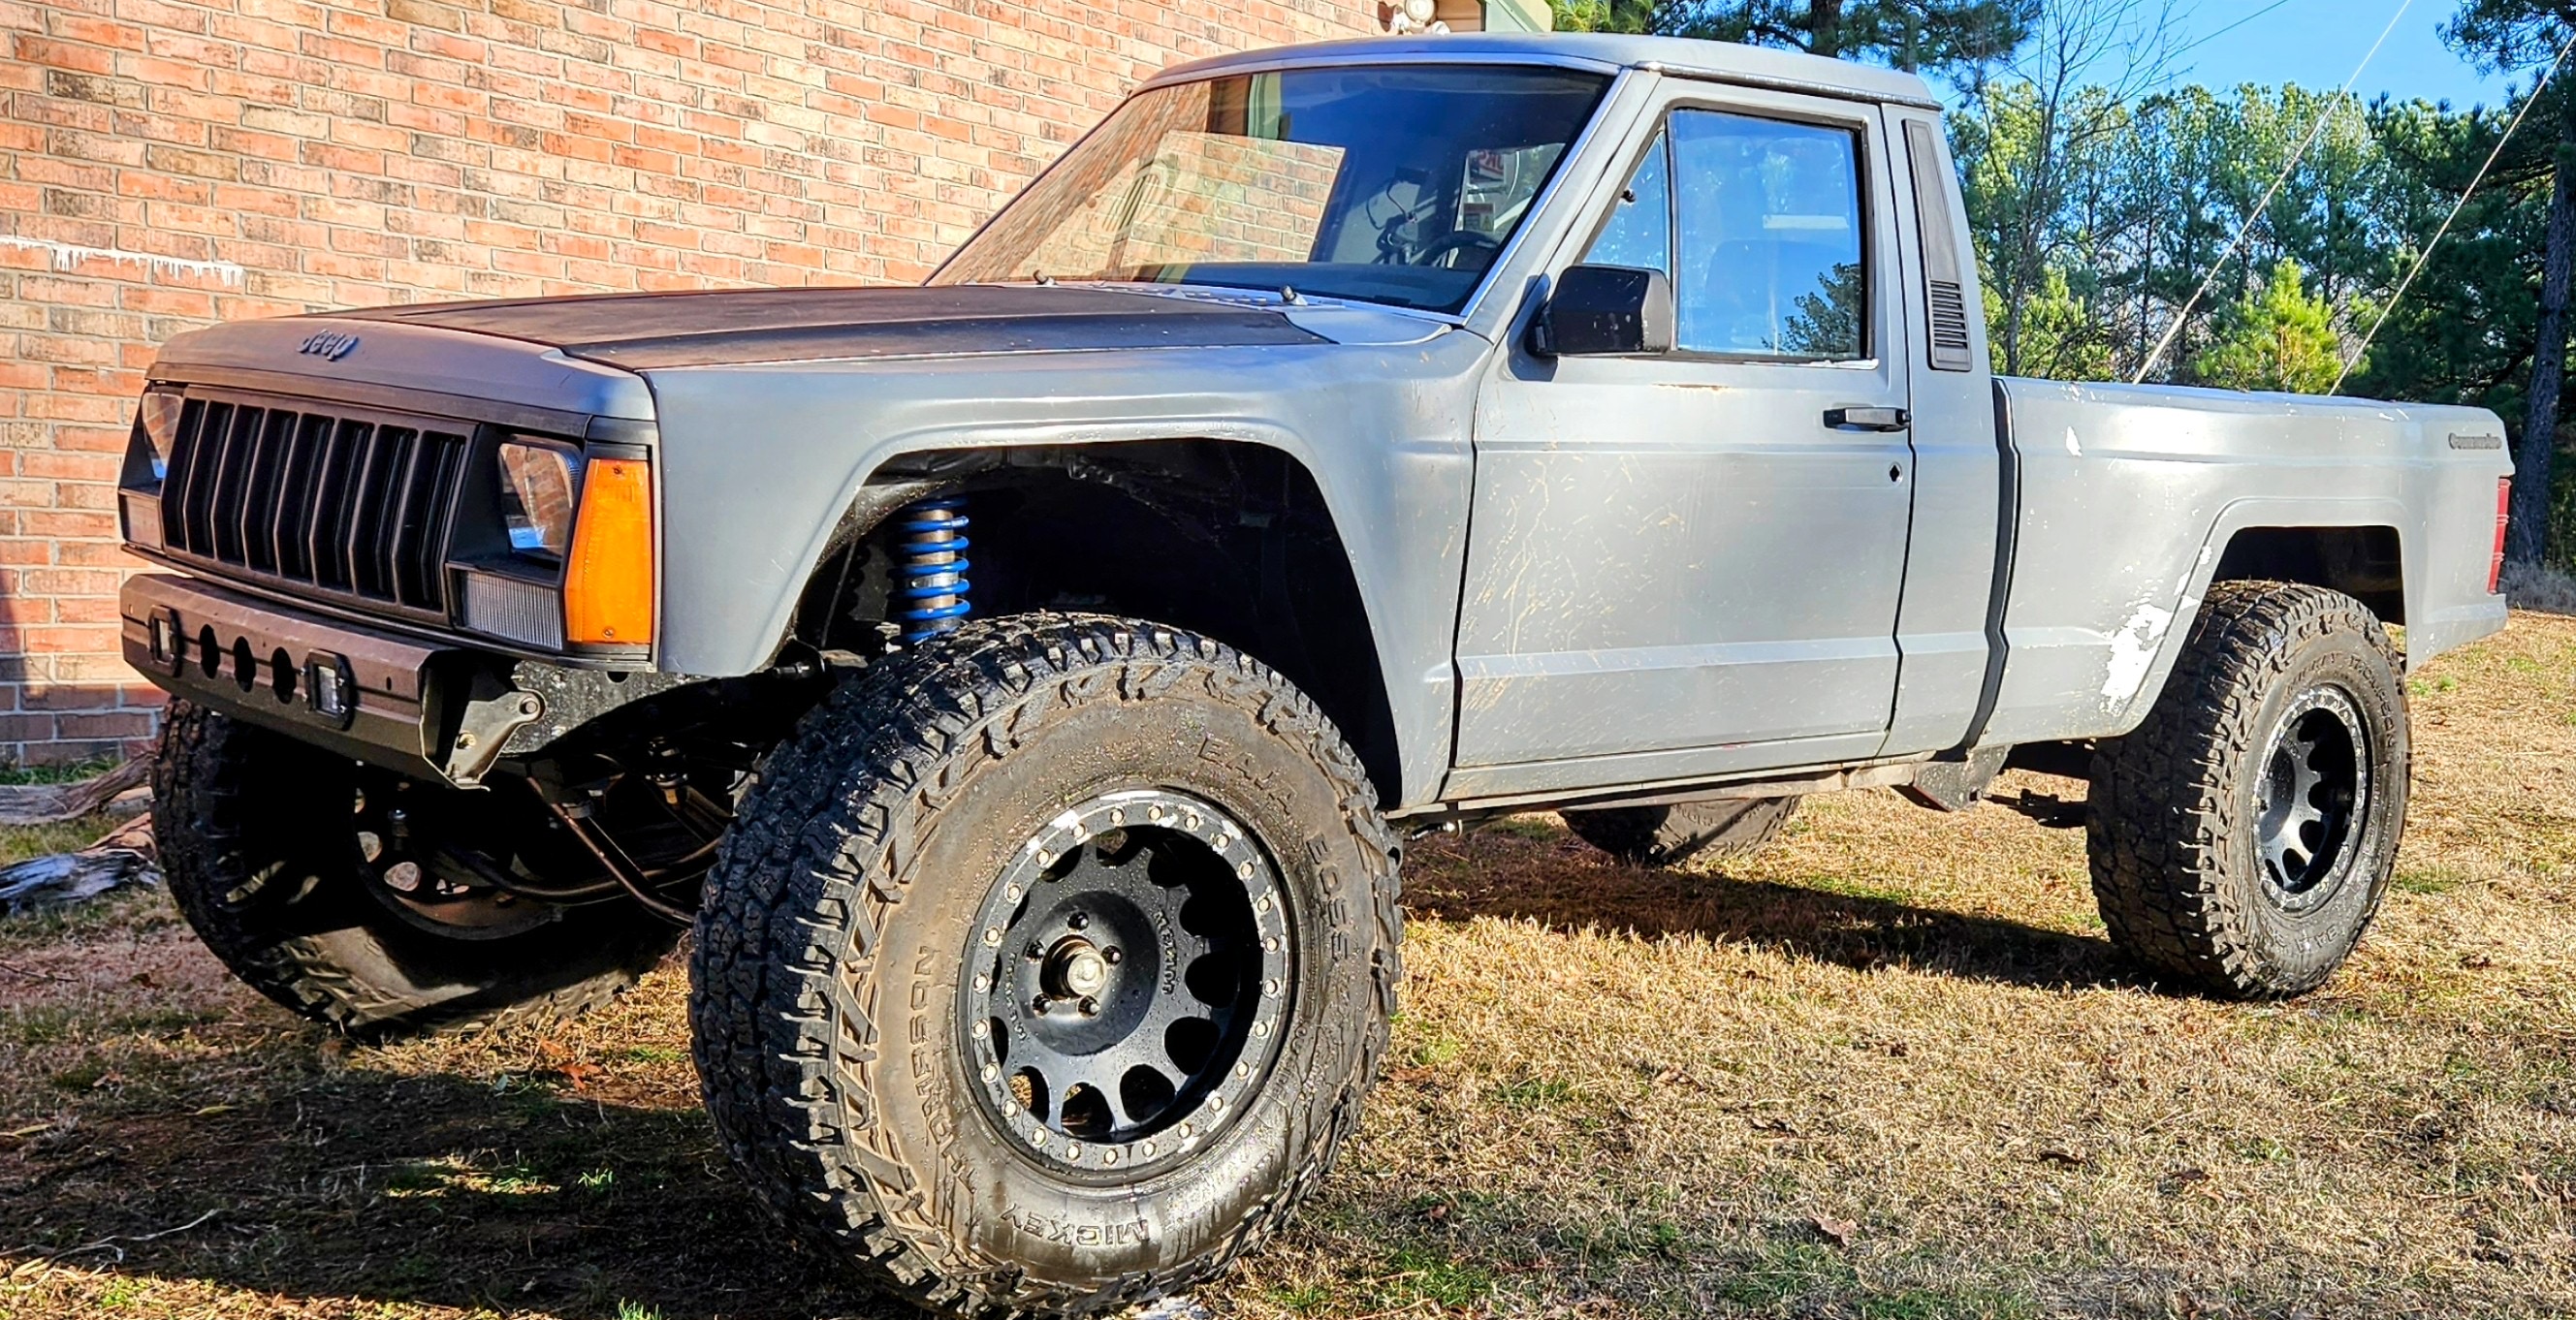
So finally it's all one color. it's far from done and not perfect. This was my very first auto paint trial, and it shows, so a little sanding and touch up here and there. Plus bed liner and inner fenders Wells all need to be done up. but for the first time in awhile it's all one color and I'm stoked on how it came out. Not bad for 95$ and a few days work! Sent from my Pixel 3 using Tapatalk
-
Thanks! Finally got the other side done today. Photos in next post. Sent from my Pixel 3 using Tapatalk
-
Another progress update, only a little more paint to go Sent from my Pixel 3 using Tapatalk
-
All stock springs, JKS adjustable spring spacers, Metalcloak Control arms, Currie sway bar, photo in beginning of build of all components
-
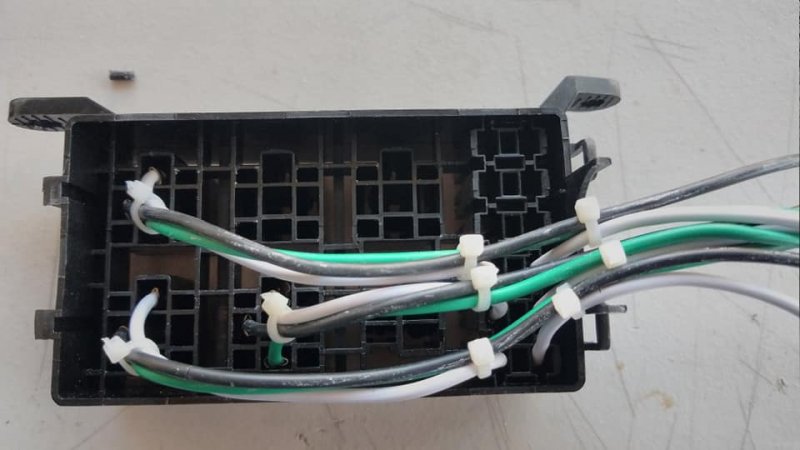
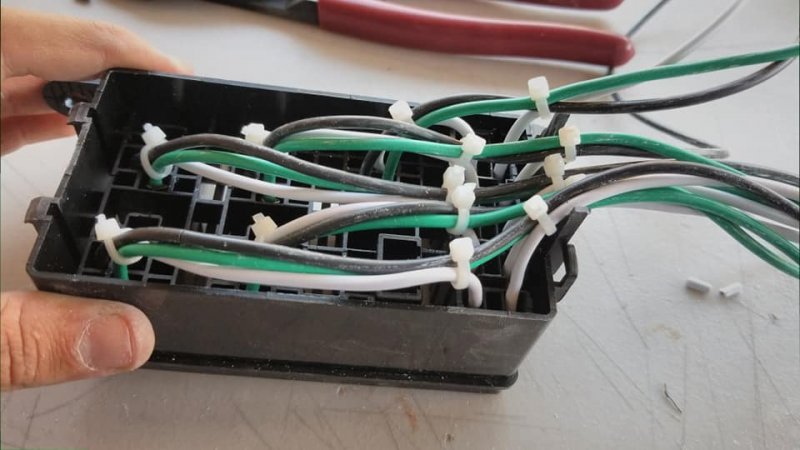
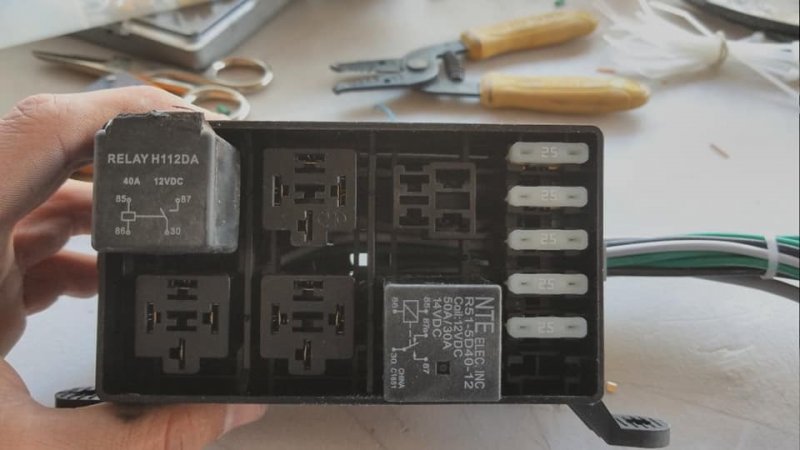
I am still here, truck is fine, I sure can build another fuse box or relay harness, I am most active on FB so go ahead and message me, my name is Chandler Gaines, I'm on all the big MJ pages.
-
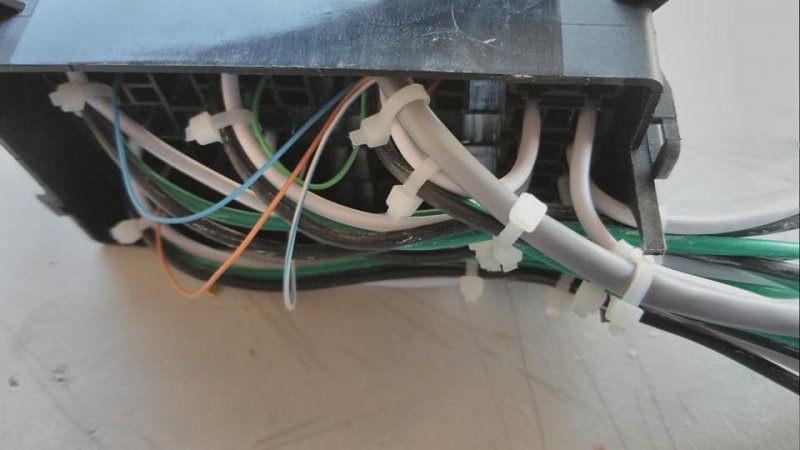
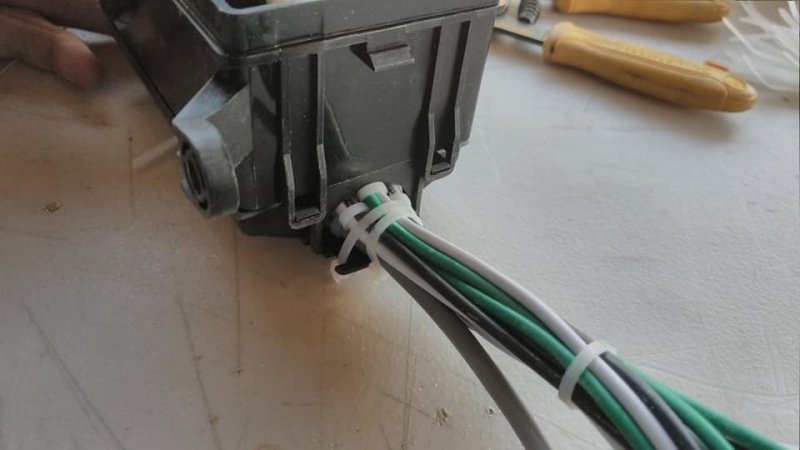
Thank you! And the cat5 cable is for the switch panel, all the signal wires are run through it rather than various designated wires. It's just for cleanliness Sent from my Pixel 3 using Tapatalk
-
Photo dump Sent from my Pixel 3 using Tapatalk
-
My process is pretty simple, just sand down, tack cloth and acetone then a medium heavy coat followed by a light and touch up coat, then a couple coats of clear Sent from my Pixel 3 using Tapatalk
-
Yep, Rust-Oleum special, this is my first ever job like this so I wanted to try and not overcomplicate it. Practicing proper prep and is not looking too bad Sent from my Pixel 3 using Tapatalk
-
more paint


-
Buncha 10mm nuts on the inner side Sent from my Pixel 3 using Tapatalk
-
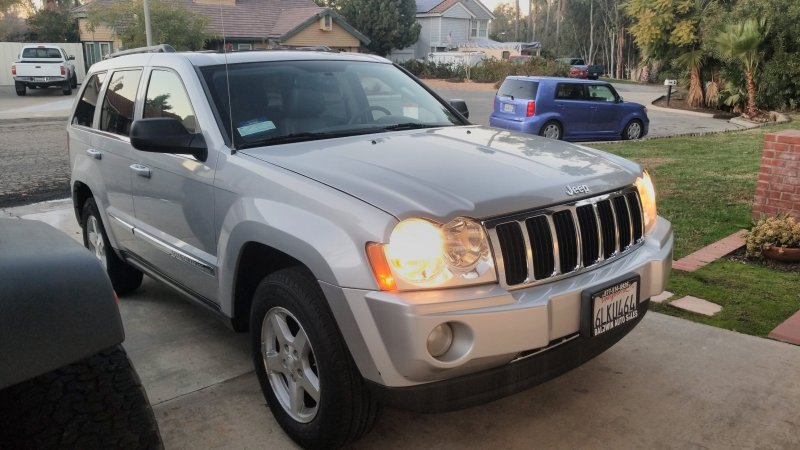
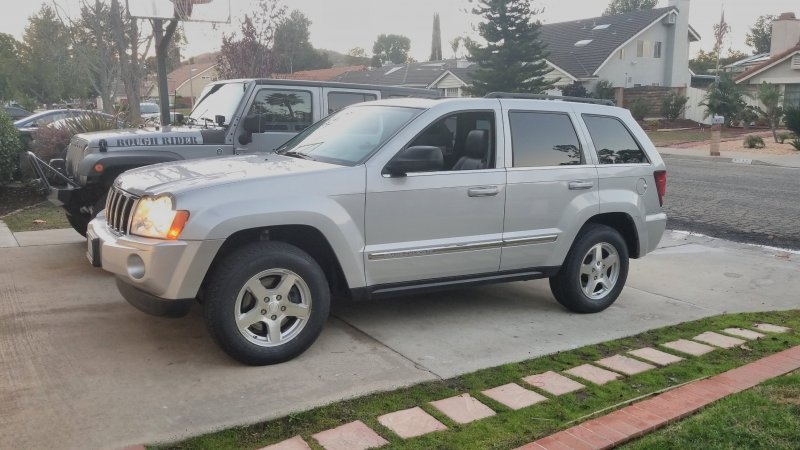
An upgrade in a sense to the MJ happened, It graduated to weekend/fun car since I got a dedicated daily. here's my 2006 HEMI Grand WK. Fully loaded, 130k miles, still on warranty, and a beast of a daily. Its immaculate, has all service records, not a blemish inside or out, it is really surprising that it has 130k on it, you would think it has no more than 10-15k based on condition of it. With a 7200lb towing capacity itll be able to lug around the mj with relative ease if or when the need be. Itll stay relatively stock; CAI, exhaust, stereo and maybe some paint on the wheels is all itll get.
-
Well just let me know! Sent from my SM-G955U using Tapatalk
-
If you'd like I can make you one Sent from my SM-G955U using Tapatalk
-
Now it looks like this! Sent from my SM-G955U using Tapatalk
-
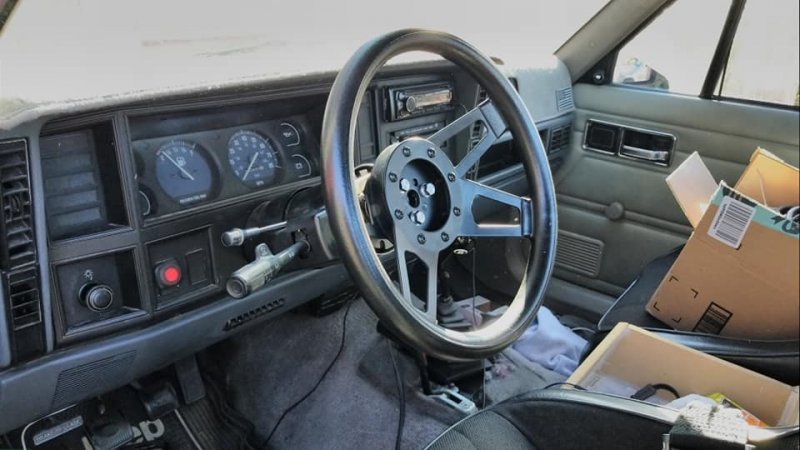
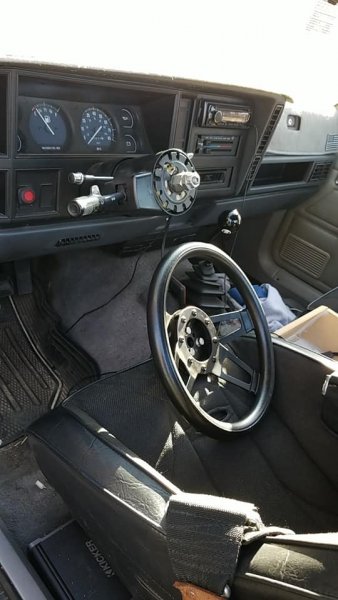
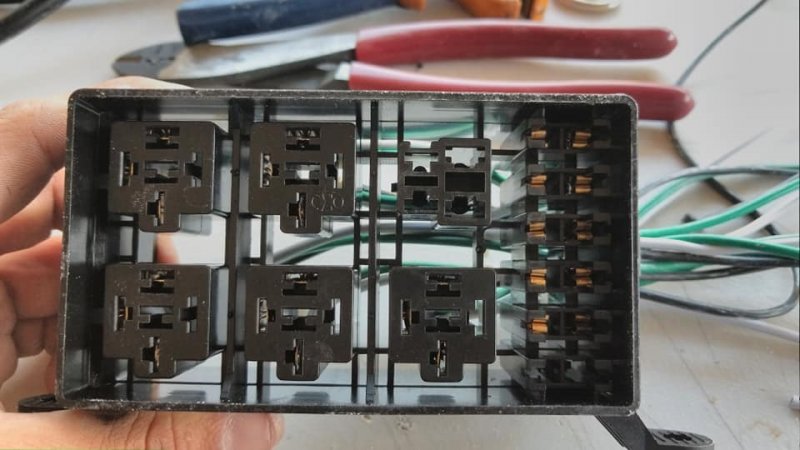
Another saturday used wisely. Started building my new harness. It is a 5 relay and fuse box. Every relay has its own fuse and it is al run off a single CAT5 cable to the switch panel. So only one cable has to go into the cab and dash as opposed to one wire per switch. Also installed my theft deterrent device.

-
Thank you! And that's the next decision after the axles are done Sent from my SM-G955U using Tapatalk
-
Already had a bike up there haha. Little scary going downhill with no sway bars and what not lol Sent from my SM-G955U using Tapatalk
-
When I lived in Arizona I bought it there, when I moved back to socal I couldn't fit it in the back of the XJ along with all my belongings so it stayed with a friend. That friend is wheeling in Johnson Valley this weekend and agrees to bring it if I met him there to get it. Sent from my SM-G955U using Tapatalk
-
Been a busy week. First and foremost I took the lady and the jku up to Johnson Valley to pickup my front axle I've owned for almost a year but didn't have access to. I bought it because it was too good of a deal to pass up at the time even though I had an XJ on rockjock 44s. But I knew one day I would have something that needed it. And here we are. So first photo is the housing. It's a 1979 F-250 Dana 44. This is the one with the 3"x 1/2" axle tubes. And normally it comes with the 8 lug outers that have dual piston brakes. But the same year F-150 Dana 44's have interchangeable outers. So I also got the 5x5.5 F-150 outers and single piston calipers. With this setup I'll net around a 66" WMS front axle. The F-150 of those years has a rear Ford 9" at a 66" WMS as well. So I'll be sourcing one of those soon. The next set of photos are my new rims. To anyone who knows broncos or F-150s of the early to mid 90's might recognize these wheels. They are a Ford and Alcoa partnership wheel. These are incredibly strong and super light. 15x7.5 in size with a 5x5.5 bolt pattern. With these narrower wheels, and wider axles I'll end up being pretty close to the same stance I currently have, but with a much nicer wheel to axle geometry and scrub radius. And much stronger axles in the end. I'll be running 35*10.5*15 all terrain tires either in the General or BFG flavor. Undecided yet. I'm planning to stretch the front a little for packaging reasons and it'll help out not having to reconfigure the front driveshaft also. Enjoy: Sent from my SM-G955U using Tapatalk