

dasbulliwagen
-
Posts
3804 -
Joined
-
Last visited
-
Days Won
3
Content Type
Profiles
Forums
Gallery
Everything posted by dasbulliwagen
-
I got mad skills bro!
-
Adding Goodies to the base model
dasbulliwagen replied to Sly_Jeeper's topic in MJ Tech: Modification and Repairs
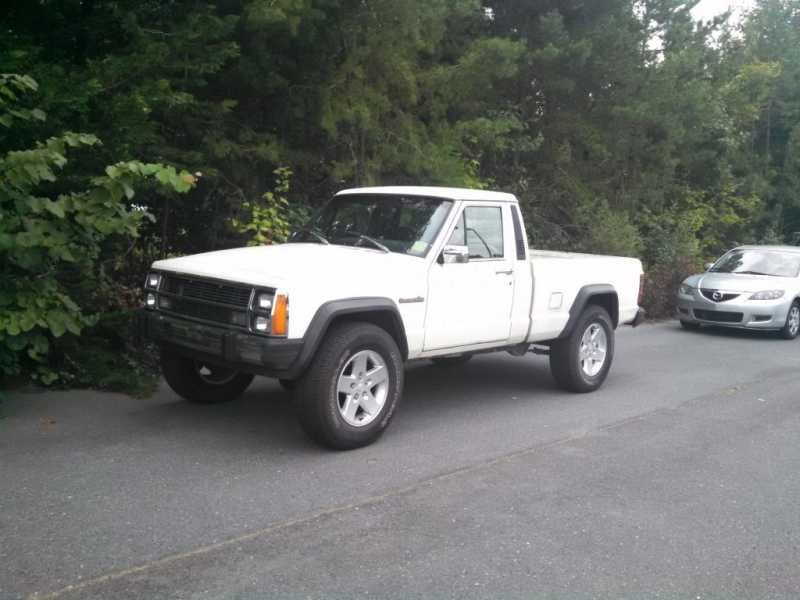
Mine was a base model Sportruck. Rubber floor, bench seat, 4 speed, 2wd, non AC, non P/S, radio delete, rear bumper delete. Ive added AC, P/S, radio, cig lighter, 4WD, 5 speed, 4:10 axles, rear bumper, hitch, Waggy header panel, power windows, power locks, vent wing windows, low ratio steering box, bigger sway bar, electric fan. That's all just OEM upgrade stuff, not including lift parts and custom parts. Its been fun doing all this. One of these days Ill run into the original owner and show him how far his truck has come from when I bought it, covered in tree sap after sitting for 4 years! -
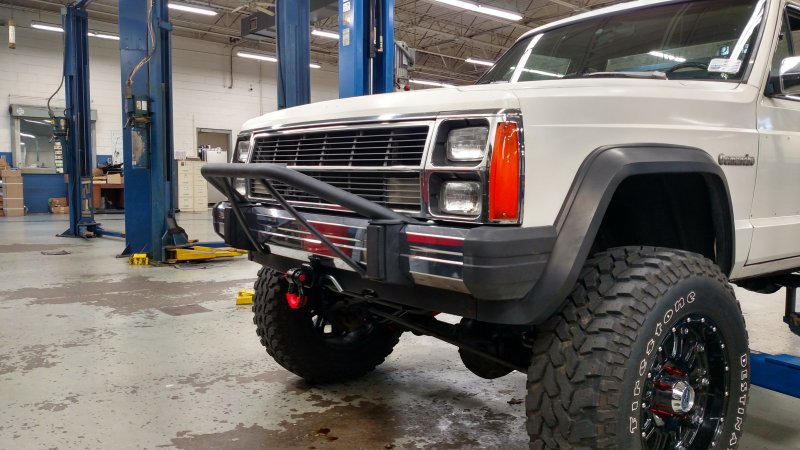
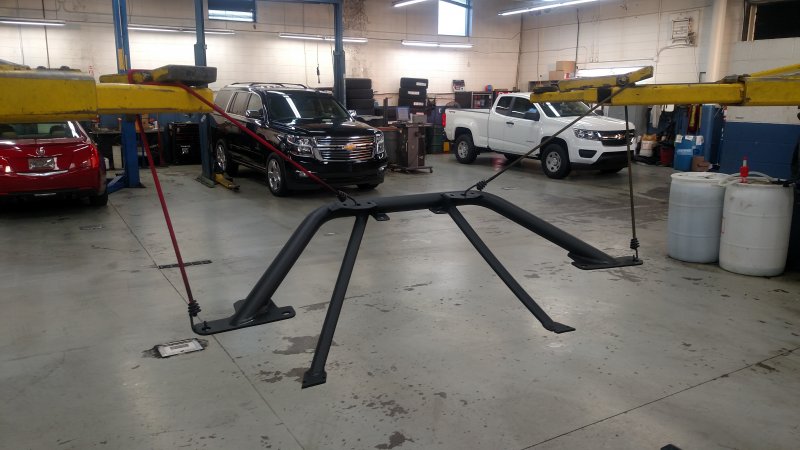
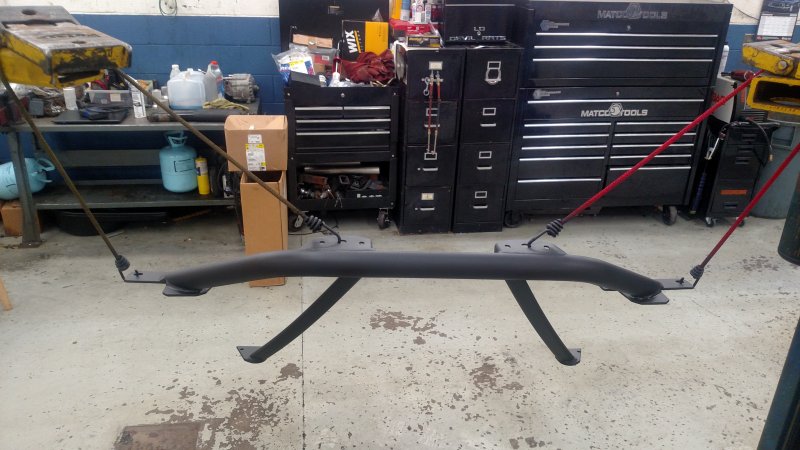
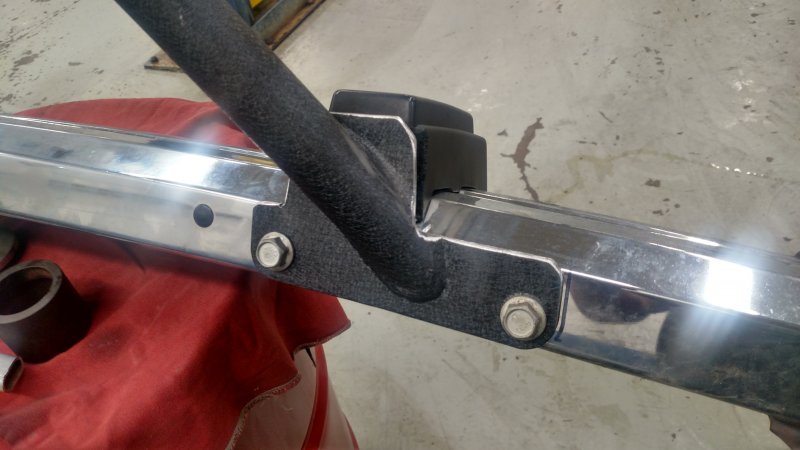
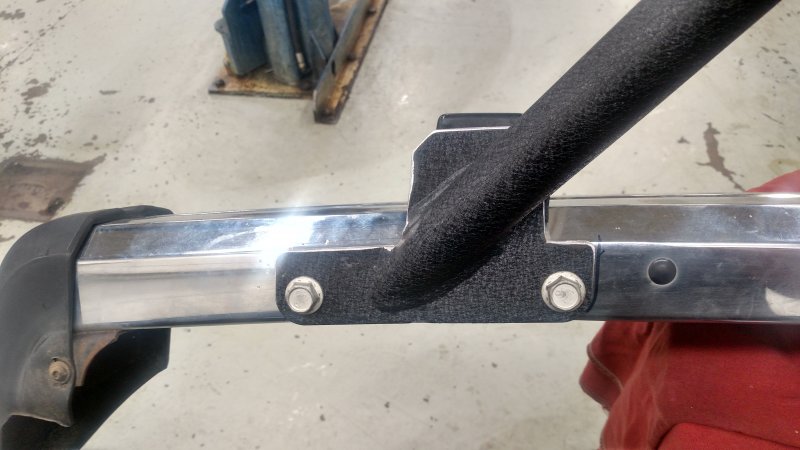
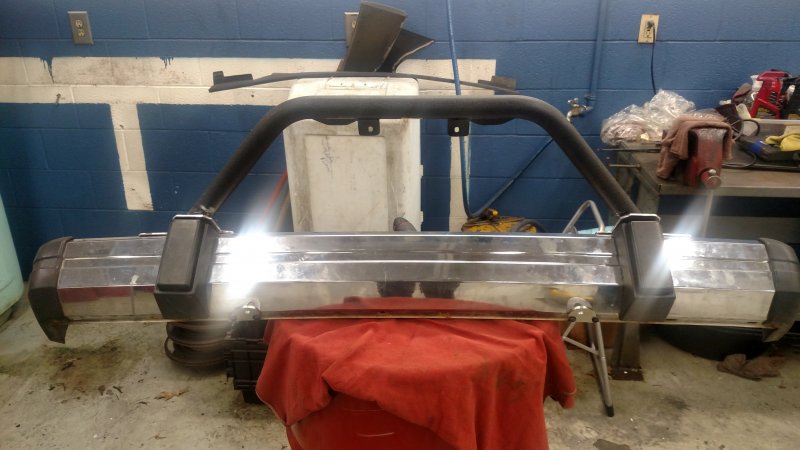
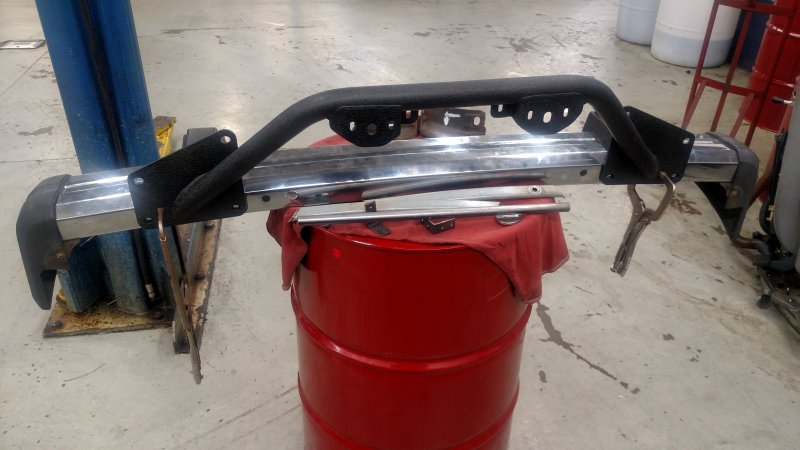
I got the bar welded up, and then sprayed it with bedliner so that the texture finish on the Smittybuilt bar and the bars I added would all match and be even. I did a test piece with red paint over the bedliner and the paint didn't seem like it wanted to fully cure, so it was scratched. Anyways here's the finished product. Next step is lights!

-
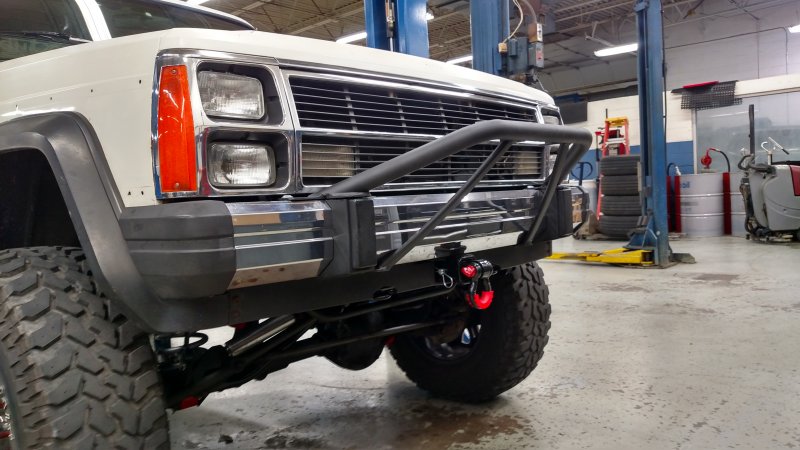
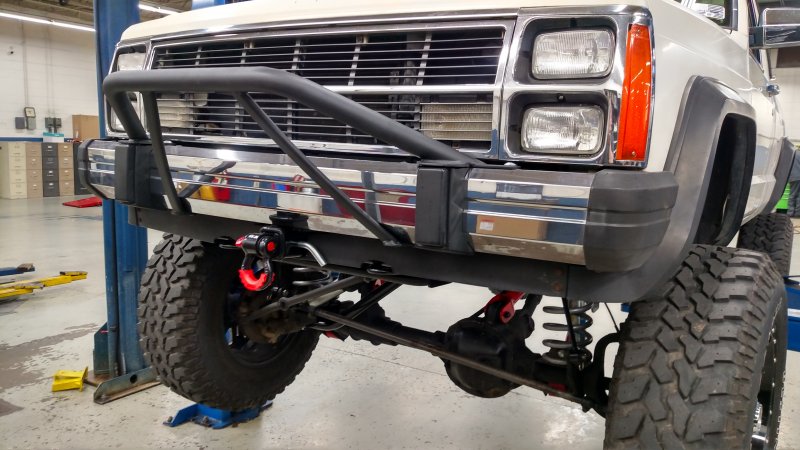
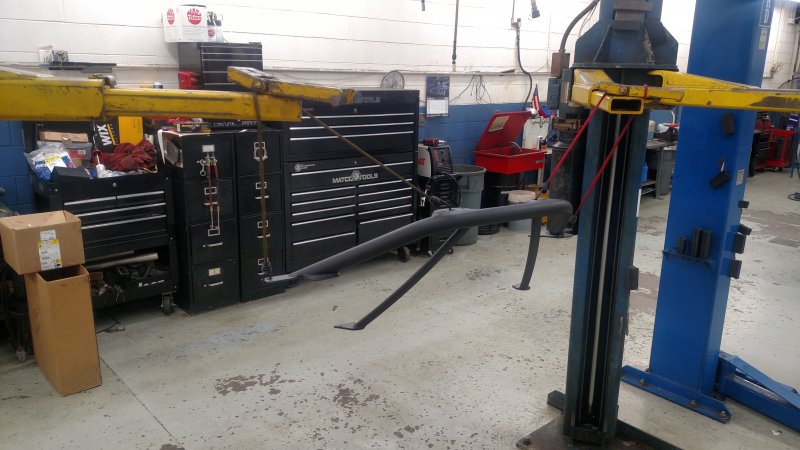
I finally got time to install the bumper today. For some reason I'm a little let down. It looks so much bigger off the truck, but installed, it just seems so small. Maybe I would like it better if it was red, but time will tell. It isn't going anywhere either way. Next step is the set of Hella lights I've had sitting around for 2-3 years. I'm wanting to convert them to LED at some point as well. Anyways here are the pics.
-
I got them on Amazon. They are made by Rubicon Express PN RE9921. I have extended, adjustable sway bar links, but even with them adjusted all the way out, when the truck is lifted the sway bar was contacting the bottom of my radiator (2.5L). I tried making some spacers myself but I didn't take into account the angle of the frame rails, so it obviously didn't work out. Then I saw someone on here had some installed and I searched them up and bought a set. They work perfectly.
-
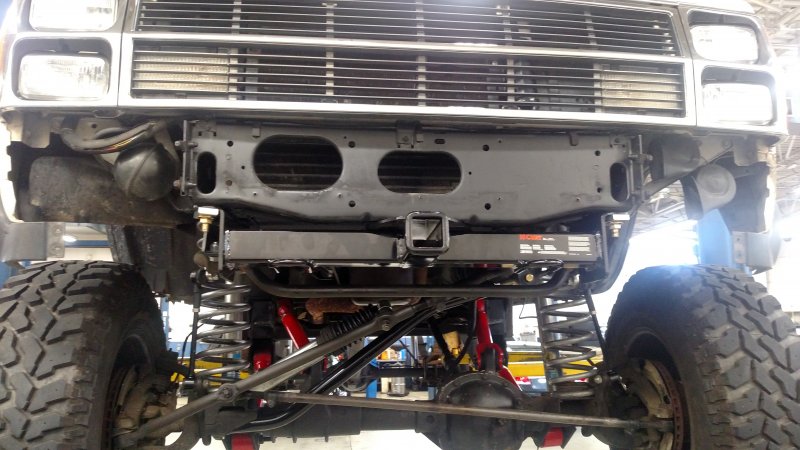
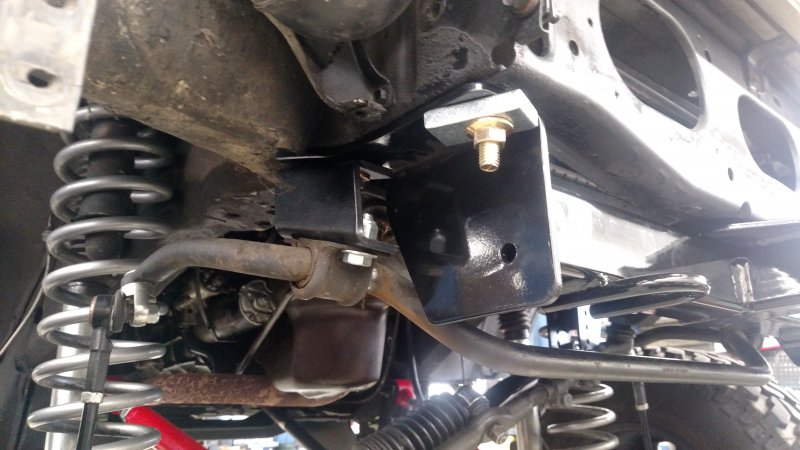
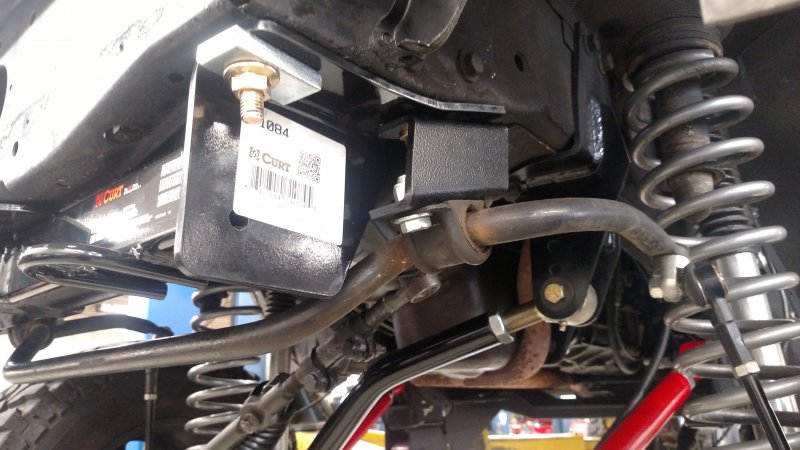
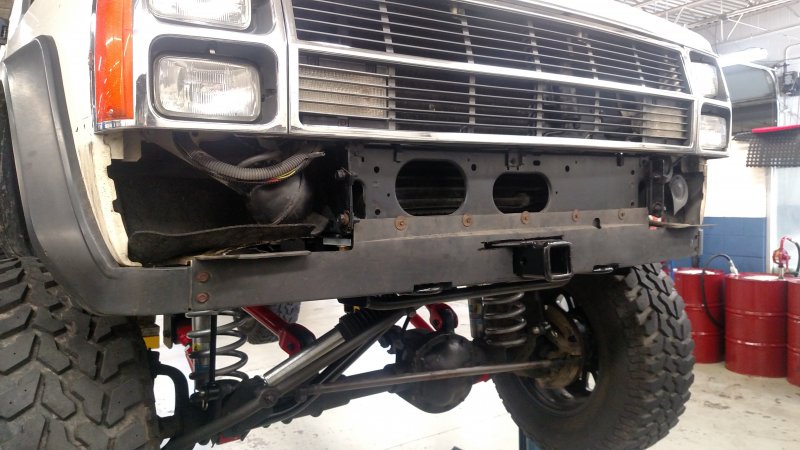
I didn't have enough time today to finish the bumper install. But I did get the front hitch installed, and the lower valance and support brackets. Here's pics of the progress.
-
I love your collection of Jeeps. What do the local people say about your love of old American vehicles? I'm sure those are quite the oddity in Europe. Keep us updated. We love seeing Comanches from all over the world.
-
Look for a nice set of JK or JL new takeoffs, a good set of quality adapters and hit the road. Here's mine with maybe 1 inch over stock with JK takeoffs. There are many different styles and most can be had at really good prices. Most of them measure right close to 32".
-
I've decided against the red right now. The red I put over the bedliner on my test sample wasn't fully curing, it was staying a little sticky. It will still look good. I'll just have to see what I can do to incorporate some red accents later. I'll have more pics after it's installed!
-
Bench seat cover and other things
dasbulliwagen replied to comanchefest's topic in MJ Tech: Modification and Repairs
The rear main is a two piece seal and can be changed without removing the transmission. Youll probably want to do the valve cover gasket too as oil can run out the back of it and then down around the bellhousing looking like a rear main leak. Theres no reason to upgrade the whole shebang just for that reason, unless youre really wanting to do it for other reasons. I'm not sure on the others, I'm sure others will chime in and let you know. Welcome to the club, thats a really nice truck! Make sure to add yourself to the registry page and theyll get you a build sheet! -
I added dual horns to my truck when I did the Waggy header, I spliced them both to the stock horn wire on the driver side..... then I found the second horn wire already there on the passenger side.
-
I finished the welding on the bar supports and primed all the bare metal parts and sprayed the whole thing with Rust-Oleum bedliner. I mostly did that because of the texture paint on the Smittybuilt bar not matching the smooth support bars, so I wanted to even it all out. I'm still considering going over the bedliner with red paint and I set up a test piece to check and make sure there won't be any issues between the different coatings. I hope to have it installed Saturday. Here's a couple pics until then.
-
Yeah, I understand the quality issue... its obvious how good they are just looking at pictures. Its just hard to justify that much cost for something so relatively simple. Another example would be the aFe cold air intake I'm wanting for my WK2. Just looking at it you can see a lot of time and thought went into its design, not just a couple tubes and a cone air filter. And I know the same time and thought went into the Currie and Synergy steering, but its just easier to justify the more complex part, even though I still havent bought that yet either because of its cost. The Currie and Synergy setups are ideal to me, I guess Ill just have to start saving my pennies!
-
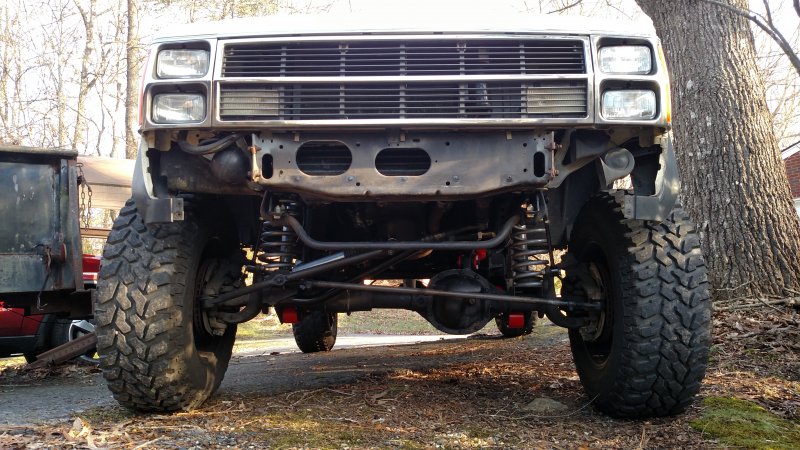
I'm at around 6 inches, on 32's. Core4x4 control arms and track bar, RRO drop brackets, RE springs. Steering is stock now, but showing signs of wear, I think whats on it now was just cheap Autozone stock replacement stuff. And I have to tell you, I'm not paying $500 for two tubes welded to 4 joints. I don't knw how they can justify charging that much for some of those systems. I'm even scoffing at the $300 ones I'm seeing on amazon, which is where I'm seeing the mixed reviews and the flop/deadspot issues. One guys is even saying his deadspot is half a turn on his steering wheel!!! My truck isn't an off road monster, If it even ever gets off road, but I'm trying to upgrade and do stuff right for if I ever get the inkling to actually do it. I'm mostly just afraid of breaking something and then not being able to afford to fix it. This is my second/spare vehicle and home improvement store go gettter, so I depend upon it regularly to actually be a pickup truck.
-
I've been looking into crossover steering recently, and I keep seeing complaints of of a deadspot due to linkage flop. I know they sell a spacer/limiter to install on those to limit the flop, but some people still complain that over time, the flop gets worse even with the limiters installed. What are your experiences with this type of steering good or bad, and if there is a particular brand you might recommend? Thanks for the input guys!
-
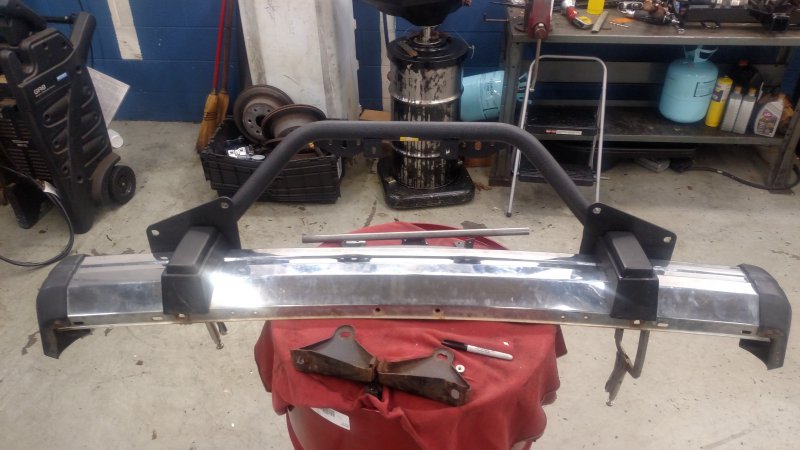
I got the mounting plates trimmed and the holes drilled in the bumper today. Next step is to weld the support bars on. Then I need to decide on paint color. I'm thinking bright red. The long term plans for the whole truck is a white, black, and red theme. I already have red tailgate letters and red backed emblems to put on it after paint. And I have red bullet lug nuts on the black wheels. Anyway, here are the latest pics.

-
As the title says, I'm installing a Smittybuilt light bar on my stock front bumper. It's not a bolt on ordeal, as the light bar was made to bolt onto a Smittybuilt bumper. That means the mounting plates are way too big, but the nice thing is that the mounting plates are made to match the curve of the factory bumper just as the Smittybuilt one does. I have it clamped to the bumper right now to get placement right and I'll be adding two support bars to the lower edge of the bumper to keep it from flopping on top of the stock bumper. I just need to drill holes for the light bar mounting and then weld in the support bars which go down to two bolt on tabs I made into existing holes on the bottom of the bumper. I'll update and add pics as this build progresses.
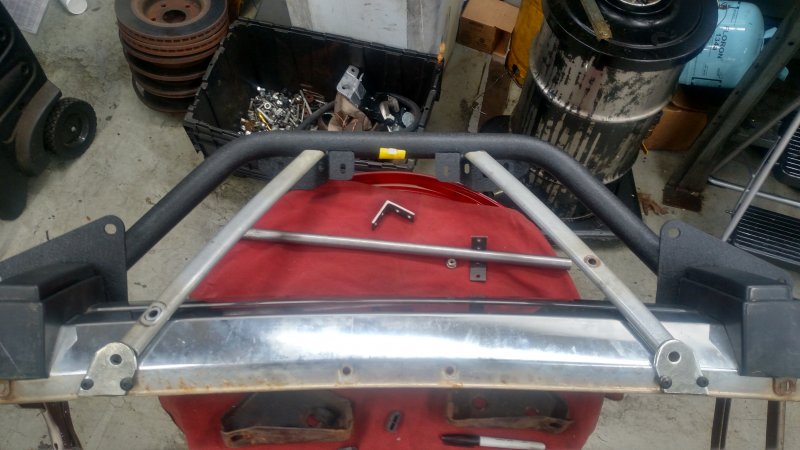
-
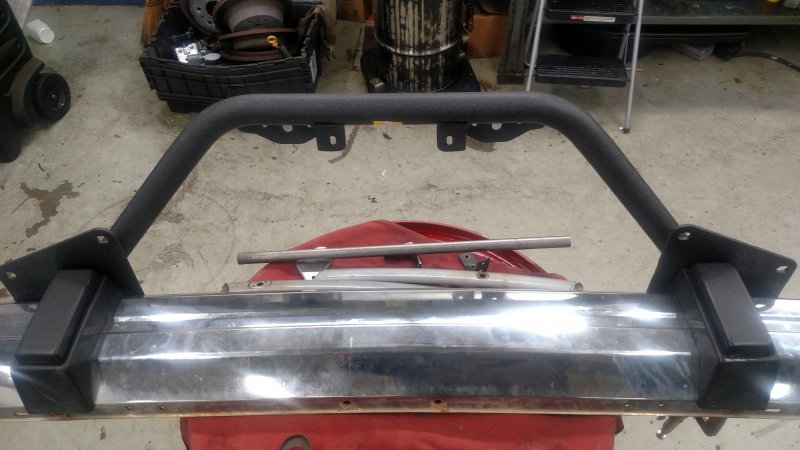
More pics of progress on the bumper and light bar. I need to drill a few more holes and then I'll be ready to weld it together. The last pic shows the grey support bars I'll be welding on to keep it from flopping. Then I'm contemplating painting it RED!
-
I always assumed there was a team of highly qualified Comanche experts that poured through the build threads on a daily basis to look for each months most deserving candidates. I never knew you wanted people to nominate themselves. I felt weird doing it myself, like, who am I to to nominate myself for such an honor! All I can say is, I'm glad you asked and I appreciate the honor. And to all of you reading this, you should do the same. Let's not let a month go by without an MJoTM!
-
Adding A/C Technical Thread
dasbulliwagen replied to drcomanche's topic in MJ Tech: Modification and Repairs
I'll see if I can get a pic of the dealer installed plug for you tomorrow. -
February 2020-dasbulliwagen’s 87
dasbulliwagen replied to 89 MJ's topic in Comanche of the Month (MJOTM)
Awesome!!! Thank you so much. This means a lot! I want to thank Pete for this awesome site which has helped and encouraged me the whole way. And to all the other fantastic builds that never stop giving inspiration to us all. Thank you -
I have the front bumper off now to install a front hitch I got for Xmas 2 years ago. And this last Xmas I got a Smittybuilt front bumper light bar..... Made for a Smittybuilt bumper. While the stock bumper is off I'm going to modify and install the light bar before putting it all back together. I'll have pics next week. Then when it's all together I can install the Hella lights I got 3 years ago!
-
Adding A/C Technical Thread
dasbulliwagen replied to drcomanche's topic in MJ Tech: Modification and Repairs
When I did mine on my 87 with an 86 donor, all the dash wiring was plug and play. On the engine compartment side, about half of the wiring was there including the relay and the orange compressor wire. But there was also an unused connector for dealership installed AC. I saw that in the downloadable 88 FSM and found it on the left inner fender of my truck. I then built the part of the harness I needed from the diagram. It worked and I've never had an issue with the electrical side of the system. -
There are a few things on Amazon too, but I'm not sure they are officially licensed or not.
-
Ive been on here since '08 with my truck. I know it isnt anything wild or special, but it has come a long way, and we're still going!