

daking
-
Posts
387 -
Joined
-
Last visited
Content Type
Profiles
Forums
Gallery
Everything posted by daking
-
looks real good, clean n tight. they tucked that that tip up there.
-
looks good. I my buy a set. I just got me a set of restored factory taillights, so I would want something that would allow those the remain.
-
Some up dated picks. really only got the down pipe done, so far.. Flex joint, 2.5" pipe. Image Not Found Image Not Found modified pace setter header down pipe. cut it, and welded on a new 2" X 2" to 2.5". Made new 2.5 mandrel bends. [url= Image Not Found[/url]
-
I did a dump before the rear axle on 600+ HEMI. Came out nice. 3" header to 3X3 to 4" Y pipe, then 4" dump, to a muffler with 4" in / out (5" internals) and turn down. Used band clamps to make solid seal, and allow quick removal of exhaust (for replacing transmissions) I changed the design a bit from this image, the 4" cutout opens on the straight exit of the Y, and the muffler is connected to the bend of the Y. So when the cut out is open, its a straight shot. Image Not Found the first dump is electric cut out, just past the muffler, you can see the turn down if ran through. Image Not Found Image Not Found Image Not Found band clamp Image Not Found audio of exhaust, closed.
-
Looks good, Yea, I'm doing a through the bed too. A little different though. I went with a muffler that has the in and out on the same side, so I can install it further back. It'll set under the bed, higher out of the way. And being a bit further back will help in weight distribution. (The tip is just setting there, for the picture. The final product will set in more, angled down n back) Image Not Found
-
I was looking forward to this show. Disappointed. 1. the rigs wore real low budget. You would think if you wore going to cross Alaska, you would build a decent rig. 2. fake drama. Clearly they made things out to be way bigger then needed. They wore basically making up issues (both in the trucks and between people) 3. Off Roading. They again over drama the trails. There was a scene with a hill, they acted like it was some un climbable hill, yet it was just a dirt road, going up a hill. For the most part, I'm sure an all wheel drive subaru would beat em all on the trails they took. (there was a mud pit, that was the worst thing they drove through).. Heck, I drove a mini van through harder stuff. I was hoping for some real off-roading. Some real trail breakage and fixes. Maybe some drama between racers. better built trucks. There wore many scenes that wore clearly blown outta proportion. Maybe it'll improve..
-
Project "Comanche Country"
daking replied to cjvaughn's topic in MJ Hardcore Tech: Epic Journeys to Greatness
looking real good -
I'm talking about this factory adapter. I'm wondering if they make one with more ports, or if anyone has tapped a new port in. I may pull one from the junkyard and tap dat.
-
I may have asked before.. I'm adding a second oil pressure gauge. The 4 or 5 sided adapter currently on the engine houses the factory sender. is there another adapter like that with 2 / 3 ports? or, are most of you using a T off that factory adapter to fit 2 senders? thanks
-
great, thanks man
-
anyone know the size of the steel hose used for fuel return? The main fuel line is 3/8, is it 5/16? Also need the size of the return on the fuel rail, I would think the same size. Thanks
-
Alexia's 1987 To 1997 Comanche
daking replied to Alexia's topic in MJ Hardcore Tech: Epic Journeys to Greatness
great build. I have a few fuel system questions. What AN adapter did you use to connect to the fuel rail? How did you connect the braided hose to the factory hardline? is that -6 hose? Are you concerned about pump life / stress with no return line? Thanks -
Options for Camera(s) for Maintenance
daking replied to kazam's topic in MJ Tech: Modification and Repairs
A few years ago, I mounted a camera to try and capture an issue. Did not work as well as I had hoped. I think a modern go pro with stabilization would do better.. Wheel hop issue. Slow mo launch. When I raced heavily, we would film everything. Review it later. like reaction time, wheel slip / spin, shift points, and much more. Including our competitors. Also had data logging. So, using a camera can help. I'm sure the tech has improved too. -
Rear under bed Mounted Battery
daking replied to daking's topic in MJ Tech: Modification and Repairs
Here are some of the engine bay pictures. Main Distribution, relay center, fuses, circuit breaker. Image Not Found Image Not Found Image Not Found -
http://www.jeep-occas.com/actualites-jeep/plus-speed-que-speed-175.html Truck motor SRT Intake (or whole 425HP SRT Motor)
-
Yea, the HEMI engines are large, the heads are huge. They fit WK's, but its a real tight fit. I'd have to find it again, but I did see an XJ with a modern Hemi, it was an early (04~08) truck engine. They had to cut the hood, to allow it to fit. On the truck engine, then intake puts the throttle body at the back of the engine. If they put on a car intake, or an SRT intake, the TB is in the front. The hood would still need cutting, but, I'll bet a cool looking scoop could solve that. I'll look for it again, I recall it was a first gen HEMI, 345HP. So only ~50 to 60HP over a stroked 4.0. More weight (over all, engine, trans, transfer case, supporting cooling systems,,,), would make that swap kida not worth it. If I did it, it would be a mild build. Also, you can actually get a HEMI with drive-train & computer for less then $2000 (from salvage yards)
-
I was considering putting a modern HEMI in my jeep. A mild build ~450 or so HP. I decided to go with a fully built I6 instead for various reasons. I've built a few modern HEMI's, and have quite a few parts laying around. I have a 600+HP HEMI in my other 4X4, its insane. But with this build, I wanted to go a different direction. I may toss a HEMI in Comanche in the future though.
-
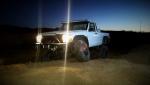
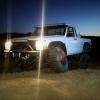
Building my exhaust. I decided I wanted to run the pipes and muffler high in the frame, and have nothing exit under. So I cut a hole in the side of the bed, and ran exhaust there. The muffler will mount high under the bed, just in front of axle. Its a same side IN / OUT. Its a larger muffler, for a deeper sound. I'll be putting an 8" flex pipe near header to prevent header cracks. I'll be wrapping the headers (already done). And wrapping most of the exhaust piping. For a few reasons, one the pipe runs near the transmission and I want to keep heat down. And the hotter the exhaust gasses the better the flow. An Exhaust that runs too large of a pipe, or too long of a pipe will have issues, as the gasses cool. (Its dry where I live, so I'm not worried about rust due to moisture in the wrap) I'm going extreme on the mounting too, to insure proper weight, and strength. multi rubber isolators. (Exhaust is not not done, that tip is just hanging in these pictures) Image Not Found Image Not Found
-
Rear under bed Mounted Battery
daking replied to daking's topic in MJ Tech: Modification and Repairs
Thanks everyone for your all's ideas and comments. I go through many design aspects when doing a project, such as a battery relocate. The 2 major concerns is battery mount and securing, and electrical. Battery Mounting: This includes location as well mounting. The further back the battery, the better for weight distribution. Lets say the battery weighs 50#. If you put the battery exactly over the rear axle, the effective weight is #50. The further back from the axle, the more the effective weight. For example, putting a 50# battery ~3ft behind the axle may net an effective weight of #65. So removing a 50# battery from the front and putting as far back, actually equates to losing more then #50 in the front, due to weight transfer. So finding a safe spot as rear word as possible is what I look for. I also tend to mount on the passenger side. The mount needs to be extremely solid, any vibration will cause failure in the future. So I opt to use cross braces as well as down hangers. Keeping the battery tight in the mount is important too. This install will have 2 methods of securing the battery to the tray. This way, If one fails, or something pop's there is a 2'nd secure mount. On the concept of moving weight to the rear, on this Comanche. A 4X4 will handle better if the front and rear have good weight. The Comanche truck is light overall due the uni-body. But the rear is very light, when compared to other trucks. AMC / Chrysler knew this, that's why the "brake proportion valve " is on the Comanche. It's not a nifty feature they put on for sales, its a safety device. It was added cause in testing, during hard braking, the light rear would cause issues. It was a solution to a problem. I'm relocating many parts to rear to help with balance. Including, Battery, Air tank, Air-compressor (s), Transmission cooler, spare tire, and some other little items. Electrical: When relocating a battery, there are many things to take into account for the electrical. Including loads, main cable safety, ground, and so on. First the loads, In order of power usage: 1.Winch 2.Starter 3. Alt (yes, you need to insure the alt as good connection with battery) 4.Fans 5. factory wiring (if you have a sound system, that would be ~1 to 3 in this list depending on amp's. In my case, I'm running a dedicated cable to the battery from behind the seats) Winch, this was a concern for me. A winch will suck some real power, and it'll heat up. Both the electrical cable and motor will heat up fast with usage. As a winch heats up, its power to work ratio gets worse. It'll take more electricity to run a hot winch then if it was cool. Picking of the main line cable was based on winch usage. Welding cable is made from near pure copper, and is made of very fine strands. So it conducts electricity extremely well. The size the cable I went with is about 5/8th thick. It's much larger then the cable that came on the winch. In my application I don't plan on pulling many people out. ( I didn't buy the winch for me, I got it for the others like Hummers that get stuck, come on man, Comanche don't get stuck :) ) If winching is going be used heavily then maybe keep a front battery. But, also keep in mind, many add a winch the the rear, so they are running on a long run. To be honest, I'm not sure of the long run effect yet. This is my first rear mount battery with a front mounted winch. But I feel really confident the cable and design will be fine. The starter is the normal front big load on a truck. The lines feeding the starter will all be larger then factory. The alternator is actually something many skip or don't think about. Well it's not taking a load off the main feed, it is dumping a load. It's important to insure proper cable size for distance. In this build, I'll run a larger cable from alt to a distribution block in the front. The distribution block will have the main cable, Alt, winch, factory fuse block. On another build I did, I had to run 4AWG from the ALT, directly back to the battery location. Due to the amount of juice the alt pumped, and for the kill switch. On that truck, cause I race it, it has a battery kill switch. But when testing, I found the Alt was making enough juce the keep the 600+HP HEMI breathing when the kill switch was engaged. So I had to run the alt line to the rear too. No plans to do this on the jeep. It just adds failure point's. Grounding is actually the one main thing people forget or don't focus on. If your positive cable is 3" thick, and your ground is some lame cable, barely bolted, you will have issues. This is very common in car audio installs. The installer will focus on positive power, thick cable, slick distribution blocks, pure copper fittings. Then they'll run some cheap ground cable to a bolt.. lame. I actually apply more effort to grounding then positive. In this build, there will be a large cable bolted the frame (uni-body) in the rear near the battery. And I'll be running a smaller ~4AWG cable to front the a block mounted on the body. Grounding cables will connect the body, engine and transmission, to insure a strong solid ground across the truck. -
I thought about connecting to the intake instead of a stand alone filter. I decided its best with a stand alone filter. Connecting to the intake tube would apply a small vacuum to vent hoses. Giving the parts a slight negative air pressure. If there are any small leaks in any part, small amounts of dust or water would be pulled in over time. So, I decided on a dedicated filter.
-
I just finished the mount for my rear under bed battery. The mount is supper strong, can't budge it, so It'll support the battery no problem. I had to weld extra supports to stiffen side and forward. I move the battery to rear on most of my off-road trucks. Better weight distribution, Cleaner engine bay. I'll be running 0/1 Welding cable to the front. Welding cable has a high copper content, un like auto grade cable. There will be a rear emergency cut off switch too, I'll put a distribution block up front for the power. Main input from battery, large gauge out to wench, 8AWG to starter, 8AWG to factory fuse-block, and 8AWG to custom fused relay center. And a fused 8AWG cable from the rear battery, popped up to the rear behind the seat for audio. Image Not Found Image Not Found
-
I put together a few parts to allow 3 hoses vent. Transmission, Transfer-case, and Front Diff. Feed to a distribution block, with a small filter. Mounted high up on the firewall. Image Not Found
-
Rough Country Long Arm Install
daking replied to joester1908's topic in MJ Tech: Modification and Repairs
looks good. Does the kit come with the transfer case skid, or is that an add on? Have you driven with the long arm installed? -
good looking build. I may steal some of your ideas