


joester1908
-
Posts
227 -
Joined
-
Last visited
Content Type
Profiles
Forums
Gallery
Everything posted by joester1908
-
Bending Dana 30 back to correct position
joester1908 replied to Jacob Ochs's topic in MJ Tech: Modification and Repairs
It might be worth a shot, but id just look to replace the axle. Is there any other damage from jumping it? -
94 XJ Buckets/MJ Brackets ?
joester1908 replied to PEEJ's topic in MJ Tech: Modification and Repairs
Should be able just to switch the brackets. Unfortunately, I swapped out my bench for buckets, and my brackets were rusted through and not structural at all. I should have kept them, but I didn't. Hindsight is 20/20... -
x2 on Castrol 10w30. I run high mileage Castrol in my 4.0 and in the 2.5 when we still had it. Year round, but I'm in Western WA, it doesn't get super hot or super cold. Just rains :laughin: I have found some killer deals on eBay for Comanche stuff. Like they said, the junk yard is a great place to look if you need something that day, or if its something that can come off a Cherokee. Anyways, welcome :thumbsup:
-
my 90 has the cable too. They call it a "long shaft" speedo gear, and they call the electronic ones "short shaft"
-
That's really what I'm leaning towards right now! hahaha
-
Also, I finally got a new CB and Coax. I'm running a Firestik antenna mounted on the roll bar, 18 feet of Firestik Coax, and a Midland CB. I got a short in my last Coax, and it fried the radio. Well now I hooked this new setup up and I can't get my SWR right. I'm getting about 2.0:1 on channel 1, 1.1:1 on 19, and 2.1:1 on 40. That's about the best I can get it. I was reading that it could be from lack of ground plain? But I thought the cab of my truck did that? I don't know, my old CB tuned ok. So I put my dads 4 foot firestik on and they were all between 1.1:1 and 1.4:1 so I'm leaning towards my antenna being bad. I guess I gotta figure that out...
-
So I started my sliders. To start out, I made a template with 4 2x6 pieces of 1/8th inch steel to make the caps. Here it was when only 2 were cut. Then I used the bench grinder to round the edges off Here's one of the pieces of steel I bought. 10 footer. Gonna have to cut it to the right length, but as for now, just welding on one of the caps. They sat outside at the steel yard, so they're a little rusty... The ground clamp for my welder is pretty small compared to the box steel. Simple solution: Ok, I just wanna say I'm not the best welder. I've done a bit here and there, but I'm definitely not a professional. For these, I want to grind them down smooth and have it look like it wasn't even welded, so I was going for strength, not pretty welds, haha. You've been warned :thumbsup: Tacked.. I was running a little too hot for the line speed so I had to go back and fill in. Oh well, like I said, gonna get ground down smooth.. After I was happy with it, I ground it down with the more aggressive disk. Still gotta go over it with a flap disk. Ok, now time to make the cut. My dad and I used a square to get a pretty good idea for the angle that the fender is. My goal is to match the angle of the fender, and continue it down in to the slider. We set the saw for slightly less than 15 degrees. We measured from where I wanted the sliders and figured approximately 76 1/2 inches long. I want them a little bit inside of the fender for plenty of tire clearance... Then I did the same, welded the cap on, ground it down smooth, then I took the flap disk to both sides of it. There were small gaps that I wanted to minimize so i decided to put a little bit of filler in them While I had the saw out, figured I might as well cut the other slider. Plus, the filler had to dry before sanding. Then I rounded the edges on the 2 other caps and sanded down the filler, which I didn't take a picture of. Then cleaned up. We took a trip to the hardware store and I picked up a few cans of self etching primer for the sliders. I want to prime them up for the side that will be hidden under the body. More to come...
-
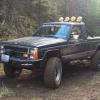
I ran 3 inches of lift, 33s, and hacked fenders. It was bare minimum. I couldn't disconnect my sway bars without rubbing. I lifted to 5.5 inches and my 33s didn't come close to fenders.
-
Looking for a bored renix throttle body
joester1908 replied to Zebvance's topic in MJ Tech: Modification and Repairs
What you're saying about the HO vs Renix makes sense. My dad had a 94, my MJ doesn't seem much less powerful.. So when you install the 60mm TB, you use stock sensors? the IAC and TPS? Also, what injectors should I put in? I had some Ford 19lb injectors laying around and I was told it was a down grade.. -
Looking for a bored renix throttle body
joester1908 replied to Zebvance's topic in MJ Tech: Modification and Repairs
I sent Jeff an email, I have 2 laying around and 1 in my Jeep, that I plan to have him do! -
cherokee floor pans in a comanche.
joester1908 replied to badazzelanore's topic in MJ Tech: Modification and Repairs
x2 ^ I have 4 door XJ seats in my MJ. I have looked and looked and can't find a decent set of 2 door seats to swap in :dunno: Getting behind them where I have my amplifier and a wiring harness for my ARBs and the CB cable is very difficult -
cherokee floor pans in a comanche.
joester1908 replied to badazzelanore's topic in MJ Tech: Modification and Repairs
The Comanche has a brace that runs down the floor, so the seat brackets are offset -
Think this could be my problem? (pics)
joester1908 replied to badazzelanore's topic in MJ Tech: Modification and Repairs
Probably. As long as the crimps are tight like you said and you hooked them up correctly it should be fine. But soldering it is the best way to do it. -
Think this could be my problem? (pics)
joester1908 replied to badazzelanore's topic in MJ Tech: Modification and Repairs
:hmm: :dunno: -
I'm planning to start installing my sliders the last weekend of November! I'll keep you guys posted for sure. In the meantime, (hopefully this Saturday) I'm going to cut them to length and box the ends.
-
Tailgate handle and New replacement cab corners
joester1908 replied to Todd Hammer's topic in Wanted
I'm cutting my cab corners off when I do my sliders. I have a guy who wants them, but he has to pay for shipping. If he flakes out they're yours. -
It really is! The more people I talk to about it, the more people I've found that have done it. The arms themselves are great. They should sell the long arms with no johnny joints and you do your own!
-
Engine swap questions
joester1908 replied to projectMANCHI's topic in MJ Tech: Modification and Repairs
check Novak for transmission adpaters. I know they have a bunch of adapter plates for the AX15 -
I'm running a Rough Country long arm kit on my MJ. I went to adjust it this weekend and found this... The flex joint on the upper control arm was shot. The metal disk was taco-ed, and the joint was completely unusable due to the threads being damaged. I went down to the local 4x4 shop where I bought it, and I was told that it was fairly common for those joints to blow out. Rough Country doesn't sell just the joints, but they do sell rebuild kits, which were a week out. I decided I was going to upgrade Here's the link to them if you're interested: http://www.currieenterprises.com/cestore/Product.aspx?id=1262 The only issue with them is that the Rough Country ones have twice the thread. If yours are threaded out pretty far, these might not have enough. For me, they worked perfectly. They thread in and are the same exact size as the Rough Country ones. These are much more heavy duty. I did not install lower johnny joints from Currie, I kept the RC ones because they weren't damaged. But these are the same size as the Rough Country lower joints. But the Rough Country ones had quite a bit more thread. I don't know if these would fit, but that is my guess if you're looking to upgrade: http://www.currieent...ct.aspx?id=2629 Here's the Currie Johnny Joints installed on my Jeep I really like the RC long arm, but the joints kinda suck. Quick upgrade and waaay beefier!
-
I'm sure all of you guys noticed how much rake my Jeep has. It wasn't perfectly level when I first lifted it, but it didn't really bother me. After installing the 8274 and winch bumper, it nose dives. We had some TeraFlex 2 inch coil spacers I decided to install on Saturday, and I wanted to do some bump stops. Got out there bright and early and tore the front end apart. After installing my 35s, my tire rubbed on the back of the fender. Leveling it out will definitely fix that. but while we had the coils out, we decided it would be a good time to flex the tire up and see how far I should let it go before it rubs. We jacked it up and noticed right away that the tire was too far back in the fender, my caster was off a little bit, and my coils had some ark in them (which we knew). We decided we should push the front axle forward and fix the caster, which should make the ark in the coils go away. So my dad started taking off the control arms to adjust them while I finished mowing. He called me over to show me this: My upper control arm was pretty badly beat up. The metal ring was taco-ed, which stripped the threads and then let the whole joint come apart, prematurely wearing the rubber out too. So we took a trip down to the 4x4 shop. We talked to Dana and he said it was fairly common to see those blow out. And it's usually due to improper installment. I don't know how you can install them wrong, it's pretty straight forward. Then my dad figured it out, over the summer I went wheeling in eastern Washington. I hit a stump pretty hard and it knocked my steering out of adjustment. That sideways pressure probably flexed the joint and destroyed it. Rough Country doesn't sell the joint themselves, only the rebuild kits, which were a week out. We thought about going to 4 Wheel Parts or something, but I decided I'd rather just upgrade them. He had some Currie johnny joints that fit perfectly. I paid 37 bucks a piece. Here they are if you're interested: http://www.currieenterprises.com/cestore/Product.aspx?id=1262 I did not install lower johnny joints from Currie, I kept the RC ones because they weren't damaged. But these are the same size as the Rough Country lower joints. But the Rough Country ones had quite a bit more thread. I don't know if these would fit, but that is my guess if you're looking to upgrade: http://www.currieenterprises.com/cestore/Product.aspx?id=2629 So I got home and my dad and I installed the Currie johnny joints in to the RC control arms, and adjusted my caster. Went pretty well and I was pretty happy with where the wheel was in the fender. So next I wanted to work on my bump stops. We figured we needed about 4 inches worth of bump stops. I had 2" pucks in the garage, so i needed 2 more. We went back to the 4x4 shop and I picked up a set of Rubicon Express extended bump stops. While we were out, I picked up some bolts for the 2 inch bump stop puck and a tap and correct size drill bit for the hole. I got home and tried to install them, they didn't fit in the bump stop bucket. You just pulled the old one out with your hand and pushed the new one in. But they were nowhere close to the same size. BACK to Olympic I went. Dana said they only have 1 size, so an employee and I went in to their junk yard and compared my bump stops to an XJs bump stops. Same with my MJ, different size. Then we looked at a TJs bump stop. Perfect fit. So Dana gave me 2 buckets from a TJ. Here's what I have on the bottom (which I got used, so I had to buy the bolts): http://www.4wheelparts.com/Lift-Kits-Suspensions-Shocks/Front-2-Inch-Bump-Stops.aspx?t_c=1&t_s=101&t_pt=9030&t_pn=R%2fERE1380 Here's what I have on the top, which again, you will need the TJ bucket to install these: http://www.quadratec.com/products/16311_434.htm The XJ/MJ ones take a pipe wrench to get off, while the TJ ones have a bolt inside. They swapped over without an issue. Here's my old one. Swapped over easily. Then we put some grease in them and pushed it in with the floor jack and a piece of wood. Pretty easy install! Then we put it all back together and put the tires on. Sits perfectly level! (I'll post a photo of it later). But now, because I pushed my axle forward, my sway bar links hit my coils, so I'm leaving them disconnected until I have time to deal with that... Here's the Currie Johnny Joint installed Went on my second annual birthday run to Walker Valley. Here we are meeting up in the parking lot Group shot Getting flexy on the Expressway A few weeks later, my uncle drove his '14 JK Rubicon he just bought up from California. We purchased a Metalcloak lift and 35s and helped him install it, then decided to hit up Walker Valley again. Here is a before picture of his JK Me working on it And an after picture, after the alignment. The next day we made the drive to Walker It was the first time he had taken it off road, and the first time my friend Jordan took her JK off road That JK followed everywhere I went with no problems Group shot Thankful for a tailgate once again Most dirty his JK had ever been. We had such a blast, and working on the new JKs is just as easy as our MJs
-
So a few members here helped me decide what size metal to use for my rock sliders. Both of my rocker panels are completely smashed, so I'm going to cut them out and weld in 2x6. I decided on 3/16 wall. My dad called Everett Steel for me, over 15 bucks a foot! :eek: Luckily, I found a small auto recycler that sells the same stuff for $9/foot. I bought 20' and they cut it in half for free. I'm not sure on an exact length yet, but with the extra i have a few projects in mind...
-
I need tailgate hinges!
joester1908 replied to brownscampmj's topic in MJ Tech: Modification and Repairs
I'm near Everett, WA and I can't find any MJ tailgates either.. -
Yea I've heard of that actually! I'm gonna save up for the JCR steering for sure. As for my sliders, I'm buying the steel today, 9 bucks a foot :eek:
-
One last question, how much tolerance did you leave between the slider and the bed?
-
I'll check that out! You're liking the JCR OTK? Also, thanks again for the info on the sliders!