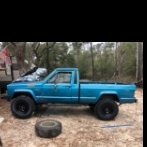
CGCWO Posted September 18, 2014 Posted September 18, 2014 Just bought a 1989 2wd 2.5 manual (sport truck I think) with 114K orginial miles got it home on maypops last night. Truck is mechanically solid and I have only found one rust thru about the size of a silver dollar in the drivers floor board (almost unheard of for a truck that has been in Florida since 1993). Bonus is I found the orginial owners manual and warranty book in the glove compartment along with vehicle registration dating back to 1992. SCORE!!! Couple of pic's from the day I picked it up. Keep going to the last post for more pic's..... Image Not Found
CGCWO Posted September 21, 2014 Author Posted September 21, 2014 Well silver dollar turned into about a ten dollar bill worth. No worries though, got it all prepped, applied rust treatment and 8 layers of fiberglass woven mat (guess those years in the Coast Guard as a Boatswain Mate working on fiberglass and steel boat hulls did pay off). Now waiting on several part and pieces to come in; 30/9.50r15 General Grabber AT2's, outside door window sweepers, headliner from Steve, 1.75 front coil spacers, drivers side cab vent trim, steering stabilizer, headlamp trim, dash cover, marker-light cover and a muffler hanger. The little 2.5L also got a fresh oil change in preparation for putting it on the road as my DD.
CGCWO Posted September 27, 2014 Author Posted September 27, 2014 Well garage is full of interior pieces and tires...Brown Santa came in September. Also scored a set of Canyons off Craigslist for $100, an hour of elbow grease and they are not perfect but more than presentable. another 30 mins and they are on the truck. Stopped by the Advanced Auto on the way home and picked up a inexpensive AM/FM/CD unit to go into the dash. If the weather cooperates this weekend I may be able to get it on the road next week.
CGCWO Posted September 28, 2014 Author Posted September 28, 2014 Interior coming along, new rubber floor mat, bench seat, trim pieces in. New radio is almost done, wired it up was ready to button dash back up then speakers stopped working intermittently, thanks to the PO for the previous rats nest of wiring. Will be fixing that in the AM, then off to have the new tires installed. Next on the list is new tail pipe and finish the trim pieces that are in the garage along with new steering stabilizer and coil spacers. Going to be a busy Sunday!
CGCWO Posted October 8, 2014 Author Posted October 8, 2014 Exterior Photos Before Another before and another before Image Not Found After tires and wheels Image Not Found One more with new tires and wheels. The discolored paint is from the rain... I'll get some interior pics and exterior with the coil spacers installed in the next few days. Last weekends up grades included new radio, 1.75 inch coil spacers and Rustys RX100 shocks for the front. Truck now sits pretty level, droops a little on the drivers side front about a 1/2 inch. Tie rod ends are in the garage and Rusty RX100's for the rear. Truck already had a rear add-a-leaf. So glad to get the Monroe Gas-Matics off the front, hopefully new shocks on the rear will smooth out the ride some. No need for 3/4 ton truck shocks on this little DD. Original truck color was what I call gun metal grey, trying to decide on the next color to go with the grey interior.
CGCWO Posted October 8, 2014 Author Posted October 8, 2014 Squeezed in a little under carriage preparation for the undercoating after cutting the grass this afternoon. Been in the dog house for the amount of time/$$ I've been spending on the MJ. Built a custom tail pipe from some flex pipe and some universal pipe hangers. Still getting a rattle from the exhaust, sounds like its in the muffler, will be investigating in the near future.
CGCWO Posted October 10, 2014 Author Posted October 10, 2014 Few exterior and interior pics posted a couple of days ago. Big news today, new windshield was put in today, not more cracks or chips to look through.
CGCWO Posted October 12, 2014 Author Posted October 12, 2014 Thanks to another member here my blower will now push air out of all the vents. Had a disconnected vacuum line inside the dash. There is a "T" that connects to the switch that controls the flappers. I am guessing that the PO or I knocked this loose when either removing his radio or me installing mine.
CGCWO Posted October 12, 2014 Author Posted October 12, 2014 Pic's as promised, since it didn't happen if you can't see it. Stock Steel wheels I have 5 of them...that need a home. Yes I know Bump Stops are missing, working on a solution.
ftpiercecracker1 Posted October 13, 2014 Posted October 13, 2014 Looks like a solid little truck. :thumbsup: What part of FL is PCB in? I am moving (back) down to Ft. Pierce this month.
CGCWO Posted October 28, 2014 Author Posted October 28, 2014 Little update, not much on the underside or mechanical front, but the paint prep is progressing. Started with the roof, bed-rails, knocking the OD green off and getting down to the original paint. Needless to say the PO did not do a very good job of prepping for the OD green. Using 220 grit I have been able to make pretty good progress. Once I have all the OD green off and everything primed, then the plan is to wetsand the primer and get it all ready for a gunmetal gray top coat. Hope to pull the bench out this week and refresh the springs and foam. won't get anytime to work on it this weekend due to family commitment (niece is getting married). Here are the most recent pic's....not happy with the behind the cab panel, but it will work for now. Image Not FoundImage Not FoundImage Not FoundImage Not FoundImage Not FoundImage Not FoundImage Not FoundImage Not Found
CGCWO Posted March 25, 2015 Author Posted March 25, 2015 So not a lot to report, life got in the way. Been waiting on the weather to warm up and get right for painting. Good news is that I have rolled up about 3500 miles on the MJ since November. Pretty much daily driver all winter (yeah for North Florida winter). Recently replaced the clutch Master cylinder, worked really well for about a week. Now having same issues before Master cylinder replacement. Clutch pedal engages either very low or not at all, sometimes it can be pumped and regain pressure. Thinking that it may be the internal slave. Not looking forward to pulling the tranny to get to that.
Crash Posted March 25, 2015 Posted March 25, 2015 Well, if you can afford it, consider swapping in an ext. slave ax-15.
Kickinmule Posted March 25, 2015 Posted March 25, 2015 New rear cab panel, JK floor mats. Have you got vinyl floor under those mats? If so original or after market? If aftermarket, how's the fit and are you happy with them and if so where did you purchase? Oh and great job gettin that green off! Nice truck!
CGCWO Posted March 26, 2015 Author Posted March 26, 2015 Yes vinyl floor under mats, IIRC vinyl came from RockAuto (I don't recall the vendor that supplied it) fit was pretty good. Laid it out on the drive for half a day in the sun, then put it in. There was some trimming to get a real good fit, mostly along the door jambs and back cab wall. The JK mats were a un-expected score from a co-worker who didn't like them in their JK. The JK mats are Weathertech. I do have a set of cloth mats (also from a JK, our other Jeep) under the hard plastic mats to help keep them from sliding around. Amazingly the JK mats are almost an exact fit in the MJ. I would love to get a AX15 with external slave just haven't seen one locally yet.
CGCWO Posted April 25, 2015 Author Posted April 25, 2015 Finally Painted, not perfect but much better than the gray primer. Image Not Found Image Not Found Image Not Found Image Not Found Image Not Found Will get better picks when the sun comes out tomorrow.
CGCWO Posted April 25, 2015 Author Posted April 25, 2015 Bed-liner done and daylight pics..... Image Not Found Image Not Found Image Not Found Image Not Found Paint is single stage Gun-metal gray metallic, trim and rockers semi-gloss, Herculiner Roll on bed-liner, 3inch Rustys front coils no lift in the rear that I know of. It sets about a 1/2inch high in front now I am sure it will settle and be just about right.
Dillithium Posted April 26, 2015 Posted April 26, 2015 Beautiful!! What kind of bedliner did you go with?

Recommended Posts
Create an account or sign in to comment
You need to be a member in order to leave a comment
Create an account
Sign up for a new account in our community. It's easy!
Register a new accountSign in
Already have an account? Sign in here.
Sign In Now