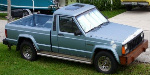
Pmb123 Posted March 24, 2011 Posted March 24, 2011 I have been reading write ups on this site for a while, and i finally decided to do something worth putting up here, so i went all out and took tons of pictures. so grab some :popcorn: maybe a and enjoy I decided to redo the headliner on basically a whim... My sister had gotten me a gift card to AutoZone for picking her up at the airport at 1am. And while wandering the isles wondering what to spend my $$ on, i saw a can of headliner glue. and having seen treklight's post(http://www.comancheclub.com/forums/viewtopic.php?f=9&t=27623) on adding a overhead console, the seed had been planted... and after purchasing the ONE can of glue i headed to the local JY, and picked up a couple of things. Image Not Found thats the sunglass holder from a third gen nissan altima. Image Not Found and that is a dome light from a bimmer Well this is what i started with, and it had been that way since before i got her, in 06-07 Image Not Found Image Not Found Image Not Found and yes that is an after market sunroof. I would advise against having an after market sunroof. I managed to break the first sunroof into thousands of pieces before i had even purchased the mj. :rotf: oh and yes i had to remove the sunroof's inner bezel, apparently the headliner is an integral part of what holds the sunroof in. its just a brilliant idea if you ask me :hmm: the first step is to remove all the extra junk from the cab Image Not Found Image Not Found removing the headliner is not that hard, just pull the visors, rearview, a+b pillar molding, Oh crap handle, spend twenty minutes trying to remove the clips on the side w/o breaking them. :doh: i forgot to get any good pictures of the clips, but here is a picture i drew of them. hope it helps. Image Not Found and the thing on the left actually holds the headliner up, the holes in it are caught by the little tag that sticks inward on the right thing that is mounted to the frame... so you kinda have to lift it up and push it towards the door to release the clip. i got some of this stuff from home dippo and i tried to protect the pingpong table with a sheet of plastic and newspaper.(seemed to work) Image Not Found and here is what the headliner looked like after one coat of the stuff, i didnt think that i would need to add any glass to this part, i kinda hoped it would just seep in and strengthen itself. and give me something that i could easily adhere the console to. Image Not Found Image Not Found while that was drying on i got to work on the overhead console's shape Image Not Found this is me just trying to mock everything up, hoping it would fit! Image Not Found and here are some of the tools i was using to shape the foam, the bondo rasp was probably the most useful thing there tho Image Not Found and after much measuring and and deciding i came up with this! Image Not Found the parts that are scooped away are there so i would have someplace to mount the sunvisor end clips, although i did have to shorten the visors. ok i think I'm done for tonight, i get more pics up soon though Thanks for checking out my post, :banana: Patric
Pmb123 Posted March 25, 2011 Author Posted March 25, 2011 alright, lets get back to it! the next thing i did was coat the foam console with latex paint to keep it from melting when i applied the fiberglass. i pushed some pop rivets into the bottom of the foam so i could keep it up off the table while the paint was drying Image Not Found Image Not Found while the paint was drying i gave the headliner another coat of resin that i would be able to sand smooth later. Image Not Found after the paint had dried i decided on a final placement for it, i ended up covering the old holes for the sunvisor end mounts. there was just not enough room up there to work with Image Not Found Image Not Found and now came the fun part, glassing it in, i prepared a few sheets of glass with the holes cut to fit right. Image Not Found and i did not get any pictures of the glassing because you kinda have to work fast to get everything right before the resin sets. and its not cool to have to remove your gloves and snap a pic, but here are the results Image Not Found here are a few close up shots Image Not Found Image Not Found i managed to get about three layers of glass vertically, a couple horizontally across the voids, and i reinforced the corners with some smaller pieces, it really seems strong and it should hold up to everything i need from it. ok and this is the fun part. sanding. i had applied quite a bit of material, and it really wasnt smooth at all. so most of it had to come off. i spent a few hours there with the electric sander, and my arm was tingling for days after.. Image Not Found Image Not Found and since this was my first time working with fiberglass, it was a little sloppy. thankfully they make these. Image Not Found i had to trim a hole in the headliner board so that the bimmer dome light would fit, and i also had to get rid of all the rough edges to get the sunglass holder in.... Image Not Found Image Not Found everyone tells me i take pictures at strange angles but i really have no idea what they are talking about. :dunno: Image Not Found that's where i mocked everything up, trying to see how little space i had
Pmb123 Posted March 25, 2011 Author Posted March 25, 2011 ok i did my final wipe down with acetone, hoping to get good adhesion with the headliner glue. Image Not Found Image Not Found Image Not Found Image Not Found Finally i got to apply the glue, it sprays really funky, and it seems as if they want you to apply 3-4 coats of the stuff to both sides of what your gluing. Image Not Found Image Not Found the worst part about gluing the fabric up was having to wait 5 minutes for the glue to become tacky. so here are a few random pics i took when i got bored. Image Not Found thats my dads Nova with my jeep lurking in the background. Image Not Found and here is the blister i managed to give myself with the sand paper... hmm now what was i doing...... oh yea the glue should be tacky by now! the material went on fairly well, i only had one little wrinkle in the back corner of the headliner, so i wasnt too worried about that. Image Not Found once that stuff is set, it's set, there really is no moving it around. here is where buying only one can of headliner adhesive came back to bite me. :wall: i was only able to get one coat of the glue down, before i ran out. had it been earlier then 10 oclock i would have run out and bought some more, but i was not to finish that night. i had to call it quits, retreat and live to fight another day. Image Not Found Image Not Found well the next morning came and i had a fresh can of headliner adhesive, and i got the rest of the fabric glued down Image Not Found Image Not Found Image Not Found i only had a few small pinches at the front of the console, but that is in a really hard place to see so i didnt mind any. i decided to slip in the light and holder to see how it looked. Image Not Found i thought i should tuck a little fabric around and glue it to the other side of the board, so i trimmed it down. Image Not Found and one of the things i wished i had done was apply a little bit of resin to the back side of the board right around the edges. because there was not that much solid material to glue the fabric down too. but i tried to anyway. Image Not Found Image Not Found Image Not Found and here i finished cutting the rest of the holes for the visors. Image Not Found
Pmb123 Posted March 25, 2011 Author Posted March 25, 2011 before i could get the headliner back in i had to run some power up to the dome light. i simply tapped into the lines for the side lights, and ran some wires inside the upper frame. Image Not Found i believe the pink wire is always hot, and the yellow wire is switched on and off, to ground, with either the doors or the headlamp knob. The black line is constantly ground i had to mess with the dome lights circuity so that it worked the way i wanted, i have the center dome light coming on only with the doors and headlamp knob, and the two map lights only come one with the switches on them. then i went for it. i got the headliner up in, held in with the side clips, then i drilled the holes for the sunglass holder, and sun visor end holder doohickeys. Image Not Found Image Not Found Image Not Found and thats enough glory shots for now! its time to focus on the sun visors themselves. here is what i started with Image Not Found i pulled them apart to see what i could save Image Not Found but there wasnt much hope for them Image Not Found
Pmb123 Posted March 25, 2011 Author Posted March 25, 2011 the old visors backing material was shot so i had to make new ones, i started by tracing an outline of the old pieces onto a 24x36 piece of poster board. i then tweaked the design so that the visors could be shortened. i doubled up the poster board and cut two at the same time. Image Not Found Image Not Found i used my girlfriends school budget cuts protest signs, and yes educations cuts do bite!!! and here you can see where i trimmed down the visor, i had to cut the tin piece, file down the press board, and hammer the stud in a few inches. here is a final mock up Image Not Found i decided to thicken up the sun visors. for some reason, i don't remember what i was thinking, but they feel more substantial now. i just used some scrap cardboard from the neighbors recycle bin. :yes: Image Not Found i compressed them down as the glue dried with what ever i had close to me. That one can of paint stripper started leaking the second i took it off of my visor, i got really lucky it didnt ruin anything!! :D Image Not Found ok so i used the same headliner glue to stick the fabric to the visor's backing Image Not Found and i used some spray adhesive to glue the visor backing to the visor inners. i had read on some other car thread that you are supposed to remove the foam from the edge that you glue around the backing, I'm not too sure if i would do it the same way again but here are a few pics of what I'm talking about. i would definitely leave more fabric overhanging the edge tho, it was not fun trying to glue a 3/8 inch strip of fabric down. Image Not Found Image Not Found Image Not Found here is a picture of what they looked like once they were glued tight and i was read to start sewing Image Not Found well guys at this point i would advise you to hand your visors off to someone with a little more experience with a sewing machine. i.e. a woman. trust me it will look better. Image Not Found Image Not Found Image Not Found well its too late now. and now the moment you have all been waiting for, the finished product! Image Not Found Image Not Found Image Not Found Image Not Found Image Not Found Image Not Found and here are a few shots of how bright it is with the bmw lights, i can read in there now, Image Not Found and here is the passenger side foot well, i had added some foot well lights a while back as well as the after market side lights, and i love them Image Not Found i guess i still need to go back and paint the sunglass holder an exciting shade of grey, but the beige doesn't really bother me. the smell of fiberglass resin has however soaked deep into my brain, and it doesn't want to leave anytime soon. i think i want to switch over to all LED interior lights soon, make the lights look whiter at least. well i hope i haven't given anyone any stupid ideas :cheers: ~Patric
treklight Posted March 26, 2011 Posted March 26, 2011 Nicely Done! You've inspired me to actually finish mine so I can finish my original post.
Pmb123 Posted March 26, 2011 Author Posted March 26, 2011 Nicely Done! You've inspired me to actually finish mine so I can finish my original post. Thats Great, I can't wait to see Yours finished!!! :cheers: ~patric
Sutek Posted April 20, 2011 Posted April 20, 2011 Wow man really nice job. That looks very clean. You've inspired me to install a headliner. No more echoes.
Muncher Posted March 22, 2021 Posted March 22, 2021 All the photos on this are unavailable Sent from my SM-G981V using Tapatalk
Muncher Posted March 25, 2021 Posted March 25, 2021 damn that sucks. i like seeing all these pictures

Recommended Posts
Create an account or sign in to comment
You need to be a member in order to leave a comment
Create an account
Sign up for a new account in our community. It's easy!
Register a new accountSign in
Already have an account? Sign in here.
Sign In Now