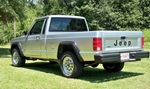
comanche09 Posted December 27, 2009 Posted December 27, 2009 Hi All, First, thanks to Hornbrod who rekindled my interest in this mod. :waving: They said it couldn't be done at NAXJA.org. I've got to say this upgrade has made a significant improvement in the way the truck steers and handles on the road. The is no more play in the steering wheel before the steering reacts, it is instantaneous (original steering box). Just minute movements of the wheel and it reacts. The whole front end has firmed up significantly, in a good way. Cornering body lean is reduced even further. Awesome upgrade. On to the Pics: Here is a pic comparing the stock arm with the WJ arm, notice the WJ arm is fully boxed. The stock arms measures 15" eye to eye, the WJ arm measures about 14.9". This corrects my caster with my 2" lift over stock, rather than adding spacers to the LCA buckets. Picture of drivers side upper control arm bucket. Remove this small amount of sheet metal directly below the bucket. (Cut a mirror image off the passenger side, I used a dremel with reinforced quick connecting cutting wheel) Size reference. Thats it, then install the WJ arms. I used a pipe wrench with my jack to help line up the axle side bolts, but a come-along will work too. Do them one at a time. More pics: Full Droop, no problems. :chillin:
JeepcoMJ Posted December 27, 2009 Posted December 27, 2009 those just look goofy. but extremely nice job!
Gjeep Posted December 27, 2009 Posted December 27, 2009 What size tires are you running? (30's?) Seems like a good mod. I like my front tires being "centered" in the wheel opening -- did you notice if your tires moved closer to the firewall? Looks like you're running WJ LCA's as well with the lift. I've got adjustable JKS LCA's with a 3+" lift in front with 30's...trying to get an idea how things would change. Thanks.
HOrnbrod Posted December 27, 2009 Posted December 27, 2009 Nice job Matt - you got 'er done mate. :cheers: Did you verify your caster angle yet? Also, I ASSume you will change out the UCA axle bushings later? That'll make it even better.
comanche09 Posted December 27, 2009 Author Posted December 27, 2009 Nice job Matt - you got 'er done mate. :cheers: Did you verify your caster angle yet? Also, I ASSume you will change out the UCA axle bushings later? That'll make it even better. Thanks Don! Haha, yea I probably should pick up some new axle UCA bushings, but I figure they are 9 years newer than the originals ('97 axle), so I'm probably good for another ten years at least! :eek: Seriously, they are on the to-do list for later. Haven't checked caster yet, but it should be closer to stock based on the info you posted on the control arm length thread. The truck just drives so much better as is. What size tires are you running? (30's?) Seems like a good mod. I like my front tires being "centered" in the wheel opening -- did you notice if your tires moved closer to the firewall? Looks like you're running WJ LCA's as well with the lift. I've got adjustable JKS LCA's with a 3+" lift in front with 30's...trying to get an idea how things would change. Thanks. Running 235/70/15 (28") right now (got em like new off of craigslist for cheap, to replace the unsafe 10+yr old tires the PO had on it) I will probably end up with 30 or 31" tires though when I finish the build. :thumbsup: Tires look centered in the wheelwell, I just went out and checked. My "Lift" is only '98 UpCountry springs (see sig), when compared to my original 2wd springs, nets 2" lift. Compared to 4x4 springs, they are around 1" lift. I really like the way the springs ride and want to keep them, but it depends on how I lift the rear (still stock). I will look into JKS LCA if/when the time comes. Thanks! Regarding the install, I jacked up the Passenger rear side of the truck off the ground to try to compress/stuff the drivers side to check clearance with the D30 diff. It clears fine, but it looks like in a full stuff/bump stop situation, there could be an issue. I don't plan to do any hardcore wheeling though...
knever3 Posted December 27, 2009 Posted December 27, 2009 You are my hero!!! :bowdown: I always wanted to find out what they would look like installed. I have 245-70-16 tires and a 3" lift so I would like to run these too. I am interested in camber but there is always moving the lower control arms forward or back to compensate. Anyone have another set I could buy???
comanche09 Posted December 27, 2009 Author Posted December 27, 2009 Thank you man! This is not the same truck anymore than when I picked it up bone stock last July in regards to driving feel, steering, handling etc. Now with some MT springs on the back and the aftermarket sway bar, I may lower it, throw on some low profile tires and enter autocross.... LOL just kidding :banana: :shake: :hmm: :dunce: Couple more notes on the install, If you can, snag the WJ body side bolts, they have an elongated 13mm head and makes it much easier to install (you don't have to worry about dropping the bolt in the frame as much) Also, the lower edge of the upper bucket scuffs the paint off the bottom of the upper arm at full droop. A slight grinding of the (talking half a millimeter here) top edge of the upper bucket lower lip would clear it.
comanche87 Posted December 29, 2009 Posted December 29, 2009 what year wj uppers are they from?? I'm looking to replace the crappy factory ones that i installed poly bushings. there horrible queek soo much and too stiff.
Pete M Posted December 29, 2009 Posted December 29, 2009 Any year WJ. WJs are the grand cherokees from 99 to 04
comanche87 Posted January 8, 2010 Posted January 8, 2010 Couple more notes on the install, If you can, snag the WJ body side bolts, they have an elongated 13mm head and makes it much easier to install (you don't have to worry about dropping the bolt in the frame as much) where be the easiest to get those bolts? i got a set of uppers coming and need the bolts. do u think the dealer be cheap enough?
comanche09 Posted January 10, 2010 Author Posted January 10, 2010 Couple more notes on the install, If you can, snag the WJ body side bolts, they have an elongated 13mm head and makes it much easier to install (you don't have to worry about dropping the bolt in the frame as much) where be the easiest to get those bolts? i got a set of uppers coming and need the bolts. do u think the dealer be cheap enough? I got lucky and got my arms and bolts from a Junkyard 99 WJ at the u-pull yard. Dealer shouldn't be too bad, I only used the two WJ bolts for the upper arms at the body side and reused all the MJ bolts/nuts elsewhere. Don't bother buying/grabbing the WJ nuts, they were crappy half nuts welded to thin steel plate (to allow for tightening the bolt without holding the nut). Fastenal may have the bolts too.
gambit4000s Posted February 14, 2010 Posted February 14, 2010 quick question, did you clearance the axle side of the LCA mount?(right behind the shock mount) It contacts the arm on mine, I am grinding a small portion away, it appears to be contacting in your pics aswell.
Pete M Posted February 15, 2010 Posted February 15, 2010 I trimmed mine. just a bit off the arms and a bit off the axle. Got full flex outta it now. :D
gambit4000s Posted February 15, 2010 Posted February 15, 2010 excellent! Thanks for the photos Pete, I did virtually the same thing, with a little more due to my lift. Do you mind if I quote your pics on NAXJA? If its a problem let me know. I didn't have my camera handy yesterday. Here is what I posted on NAXJA http://www.naxja.org/forum/showthread.php?t=1018788 I just swapped WJ arms into a MJ w/4.5-5" of lift(not quite done over all, I will get exact measurements, photos and caster specs when I finish) I performed the same modifications as above, triming the 3/4"x1" tab below the uca frame mount, and narrowing the lca bushing bolt sleeve;making sure to not cut flush with bushing, two reasons: A]its not needed, B] metal outer bushing sleeve will rub I found for my lift I was going to run into contact issues as others have posted about, stock/slight lift may not have these problems. On the frame side UCA mount I ground out the bucket for clearance (removed yellow portion in pic) It ended up being a little more square than is drawn, but you get the idea. I used a straight grinder with a carbide burr. Outside of plating the entire mount, I don't see an easy way of reinforcing the mount, The minor grinding I did for clearance shouldn't really affect the mount, but only time will tell. Depending on my exact caster angle, I may move the axle side mounting hole on the arm to gain more angle. On the axle side LCA mount I had to trim quite a bit out of the mount behind the shock,(again in yellow) by cutting the mount off at an angle it allows the arm to flex up into an arch formed into the plate, from the underside you have to further clearance the flat plate that makes a box out of the shock portion of the mount. I plan on plating the leading/lower edge of the axle side LCA mount and capping the cut edge.
Pete M Posted February 16, 2010 Posted February 16, 2010 steal away. :D that's why I post them on the internet. :thumbsup:
eggdashure Posted March 3, 2010 Posted March 3, 2010 Sorry to revive a semi old thread, but I have a couple questions about this setup. I've installed the Lower WJ Control Arms on my XJ. You guys weren't kidding, big difference in ride quality! I am planning the upper arms soon, but I've noticed something after installing the lower arms. When I hit a bump hard or brake moderately I hear / feel a clunk under the drivers side. I've checked the bolts and everything is tight. Only issue I saw was that when the guy pulled these arms out of the WJ, he bent up the outer most metal housing of the bushing. Only correction I had was to pound on it with a hammer and grind it down a bit to be safe. Any ideas what might cause this clunk? I really don't think the bushing housing is an issue, is it possible for this setup to contact the unibody? Also, keep in mind these issues are on the drivers side only and on flat paved roads. :dunno: Maybe installing the upper CA's will pull the caster into alignment and make everything happy. :idea: Appreciate any thoughts or ideas! :yes: 1999 Jeep Cherokee XJ 31's 3 inch lift
gambit4000s Posted March 3, 2010 Posted March 3, 2010 If you trimmed the bushing insert flush with the bushing sleeve, you may be rubbing inside the frame brackets
gambit4000s Posted March 3, 2010 Posted March 3, 2010 Question, did you clearance the axle side mount? check for contact on the top of the arm
eggdashure Posted March 4, 2010 Posted March 4, 2010 Everything was good prior to installing the Arms. I'm thinking that If you trimmed the bushing insert flush with the bushing sleeve, you may be rubbing inside the frame brackets is probably my issue. As I stated the bushing housing was messed up. So next question, I don't quite know how I would do this, but could I fit a washer between the arm and the bracket? Anyone see any side effects to this? :hmm:
Pete M Posted March 4, 2010 Posted March 4, 2010 While I guess it's possible, I didn't experience any funny noises and I trimmed mine flush with the rubber bushing. :dunno:
eggdashure Posted March 6, 2010 Posted March 6, 2010 Yea, I just trimmed too far on the drivers side. I didn't realize it when cutting down the ends, but my cutting wheel was half it's starting size. So I was sitting there trying to get just a quarter inch further and actually started angling the cutting wheel, and cut too far in. After grinding everything level I must have gone past my original marks. Oh well, washers worked like a charm! No more clunk.

Recommended Posts
Create an account or sign in to comment
You need to be a member in order to leave a comment
Create an account
Sign up for a new account in our community. It's easy!
Register a new accountSign in
Already have an account? Sign in here.
Sign In Now