feerocknok Posted September 5, 2006 Posted September 5, 2006 I wasn't sure if the rusted out rear 44 that was on the truck was the same purty one you had painted. Good work!
Twisty Posted September 5, 2006 Author Posted September 5, 2006 thanks man. ill get some better pics when i put 2 more coats of paint on the thing. it looks so nice now, i don't really want to put it back in. :brows:
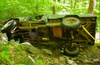
Twisty Posted September 21, 2006 Author Posted September 21, 2006 So i redid the vaccume system today. The PO had capped much of the fittings when he did the engine swap. I just took the hoses out of the 1990 and put them in the MJ, and using the vaccume diagram i reassembled it all except for 1 hose, and i don't know where it goes. It seems to run a little smoother now, and I'm happy about that. However it seems to have a knock now, and I'm not happy about that. I also discovered somthing else. See below pics. New Vaccume Hoses. The Crew! XJ Seats ready to be swapped in. Frame Rail. Is this bent? It looks like a bad recovery attempy happened to that "frame rail", and you can see that the metal is ripped and shredded. I'm also wondering if the frame rail is bent. it does not look symetrical to the other side. I will measure the distance between these rails and the ones on my 1990 to double check.
Twisty Posted September 21, 2006 Author Posted September 21, 2006 GOO!@ :eek: that dosent sound good. I'm getting worried that this is a major issue.
Oizarod115 Posted September 21, 2006 Posted September 21, 2006 GOO!@ :eek: that dosent sound good. I'm getting worried that this is a major issue. i was just lookin at the rip cause ive never seen that before, i wouldnt worry about it til someone more experienced with this sort of thing pops in. it doenst look to misshapen to me, looks like it might have gotten disfigured a bit but that far forwards is past the axle and the important stuff right? the steering is all mounted to the other side
Pete M Posted September 21, 2006 Posted September 21, 2006 I wouldn't say it's a "major" issue, but I would give some thought to strengthening the area. What were your plans for a front bumper?
Twisty Posted September 21, 2006 Author Posted September 21, 2006 I wouldn't say it's a "major" issue, but I would give some thought to strengthening the area. What were your plans for a front bumper? I was hoping to get a JCR stage 3 or 4 bumper with shackles and a 2" reciever. Ill deffinately have somone beef up the area, if i am not able to do it myself (lack of a welder). thanks guys.
Pete M Posted September 21, 2006 Posted September 21, 2006 Those bumpers have brackets that run back along the frame, yes? That should go a long way towards keeping everything straight.
Twisty Posted September 21, 2006 Author Posted September 21, 2006 Those bumpers have brackets that run back along the frame, yes? That should go a long way towards keeping everything straight. yeah, i wouldnt skimp on the unibody tie-ins...i think they are very necessary. thanks pete, that eased my mind. i was worried that i might have to scrap my MJ (a little extreme, i know)
Oizarod115 Posted September 22, 2006 Posted September 22, 2006 I wouldn't say it's a "major" issue, but I would give some thought to strengthening the area. What were your plans for a front bumper? I was hoping to get a JCR stage 3 or 4 bumper with shackles and a 2" reciever. Ill deffinately have somone beef up the area, if i am not able to do it myself (lack of a welder). thanks guys. my brother bought a JCR offroad winch bumper and one side sticks out 1 1/2" further from the body than the other... make sure they get it right.
Twisty Posted September 22, 2006 Author Posted September 22, 2006 I wouldn't say it's a "major" issue, but I would give some thought to strengthening the area. What were your plans for a front bumper? I was hoping to get a JCR stage 3 or 4 bumper with shackles and a 2" reciever. Ill deffinately have somone beef up the area, if i am not able to do it myself (lack of a welder). thanks guys. my brother bought a JCR offroad winch bumper and one side sticks out 1 1/2" further from the body than the other... make sure they get it right. I'm happy with my stage 2 XJ sliders, but ill def keep what happened to your bro in mind. thanks for the heads up!
Twisty Posted September 24, 2006 Author Posted September 24, 2006 OK this isnt a real update, but ive made myself a new goal. By the end of July of 2007, i want to have it drivable, street legal, RE 5.5" kit, and 34" Trxus OR BFG AT or MT tires. and front and rear recovery.
Twisty Posted November 5, 2006 Author Posted November 5, 2006 so this weekend.... 1.) i got the brakes on the axle ALL assembled. only think thats left to do is run the hard lines from the wheel cylinders to the flex line. 2.) took out the master cylinder, and air box... and just like in PeteM's picture above, i removed the bottom brake line. the one coming off the nose goes back, and is still intact :banana: going to the local auto parts store tomorrow to get the last things, then its going to be on its wheels again! o yeah, pics ASAP!
Twisty Posted November 13, 2006 Author Posted November 13, 2006 axle is in!! yes, i know my brake lines are all twirly, and that i have drum brakes instead of discs.
Twisty Posted November 14, 2006 Author Posted November 14, 2006 yeah, you are not the first person to mention that. I'm going to re-measure the lines and get new ones before i bleed the brakes and such.
Twisty Posted November 20, 2006 Author Posted November 20, 2006 some weird problems arose. temporary fix tho. here's the rotor without any washers. Here is what it looks like w/o the dust shield. Notice how far the 3 bolts(or screws!! ;)) holding the knuckle on stick out? Here is the XJ, see thatt he bolts don't stick out as far? With 3 washers per lug. For next summer, I'm debating just trying to find a 1995+ XJ D30 for the front so I don't have to fuss with this one. It will come w/o the disco, and will have 297 u-joints. I might be able to get one for $200. I don't know yet. Oh well, it works now. Its not going to be on the road for a long time. Just drinving it around here and no faster than 20mph, so I'm not too concerned.
Twisty Posted November 24, 2006 Author Posted November 24, 2006 I got different rotors, and things are going well now. the bucket seats are in, and it drives!!
Twisty Posted November 26, 2006 Author Posted November 26, 2006 well i pulled off the rear lights, and found out that there were no bulbs in them. that could cause the no lights problem ive been having. it was good because i was worried that i would have to re-wire the rear lights.
Twisty Posted April 8, 2007 Author Posted April 8, 2007 SOA D44 anyone? Those are my first welds. I think they look alright ??? Dirty would be proud....I did that with a stick welder :brows:
Southen Crawlin Posted April 8, 2007 Posted April 8, 2007 looks like ya got the job done on the axle but... how to put this. your fist dozen or so welds should be on scrap steel and should have a friend that allready knows how to weld directing you on do's & don't's and how to make a proper and strong weld. this is why i said that. plz take this as help and don't be offended. i weld everyday and have seen trailers and numbers of vehicle parts that have been welded on crack and break off due to these weld defects your weld has and others. the welds on the mount need to be strong (explanation why shouldnt be necessary). from the pic of your weld i can see porosity. thats air trapped inside the weld and is a major weld defect as the weld will easily crack with it. you don't have undercut on the weld and you have multiple restarts on the weld, so you were probly on the low heat range for the rod which helps get rid of undercut but can also cause incomplete fusion of the weld metal and base metal. oh and if you didnt grind the axle tube well to where theyres no paint were you will be welding, you will have porosity and sometimes bits of paint in the weld. i can't tell from the pic if you grinded it or not but if you did then thats a big help towards a stong weld.
Twisty Posted April 8, 2007 Author Posted April 8, 2007 I don't take offence to any of that! I'm glad you posted. Actually, I did it at my neighbors house, and he watched over me while I did it, and inspected them afterwards. He does a lot of welding on farming equipment...so I trust his judgement. I did grind it smooth so there was clean metal where it was being welded. I even ground off some REALLY bad welds, and tried them again. I don't want this to sound sarcastic..because I think it might, but: do you think that the way I did it with my neighbor there watching over me was ok?
Southen Crawlin Posted April 8, 2007 Posted April 8, 2007 do you think that the way I did it with my neighbor there watching over me was ok?long as he had a welding hood on ;) .
CWLONGSHOT Posted April 8, 2007 Posted April 8, 2007 do you think that the way I did it with my neighbor there watching over me was ok?long as he had a welding hood on ;) . I HEAR THAT!!! I was doing those rear shock mounts last week end... well welding upside down is tough enough... but doing it on your back with a flip down helmet is a REAL pain!!! So I did it with out and just closed my eyes!! :eek: :eek: My "sun" burn on my fore head and cheeks is peeling nicely!!! :D :oops: ;) CW

Recommended Posts
Create an account or sign in to comment
You need to be a member in order to leave a comment
Create an account
Sign up for a new account in our community. It's easy!
Register a new accountSign in
Already have an account? Sign in here.
Sign In Now