

dakal
-
Posts
1584 -
Joined
-
Last visited
Content Type
Profiles
Forums
Gallery
Everything posted by dakal
-
update: tried the lights today. tail,brake,parking lights work. the toggle switches worked. :clapping: :clapping: :clapping: :clapping: :clapping: :clapping: :clapping: :clapping: :clapping: :clapping: :clapping: turn signals are hooked up as per directions but a wire isn't right. the directions have a mistake so will call ron francis monday. i hooked the front parking light to be a turn signal and that works. its great to be buttoning everything up. bulbs etc. with the motor; finishing the fuel pump wiring, then i think its good to go. i turned the key to find prestart and it cranks, thats good. when it runs, going to get rid of useless wires in engine bay, than will take photo of engine bay, passenger side. then its cleaning up the wires inside to look good. :banana: :banana: :banana: :banana: :banana: :banana: :banana: :banana: :banana: :banana: i was really worried about all this redo working. so i'm glad for the progress. :rotf: :rotf: :rotf: :rotf: :rotf: :rotf: :rotf: :rotf: :rotf: :rotf: :rotf: :rotf: :rotf: :rotf: :rotf: :rotf: 3d
-
i have the dash out to make the plate for the new gauges. also i wanted to see what the firewall looks like. and lastly, to see what could possibly cause leaks. i am going to take pictures of the firewall so everyone can see where the possibilities lie for leaks. i still have the the water and vacuum gauges hooked up, and they are turned upside down next to the fuse panel. when i hook up the gauge wiring supplied by wireworks, and make the gauge panel, then it will look right. i have called ron francis with questions and they have been great. each wire is separate so i can run it how and where i want. :yes: when i am done everything on the truck will be controlled by its own dedicated toggle switch. on its own fuse. no more combination fuse crap. :agree: just had cataract surgery in one eye yesterday. in three weeks will have the other eye done. so i will work on the truck as i can. 3c
-
the fuse panel includes all the wiring ,panel instructions, fireresistant, you won't find wire like this stuff. i have looked for years in stores. he has it made up. the price as of two days ago for complete kit is $429.00 now. you can see its colorcoated, numbered and the panel is color matched to the wire. they will make you a kit for the price. my cherokee was a 2.8 carb that i changed to a 3.1. yes i learn the hard way. you can now see why i jumped on the mj. so the wire kit was made for that, 2.8. has caused some :rant: :???: , but they have great service. they are going to get tired of my phone calls. a friend of mine who builds circle track cars showed me the difference between painless and wireworks stuff. there is a huge difference in quality. get what you pay for :yes: i bought all electric gauges. summit racing, autometer hotrod pack. i friend gave me a autometer tach. electric speedo comes with the pack. so that way i'm set. i have already cut the dash to accept 1/4 smoked plastic cut to fit around the opening where everything is. if i don't screw up the hole cutting it will look great. yes i have hole saws. 3b
-
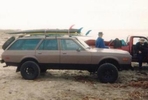
i am rewiring my mj :no: four years ago i bought a ron francis wiring harness with some extras. the cost was $369 or $ 389. it was for a cherokee i had. but this mj came up for sale with lots of extras so i bought it. now i'm on to the rewiring. pete wanted me to take pics and tell what i'm doing. i will be adding to this as time goes on. i debated how to start,but i finally ended up taking out the fuse panel an related wiring. i was careful stay away from the computer stuff for now. also cleaning up the wiring in the engine compartment has proven to be a chore. will take a picture soon. i had also purchased gauges, so will add those later. right now is getting the lites and engine running. took the heater out, it didn't work well. will add a great heater i found, not mohave? . also later. this will be my only vehicle, i love to go prerunning different races and just in the desert. so all my up grades are geared that way. a friend of mine is welding up a gas tank from [2] 15.5 gallon stainless steel beer kegs. it will be about 30 gallons. i have bought everything to change tanks but the fuel pump. thought i would post a pic of the progress. front lights done but turn signals. back lights labeled on the left side. ign ,turn signals, an a bunch of wires. lots of wires attached to panel. figured out computer, and computer check wires. i am drawing specific diagrams of the different systems. :banana: 3a
-
i never liked the linkage in my cherokee or mj. a couple weeks ago i saw bs or bk writeup. after looking at his pics and my linkage, i realized it would work if i modified his idea. a couple of pics of my linkage. after taking off all the linkage, this is what it looks like. also in the bottom left corner is my new linkage. this pic shows the space with the complete linkage removed. the reason i changed the size of his linkage is because of the room where it goes. i also i thought i could make it smaller so it would fit closer to the transfer case and away from the driveshaft. i bought hardened 1/4/28 atr x 3' allthread, two nuts and two 1/4 " yoke ends, two clevis pins, and two hairpin cotters the total cost for these items, $14.87. :banana: the first one i cut worked, but reefing on it i later noticed i bent it. also i added a 1/4 " to it. this way it would go through the threads into the u of the yoke. also in this picture you can see the measurement from hole to hole on the yokes. this is a picture of where the shifter handle goes through the transmission tunnel. at the end is the lever that attaches to the linkage. the pin is held by a snap ring. . these are three levers i got at the jy. i got my levers from 80's or 90's chev products. i couldn't find the lever bk noted, but i found a short and longer one. after looking at my setup i thought i could use the shorter one. i think the hole is 7/16, so out with the welder. i put a bolt that just fit, welded it up, then out with the grinder. you can see in the pic the levers are mostly flat. this is a pic of the lever from the shifter, the shorter one i ended up using and the old lever. the reason you can't use your old one, the lever needs to point up. like this pic. at this point i have drilled 17/32 holes, one up from 1/4, off center, as noted in picture. this next pic shows the holes better. plus i have the shift lever mechanism pit together. . another picture of the shift linkage.this pic shows the new linkage and the shifter lever completely installed. if you notice the two levers are not in line. rain was coming so i thought i would finish the pic. after it drys up, i will remove the transfer case lever, heat it up and bend it to line up. quench it of course. if i need to readjust the linkage i will do it. but it works fine now, however, for long term usage it would work better lined up. i just bent it. it will be more in line now. Image Not Found. i just installed the bent linkage. either i bent it to far or i shouldn't of bent it. so, i'm going to straighten it and call it good. as bkf did, i would get one longer than you need and cut out the hole and redrill your new hole. someday when i go back to the worlds most expensive jy, i will look for one. until then :waving: two pics of the shift lever with the transmission shifter. i cut the shifter lever just after the bend so i could use my own knob. the shifter knobs are made from zebra wood from africa. a friend of mine thats retired makes them. a not so shameless plug. if you would like him to made you a knob,[ he's reasonable], his email is frontyardforest@epud.net and his name is mark. a pic of the shifter knob from my cherokee transmission. if someone bought my brand new, cut to fit carpet from my mj, for $45.00, i would include the shifter knob. i'm going with stuff from second skin audio for the floor. this item is very hard to store!!!!!!!!!!!!!!!!!!!!!!!!!!!!!!! can't drive the mj until my knee heals more, but with all the shifting i did with the lever it works great. took the mj 4wheeling today the linkage worked great the lever moved about 1/16in. no biggie
-
the window almost fell out. just tap on the metal piece and away it goes. they are stainless steel carriage bolts that i ground down. 2b
-
ever wonder what the bolt looks like for the wind wings. mine was broken. one bolt is broken. other bolt is the new one. you can see how the factory bent the bolt over on one. the other one is mine with the new one pressed in. the factory ground the glass to have it fit with the bolt sticking up. 2a
-
What are you going to do with the parking brake? Or are you just leaving it out? Just curious! Nice work! thanks. i have removed the parking brake. some other idea not completely formed. Looks good, the only thing Id be wondering is about the traction on them will be like, especially when wet thanks. you will see when they are done. the allen screw should stick up enough to stop a slidding foot. the petals will be almost even, the gas petal will be lower. you know , trial & error. i have the finish product in my head. 1b
-
i wanted to make my pedals more comfortable for my feet, so i wanted a dead pedal so this is it. i need to install the other pedals before choosing the proper placement i got the brace from the back, underneath the bed. don't remember where though. 1a
-
i am compiling my tech posts of my build into the project posts where it should be. stay tuned
-
and you did :clapping: :clapping: :clapping: :clapping: :clapping:
-
I have found that using a big pipe wrench on the axle tube, then lifting on the end of the handle with a floor jack worked for me. x2
-
learn something new everyday.
-
'88 Eliminator... Feb. 2009 - June 2026
dakal replied to neohic's topic in Member Projects: Your Comanches
yep -
'88 Eliminator... Feb. 2009 - June 2026
dakal replied to neohic's topic in Member Projects: Your Comanches
looking good. you do nice work. :yes: -
can someone post a pic. it helped to see the parts in alignment. i would but its a 88. i couldn't get it right until i went to a jy and found one. found out i was missing a part.
-
hahaahaahahahaha
-
The worlds Fastest Comanche
dakal replied to Worlds Fastest Comanche's topic in Member Projects: Your Comanches
woow -
Dyno Pull Bonneville Comanche
dakal replied to Worlds Fastest Comanche's topic in Member Projects: Your Comanches
life's tough, but it's tougher when you're stupid." John Wayne hahahahaha -
i did a write up on transfer case linkage. ax-15 and 231 trans case. it works great without the extra gar-bage. see write ups.
-
welcome to detroit locker land!
-
welcome :wavey:
-
Mnkyboys 89 Comanche project
dakal replied to mnkyboy's topic in MJ Hardcore Tech: Epic Journeys to Greatness
great looking truck neighbor. -
porsche guards red is the purest red on the paint scale. i went through this years ago when i painted my laydown cart. i'll take a pic of the only piece thats left from the wreck.