

skidoo_j
-
Posts
988 -
Joined
-
Last visited
Content Type
Profiles
Forums
Gallery
Everything posted by skidoo_j
-
Rewiring Your Marker Lights As Turn Signals
skidoo_j replied to HOrnbrod's topic in MJ Tech: DIY Projects and Write-Ups
You're confirming what I stated. You're pulling the ground from the marker and connecting it to an intermittent hot wire(with turn enabled) So when markers are on it's feeding power through the turn indicator filament to get to ground, I'm guessing the marker will be dimmer after this rewire because they end up in series. If you have installed LED lights this may not work at all because LED's only let current flow one direction so it will depend on the circuitry in the LED bulb conversion. -
Rewiring Your Marker Lights As Turn Signals
skidoo_j replied to HOrnbrod's topic in MJ Tech: DIY Projects and Write-Ups
This seems like such an odd idea for the wiring. What it appears this does is when your running lights are off and your turn signals trigger the marker bulb will ground through the filaments of the running light bulbs and actually back feed your running lights, so they may slightly illuminate too (puts them in series, so the bulb might not be as bright). And when your running lights are on the marker bulb grounds through the filament of the turn signal bulb again appearing in series so the turn signal filament would receive some power. I'm surprised this wouldn't cause the turn signal dash lights to illuminate with just markers on. And or the filament for the turn signal bulb burning out faster because of the back feed. My interpretation is based on the wiring diagram not knowing if the headlight switch put contacts to ground when off vs just open. If switch goes to ground when off (highly unlikely) then no back feeding would occur. Correct me if i'm reading the diagram wrong. -
Brake Light On Dash Stays On
skidoo_j replied to mdwatson's topic in MJ Tech: Modification and Repairs
http://comancheclub.com/topic/40428-brake-bleeding/ -
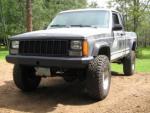
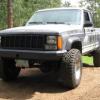
Very happy with how the truck is driving and handling. Truetrac in the rear disc brakes on the 44 and dual booster made a huge difference.
-
It appears to be in the 4th picture he posted in the bed of the truck.
-
disconnect the rod that controls the height valve to the axle. Tie the lever so that it sits about 30-45* upward. Connect your bleed hose (vacuum pump is easiest) to passenger rear start bleeding. Bleed until clean fluid. Close bleeder. Connect a catch can to passenger front Bleeder. Open bleed port on the front brake . While leaving partially open Lower the prop valve lever to just below level. Bleed the passenger rear again by pumping the pedal. Keeping the front bleeder open should allow the front distblock to let fluid flow through the "fail safe line". You may have to play with how "open" the front port needs to be, so be sure you've got a catch can/bottle on the front bleeder too. Hint if you're able to do this with out the parking brake set you'll know if fluid is flowing through the "fail safe" line if the brake warning light comes on during bleed. So use blocks to secure the truck, and have the key in the on position during that part. bleed until clean. close front valve you'd left open and then bleed the drivers rear with the prop valve lever at upward angle. once clean at rear bleed passenger front then driver front Be sure during all process that neither bowl of fluid goes empty. I usually scrub the master's bowls and use a syringe to empty them before i start. THen put clean fluid in it. The smaller bowl feeds the rears. And most basic basic bleeding procedure with two people: Person one: Press and hold pedal Person Two: Opens Bleed port Person one: continues to press until hits floor. And states "Floor" Person Two: Closes Bleed Port. States "Closed". Person One: Releases pedal. Repeat until clean. If person one lets up on pedal while bleed port is open it will suck air back into the brake, this is why some people will bleed into a bottle of fluid with the hose in fluid so if it does get sucked back up it's fluid and not air. I did mine by myself using just one of the vacuum hand pumps and was able to shut off the main rear line enough that the vacuum was strong enough to pull the fluid through the "fail safe" line with out opening the front bleeder. It was all about just finding the spot where the height valve let the least fluid through the main line. I could tell it was successful because i was getting nothing but clean fluid, then started to get more and more vacuum built up as i messed with the lever, then all the sudden vacuum was released and i got all sorts of nasty again, so I kept the lever in that spot and just bled until clean. edit: excerpt from the FSM:
-
If you time it right and use a 20 or 25% coupon you can get it for 230. It's going to be 299 with out coupon in the next month. And it's not listed as and exclusion on the 20 and 25%. I've been debating it strongly too just because of the price. But also been looking at the quadratec ones with the synthetic line
-
Wow, 10 years to find one and then he hacks it down? Maybe I should just keep the one on the truck I'm selling just in case I ever get a LWB again so that I'd have factory LWB and SWB ones, or sell it with brackets separately from the truck... Keep the bar and sell me the brackets, or let me borrow them to replicate.
-
Steep, But D**n Is It Nice.
skidoo_j replied to ftpiercecracker1's topic in Craigslist/eBay... i.e. Not Your Stuff
I think dual mirrors was an option regarding having a mirror on both passenger and driverside. In the 80's it was not required to have both. -
What brands? Which model? Maybe I'll jump for a new header instead of just the gasket :)
-
Help!! Wj Booster Behavior? Need Help Asap
skidoo_j replied to skidoo_j's topic in MJ Tech: Modification and Repairs
Same here. -
Factory or aftermarket? No issues with the headers contacting the intake?
-
According to the FSM when replacing the intake manifold gasket I'm to drain the coolant system? When I installed the headers I did follow the FSM and drained the system, but is it necessary? I don't remember removing any heating or cooling hoses and don't recall any of the bolts getting sealant put them to seal for water... I"m just thinking it would save some time and money to not drain it.
-
Well pull the power off the tail light cicrut to control the switch in the cab. It would meet the requirement and keep it isolated from the headlight switch.
-
Skidoo gave you the wiring diagram. You need to BUY two (2) relays. The way to wire your lights is to wire them according to Ski's diagram. And I don't care what you want to believe, if you have driving lights and you wire them like fog lights you will NOT be legal. . Say - since the current draw required to trip the switch in the relay and keep it closed is small, is there really a need to use 2 relays? Seems there would be enough reserve capacity in the circuit to allow tapping into one of the low-beam wires behind a headlight and using it to energize the relay. . What is the energizing current requirement for those automotive relays - not more than a quarter amp, right? I've always piggy-backed a relay to power another circuit just as I have described, by drawing minimal energizing power from the parent circuit itself. Energizing a relay to energize another relay to power the auxiliary circuit seems unnecessary and wasteful to me, to be honest. Would that maybe be to power a much larger relay needed to supply a LOT of current for more than 2 high-power lights? What am I missing?. If what you're asking is if rather then using a second relay powered by the high beam circuit to turn off the fogs lights vs using the low beam circut to power the switch that controls the first relay then yes you could do that and eliminate one relay, the down side to powering it in this manner is you then could only use your fogs when your low beam circut is enabled. So no just fog option, or no back up lights if you have a fuse or circut go out on the factory lights. I've had my headlight switch go out twice prior to isolating highs and lows to relays too, .
-
Help!! Wj Booster Behavior? Need Help Asap
skidoo_j replied to skidoo_j's topic in MJ Tech: Modification and Repairs
New booster in. The guys at autozone agreed it was faulty. They gave me a replacement with them just razing me a bit. With the new booster the behavior is as follows and it totally makes sense. Press brake- Instant small increase in rpm Hold brake- no change Release brake- RPM Jump slightly for a few eye blinds press hold brake turn off engine- I can hold the pedal down, held for 20 seconds or so and decided it was good as prior booster was just shy of bucking me off. Start engine shut engine off- Get one good easy pump and a second about twice as hard and the third is all manual. -
I hope you're stating the power to control the relay is coming off an acc connection in the fuse box and not the power for the lights. The power for the lights should be getting pulled direct from the battery to the relay to the lamps. The high beams are controlled (direct power no relay) by a switch mounted on the steering column about knee height(a pushrod from the yoke presses the switch, kinda like a monkey with a stick to eat ants). I'd suggest (assuming your relays are under the hood) you simply put a splice on one of the high beam positive wires and simply run it to the override relay. 100th post!!!
-
Help!! Wj Booster Behavior? Need Help Asap
skidoo_j replied to skidoo_j's topic in MJ Tech: Modification and Repairs
Based on your posts I think you are a stand-up guy. :cheers: I learned the hard lesson buying re-manufactured / rebuilt products and there is a remote possibility it could have had a busted diaphragm. But you did mod it, turned the push rod, so who knows, you might have ruptured it. I used 95/96 XJ booster and MC for mine, and it was a simple bolt in. The point is trying to conceal it for a refund. Then another member endorsing it. That's all. Re-reading what I wrote I can see where you received the impression of an intent to deceive. I am of the opinion that re-manufactured products are often crap and I rarely buy them. I will be speaking with the local autozone manager regarding my scenario. Based on my record there I'm sure he will warranty it. Not all of us are lucky enough to have a 91.... :) I even considered swapping pedal assemblies, but all the locals getting parted out are auto, and not jy around me now. I'll probably be making spacers or adapters to use the rod un modified to prevent the "you modified it" so "no warranty" risk. based on how the switch works I"m sure it's not too hard. With that said I found these steps to diagnose a booster: Test Power Brake Booster If the pedal feels "hard" while the engine is running, the booster isn't operating correctly. If you suspect the booster is defective, do not attempt to disassemble or repair the power booster. Doing so is unsafe and will void your warranty. Test 1 Passed With the engine off, pump the brake pedal to remove any residual vacuum in the booster. Hold pressure on the pedal while you start the engine. When the engine starts, the pedal should drop about a 1/4", this indicates that the booster is working properly. Test 2 Passed - kinda I get one good push then maybe a 1/4 push then all manual. Run the engine a couple of minutes. Turn the engine off and press the pedal several times slowly. The first pump should be fairly low. The second and third should become slightly firmer. This indicates an airtight booster. Test 3 FAILED??? I couldn't hold the pedal down, as soon as the engine was off the pedal started push back hard! Start the engine and press the brake pedal, then stop the engine with the pedal still pressed. If the pedal does not drop after holding the pressure on the pedal for 30 seconds, the booster is airtight. Inspect the Check Valve Passed Disconnect the vacuum hose where it connects to the intake manifold. Do not disconnect the vacuum line from the booster. Air should not flow when pressure is applied, but should flow when suction is applied. If air flows in both directions or there is no air flow, the valve needs to be replaced. Verify Enough Vacuum Passed Check the operating vacuum pressure when the engine is at normal operating temperature. There should be a minimum of 18 in. of vacuum. Vacuum may be increased by properly tuning the engine, checking for vacuum leaks and blockages in vacuum lines -
Help!! Wj Booster Behavior? Need Help Asap
skidoo_j replied to skidoo_j's topic in MJ Tech: Modification and Repairs
I can only hear the hiss when I put my head under the dash. But there is definitely a hiss when pedal is pressed. -
Help!! Wj Booster Behavior? Need Help Asap
skidoo_j replied to skidoo_j's topic in MJ Tech: Modification and Repairs
That's my fear. An autozone 30 miles has one instock as I had to order it to my local store. I"m thinking a trip to the other store, connecting it just to the vacuum line and pushing in the rod to see if I hear the same hiss I'm not sure how I could have caused damage to it though. I'd like to consider myself an honest individual. I used a hand file to shave it to width and a uni bit to bore the hole, so I don't think heat could have been an issue, and I supported the base and push rod well while working on them so I don't think i tweaked it, but I guess anything is possible. But hornbrod you too are saying it's bad? The only thing i can think of is that the push rod was askew when i received it and i turn it the wrong way so maybe the rod is 180* out? I don't recall if i turned it clockwise or counter clockwise to make the rod parallel to the pedal. -
Yeah? Did you read it? There's a lot in there that applies directly to you: This immediately tells you that FOG lights are different from DRIVING lights. They have a different SAE (Society of Automotive Engineers) type code. You can't buy a driving light and call it a fog light ... even by changing the lens. For an MJ, this means you can have two fog lights, two driving lights, or one of each. For your father's old car with the quad headlights, since driving lights come on with the high beams and he had four high beams already, he could not have added driving lights. He COULD have added two fog lights -- as long as they were wired to turn off when the high beams turned on. Translation: You can't use a driving light as a fog light, or a fog light as a driving light. Note specifically that it says vehicles equipped from the factory with two driving lights shall not be rejected. This is consistent with the state law. Driving lights MUST be wired so they only operate with the high beams on. You can't install driving lights and try to modify them to be fog lights. Fog lights must be an approved type. No alterations allowed. This document is an administrative regulation. It is a "law," but only because it exists and functions under the "statutory authority" of the section of state statute I cited earlier. An administrative regulation can NEVER cancel, override, or contradict the statute. Statutes rule. The language of the statute is clear: you can add fog lights, but driving lights are allowed ONLY from the factory. How would this apply to those LED light bars? They must be for off road only use and have to have a cover on them when you're on the street? Questioning because of the "# of lights allowed" so is each led a "light" or each housing considered a light?
-
I just completed the wj booster and master conversion on my truck. I picked up a reman booster and a new master. My concern is... When I press the brake engine idle increases by about 200 rpm. And when I let off the brake the engine bogs a bit If I press the brake and hold it for a while the engine idle comes back down, but then when I let off the engine almost dies. I'm thinking the "re-manufactured " booster is bad but am unsure. I did several google searches and it seems up in the air pending the design of the booster. I'd like to get it replaced before i button everything else back up if it's bad, but now the concern is because I ground the rod if autozone would even notice i altered it and if they would replace it. If you have any input please share it right away as this weekend is my weekend to button up all my projects on the truck.
-
i did, looks closed off like a tube bumper or somethin unless the plastic dirt skirt is in the way :dunno: can't see a way to take that bumper off either :( and if lights are aimed right they can be used for anything with the right modification, just throwin my 2 cent out there :D Redwolf No, they can't. Because the lenses are different, and the reflectors are different, so the lights throw light in a completely different pattern. Aiming driving lights low enough to not blind on-coming drivers would make them useless as driving lights, and because the beam is very narrow they would also be useless as fog lights. And the fact remains, however you aim them they ARE driving lights, and the law for driving lights is that they can operate ONLY with the high beams ... while the law for fog lights is that they canNOT operate with the high beams. Skidoo's excellent wiring diagram is NOT correct for driving lights. It can be modified to work for driving lights, but as drawn it is WRONG if your lights are driving lights. And, by the way, just putting a yellow lens on a driving light doesn't make it a fog light. To modify the diagram for driving lights simply move the connector from the second relay to pin 87 instead of 87a. That will then only allow power when High beams are on. You could also keep fogs on 87a that way when you're on low your fogs would be on and in high your driving lights would be on.
-
Holly hell this has gotten beaten like a dead horse. Now my VW GTI has a separate bulb for high and low in separated chambers, I've wired so I can have My highs, Low, and fogs on all at once. I drive alot of rural roads late at night and this makes it near daylight. Very usefull when searching the tree lines for eyes. I can also just run the markers, or markers with fogs. best scenario when there is actually fog.
-
I get my relays from the jy. I usually pull every relay and bracket that's good in the "relay center" on our era vehicles so i can keep my accessories looking stock