Gojira94
-
Posts
677 -
Joined
-
Last visited
Content Type
Profiles
Forums
Gallery
Everything posted by Gojira94
-
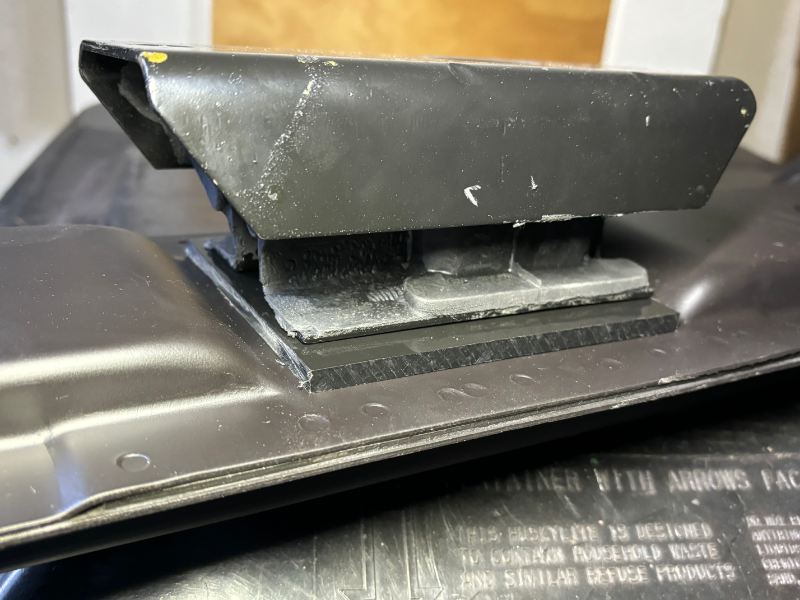
I have the 'baseball.' As the vehicle was originally built and sold, it had no A/C, no CAD, no cruise, just vacuum to run the heater controls. I'm only adding cruise. Is the 'baseball' tank adequate for these 2 functions, or should I be looking to replace it with the 'football' if I'm adding cruise?
-
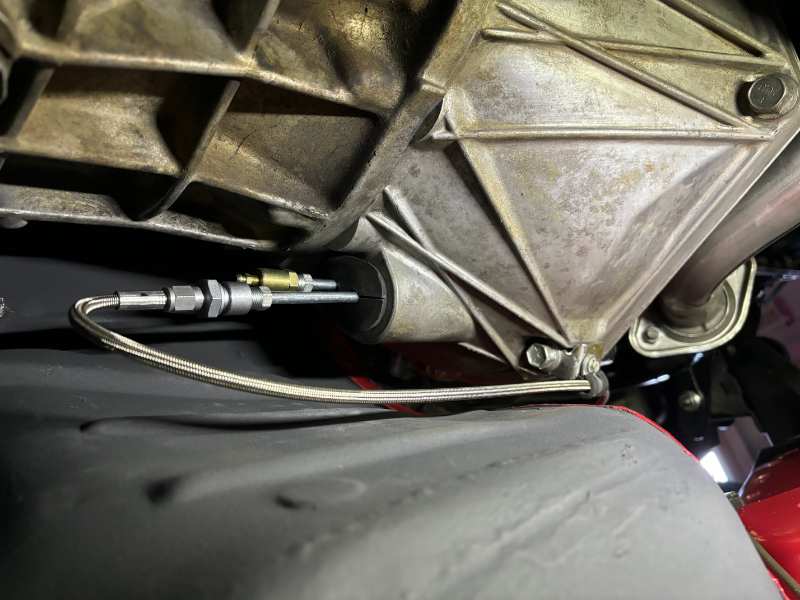
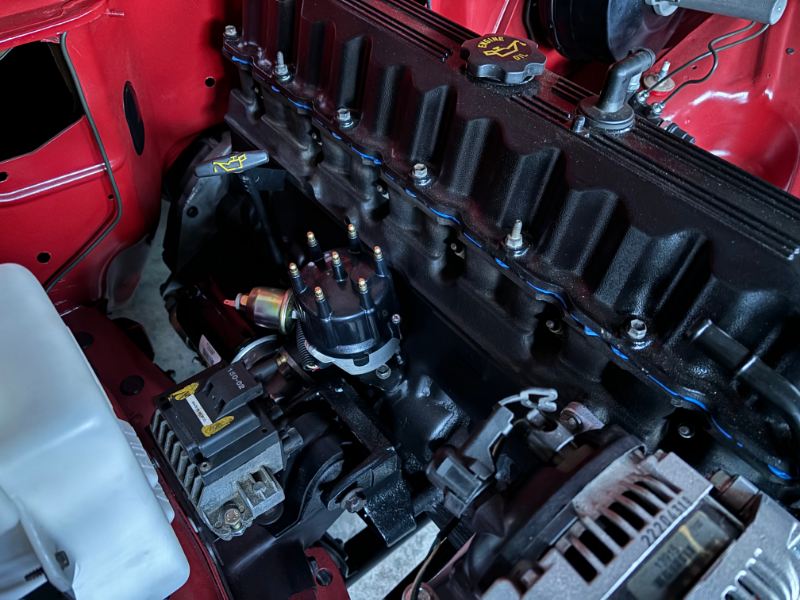
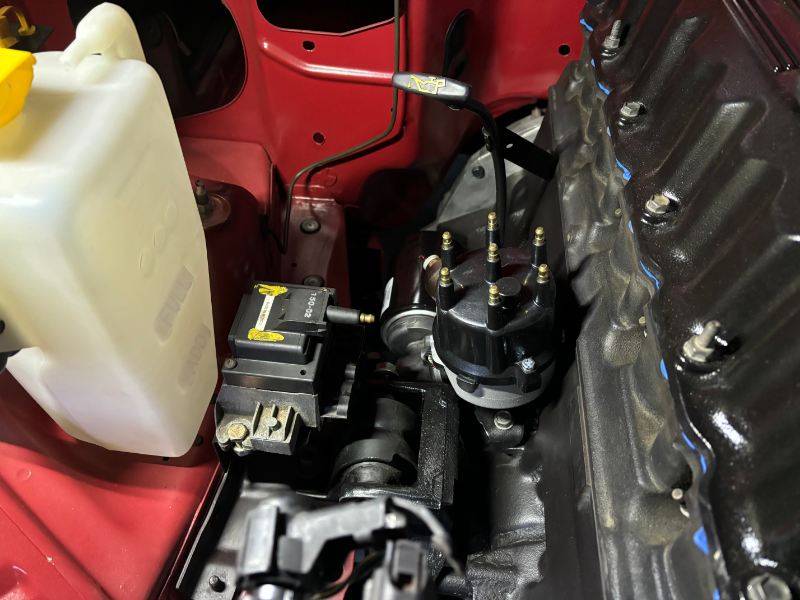
A few more details attended to up top, and a pic of the clutch hose setup. Figured out where I'm going to mount the cruise servo. Attaching to an HO throttle body, unlike the Renix XJ it came out of, where all the cable attachment is way different.
-
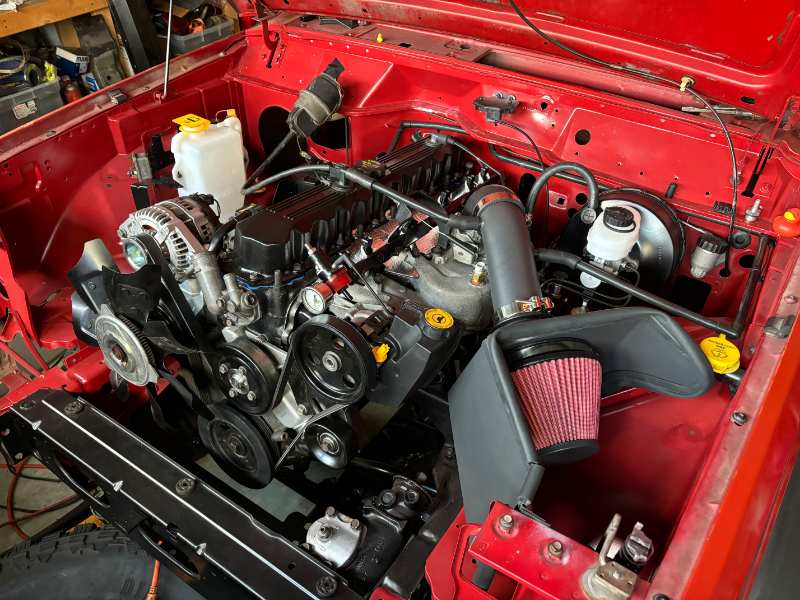
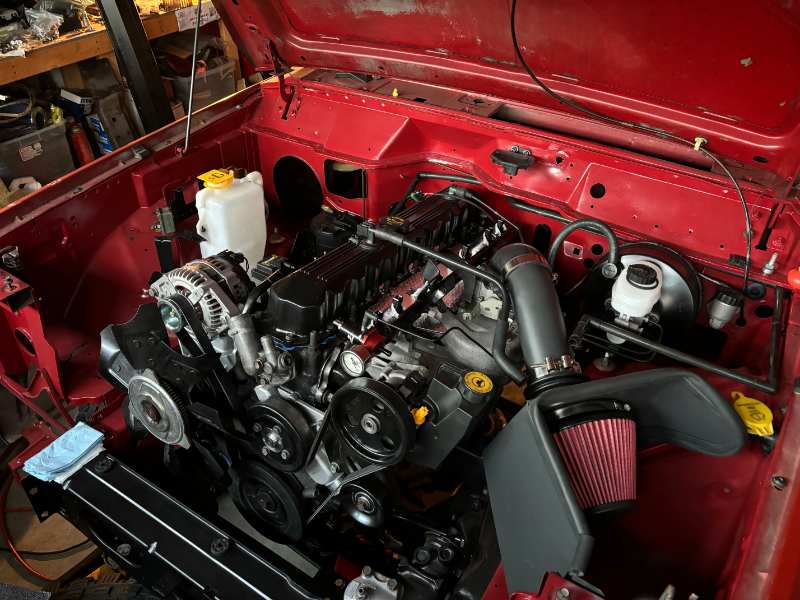
Sunday was a day of "How many 5-15 minute tasks can I get done today?" - Canister fresh air line - Clutch hydraulic line - Finish cleaning intake - Fuel rail & FPR vacuum line - Injectors - DEI fuel rail heat shield kit - Brake booster vacuum line - Throttle body (still needs bored) - MAP sensor - Throttle and cruise cables retainer on VC - PS pump - Metered orifice and fresh air CCV tubes - CAI (RC open box, < 1/2 price, for giggles) - Exhaust final mounting
-
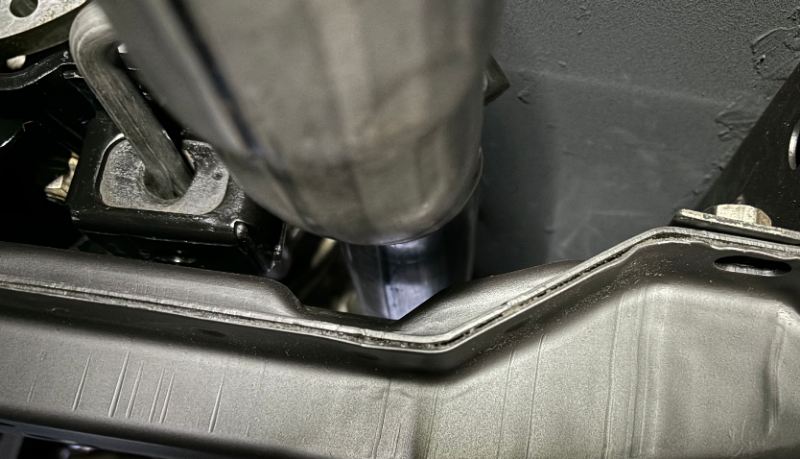
@Eagle_SX4 I decided to try what you've tried before and see how it goes. I can always circle back and add additional shielding. Here's everything tightened and tucked up in place:
-
Interesting. First of this type I’ve installed on anything I’ve built, so thanks for the findings. I’ve always used spun cats on my street builds, 300 cell/in. or 100 cell/in. and done heat shields above. The GM shields are 2 layer heavy foil with glass or ceramic fiber in between, and flexible mounting tabs. I trim to shape and re-crimp the edges. My local yard usually has an Xj or 2, so I should be able to browse, choose and test fit to find a good match to customize.
-
Pretty sure that one’s meant to be bottom side (think pulling off the road on tall grass). I think It would be too small to be effective up top anyway. The original heat mat under the passenger side seat was like a soggy diaper when I pulled the interior out.
-
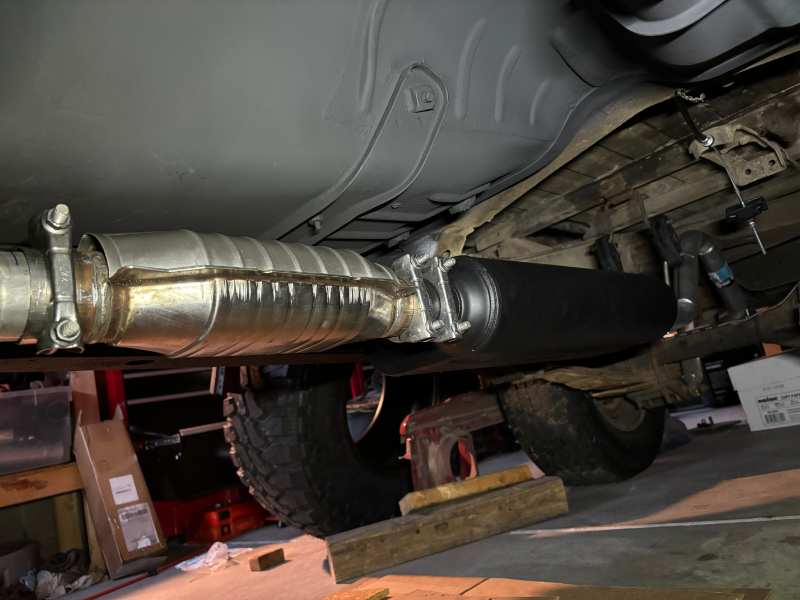
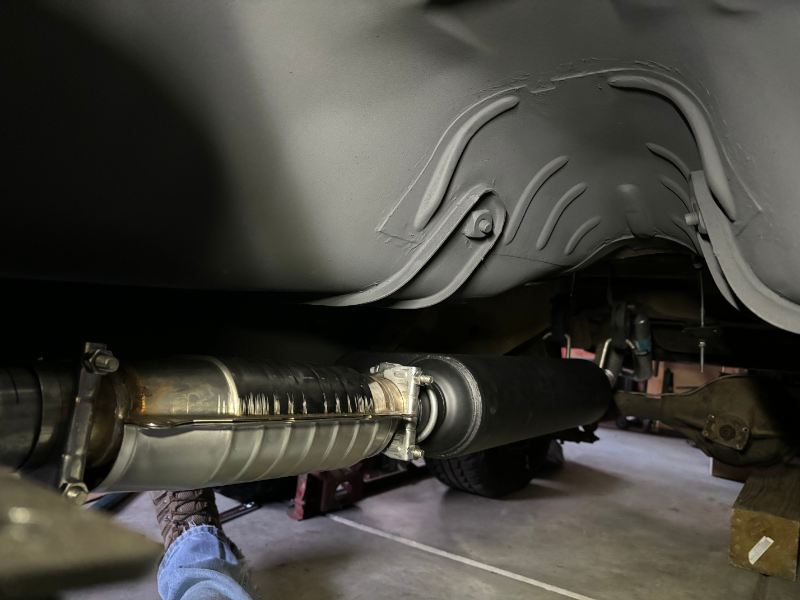
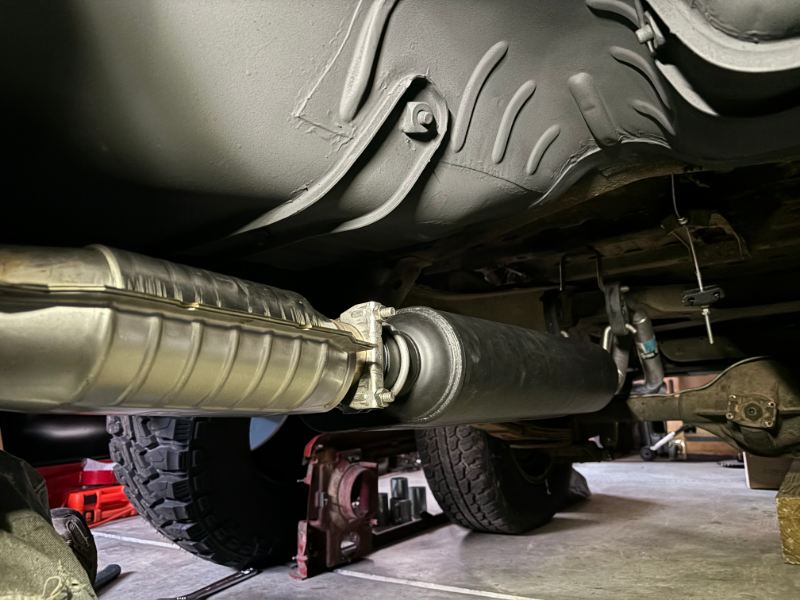
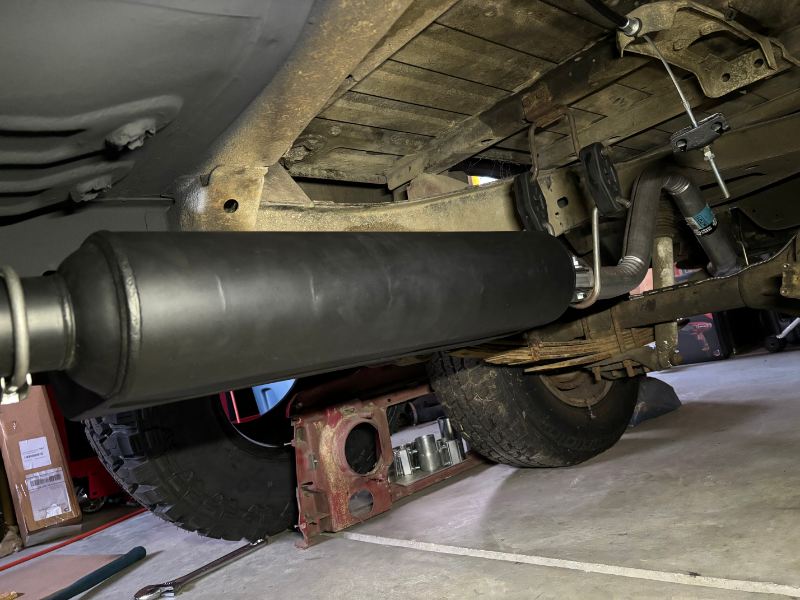
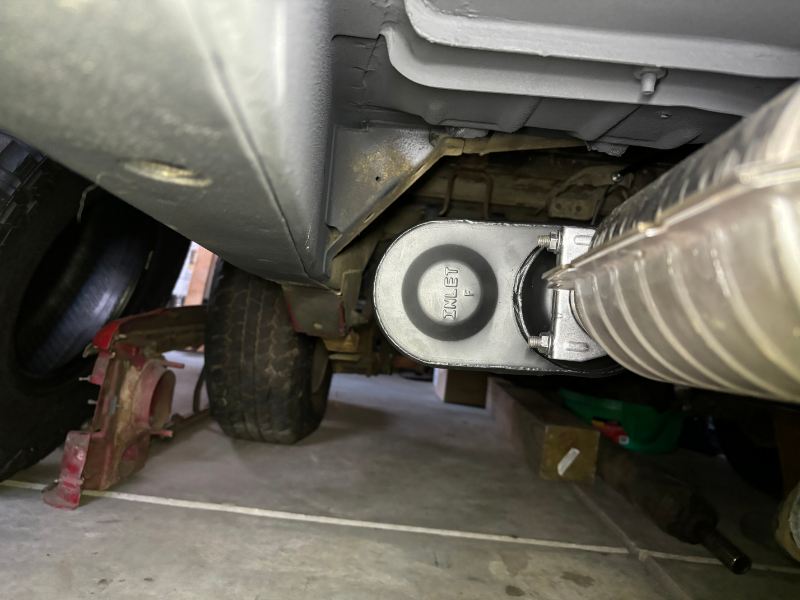
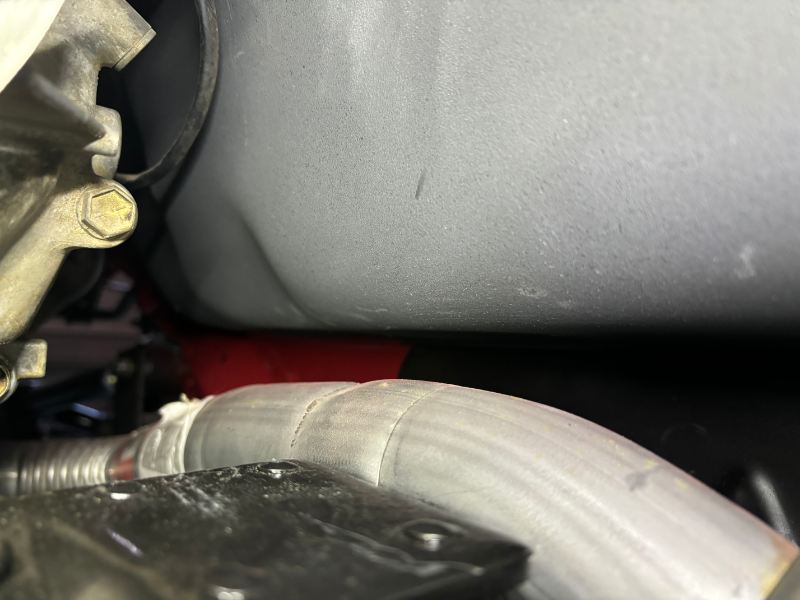
Exhaust pics. Only had to shorten the tailpipe 7.25". None of the clamps are tight, it'll sit about 1 1/2" higher once tight. I'll be cannibalizing a heat shield for the cat from a full size late model Chevy/ GMC.

-

Oil light , where to start
Gojira94 replied to Tyson Josh's topic in MJ Tech: Modification and Repairs
If you have a round pigtail with an offset single blade terminal, Wells PS117 is available at most parts stores. Autozone re-packages it as Duralast red/blue box. $10.00. PS117 -
Thanks very much! It feels good to be making progress!
-
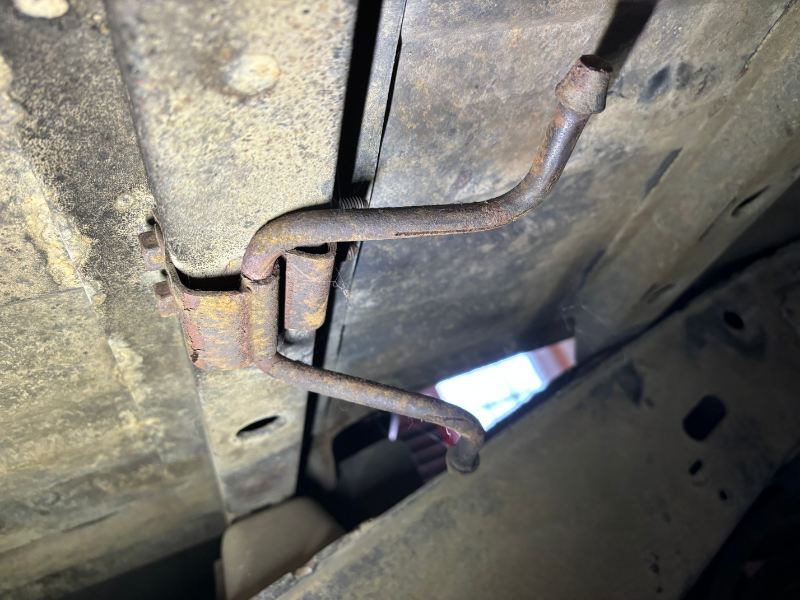
To start clearing out some of the larger stored parts, I've been working on exhaust. Parts list is as follows. Since the engine and manifold are essentially 91-95 HO, I'm comparing lengths to a 91 MJ's stock parts as made by Walker. Any slip fitment is excluded from nominal measurements to be conservative in estimates. Mine: Stock 91 MJ: Additional Length Headpipe Walker 55277 2.5" no crush, 38.25" length. Walker 44626 2.25" crush, 36" OAL (2.25" longer) Converter Magnaflow 94006 2.5" 16" OAL Walker 15634 2.25" 21.75" OAL (5.75" shorter) Muffler (big, deep, quiet) Flowmaster 52571 70 Series 2.5" 28" OAL Walker 18403 2.25" 21" OAL (7.00" longer) Tailpipe Walker 46701 2.25" 70" OAL (Same/ no comparison) (net 0.00") =========== min. 3.5" longer The idea is to be able to keep it in 4 sections for ease of removal. 5 stainless band clamps, and several adapters to be welded to cat and muffler (with a very short spacer pipe between cat and muffler) are in play. This introduces additional approx. 8.5-9.0" net. I can take an absolute max of 10.5" off the front of the tailpipe to accommodate the longer cat and muffler assembly. Looks like the tailpipe hangers can swing forward/ backward about 2" more or less. I need to mock and measure on vehicle before doing any trimming (already did it in my den lol). As I went out to the garage on my lunch break from job #1, I wondered aloud "I wonder what the first issue will be?" There were two... First issue, I always thought the hanger angle on the headpipe didn't look right. Quick fitment check had it resting on the crossmember. I bent it about where I thought it ought to be and I like it now. Second issue is the front hanger for the tailpipe. Somebody had an 'oops' somewhere back in time. I have this soaked with PB Blaster so I can pull it off and fix it before I can continue the mock-up. It's frozen solid and now asymmetrical...
-
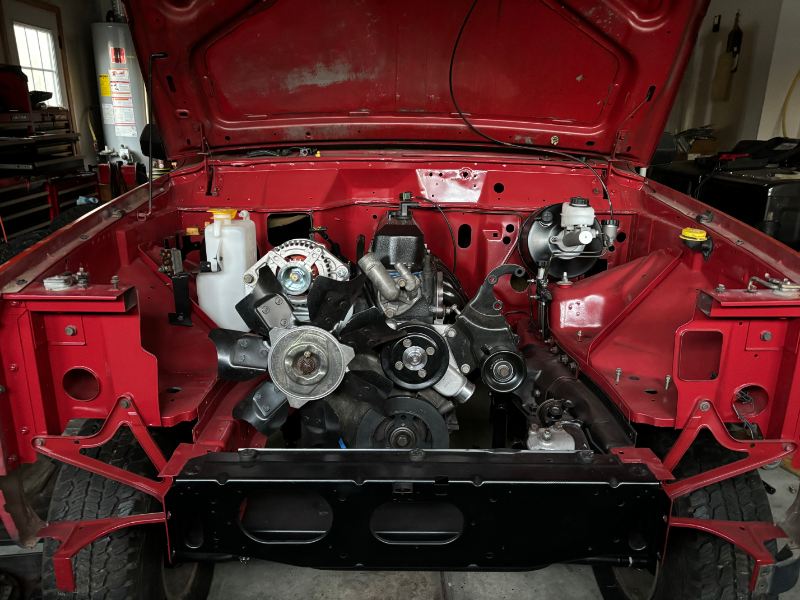
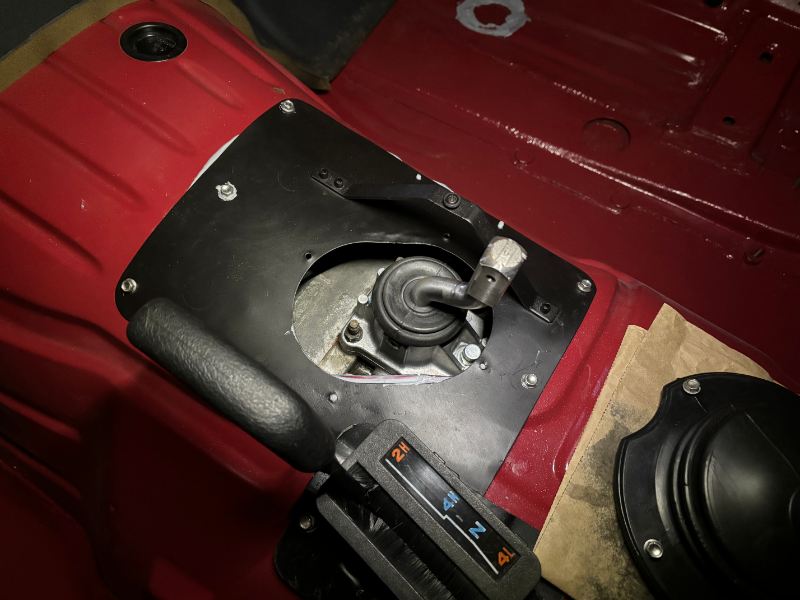
Engine and trans in today. Still working on cleaning and prepping the intake.
-
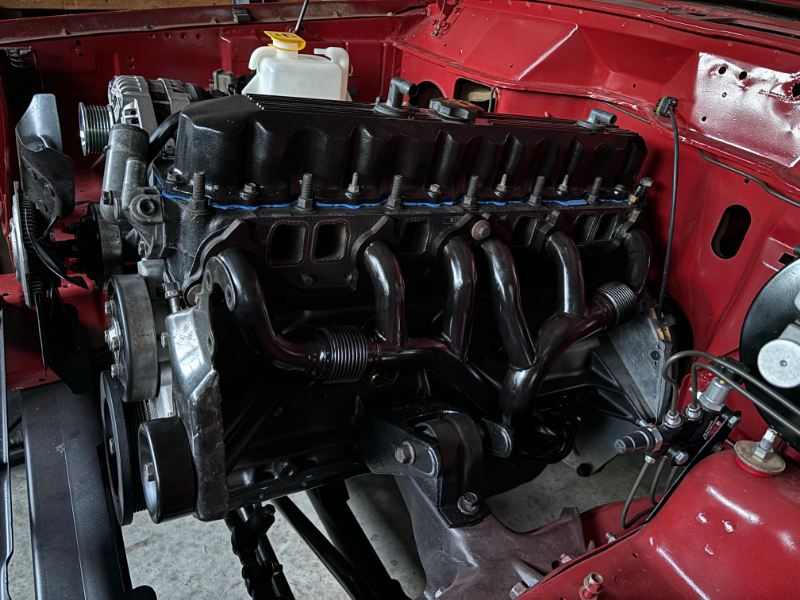
One of the kids that works for me at job #2 said he had some Cerakote and he'd shoot it for me. It's essentially high-end header paint. And yeah, heat to cure it is the key. Ideally, bake it in an old oven at 475-500* for about an hour. He did 2 light coats, after which i got it piping hot with a heat gun, followed by a medium coat. I let that cure for about 12 hours and then used a map gas torch for the final cure.
-
Probably been mentioned before, but if we could get a 3D laser scan of both 6' and 7' bars and create an engineering drawing, almost any experienced fab shop with a mandrel could make them. I have just such a guy in north Raleigh, NC that is a flatout wizard...
-
One more- I decided to go ahead and ceramic coat the manifold. First 2 cures with a heat gun, 3rd with a torch.

-
AX-15 Spacer - Cushion to Crossmember (?)
Gojira94 replied to Gojira94's topic in MJ Tech: Modification and Repairs
Thanks! -
AX-15 Spacer - Cushion to Crossmember (?)
Gojira94 replied to Gojira94's topic in MJ Tech: Modification and Repairs
This truck is a jigsaw puzzle with no box/ picture. And half the pieces were missing when I got it... -
AX-15 Spacer - Cushion to Crossmember (?)
Gojira94 replied to Gojira94's topic in MJ Tech: Modification and Repairs
Thanks for confirming. The crossmember I snagged was from a 96 XJ and I didn't see one on that either. But you never know with older vehicles, people change out mounts and sometimes forget to put everything back. FWIW, if you have an AW4 and it's missing, 1/4" HDPE makes a pretty decent substitute if you don't have 1/4" mild steel plate handy. -
AX-15 Spacer - Cushion to Crossmember (?)
Gojira94 replied to Gojira94's topic in MJ Tech: Modification and Repairs
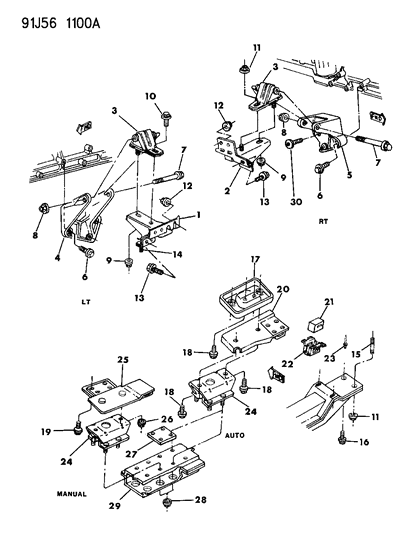
Yeah, the diagram seems to indicate it's for auto, but I filtered the lookup for ERH/DDQ/4WD and it shows in the list of applicable parts. That's why I'm asking, if anyone has a late 89-92 4.0/AX-15 or ever seen a rig that came with this spacer. -
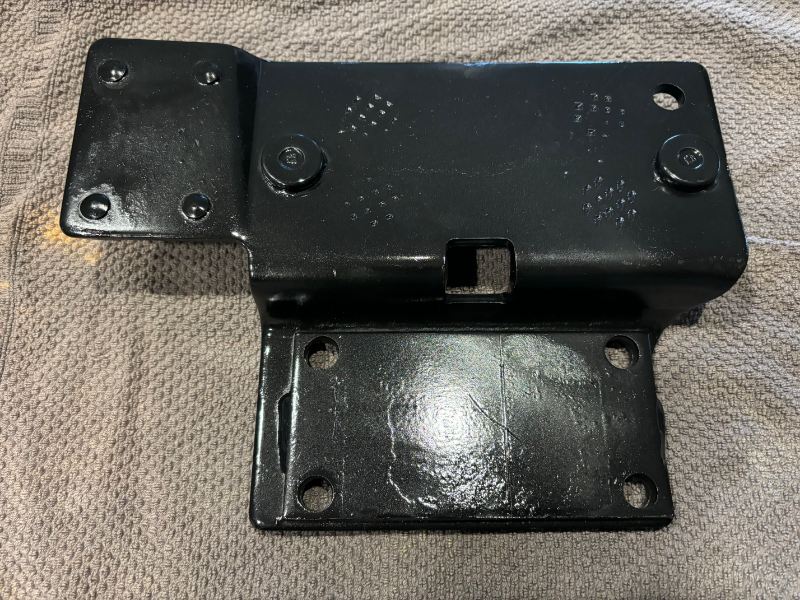
Part # 27 - 52003939: I think this is used for manual trans applications but I'm not 100% sure. If so, how thick is it? I made one from 1/4" HDPE just in case.
-
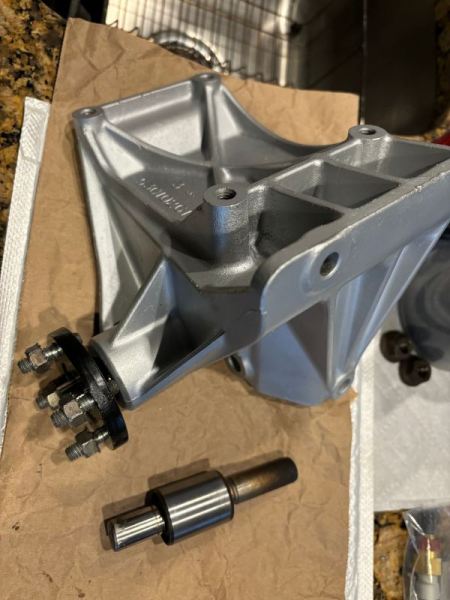
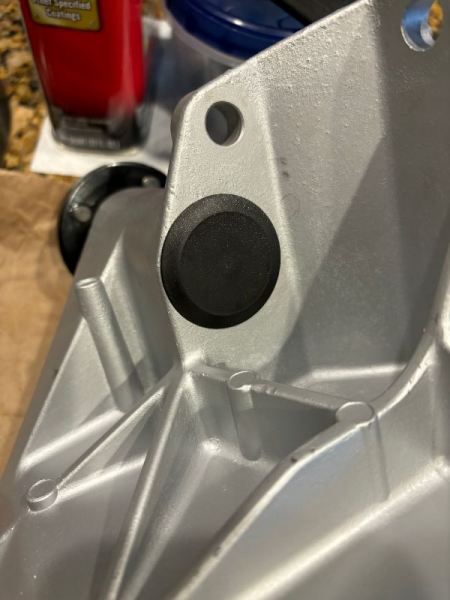
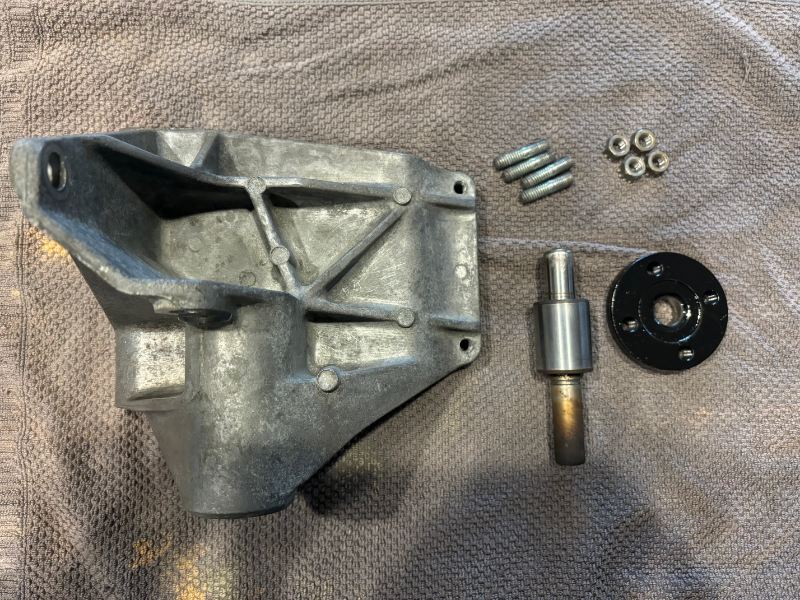
Minor update- I switched out the shaft bearing in the fan/ compressor (now alternator) bracket. NSK 885586. It's longer than the one I pulled out, so I shortened the 'long' end to be the nose. The back side ends up just short enough to cover with a cap plug to keep dirt and water out at that end. I used Seymour Alumi Blast to brighten up and protect the bracket. Good stuff, I'll probably put it on the intake when I get done cleaning that as well.
-
Heck yes! Thank you very much for the kind offer to help me out with this!
-
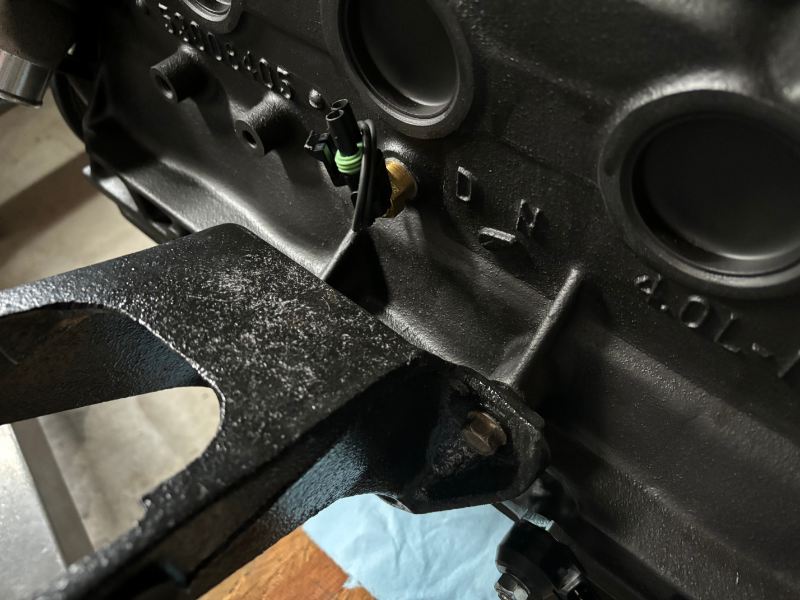
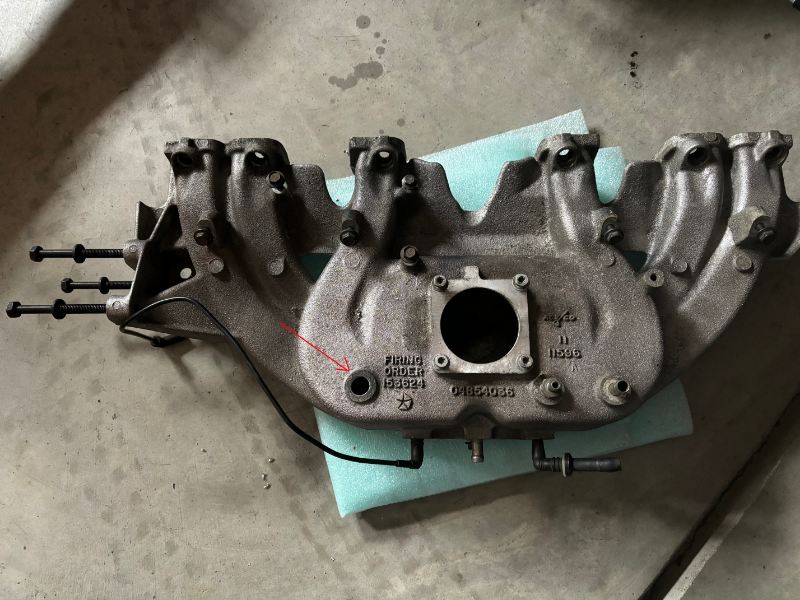
Got that plug pulled, CTS installed, relocated the plug to the water neck.

-
AC compressor (now alternator relocation) bracket- "water pump shaft bearing" on the way to replace the crunchy bearing in the mechanical fan bracket/ mount.
-
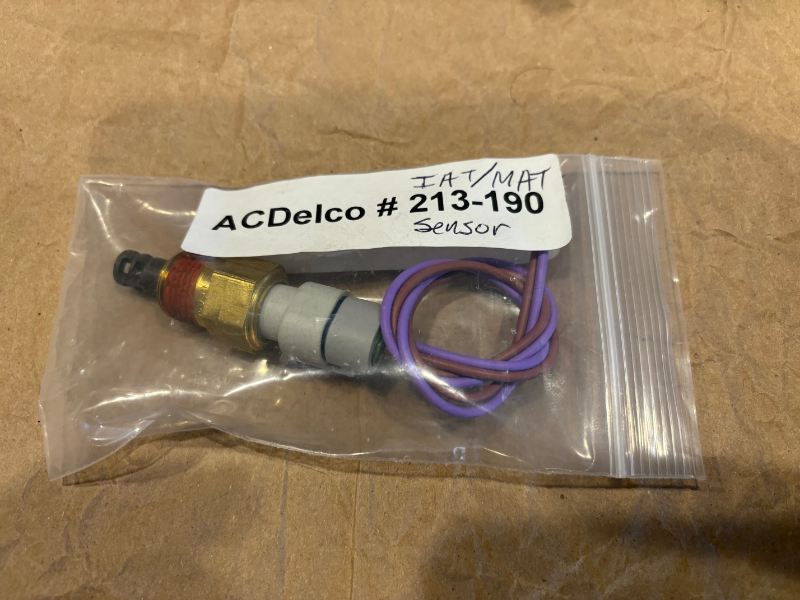
'Horseshoe' intake- was in a box of extra parts that came with the YJ drivetrain. I hate how online salvage yards spray rattle can pretty-up over filthy parts to make them more enticing/ appealing. First drilled and tapped the IAT sensor hole to 3/8" NPT, now in the process of cleaning it up. Renix-compatible GM sensor acquired a while back:
-
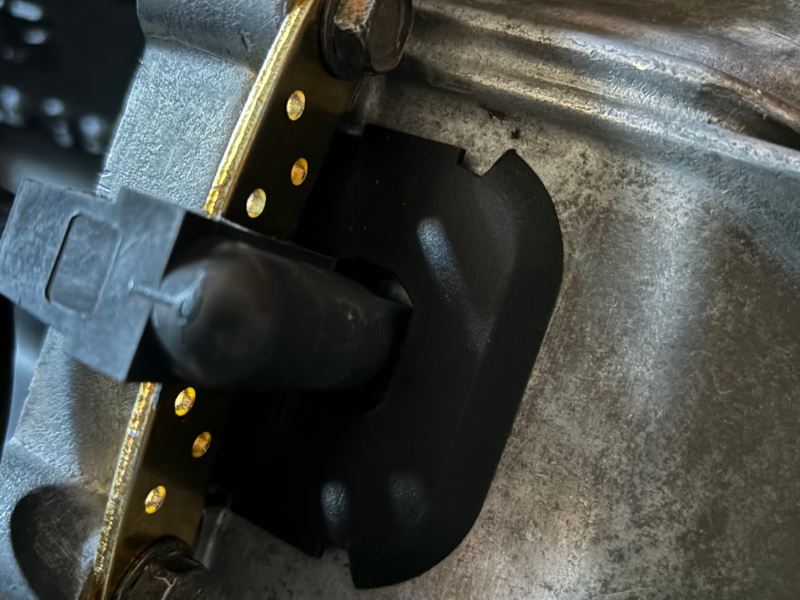
I decided to switch to a standard/ 'low altitude' CKP for now, and maybe experiment with the 'high altitude' later on. Also found a dust cover for the sensor online (Crown 53006010, $6.50 on Amazon). Still hunting for the grommet for the slave cylinder lines, but I'll proceed for now without it. XJ/ MJ AX-15 mount plate was not the easiest to find, but it's ready to go as well.