


Big_Mark
-
Posts
324 -
Joined
-
Last visited
Content Type
Profiles
Forums
Gallery
Everything posted by Big_Mark
-
Low-mid lift leaf spring options
Big_Mark replied to ghetdjc320's topic in MJ Tech: Modification and Repairs
The advantage and why they are called military is if you break the leaf with the bushing in it, the top leaf should keep the pack together enough to "get out" of a sticky snitchuation! -
From the woods - 1989 Basket Case
Big_Mark replied to Big_Mark's topic in Member Projects: Your Comanches
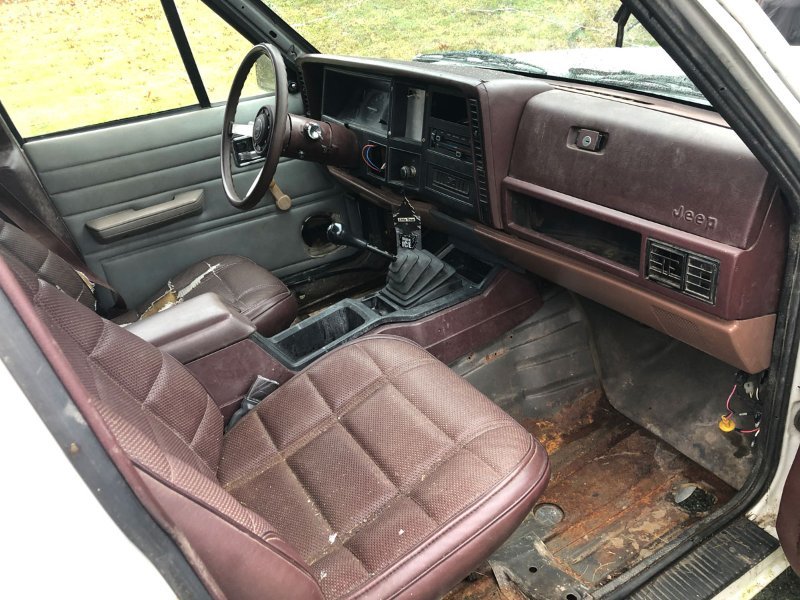
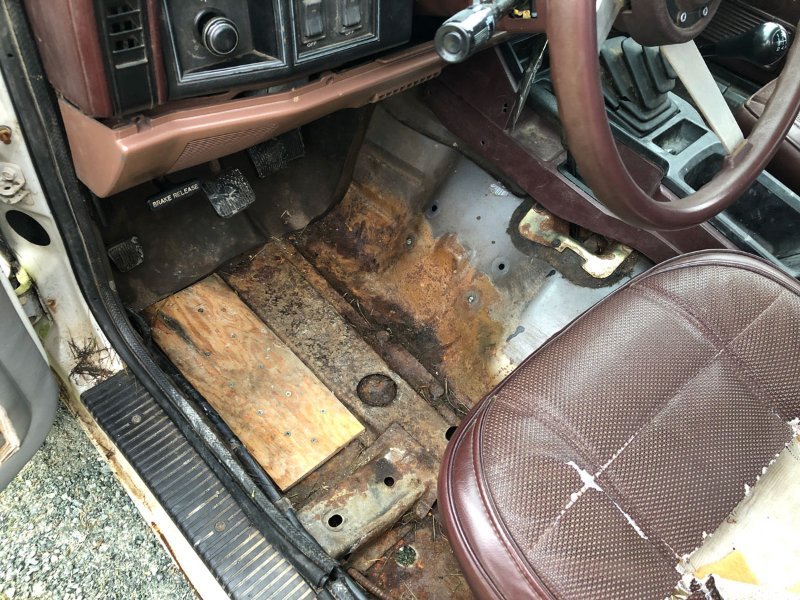
I got the center console back in the car: Also I "fixed" the hole in the floor! "I hear banjos playing in the distance......." I too can do booty fab Once I fix the cab leak (I think it's the bed light) I'll make a more permanent fix to the floor situation and perhaps even install some carpet!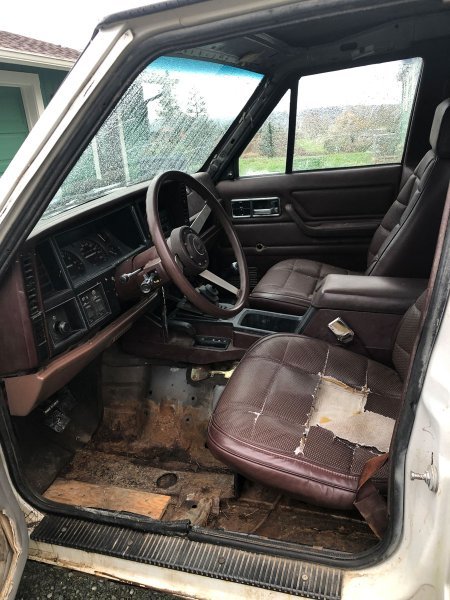
-
From the woods - 1989 Basket Case
Big_Mark replied to Big_Mark's topic in Member Projects: Your Comanches
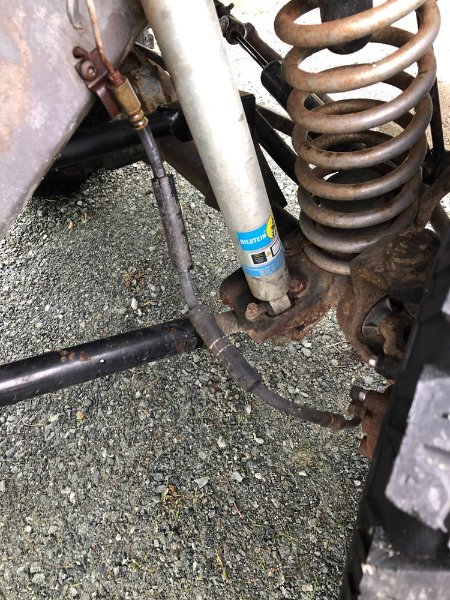
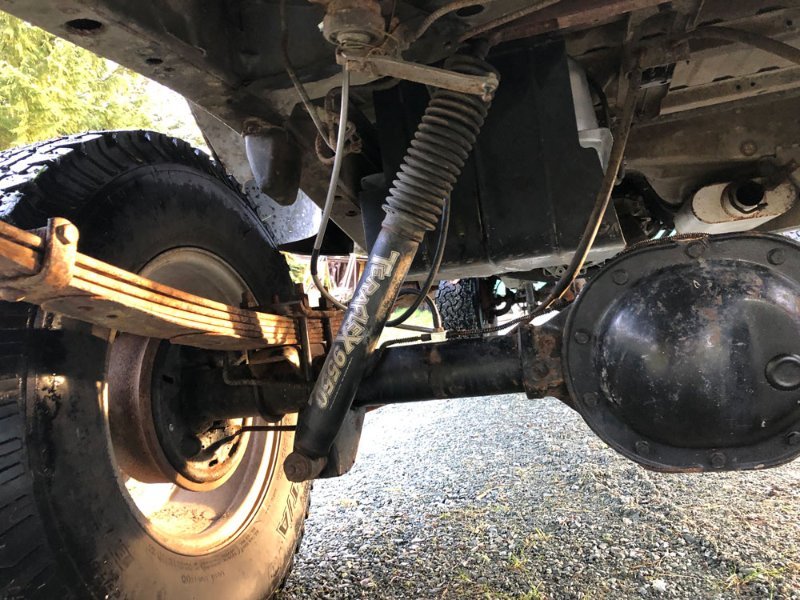
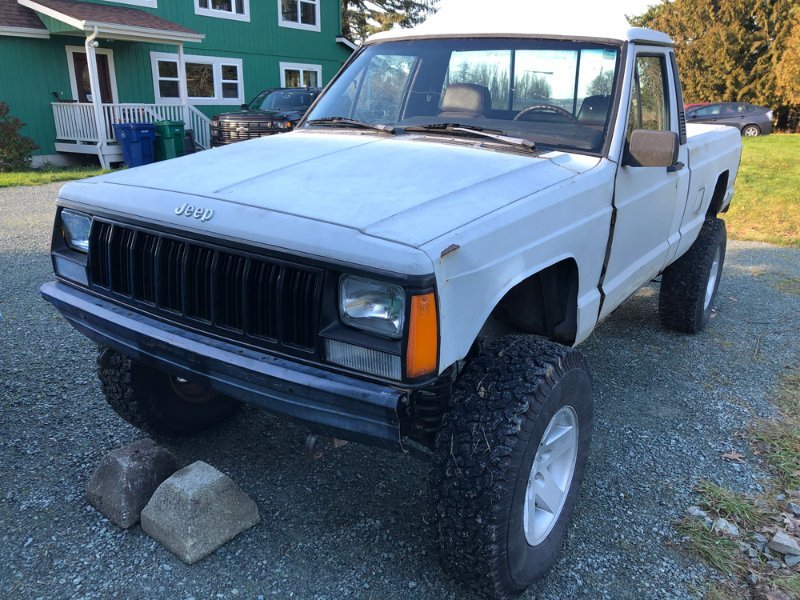
I didn't measure perch to perch because my shackles seem to line up straight Can you identify these springs? Is there a leaf added in there. Never having seen a stock pack I don't know what I'm looking at. Here is the profile of the Jeep parked on my flat driveway The rear look a little high, but this is as low as the leafs will go since the PO went through much effort to do this: Good gawd, the booty fab is strong here! From what I can gather the front is a 4-6" lift, possible ProComp, maybe Ruff Country. What I'd like to do is pull these leaf s out and replace them with stock length shackles and leaf packs that will make the Jeep sit level, any ideas what I have and what I should look for to fit the bill?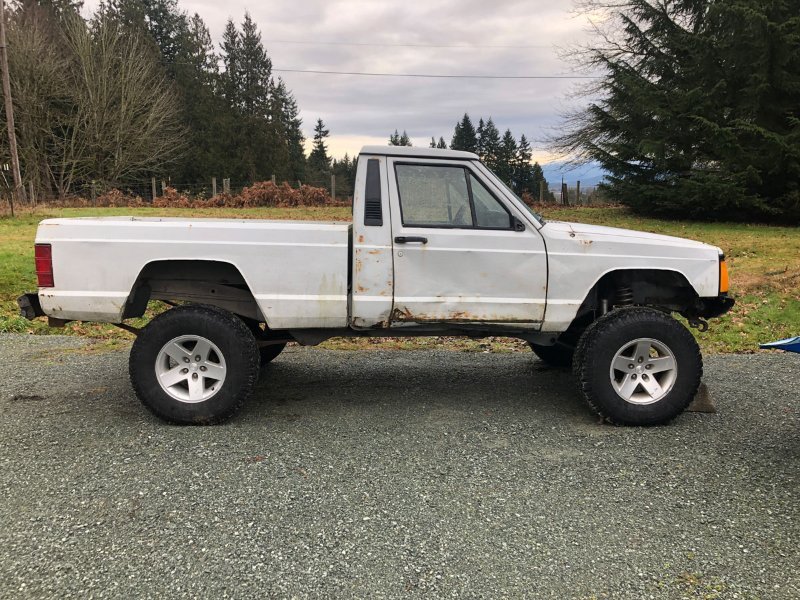
-
From the woods - 1989 Basket Case
Big_Mark replied to Big_Mark's topic in Member Projects: Your Comanches
I don't know the Jeep came this way, what's the MJ width? I'll measure to find out. -
From the woods - 1989 Basket Case
Big_Mark replied to Big_Mark's topic in Member Projects: Your Comanches
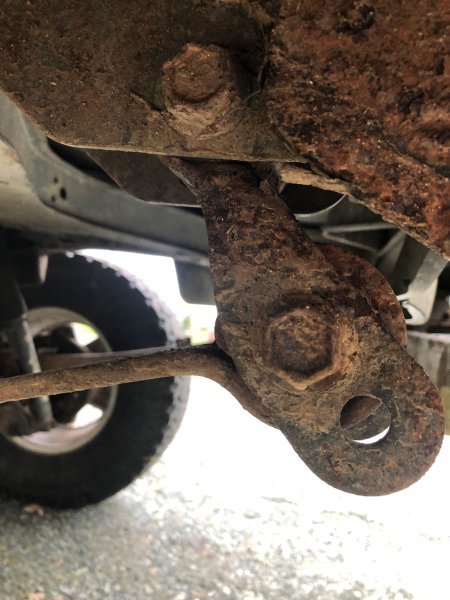
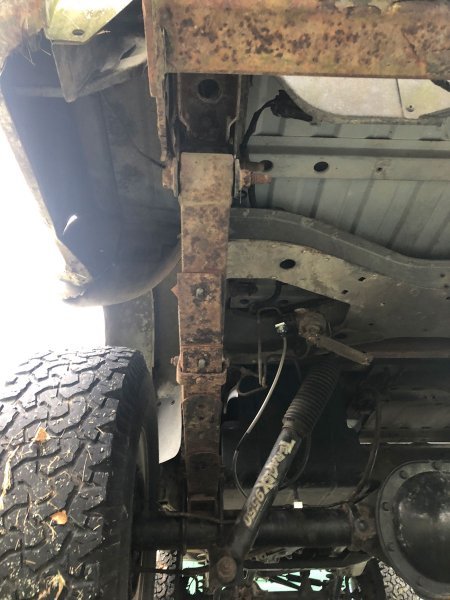
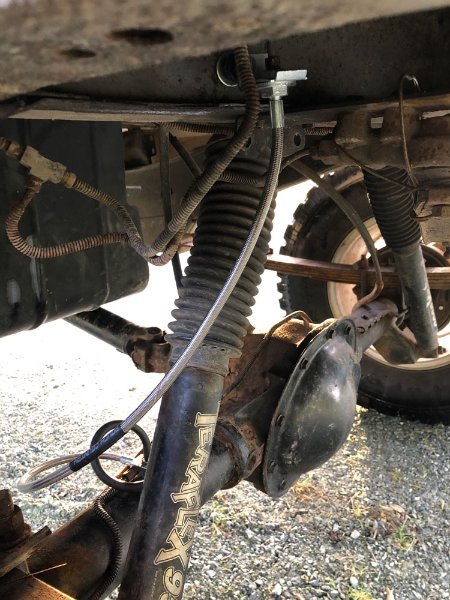
Also I got my braided brake lines on there FINALLY!! FP Before: Same After! The rear brakes were such a sh**sh** that I didn;t even taek a picture, here's the afterez... Next rear plans are to do something about the shocks. They are NOT secured well to the frame/unibody and I'm not sure how optimal this placement is. Also I thing some valves need to be oriented in one direction or another. Mine is in the "another" category. There's always something, the good news is I was able to put the freaking axle tube brake lines into the correct positions so they are secure. nothing worse than loosing a brake line in the middle of deep mud/water with random stick/logs floating around in there. They tend to rip stuff off that isn't secured properly. For transparency, I didn't set up the rear valve like this, it came that way. I wanted to put it back where it belongs but the shocks are in the way so I am leaving it for now. I did use a coat hangar to wire the valve lever into the middle/neutral position so it would provide unloaded bias. Not sure it's working but it's not "bad" either. Anyways the tinkering continues!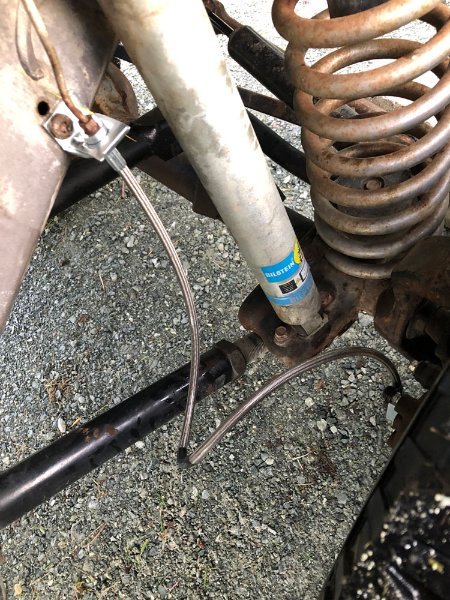
-
From the woods - 1989 Basket Case
Big_Mark replied to Big_Mark's topic in Member Projects: Your Comanches
Since "ole' Jeepy" is up and running now I decided to formalize things, before: Something was missing, let's see from the other angle... In case you missed it: It's official I have a "new" Jeep!!!!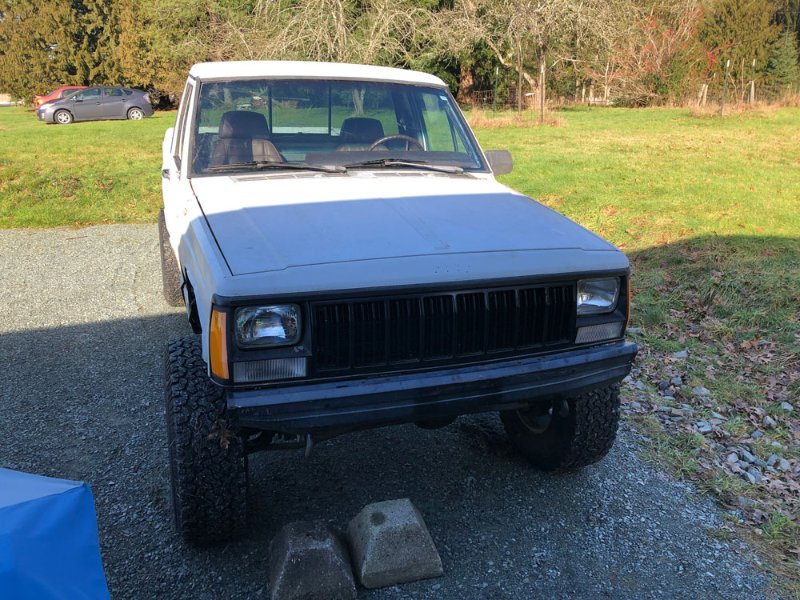
-
Here's mine:
-
Belt noise--Harmonic Balancer (with pics)
Big_Mark replied to coolwind57's topic in MJ Tech: Modification and Repairs
I just did this yesterday, my HB was also separating, removal was easy, inspected the bearing seal it was "fine" so I'll run it as is and replace it later (when it's rebuild time). The hardest part was getting the new HB back on since the bolt is too short to use to run the HB all the way down. Fortunately I have a 2 bolt steering wheel puller that has the same thread as the main bolt so I was able to place the HB on the end of the crank, then with the big washer in place, threaded the 2bolt puller into the crank, then I turned the 2 bolt puller (the part of the puller where you run the bolts through) body in by hand, this got the HB to move down the end of the crankshaft. I did this by hand until I couldn't turn it by hand, then I used a socket to keep cranking the HB down until it stopped. Next remove the puller, replace and torque the bolt. Also someone asked how to keep the crank from turning when removing the bolt. I just used a punch placed through the HB slots (screw driver might work too) then turned the bolt and held the punch until the HB and punch bound on the block, then a couple of hard, palm of hand, taps on the bolt broke it loose. Same process for getting it back on. Pro tip - If removing this in vehicle, remove the fan shroud so the puller doesn't bind on it near the bottom like mine did. -
From the woods - 1989 Basket Case
Big_Mark replied to Big_Mark's topic in Member Projects: Your Comanches
P.S. I'm all through Cruiser54s steps, and it's running great! (Ground the grounds with grounded Grounds! ) -
From the woods - 1989 Basket Case
Big_Mark replied to Big_Mark's topic in Member Projects: Your Comanches
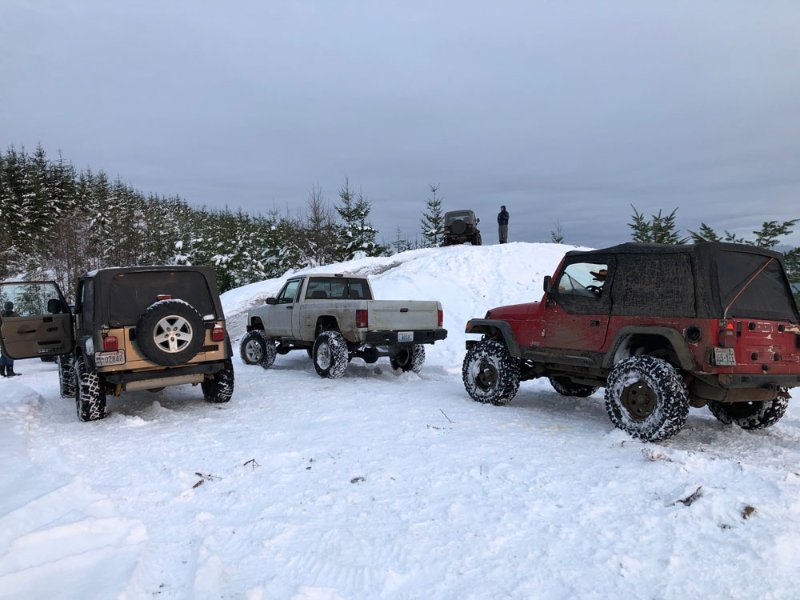
Some pics! Under the hood is looking better. In the dark waiting for the TJ to get unstuck in the snow/ice entrance. I'd drive back in to help but then they'd have to help me get back out for sure! Last pic at the lookout. I had to be towed up the last hill climb due to lack of tires. Next year I expect to be able to drive up that snowy hill!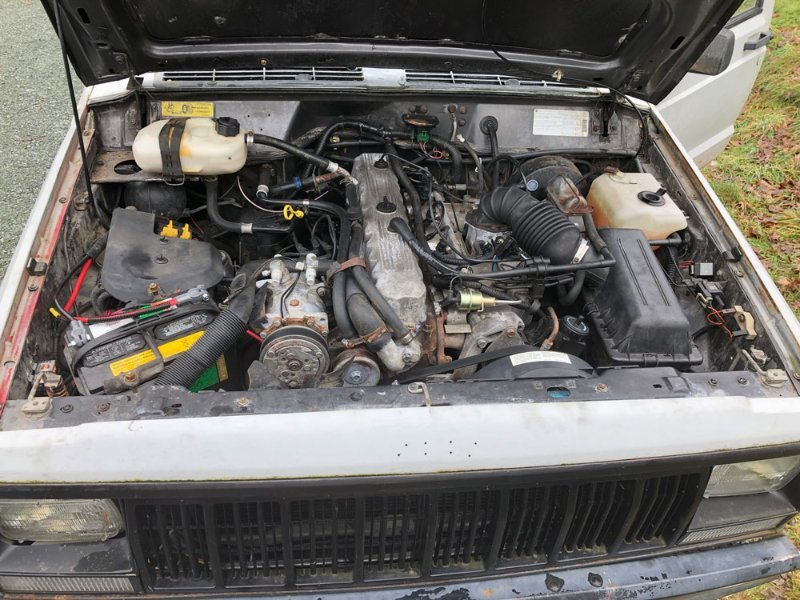

-
From the woods - 1989 Basket Case
Big_Mark replied to Big_Mark's topic in Member Projects: Your Comanches
Took a bit to find this thread but here's some updates. I have the Comanche up and running. I ended up having to secure the fuel pump to the new armature/sending unit/pickup tube with hose clams since the new piece did not have the top keeper part and my old unit also didn't have it. Once I secured that my fuel pressure problems ceased! New Gas Tank Replaced valve cover gasket Front and rear brakes are serviced and working All lights, gauges and accessories work as expected with the exception of my wipers they are still really slow overall, but the intermittent, off, low and high settings all work, they just seem a bit sluggish. Motor and T-case mounts have been replaced, that was easier than expected. During the motor mount swap I discovered that my oil filet adapter was leaking like crazy so I replaced those 3 gaskets, now the leak has stopped. I'll watch the oil stains on the oil pan to see if it stops leaking now, if not I should be able to pinpoint the leak easier. I need new tires. The BFG AT's are old, hard and not good for pacific NW wheeling. I want to get 32" of 33" Iroks but they are currently back ordered like everything else these days so that's on hold for a bit. I discovered I needed tires on the inaugural wheeling tri on Jan 1st 2022, boy my current tires were practically useless in deep snow. but my heat works!! At any rate now I have the car up and running, it has decent on road manners and starts', stops and runs as expected. Now I just need to keep driving it, work out any new issues that come up and start making it more comfortable inside, perhaps stop the leaking from everywhere along the roof, find and fix that squeel, squeek that I think is coming from the speedometer cable and so on. I'd add some photos but from the outside the Jeep looks the same, only now it's streetable! More to follow! -
I finally got it all buttoned up after I had a successful start up I took a hard drive (more like hammer down light) around the yard for good measure! Gas tank skid is back on, Hood and assembly is back in place and works better than before. I had to troubleshoot my headlights, a fuse in the headlight relay had corroded, brushed it off put it back, now the lights work great again. Some notes on things I had to discover along the way as it relates to Gas Tank removal and replacement. 1. Unbolt the emergency brake cable assembly under the truck bed and leave it off until you have replaced the gas tank and skid plate. 2. After you've removed all the fuel supply lines from the tank and unscrewed the gas cap assembly from the bed panel (remove the cap when pulling the tank out), and the straps are removed from the truck, you can remove the gas tank and filler hoses as one assembly. This makes removing and installing the filler hoses and tank MUCH easier. 3. Keep track of which tank strap is front and rear, it makes reinstalling them easier. 4. Clean the threads on the tank straps, run the bolt out (to loosen it) about 1/2" - 1" on a vise, with PB Blast. The new tank will need some extra thread to get it back in there. O.k. on to bigger better and more fun things! rear shocks, motor mounts, lengthen drive shaft and beyond.....
-
This seemed to be the issue. After a FRIGGIN YEAR I finally gave up and called my buddy who is an actual mechanic. He brought a scanner and checked what he could (all my sensors are good) and we determined with a proper fuel pressure gauge that I was only getting 5 -10 psi (maybe) at the rail. So today I pulled the "new" pump and fuel gauge assembly only to find the hose had indeed partially slipped off the feeder line. I am going to replace the pump and strap it onto the assembly, then change my tank since mine is rusty inside I'd like to have this done once and for all. More to follow when it's back together! Hopefully in the next few weeks, not YEARS!!!!
-
@Dammerung any progress here? I'm still having the same issues so today I am going to go over all the vacuum lines. Will start by blocking off the accessory line that comes off the manifold, then will spray some carb cleaner around the seals and hose ends. Thing's I've done since Feb: Swapped in new Alternator, replaced fuel pressure regulator, re-wired battery grounds and starter cable. I pulled open my wiring harness under the hood on the firewall to work on Cruiser54s ground hack, only to find it had been fixed already. I plan to solder a wire directly to the ground bundle to see if that makes any improvements. Before I had this issue I had been working on the heater controls, and vacuum reservoir. It's entirely possible one of the one-way vacuum valve has just given out. Fingers crossed that's the issue here, I really want to drive this thing!
-
In my case I had one bad parking lamp socket. After replacing it my parking lights came on, as did my hazards and turn signals. You can buy replacement sockets at NAPA, Oreilys, etc EDIT: Not sure if you mean front or back parking lamps, if back lamps I fought a huge battle with the rear wiring harness and ended up grounding it on to the chassis/body via the fuel pump ground wire. Then I did the Cruiser 54 fuel pump ground trick. So my rear harness is grounded in 2 places. Also I had to pull the rear harness apart to find the cracked wire that was causing intermittent issues back there. Good luck, keep working through the harness eventually you'll find the weak link :-D
-
Since it snowed today I decided to give the old Jeep a hammerdown through the yard, I started it and it was responsive and worked well, but by the 3rd pass across the snow covered field it started stumbling off idle. I noticed the engine had come up to temp. Research on Cherocar forums indicate O2 sensor, when the sun comes out I'll try that since as it has been mentioned here, O2 Sensors are replacement parts and I haven't replaced mine yet. It was fun to drive hard again, even if it was just for 10-15 minutes :-)
-
SO yes I tried this and there was zero change in behavior. I've also thrown some parts at it (from a junk yard truck) to no avail, including the ignitor and coil. Tested all plug wires, they are good, I'll wait until spring to work on this, hopefully I'll have had my vaccines and my mechanic buddy can help me out. When it's warm again I plan to take off the hood and do the Cruiser54 sensor ground hack to see if that makes any difference for this issue. I'll post up later!
-
money sent, thanks for keeping up this site, it's been a wealth of knowledge!
-
Not yet, I guess I'll give it a go and see what happens. Will post up here and in my thread with results. thanks man I feel you pain.
-
Thanks guys, I just found this in the archives here https://www.pirate4x4.com/d1/tech/billavista/PDFs/Jeep_Renix_Fuel_Injection_manual.pdf will give it a read and continue troubleshooting per the doc.
-
What is REM? The light doesn't seem to come on in Neutral, I can make the engine backfire if I wrap it at the throttle body about 1/4 of the time and never see the light under that test condition. Injector wires are plugged into the correct injectors. How can I test the injector harness? I was thinking the wires may have cracks and would like to test them all. Fuel comes out of the rail when I press the Schrader valve, I just installed a new fuel pump this Summer.
-
Hi All, my most recent upgrade has caused an unexpected side effect. I decided it was time to replace the leaky valve cover gasket and single port injectors and fuel filter on my 1989 MY 4.0. The valve cover job went well (aside from having to extract 2 bolts from the head ) and the injector job was fairly easy with the exception of waiting for Jegs to send me new fuel line quick disconnects. Fuel filter replacement was uneventful aside from replacing the short lengths of hose and clamps. After I got all the stuff back together and buttoned up I went for a test drive which for me is a quick hammer down through our lower acreage in 4 low, 2nd, 3rd,4th as fast as I can go in a short distance, then back in 2wd for a street drive on pavement 1/2 mile that includes a 200' elevation gain straight up a hill to a State Park. All went well and the engine was running really smooth at the park so I decided to go further and head into town (Snohomish WA) on a flat paved back highway. As I went down hill under compression I noticed a little bit of stumbling but nothing major. When I got to the "T" at the highway I put it in 1st to drive off when I felt the first stumble, it either feels like no spark or no gas, not sure which it is. So I compensated by taking out out of gear, wap, wap wap on the throttle until it was running normal then I slipped the clutch until I got the Jeep running down the road. At this point the little "house" or "Up arrow" light came on on my left bank of indicator lights. I do not know what that is an indicator of however every time it comes on the engine runs like this. It comes on and off as the issue arises and goes away. I was eventually able to hobble the MJ home and start troubleshooting and searching for others with similar issues Found one here! I read through Dammerung's journey and went on one of my own, here's what I've discovered along the way 1. I have not done Cruiser54s Sensor ground mod yet but I did test the TPS using Cruiser54's method, there was no fluctuation in the ground resistance, while I am not ruling out a ground issue I do not think this is the root cause of my problems at this time since the issue only came up after specific work was done on the Jeep, and it occurred after a 10-15 minute period of driving. 2. I removed and reinstalled the original injectors (turned out I already had 4 hole Chrysler injectors) < No change in behavior 3. I tested my CPS, it was only putting out .1 -.2v so I replaced it, and am getting a strong .5v. When the engine is running it runs smoother but over all < No change in behavior 4. I checked the resistance in plug wires, inspected wires, all are good, I have not pulled any spark plugs < Ad to my to do list 5. I checked the cap and rotor, the cap contact (middle contact from coil wire) was broken and the broken off part was stuck under the rotor contact which had bent over to the side a bit. Replaced cap and rotor < No change in behavior 6. Errata 21 week prior to this I took the Jeep to a spray and wash and hosed out the engine compartment to get the oil off the engine and hood and firewall, etc. I was careful to not directly spray the electronics but some overspray did get on everything. Maybe something got wet and took time and driving to ruin something? Now I am out of ideas and am waiting to see what results Dammerung has before I shoot the parts cannon at other parts of the system. If anyone has thoughts or ideas please post up I am willing to try them. P.S. besides checking the resistance to the battery from the TPS harness I am unable to properly test the TPS because of where it is mounted, I have a manual transmission and the expen$ive TPS without pigtails, so getting the multimeter probes in there is a physical impossibility. If I was to by any one new part it would be the TPS for an automatic, since they are cheaper and make that test (and adjustment) easier. However it seems like that isn't the issue for others so I'd rather not spend money that will likely not resolve my issue..
-
My MJ has started doing the same things, can't wait to see how this plays out! Fingers crossed one of those two items fixes your issue.
-
1999 Unit bearing / Hub offset questions
Big_Mark replied to Big_Mark's topic in MJ Tech: Modification and Repairs
I went with the larger offset Unit Bearing and it was a tight fit on the insides of the calipers with fresh pads. I think the other unit bearing would have made it easier to install the calipers however it all fit together as expected and the brakes do work. Over time the pads will wear and the calipers will move closer to the inside of the axles so I'll run it like this. Driving around without the friction of bad U-joints has made a huge improvement in performance. Also being able to stop the truck without grinding noises is a bonus Thanks for the insight folks -
Has your driveline angle or length changed? Is the pinion in the new axle loose? Those are the likely suspects for vibrations