pizzaman09
-
Posts
1556 -
Joined
-
Last visited
Content Type
Profiles
Forums
Gallery
Everything posted by pizzaman09
-
Internal slave leaking
pizzaman09 replied to pizzaman09's topic in MJ Tech: Modification and Repairs
I've been learning towards the Advance Adapters kit, does anyone have experience actually using this kit, is it pretty straightforward? -
I seem to have the unfortunate internal slave cylinder leaking issue. Looking through the records that came with my truck (a dealer owned it for 15 years so I have great records) it received an LUK clutch kit PN 01-034 about 7,000 miles ago. What are my best options for replacement? I see some people buy the AX-15 bell housing and external slave parts. Also it appears that Novak sells a conversion to external slave. Can I still get a MOPAR internal slave?
-
Still bucking and dieing
pizzaman09 replied to comanche32's topic in MJ Tech: Modification and Repairs
The check engine light is what ultimately triggered that told us to check the O2 sensor. It was a very sporadic issue, dealer changed many parts and tested many things over the years trying to fix it. As soon as we changed the O2 sensor the problem was fixed. -
Still bucking and dieing
pizzaman09 replied to comanche32's topic in MJ Tech: Modification and Repairs
I know it's not a Renix, but my parents 97 ZJ with the 4.0 acted like this due to a combo of a fault O2 sensor and cracked exhaust header. We chased that problem for 10 years. -
1990 Comanche Eliminator
pizzaman09 replied to pizzaman09's topic in Member Projects: Your Comanches
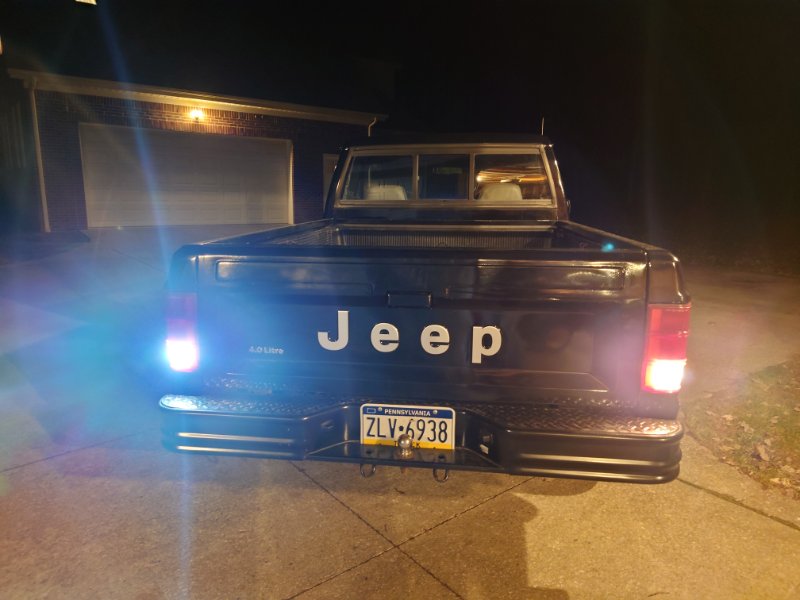
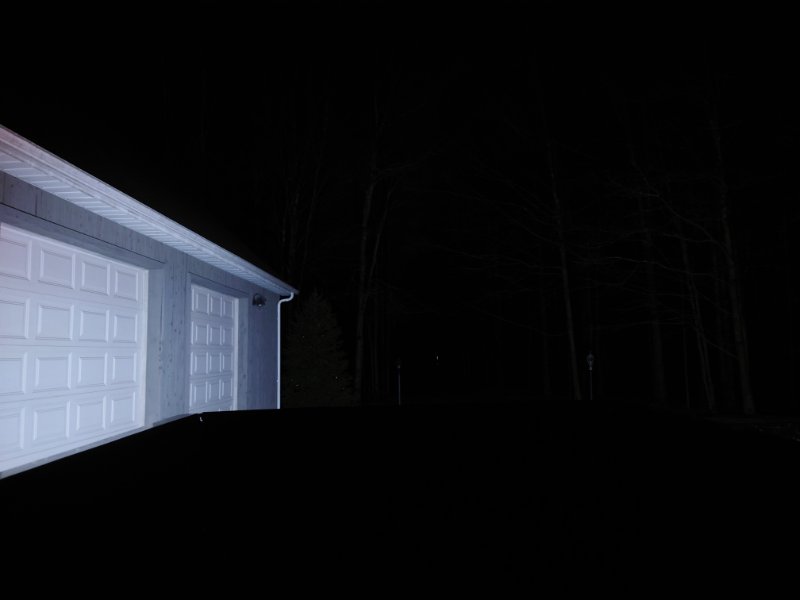
Upgraded reverse lights with these light bulbs based on someone's recommendation on the forum. https://www.amazon.com/AUXITO-Lumens-Replacement-Backup-Reverse/dp/B07W7HQPZF?pd_rd_w=6gfht&content-id=amzn1.sym.55bebd03-1feb-4883-a1f4-21b3be773289&pf_rd_p=55bebd03-1feb-4883-a1f4-21b3be773289&pf_rd_r=9E39KKAW1QJP61GG399Y&pd_rd_wg=2heao&pd_rd_r=bc776f05-5ffb-48a9-9a7e-884b8e70f0e3&pd_rd_i=B07W7HQPZF&psc=1&ref_=pd_bap_m_grid_rp_0_1_i They are awesome. Final install. New on left old on right. Lighting up what's behind. You would barely see that garage with the original lights.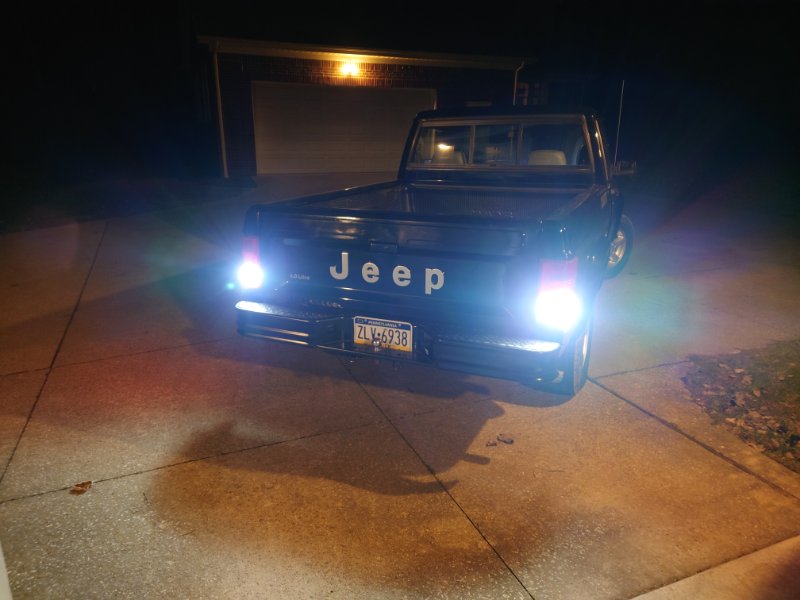
-
Found during valve cover gasket install
pizzaman09 replied to NC Tom's topic in MJ Tech: Modification and Repairs
If you have non terminated vacuum lines like that, you probably would only have heat on defrost anyway due to the vacuum leaks. That sure looks like the correct line to me, should have a rubber 90 degree fitting on the end of the line. -
Found during valve cover gasket install
pizzaman09 replied to NC Tom's topic in MJ Tech: Modification and Repairs
My factory plastic valve actually exploded when I was working under the hood and I got some darn hot coolant on me. A new one was worth while, picked up at Advanced Auto in a day. -
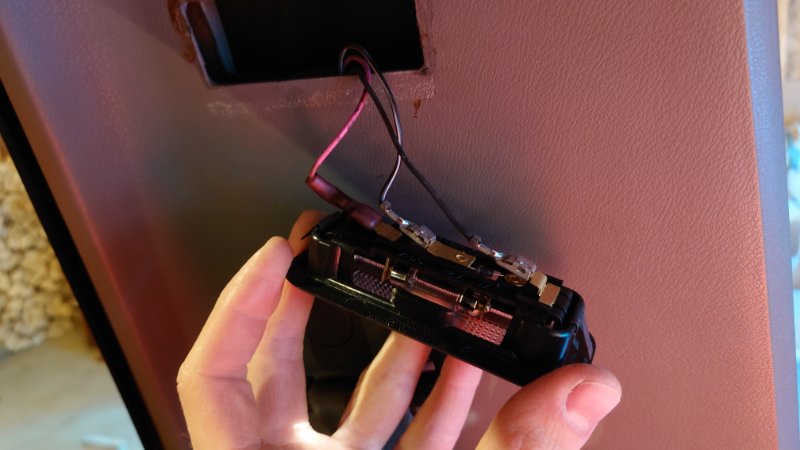
I hope this helps. If I remember correctly, I used the Euramtec lights.
-
I'm really just a Penn State fan, but I always appreciate when kinda local teams do well. Sure I'm smack dab between Browns, Bills, and Steelers country, but I have family in Philly and definitely rooted for them.
-
In order of when vehicle was acquired. 1999 Oldsmobile Eighty Eight (still own, daily and winter beater) 2002 BMW M5 (sold, nicest fastest car, heavy on maintenance) 1999 BMW 328is (still own, project car with experimental rotary valve engine head) 1962 Austin Healey Sprite (still own, summer daily) 2013 Mini Cooper S JCW (sold, autocross king, more expensive to maintain than M5) 1988 Jeep Comanche SporTruck (sold, purchased in Roadkill style cross country trip with friends) 1999 BMW M3 (still own, current autocross car and winter beater) 1990 Jeep Comanche (still own, dream find summer daily and doing truck stuff) My twin brother and I own all our vehicles together, we are 32. The Oldsmobile was a gift from our grandparents, first car. The Sprite has been in the family since 73.
-
Wiper Arms Park in Up Position
pizzaman09 replied to White_Comanche's topic in MJ Tech: Modification and Repairs
I made this mistake once on a Suzuki Samurai. The crank arm is indexed wrong on the motor. When parked, unbolt the crank, move the wipers to the correct parked position, then bolt the crank arm back on. -
That will do! Are you adding any sort of trailer receiver setup?
-
Renix misfire under load
pizzaman09 replied to speeding_infraction's topic in MJ Tech: Modification and Repairs
How is the condition of the ceramic insulators on the plugs, any cracked insulators? Is the distributor aligned correctly so that spark doesn't have a giant gap to jump? Are the manifold bolts tight, a good intake leak could cause misfires. -
A quick search has yield that a cowl and scuttle are the same thing. The Brits apparently call it a scuttle panel.
-
Basically the panel in front of the windshield that the wiper spindles are in.
-
My two friends with Wranglers, JK and JL are constantly getting rock chips or cracks and having to have their windshields replaced. This is in PA, primary cause are the salad and cinder trucks for snow. My friend with a Bronco actually purchased windshield insurance. I had Safelite replace the glass in Comanche, they broke the glass in the process. Also scratched the heck out of the two pieces next to the scuttle panel. I don't recommend Safelite. However I did end up with a nice new windshield when done all conveniently done at my workplace's parking lot.
-
Front shock recomendation
pizzaman09 replied to Whitaker717's topic in MJ Tech: Modification and Repairs
Yep, those tabs come with the shock. Install that end first, then rotate it up to align the rod with the hole in the wheel well. Here it is installed in mine, the white tab will be pre installed into the bushing.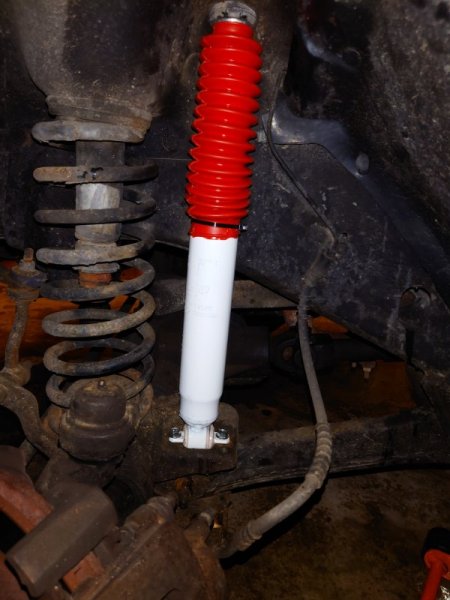
-
1990 Comanche Eliminator
pizzaman09 replied to pizzaman09's topic in Member Projects: Your Comanches
I found the clutch master cylinder was in very bad shape. It looks to be original at 258k miles. The piston was stuck at the bottom of it's travel. I replaced it with a Sachs master cylinder. I didn't have much success bleeding it with the two person method. So I then tried gravity bleeding and that worked brilliantly! Clutch feels amazing, better than it has since I purchased the truck! -
Front shock recomendation
pizzaman09 replied to Whitaker717's topic in MJ Tech: Modification and Repairs
I purchased RS55128. I am not quite sure what you mean by tabs or fins. The Rancho shock came with 100% of the new hardware required including bolts. I like the softer ride if the KYB in the back, I would have purchased them for the front but I couldn't find a source of them. That said my Ranchos in the front ride fine. -
Front shock recomendation
pizzaman09 replied to Whitaker717's topic in MJ Tech: Modification and Repairs
I put Rancho RS 5000X on the front of mine a few weeks ago. Completely stock suspension setup and truck in general. I am pleased with them. Definitely good for the price. I have much cheaper new KYB shocks on the rear, they too are a wonderful upgrade over the old blown ones. -
Like most engine management systems, it's all about just having the right sensors in the right places. The engine harness is still going to be engine bay shaped. I'd grab it all and swap it over. Drill a few holes in the firewall to send the wires through and hook it up. You basically already have the full package, the mechanical connections and ancillary packaging are probably going to be the main hurdles. You can certainly look at the six cylinder YJs for inspiration for a lot of it. The connectors on the Renix ECU don't look very waterproof to me so if you mount it under the hood, consider the weatherproofness.
-
Engine swap options? Help me decide
pizzaman09 replied to JRappleguy's topic in MJ Tech: Modification and Repairs
I'm all for a cool swap, I know nothing of any of the American V8s. Anything is possible and not everything has to land on the logical LS, K series or rotary swap that so much of the automotive build world lands on. Personally, I want to swap in an early 2000s BMW M3 S54 inline 6. Lightweight, high revving, makes more power and torque than any stock 4.0L. -
Yes, my bumper always catches stuff and I make sure to clean it out every time the Comanche gets washed.
-
Where I live in PA, we only have a visual for emissions, so I'm not too familiar with states that actually sniff the exhaust. However, high carbon to me sounds like you are either burning oil or running lean. If you ran a smoke test, I suspect the intake is leak free and all your header bolts are tight. I'd look at the egr setup and test to confirm it is operating correctly. I'd also check to make sure your crank case ventilation is functioning, not clogged or just pumping oil into the intake.
-
I love my Fey bumper. Fits the style well and is quite heavy duty. I've put way more load than it's rated for in the ball.