pizzaman09
-
Posts
1506 -
Joined
-
Last visited
Content Type
Profiles
Forums
Gallery
Everything posted by pizzaman09
-
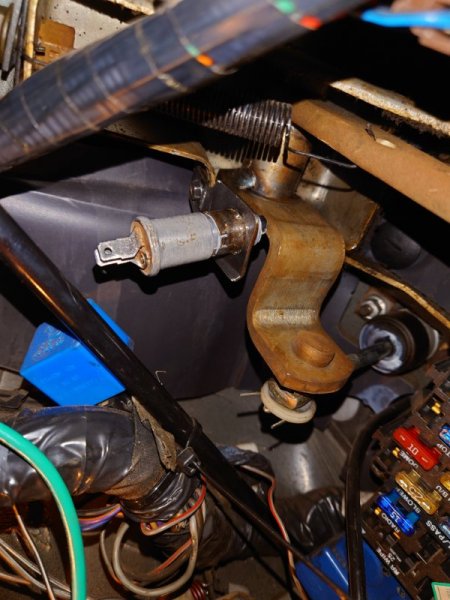
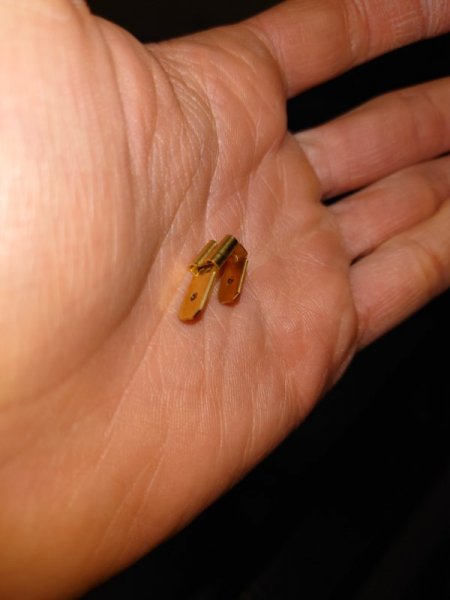
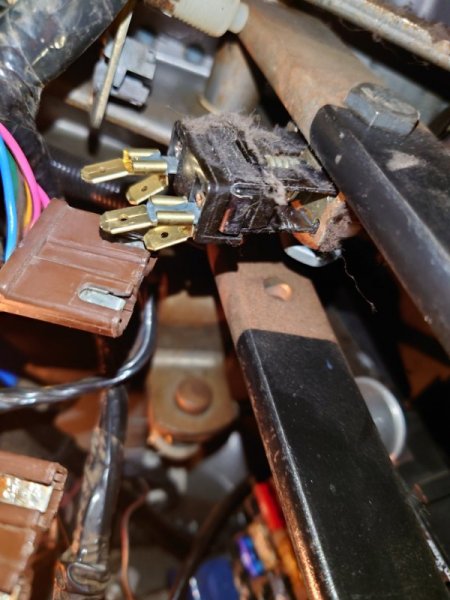
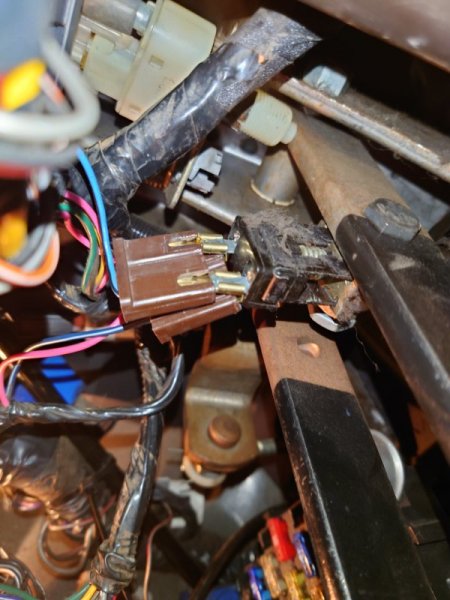
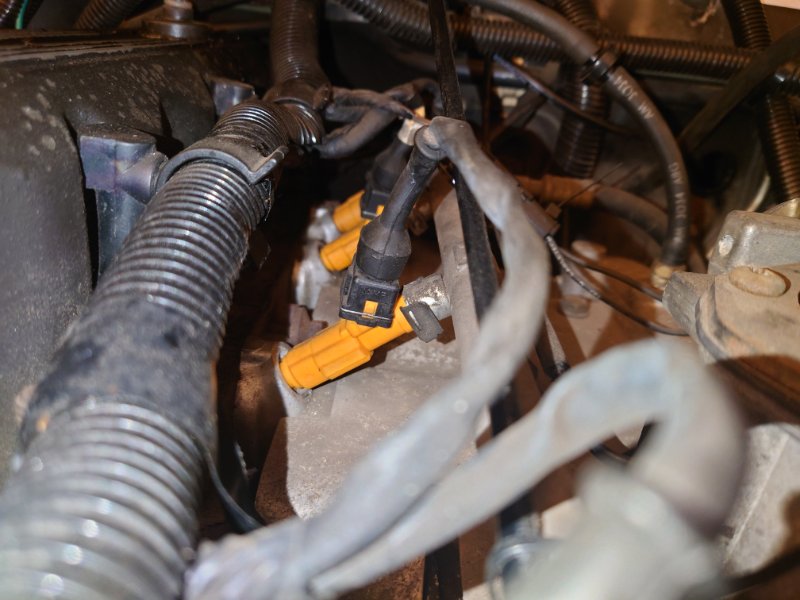
Some additional cruise control pedal switch thoughts. This is how the clutch switch is oriented and installed. The bracket was very difficult to tighten the bolt up on, a ratcheting 8mm box end wrench saved the day Additionally, I didn't acquire a factory brake light switch with the 4 spade terminal connections. Instead I purchased doorman 85412 and split the outputs. With a little Ox-Gard on all the fittings, it basically looks factory. As a bonus I didn't have to swap out and realign the switch!
-
1990 Comanche Eliminator
pizzaman09 replied to pizzaman09's topic in Member Projects: Your Comanches
So you are saying it might disengage cruise if for instance the t case is not in high range? I'll have to test that. -
1990 Comanche Eliminator
pizzaman09 replied to pizzaman09's topic in Member Projects: Your Comanches
Ah, so I didn't need to fight for 10 minutes getting it plugged in as I have a manual. That explains why the valve that I got that came out of a manual truck didn't have the plug. -
1990 Comanche Eliminator
pizzaman09 replied to pizzaman09's topic in Member Projects: Your Comanches
Since I am installing this on a manual, does the dump valve with switch plug into this plug that is already in the truck on the factory non cruise harness? Does this replace the brake plug on the cruise harness or do I still need to connect that to the brake switch?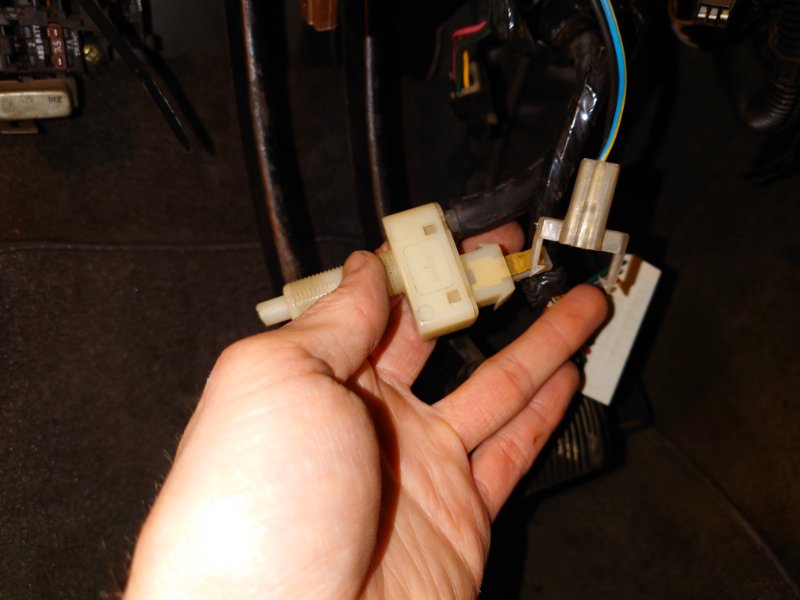
-
1990 Comanche Eliminator
pizzaman09 replied to pizzaman09's topic in Member Projects: Your Comanches
I like that idea with respect to the rubber grommet. -
1990 Comanche Eliminator
pizzaman09 replied to pizzaman09's topic in Member Projects: Your Comanches
I snipped out the old one and soldered another in its place. I have the modern replacement interior B pillar lights that are recommended by others on the forum. The first time I installed one I had two of the wires swapped and shorted the diode, it then just acted like an solid wire. Now when I turn on the lift by tipping the lens, just that light turns on instead of it back feeding the wire harness and turning on all of the interior lights. I was actually dreading getting to the Vacuum canister the most, I tried to get to it in the summer and wasn't pleased on how to get the bumper corner cap off. I also suspect I need to find another hole for my REM Ethernet cable as I'm currently using the cruise control wire harness hole for that. -
Recommendations for Sound Deadening/Insulation
pizzaman09 replied to Warren99's topic in MJ Tech: Modification and Repairs
Your truck sounds like mine. All original components at 250k miles including the heavy pad under the floor that has lots of rust chips stuck to it. When I get to recovering my seats I'll rust proof the floor and probably replace the pad. Also don't forget to use the opportunity to replace your parking brake cable. -
1990 Comanche Eliminator
pizzaman09 replied to pizzaman09's topic in Member Projects: Your Comanches
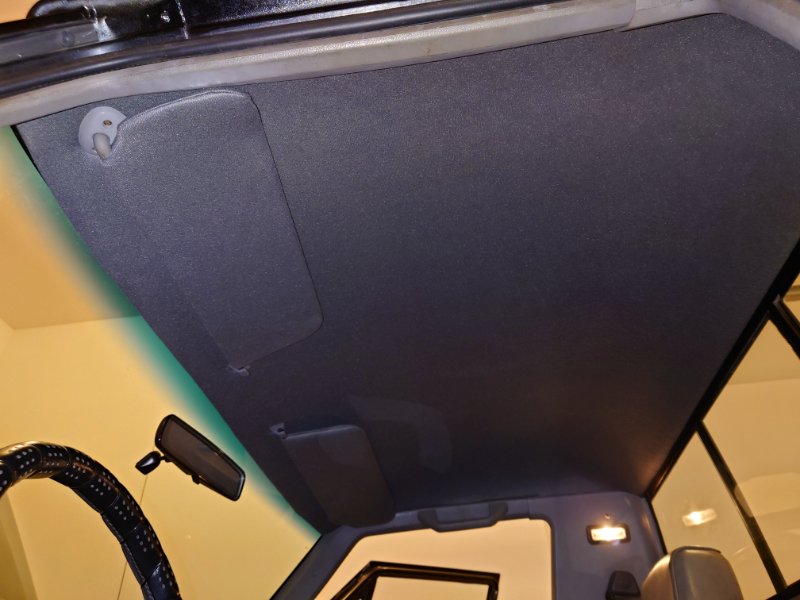
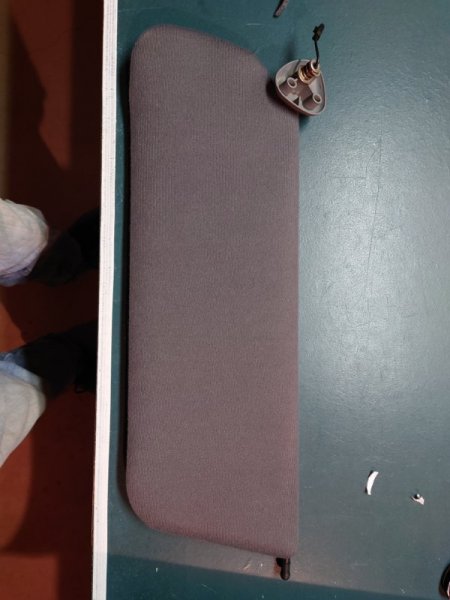
Knocked off a few things on the list the past few days. Did a little rust prevention on the inside of the roof, put sound deadening on the roof and reupholstered the headliner and sun visors. If you are interested in the repair and reupholstery of the visors see my thread here. https://comancheclub.com/topic/70640-sun-visor-reupholstery/ Also fixed the burned out diode in the one B pillar. Swapped in the cruise control speedometer cables and speed sensor in preparation to install the cruise control system. I found one didn't need to remove the dash to unplug and reinstall the cable. It was easy enough to feel up under the dash and remove it in place. Plugging it in was also a sinch.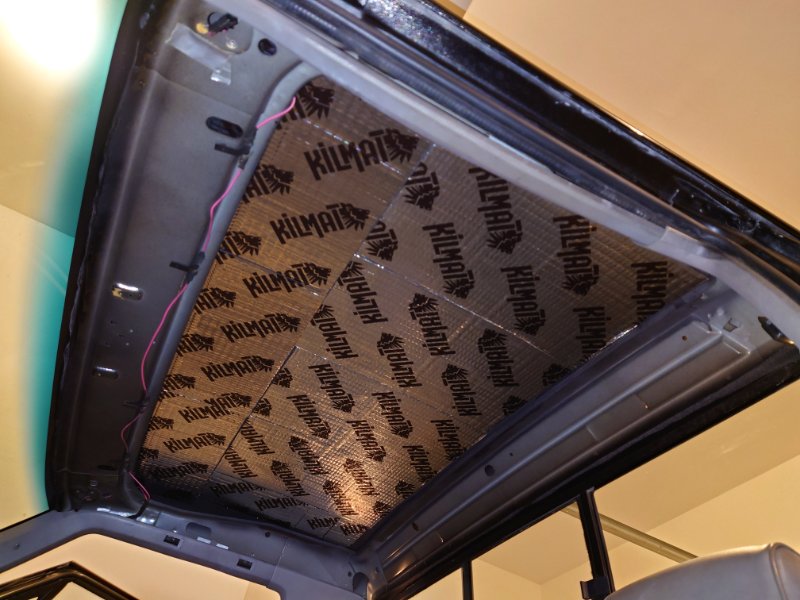
-
Sun visor reupholstery
pizzaman09 replied to pizzaman09's topic in MJ Tech: Modification and Repairs
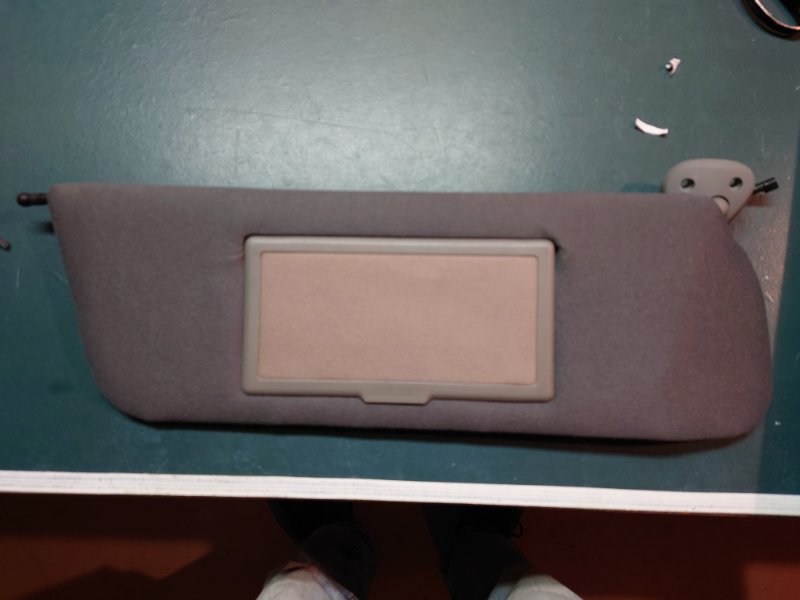
Installed with fresh headliner!
-
Recommendations for Sound Deadening/Insulation
pizzaman09 replied to Warren99's topic in MJ Tech: Modification and Repairs
Just last night I put 8mm killmat on my roof, it made a huge difference in roof vibration and even how solid the doors sounded when closed. I will warn though, that extra thickness did impact fitting the headliner, it's now probably 1/4" farther forward than it used to be. I used the Killmat because my friend had extra enough from his MR2 project to easily cover the Comanche's roof.
-
New Injectors issues. (Maybe?)
pizzaman09 replied to Skylynx's topic in MJ Tech: Modification and Repairs
Google Jeep 4.0 fuel injector clip, they come up from a million sources. I'd just got your local auto store and ask for a fuel injector clip, they appear to be rather universal, particularly as so many vehicles use Bosch injectors or Bosch style. -
New Injectors issues. (Maybe?)
pizzaman09 replied to Skylynx's topic in MJ Tech: Modification and Repairs
Believe it or not, those rectangular clips are pretty universal, at least to Bosch injectors. The clips that hold the injectors to the fuel rail in my 99 BMW are the same as the Comanche. -
If it has SU carburetors or the Hitachi equivalent, I'm in. I'm also a big sucker for inline 6 engines, they are smooth and zippy. It's hard to go wrong with the character of an I6. Plus a 240 is a great looking car.
-
Welcome welcome! If you pickup a Comanche, you find that many people really relate to it and love it for one reason or another. They are a great classy design, it gets attention from most people into Jeeps, truck fans, and gals that think it's cute. Looks around and ask questions! Comanches are fun!
-
New Injectors issues. (Maybe?)
pizzaman09 replied to Skylynx's topic in MJ Tech: Modification and Repairs
I suspect you are trying to push them in farther than they need to be. I am running similar injectors and they don't go in any father than yours do. As long as the lower o-ring is fully inside the manifold there should be no issues. There is actually some advantage of having it not bottomed out as it gives some flexibility in a high vibration environment.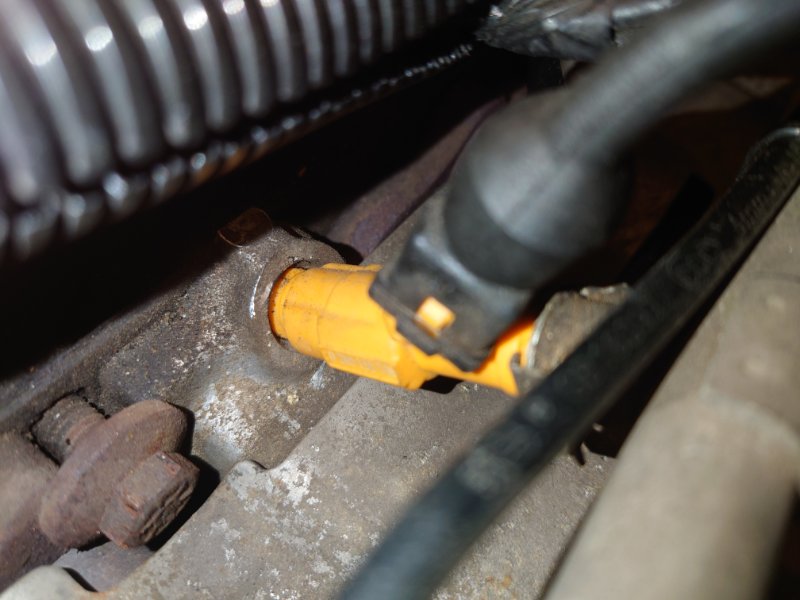
-
Sun visor reupholstery
pizzaman09 replied to pizzaman09's topic in MJ Tech: Modification and Repairs
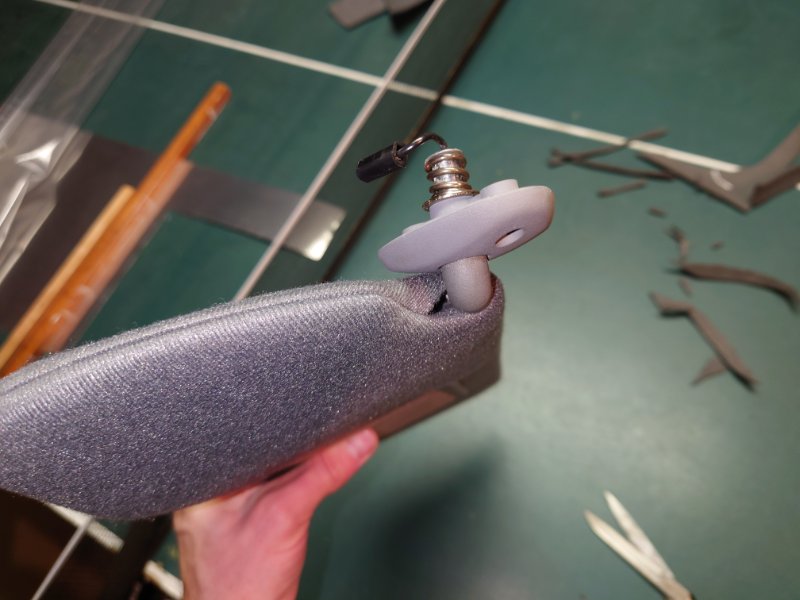
Utilized the original fabric as a template. Slid the slot over thr mount. Next step is to install the mirror. You will need to trim the fabric around the mirror a little on the inside to prevent it blocking the light. Following step was to use small pieces of duct tape to hold the fabric in place all around prior to folding closed. When snapping it together, it's very tricky to get the brass spring switch under neath the little plastic pin on the bottom of the mirror lid which actuates the switch. Start by holding the curved end to the closed position with a finger then fold the mirror closed clipping the snaps together nearest the clamshell hinge. Once you think you have the pin behind the brass spring, let go and remove your hand. Snap together the rest of the snaps, they go together pretty easy. When done it should look like this Final product.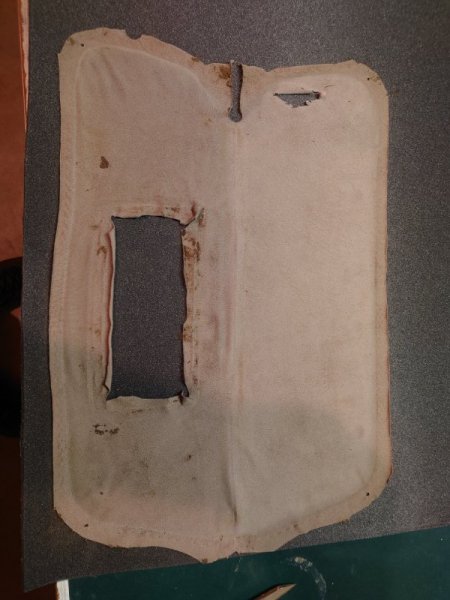
-
Calling All Electrical Gurus
pizzaman09 replied to CO MJ's topic in MJ Tech: Modification and Repairs
2. Blue box is the Sentry light box. This is the feature that keeps the headlights on for 45 seconds after you turn off the truck. Black plastic box is your floor heater vent. -
Makes sense. I drove a coworker's 01 Cherokee with a freshly rebuilt engine, automatic with 3.55 rear gears and it was positively a rocket ship compared to my Comanche. I suspect the gearing has a lot to do with it, but I'm also sure my Renix engine could use something yet as it's not as strong as the 88 Mj I had either.
-
I'm genuinely curious what the drive difference is like between a 92 HO and Renix. Is the HO noticably quicker?
-
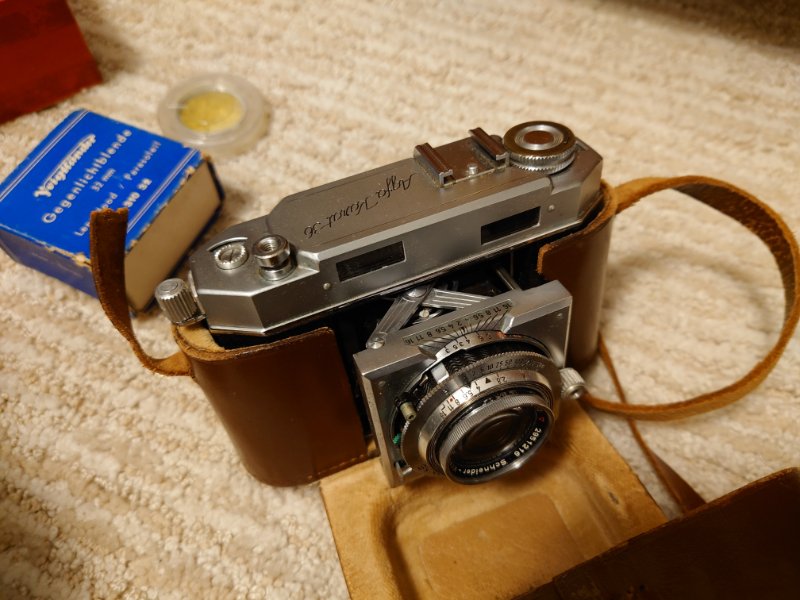
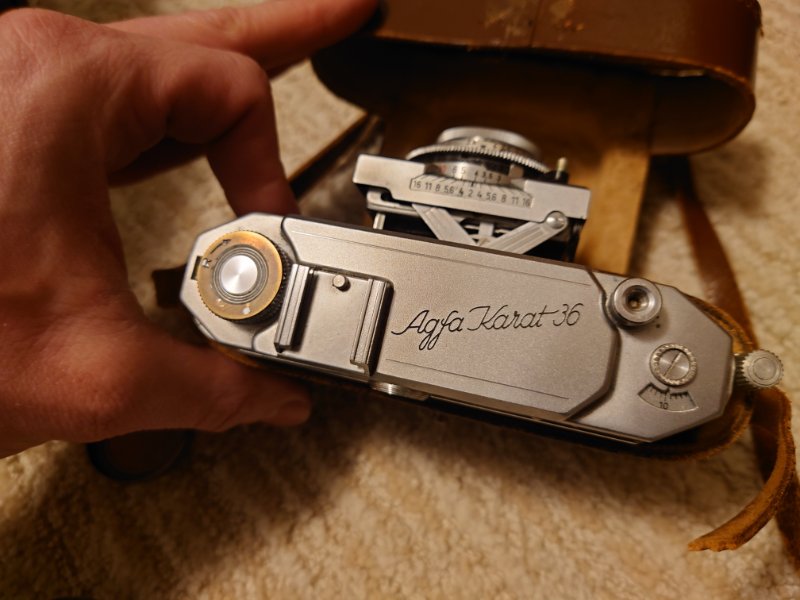
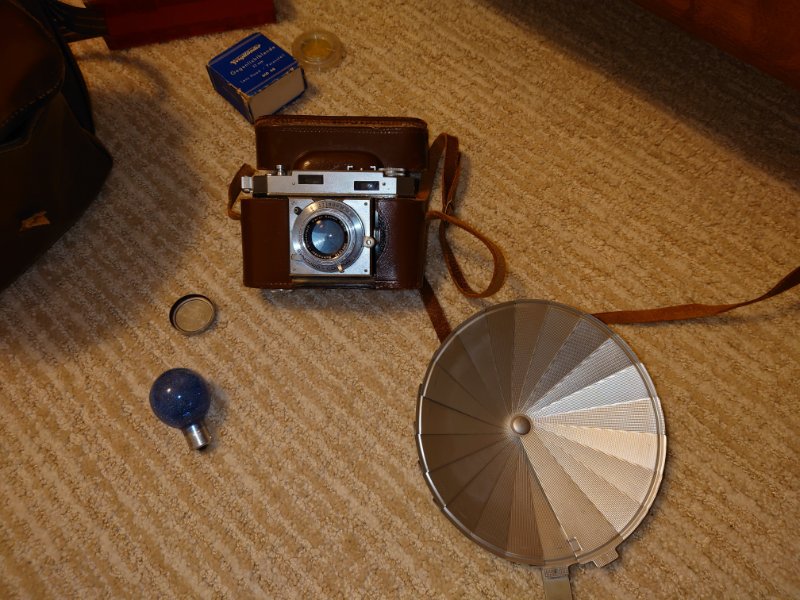
My ancient camera came from my grandpa. He was lucky enough to be drafted and sent to Germany during the Korean War. He purchased this 35mm and spent time photographing the castles of Germany. I have everything for it, flash bulbs, light meters, remote triggers. Someday I'll buy some film and take photos with it.
-
Sun visor reupholstery
pizzaman09 replied to pizzaman09's topic in MJ Tech: Modification and Repairs
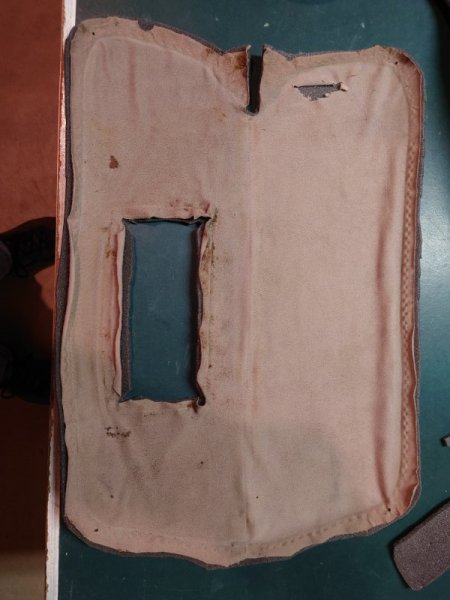
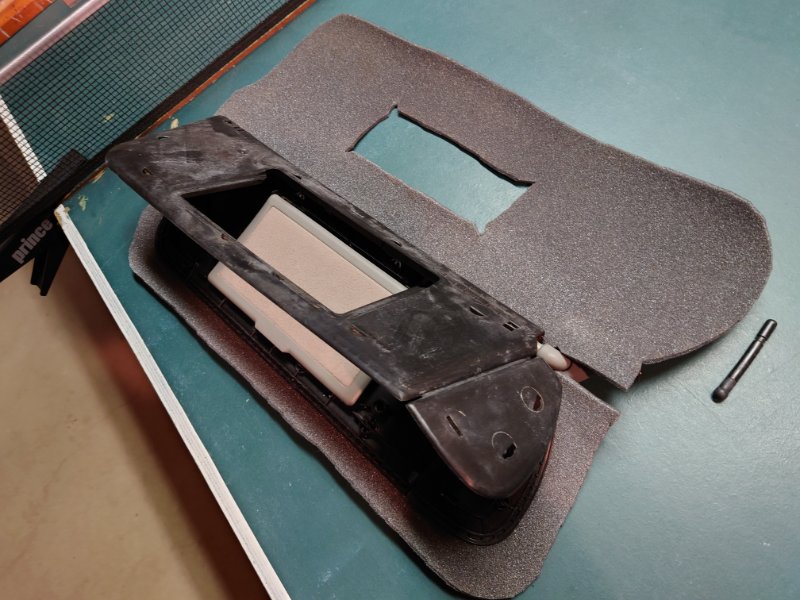
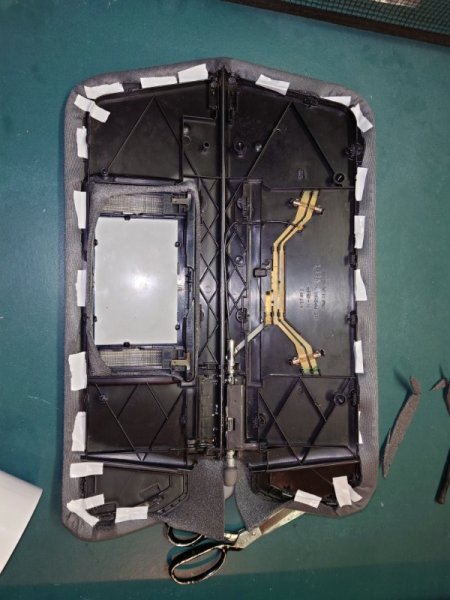
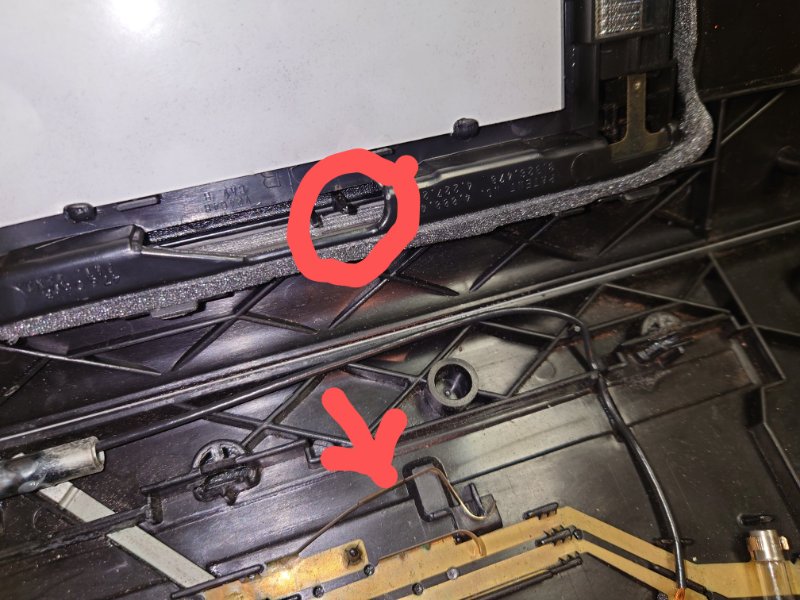
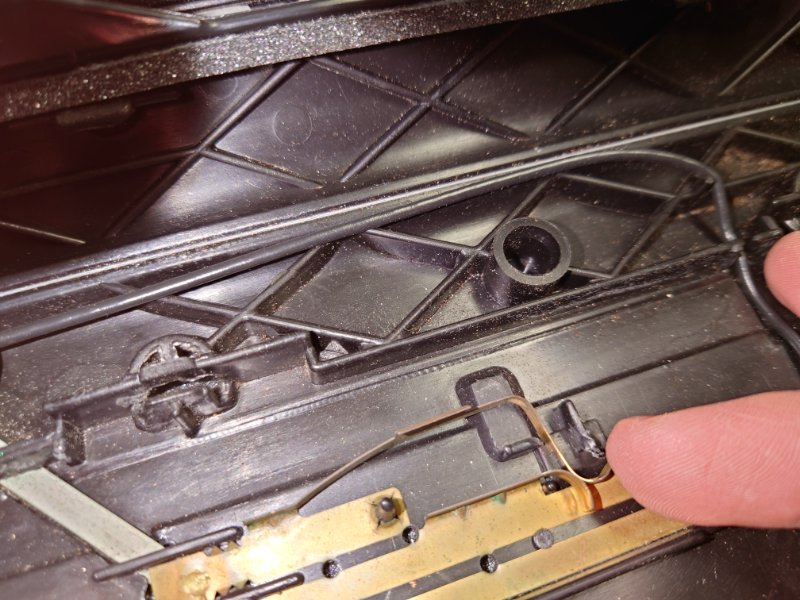
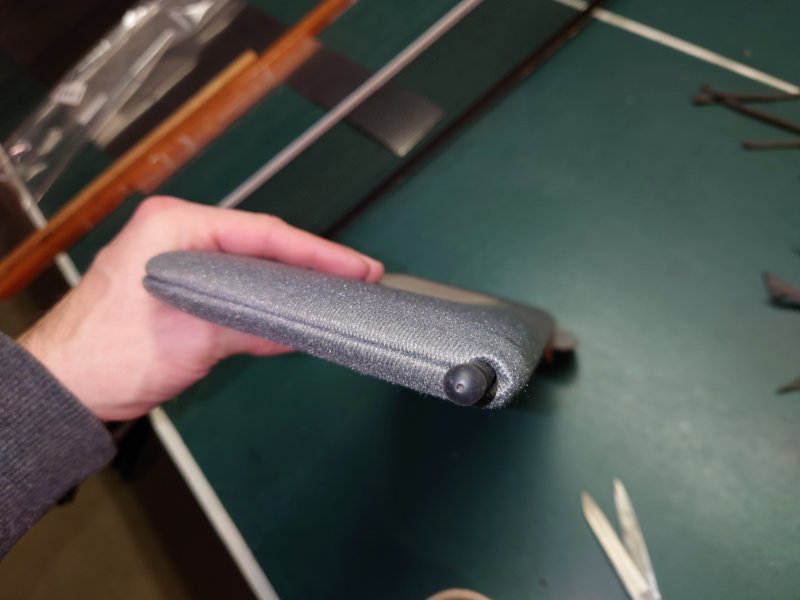
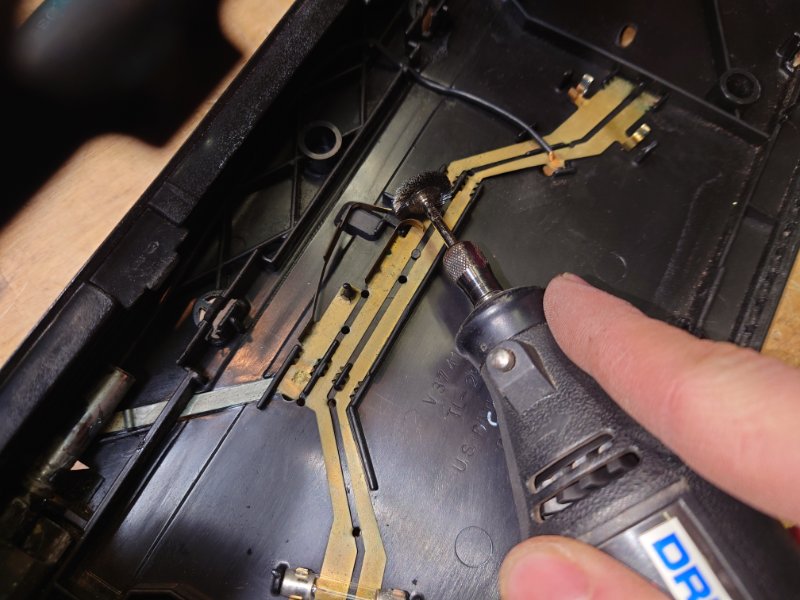
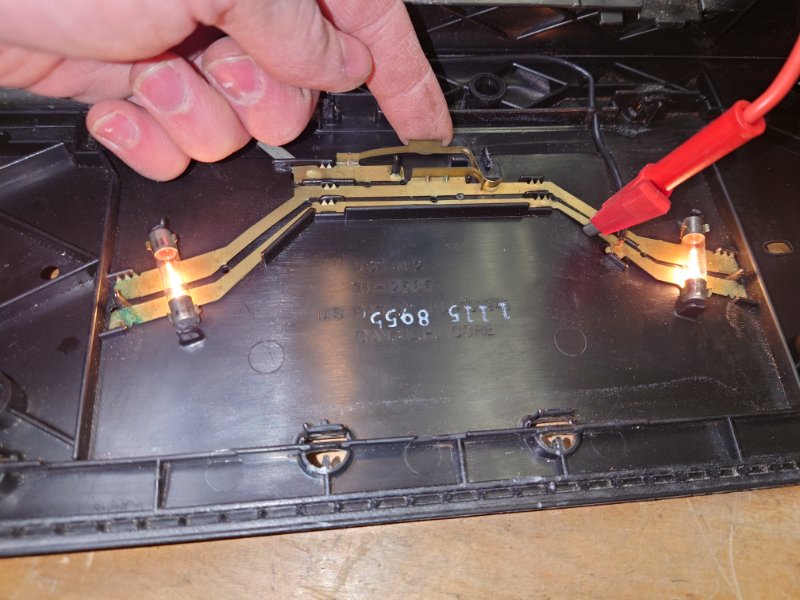
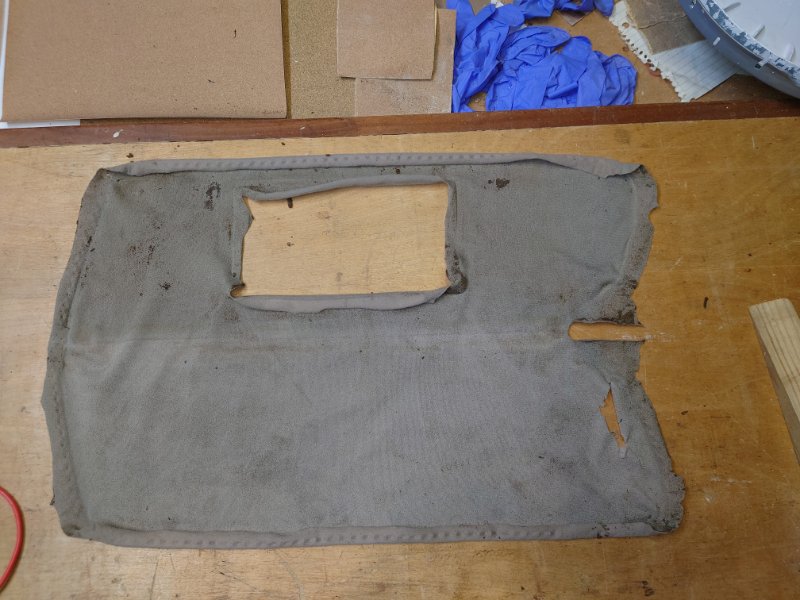
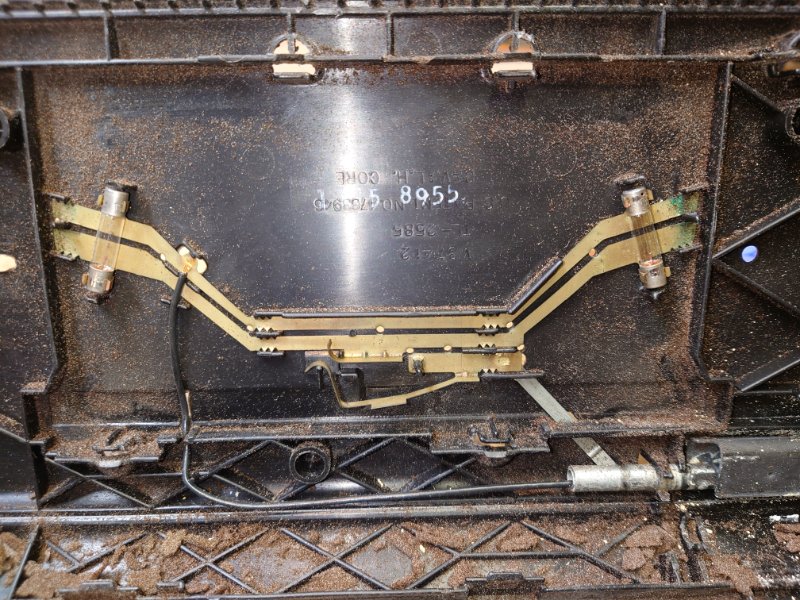
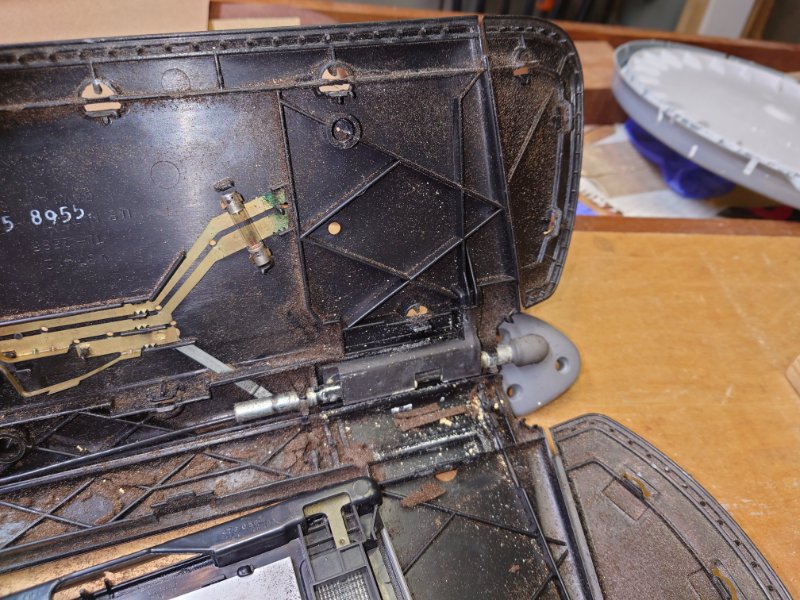
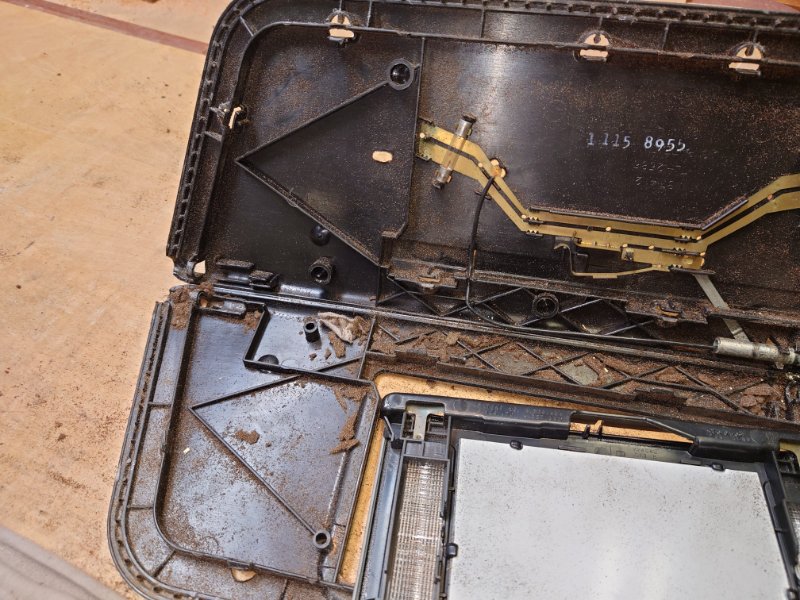
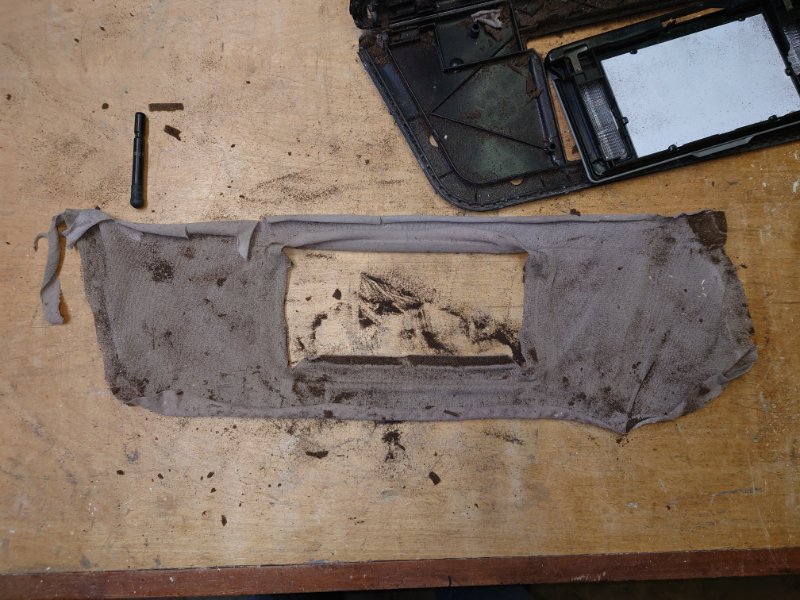
Original fabric layout, my passenger visor fabric was in fairly good shape Swivel post side. The fabric is all one piece sandwiched together at the seam. The cover fabric is one piece. These clips are on the non mirror side. I carefully removed the fabric from the clamped plastic so it could be used later as a pattern. Once I had the non mirror side exposed, I jambed a screwdriver in to pull the thin plastic cross piece out from under the clip and then pulled that portion of the shell apart. The plastic is surprisingly flexible and not brittle. I mangled things a bit but it will definitely clip back together. Once open, I vacuumed all the old foam out and cleaned all the electrical connections. I Dremel wire wheeled the switch contact, ground contact to the rotating mount and the bulb sockets. Be careful all everything is small and probably easy to break/bend. The ground rotary contact and bulbs got some Ox-Gard to help with conductivity. The previously flaky connection works perfectly now.
-
Sun visor reupholstery
pizzaman09 replied to pizzaman09's topic in MJ Tech: Modification and Repairs
I am also doing the headliner, I purchased some foam backed headliner material on Amazon, should be here in a few days. I plan to use the headliner material on the mirrors. Surprisingly my vanity lights still work, I plan to clean the contacts. -
brake reservoir sediment (red mud, rust, ???)
pizzaman09 replied to brucecooner's topic in MJ Tech: Modification and Repairs
This is my approach! I don't want to touch the brakes in my Comanche, they are nice and firm, stop with some pressure and work well. I wish my shall be unnamed German sports car had brakes that felt as good as my Comanche. -
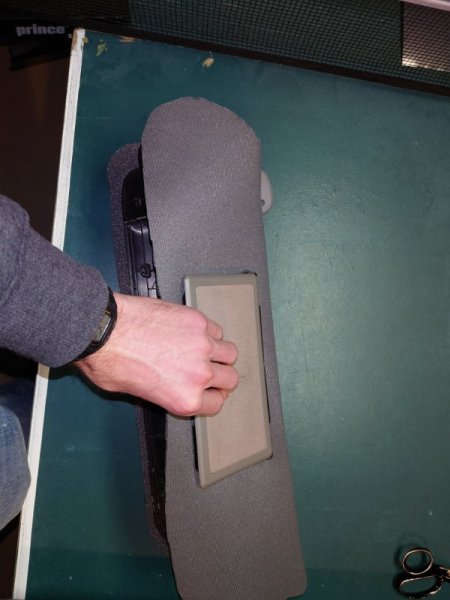
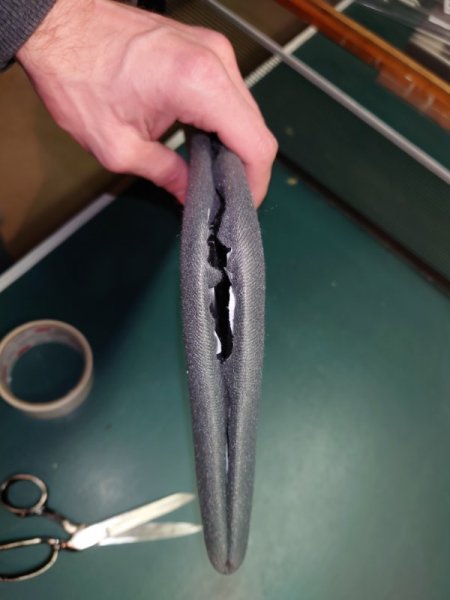
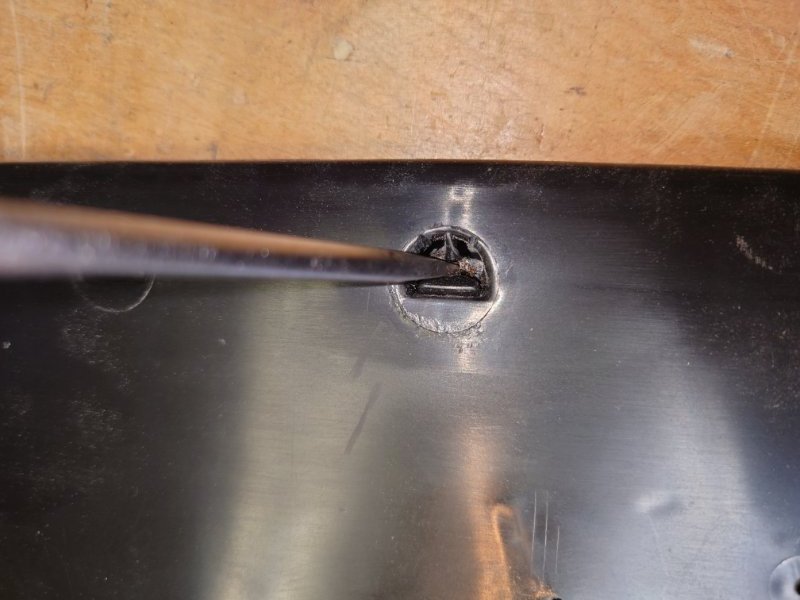
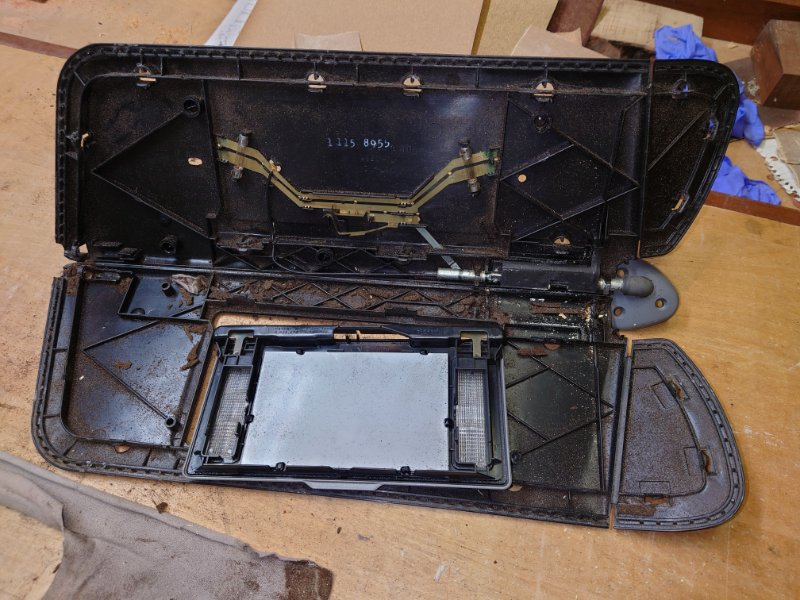
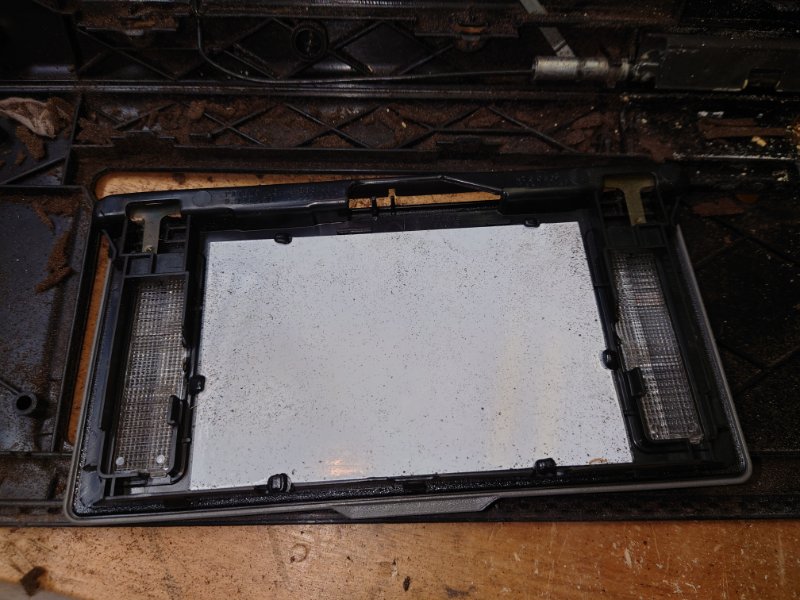
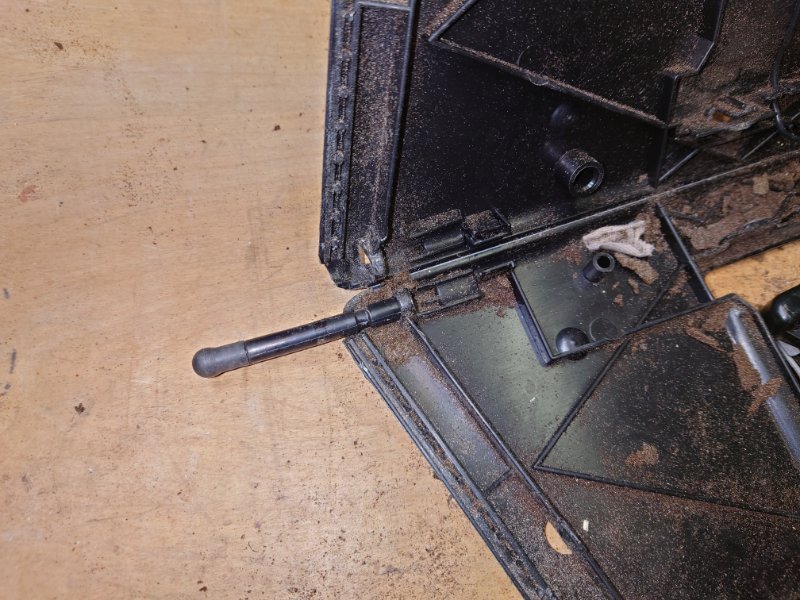
I am reupholstering the headliner and sun visors in my 90 Comanche Eliminator. These sun visors have the lit vanity mirrors. For reference here are some pictures after I got the clamshell apart. The clamshell pinches the two pieces of fabric in. There is a built in micro switch. The micro switch is activated by a little plastic pin on the mirror assembly. Note the pin that clips the visor near the mirror, needs to be slid out in order to open the clamshell.
-
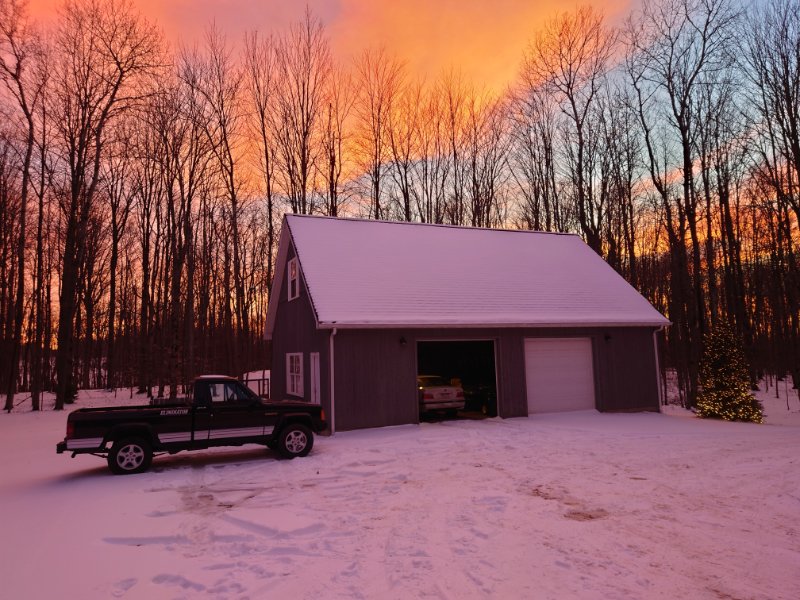
Had a good sunset that actually poked through the trees.