

Zenobian_84
-
Posts
19 -
Joined
-
Last visited
Content Type
Profiles
Forums
Gallery
Everything posted by Zenobian_84
-
Howdy all. Been eying this for a while now, and will probably have the $ saved up in the next month or so to get it; replacing my one piece back pane. http://www.dkhardware.com/product-30693 ... anche.html Just wanted to know if anyone has bought this particular one from DKHardware. Good or bad quality? Any other suggestions as to a cheaper rear slider? Any of you guys on here that have installed any sort of aftermarket rear slider, have you had any problems with it? Specifically, leaks (compared to OEM) or just general fitment (again, compared to OEM)? Any help is appreciated; I want to get a general idea of what I can expect before I make the next step and purchase one. :bowdown:
-
That's what you call a REAL ride with class. ;) :thumbsup: Looks gorgeous Jim!
-
 Hey, I can't help what I like. No different than guys who spend thousands of $ modding out trucks to become rock crawlers. :yes: Maybe I just want to have the coolest looking MJ around. Might even move out to Oklahoma one day and chase tornados. :shake: Kidding aside, I've always wanted to make my own Dorothy. Have since I was 6 :chillin:
 -
:clapping: Smart thinking Jim. If only othees would have done so as well.
-
Project "Honcho" - The '87 MJ
Zenobian_84 replied to Zenobian_84's topic in Member Projects: Your Comanches
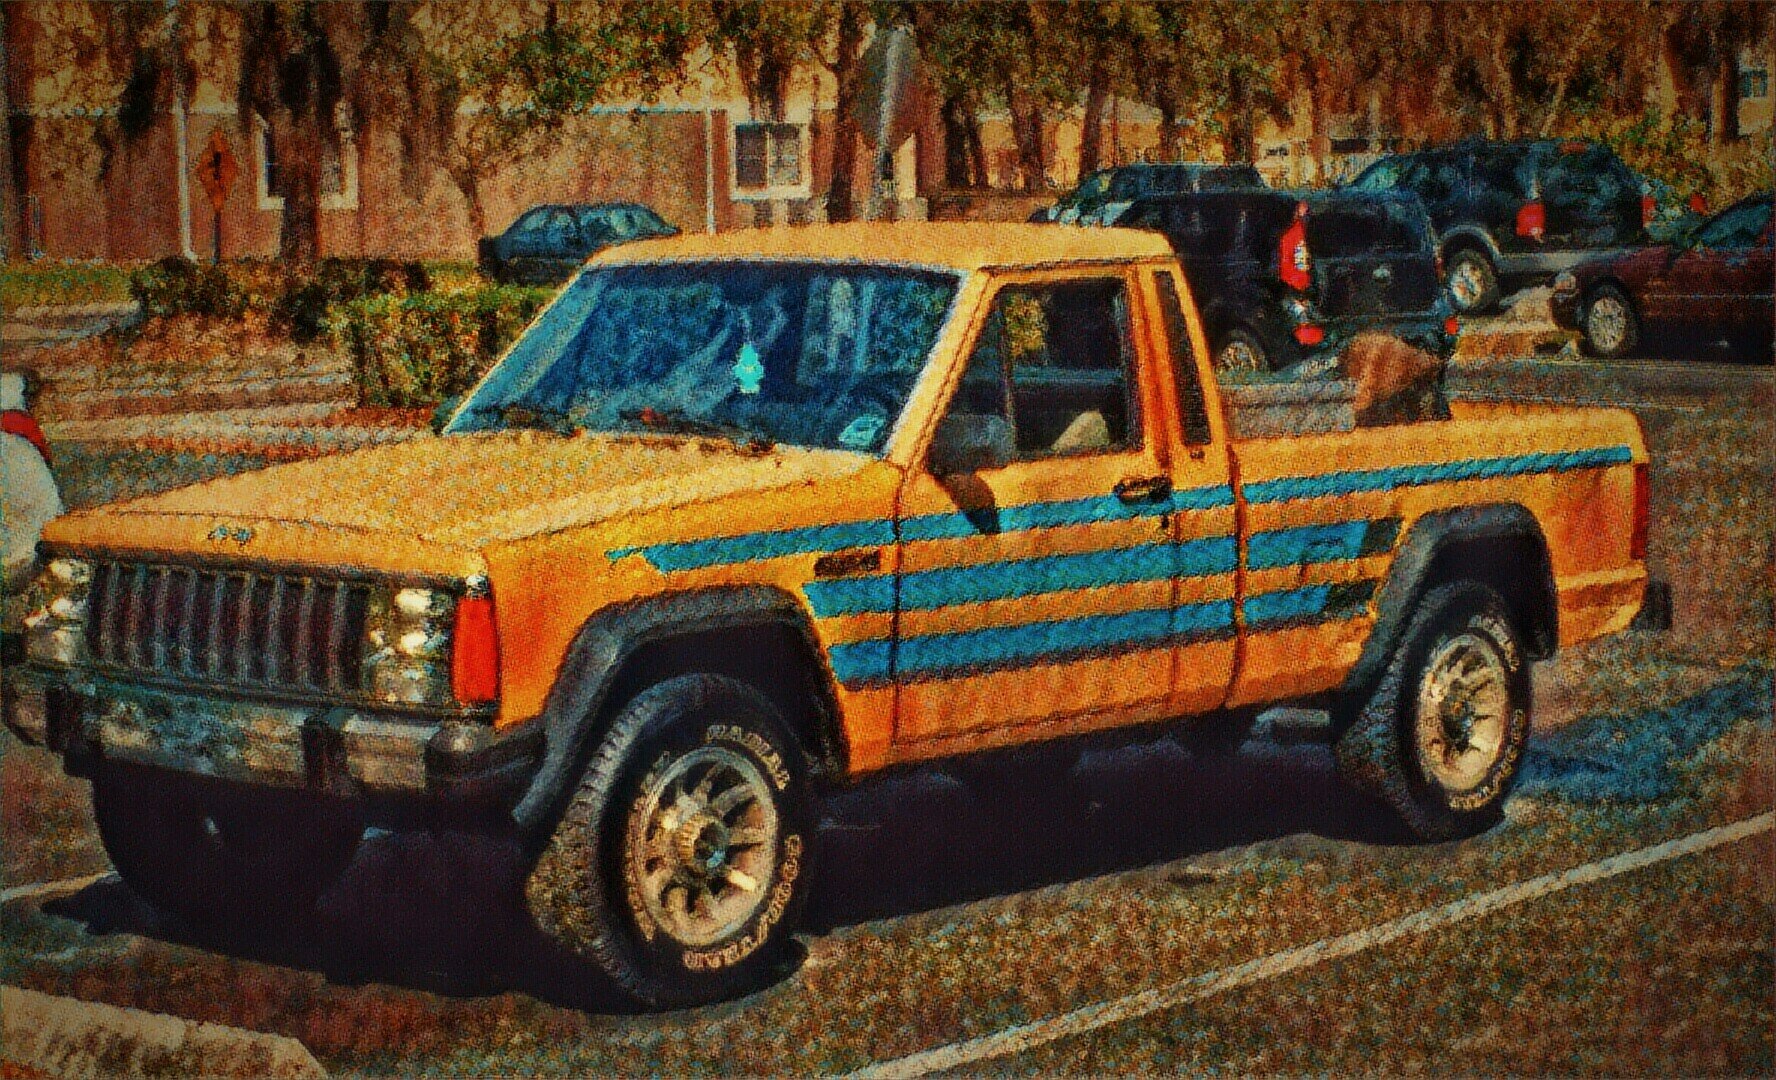
Decided to try out the Duplicolor Vinyl paint. This was after the 2nd coat was halfway done drying. Am pleased with it so far, but I want to see if it's going to chip or flake. So, I'll hold off on the passenger side for a couple of days so I can put it through the FL heat / humidity test. Below is how it looks against a similar factory J10. One day I'll get a better camera; this phone is starting to make me mad. :mad: -
Good lord. No wonder people dislike the 2.8. :eek:
-
Y'know, I actually never thought of this. Will definitely look into it. :brows: ;)
-
:clapping: Part of being a kid I suppose; making more work for the adults to clean up. :cheers: Pretty sure I've located the "sensors" I plan on buying. I'm contemplating on whether the cost of actually implementing glowing lights is going to be worth it in the end. There's a good probability that I'm going to install 4-7 Red, Blue, and Green LEDS along the inner wall of the housing itself. Something along the lines of this. Each battery installed inside will be protected by a styrofoam sheath (leaving the top 1/4 in. exposed); so when I have to replace the batteries, I can simply slide them up and out. Each protective sheath will be bracketed to the tube itself with a metal U shaped fitting, acting as the bracket and a grounding point. You can also see the beginnings of the siren/outer lighting switch hub. That will be located around 6 inches from the top of the lid; and the wires will be hidden behind the actual switches, underneath the top of the plate. Where the lights will be placed inside is still up in the air. I haven't spent a lot of time looking for the type of lights I want to use yet. All the wiring will be run down through the tube and a run outside into a "Box" mounted to the side of the cylinder. Something like this should be good enough. In the movie, this box controlled the 3 cameras mounted to the instrument, each at different angles. I was thinking of using a design like this, and possibly using mounting 6 Cherokee fog-light console switches (not sure if I want to incorporate the factory mounting plates into the box yet.) to control the inside lighting. I'm going to attempt to make the factory switches light up as they should as well while the lights are on inside. Decided to take some screen-caps of Dorothy from the movie. Most of this equipment is going to be fairly simple to re-create. Red Arrows - Wind Speed Amemometers - Will be making this out of PVC tubing with a small 4 pronged "cup" structure at the top. (see 2nd to last picture) Yellow Arrows - Angled Mounted Cameras - Will make these out of wood probably, with a glass ball of some sort for the "lens". (Not going to splurge for actual cameras. :ack: ) Blue Arrow - Mini Doppler Radar Dish - Not sure if I'll make this or not. If I do, it'll be made of wood with wooden dowel rods for the "prongs" with a tip on the end of them. There's also a weather vane on there somewhere, which will be added. (last picture) Finally, here's a shot of how the sirens and warning light HUB looks like. I never did like how everything was just twist-tied together and laying everywhere. Just going to use an L bracket and attach it to the cylinder, as well as tucking the wiring under and behind the toggle switches (tucked into a brace and bolted to the top of the L bracket so they don't dangle around while I'm driving, and so they don't look shoddy). :wrench: :ack:
-
After an afternoon of driving around, listening to Satriani and EVH instrumentals, and getting looks from people on the road over my truck, I thought about what I'd still like to do with it. Since my truck is basically a giant theme, I thought that I should "complete" it, like any other person would. ComancheKid45 brought up a good point when he asked me if I would one day get a rollbar and lights for the old girl to complete the homage; to which I told him perhaps. I also thought about the "Dorothy" weather drum from the movie (Twister), but had serious doubts of whether I could make something like that. Well, I thought about it a bit, and decided, "Hey, why not?". If guys out there can build a car from the ground up, why can't I build a faux drum with lights and whatnot to take to car shows? :brows: Seeing as how there were 4 of them in the movie, mine will obviously be the fifth. Here's what one looks like: A picture of a replica out in Oklahoma I'm assuming. Without all the instruments / lighting attached. Lastly, a hi-res shot of the 2nd one; very glad I was able to dig this one up. Pretty sure this is before it got dumped all over the highway in the movie. The design is a pretty straightforward one; a steel (possibly aluminum?) drum attached to a (probably) 1-1/2 in. thick steel frame with 1/8in. (most likely 1/4in.) steel brackets keeping the drum on the frame. All in all, I discovered this thing weighs about 300 lbs with all the bells and whistles attached, from sources online I was able to dig up years ago. If you've ever seen the movie, mine won't be anywhere close to running like the ones there did; and will probably weigh just a fraction of 350 lbs (shooting for <100 lbs, fully dressed). No fancy Doppler radar dish, and no fancy on-board data-logging system. First step was figuring out the dimensions of this beast :smart: Found a few pictures of it in the back of the J10; here's the better one. J10s have a standard bed length of 8 feet (7 shortbox), and judging from the distance it is from the tailgate to the cab, I figured the real thing is around 4' x 3 1/2' (also taking into account the characters from the movie were able to fit 2 lengthwise in the back of a '96 Dodge Ram pickup with the tailgate lowered) I then went and took some measurements of my MJ's bed with the toolbox still inside. Discovered I can fit one comfortably inside on a 4' x 3' "Box" frame; but most likely will take out my toolbox when I attend shows so it sits aligned in the middle of the bed. Ok, so enough banter, here's the schematics I drew up and dimensioning nonsense I made while listening to cartoons this afternoon. Excuse my sloppy handwriting and lack of straight lines in areas; it feels like ages since I've last done something like this, and it didn't help that I did it lazing on my couch with my sketchbook :eek: Here is also the method to my madness. This is here just to have on record so I don't lose it, and because some might not get what I've written. --KEY-- AMB = Anti-Movement Brace CTH = Cylinder Tube Housing BHF = Box Housing Frame NTS = Not To Scale --Dimensions-- **Box Frame is going to have 1" thickness all around.** Cylinder Tube Housing = 43" (3'7" - Height) "Box" Housing Frame = 3'x 4' (36"x48") Corner Posts = 1"x1" Cylinder Housing = 28" (2'4") Diameter ----------------- * BHF will have 4 crescent shaped supports holding the CTH still; one at each post. * Each post will be offset from a corner of the CTH by 2 inches (measured from the inward corner of the post to the cylinder); leaving enough room to install the braces flush against the housing/posts. * AMBs may or may not be needed, depending if I want to have a "Removable" tube. If so, then AMBs will be installed. If not, then brackets will be mounted on the inside housing to the bottom of the BHF. * CTH will be filled 75% full with Sensor Balls. * Depending on cost to create ONE Sensor Ball, may just put plastic balls with some wiring in instead; some may have random flashing LED lights. ------------------------------- A picture of the sensor balls; basically a double A sodered to a wiring board with a green and red LED installed. Lastly, how this beast should sit in the truck, with the toolbox installed. The top line is how much above the bed it will sit (43 inches from the "humps" on the floor of the bed) and the box is where it's going to be placed. So... with all that being said, now I have to basically figure out what I should make this out of. Since I'm shooting for a goal of <100lbs (I know that realistically, it'll be upwards of 120, MAYBE <150 if I'm lucky), does anyone have any suggestions on what I should build the "frame" out of using the measurements I'm going to use? I'm especially worried about the thickness being a huge factor; especially if I decide to go with metal. I was thinking about possibly making it out of wood and painting it, but I don't think I'd be satisfied in the end with that. Most likely I'm going to use a similarly shaped rain barrel for the sensor housing unit; seeing as how I don't think I can come across a steel/aluminum barrel like the actual thing. Everything else I can just do on the fly as it comes. So, now I'm going to go grab a cold drink and do some researching. Stay tuned for further details.. :typing: :thumbsup:
-
http://cgi.ebay.com/ebaymotors/Jeep-Com ... 460575665e Very good condition. Has been garage kept. Could it be one of the last ones? "JEEP COMMANCHE 1992 WHITE 2WD WITH STRAIGHT 6 CYLINDER 4.0 HIGH OUTPUT 170,500 EASY MILES, 7' BED WITH BEDLINER CHROME RIMS WITH NEW OVERSIZED TIRES ,NEW BRAKES AM-FM RADIO WITH CASSETTE PLAYER,WELL MAINTAINED,OIL CHANGED EVERY 3000-4000 MILES RADIATOR FLUSHED WITH NEW ANTIFREEZE,GARAGE KEPT ,A COUPLE OF RUST SPOTS AND SOME PAINT IS CHIPPED ,DRIVER SIDE OF THE BENCH SEAT MAY NEED NEW SPRINGS ,DRIPS A LITTLE OIL, HEADLINER MAY NEED TO BE GLUED , BUT THIS TRUCK STARTS EVERYTIME NEVER HAD ANY PROBLEMS,JUST MINOR UP KEEP.TRUCK RUNS GOOD LOOKS GOOD VERY CLEAN AND FAST AS HELL, MUST SEE IF INTERESED OR IF YOU HAVE ANY QUESTIONS PLEASE ASK,THANKS"
-
1990 Rebirth ('97 Conversion)
Zenobian_84 replied to Rymanrph's topic in Member Projects: Your Comanches
I keep forgetting how sexy this truck is. I especially like those rims on it. They give it a real tough look ;) :cheers: CL isn't a viable option to get another 29 spline 8.25 on the quick? If not, I'd probably just rob the shafts from the other axle; seeing as how many times you've been disappointed with the P&P guys. :( It sucks, but sometimes you just have to keep going. Irregardless, keep up the good work! -
Misc. Parts Questions
Zenobian_84 replied to Zenobian_84's topic in MJ Tech: Modification and Repairs
Guess I'm stuck waiting until a 2.5 comes my way. You can see why in this old picture; the top arch of the shroud is completely gone, and has been since I've bought the truck. Guess the PO figured it "got in the way" so he jaggedly cut it off. :fs1: I'd get rid of the engine driven fan, but I don't really trust Electric ones; as I'd have to run wiring, and relays and etc. If that fan ever took a proverbial dump, I'd really be up $#!& creek. I also want to keep the engine moderately close to stock as I can. Besides, as of now, the truck runs at a consistent temperature, and hardly ever goes past 210, even in the hottest time of the day stuck in traffic. Also, Genovast, thanks for the picture. I can clearly see the difference now. For whatever reason, the last picture I saw of the 8.25 wasn't very good; and it seemed to be more "rounded" like the 35 instead of "oblongish" like your picture shows. Appreciate it :cheers: -
Just a few questions; these have been bothering the heck out of me as-of-late. 1. Are the 2.5 fan shrouds the same as a 4.0 fan shroud? Mine's busted almost in half and since there are hardly any 2.5s in the P&Ps around here, I was wondering what I could use for a suitable "slap it on and be happy" replacement. If they aren't, does anyone have any recommendations for a decently-priced replacement? 2. I know the difference in a D35 and a Chryco 8.25; but were the 35s still the default rear-axle until '01? Aside from the visual look in the yards, is there a stamping I could look at to tell it's a 8.25 (if the tag is missing on the diff cover) in case I somehow take it for a 35? If so, where is said stamping?
-
Project "Honcho" - The '87 MJ
Zenobian_84 replied to Zenobian_84's topic in Member Projects: Your Comanches
Went out to the beach with my girl today. We had a blast, and not much sun-burns to show for it; but we both got a good tan. I like hers better though. :brows: ;) Should be able to get some work done tomorrow on the MJ. If not tomorrow, then maybe during this work week if I can manage it. Am probably going to extend the stripes another 8" or so in the back; I really don't like how they're hanging out around the fender flares. On the road. 'Ol girl managed 65 quite comfortably all the way there. Ran at a very cool 205 with about 50 pounds of oil pressure. :thumbsup: Miles of beachline; sun just shining away. A picture-esque day if I ever saw one. Decided to do some camera work. I wish I had a better one though. Some poser shots in the sand. Closeup shot. One of the better ones I've taken recently. Not sure what's up with my paint though. Decided to head home before some bad storms rolled in. Ended up pouring for over half the ride home and a few hours into the night. I think the best news of all today though is that I managed 115 miles roundtrip on just a 1/4 of a tank of gas. Filled up this morning to half a tank, so you can imagine my surprise with the little 4-Banger doing 60 75% of the way; other quarter was stop and go traffic in the city. Seems I get much better mileage doing 60-70 than just doing 55. If I did a consistant 60 MPH driving for an entire tank, I'd be getting damn near 500 miles on a 19 gallon tank. Pretty good, I'd say; I might even be able to give those Prius guys a run for their money. :brows: :yes: -
--- COMANCHE OF THE MONTH - JULY 2012 ---
Zenobian_84 replied to Automan2164's topic in Comanche of the Month (MJOTM)
Very cool, and totally deserved. :clapping: I know my truck wouldn't be anywhere near as good looking as it is now if it weren't for you. Kudos man, enjoy the spotlight. :cheers: :thumbsup: -
Project "Honcho" - The '87 MJ
Zenobian_84 replied to Zenobian_84's topic in Member Projects: Your Comanches
Yeah, that's been missing since I've owned the truck. Made quite a few trips unscathed as it is; and I always re-torque my lugs down before I do any serious trips though.You have any recomendations on some replacements? I'll get around to replacing it one of these days... -
Project "Honcho" - The '87 MJ
Zenobian_84 replied to Zenobian_84's topic in Member Projects: Your Comanches
;) Some teasers; probably going to be another day to finish off the final touches on the passenger side as well as the driver's. I'm probably going to also sand the bumper down and throw some paint on it too. I also found out that I'm going to be getting my headliner professionally re-upholstered in a week or so for free by a friend of a guy my dad works with. :banana: Off to New Symerna beach tomorrow to relax for the day though. Gonna be a good day to do some driving Did some freehand painting on the tailgate for the Jeep letters. Pretty surprised I can still do a half-decent job at stuff like that. :yes: -
I wouldn't install that 160 degree thermostat if I were you. Go with the stock 195 degree one; as anything lower will probably create some kind of problem down the road, or just mask existing problems already there. Do you have an "Open" or a "Closed" system for your engine cooling? Would probably start with the thermostat and giving the radiator a good flushing, irregardless of the engine setup. You'd be surprised at how many chunks of built up gunk can come out. As stated before, It wouldn't hurt to do the TB cleaning, as well as adjusting the CPS. :cheers:
-
If you have the AMC Logo in the bottom left-hand corner, it should function as your low fuel light. If your cluster was anything like mine, there was missing bulbs in it, specifically, it was missing the Temp and AMC logo lights. :fs1: If you decide to pull the cluster out, it wouldn't hurt to replace the "Dummy Lights" with some new bulbs. Never know when one'll burn out on 'ya. :cheers:
-
:agree: Very good advice here. This coming September will be my 3rd year anniversary with the GF. Not only is it our anniversary, but it'll be my 20th birthday :clapping: Usually, I sacrifice my day to take her out someplace nice. Last year I took her out for a day of shopping, and we caught a movie around 6 (Disney's Tangled) and then I took her out for a romantic dinner. Ended the day with some adult activities and she went home satisfied all 'round :yes: ;) Like Neohic said, always have a backup plan, because it always seems that no matter how much time you spend planning everything to the last detail, SOMETHING will probably go wrong. Just another case of Murphy's Law, hard at work. In any case, enjoy your anniversary with your wife! I can only hope I'll get to that point someday. :cheers:
-
Wow, can't believe I forgot about those. :eek: ;)
-
This thread.... :eek: :shake: :shake: That truck. :dunno: Good looking for what it is, and kudos for the guy spending bucks on NOS gear for it and modding it out; definitely not my cup of tea though. I would say something else, but I've alredy read enough bickering posts for one day. :no: This also makes me think about cleaning up the spare pair I have and putting them up for auction. They're about the nicest, dirtiest tailights I've ever seen.
-
Factory Fog Light Swith bypass?
Zenobian_84 replied to Paul Bruchal's topic in MJ Tech: Modification and Repairs
Disconnect the splice you made when you wired the Hellas into the harness. Run wiring directly from the Hellas to the factory green 3 wire prong that goes to the foglight switch. Don't forget to add a relay or some sort of safety that the power from the battery runs through so your switch and wiring don't become toast. Relay should be a 55 one, if I'm not mistaken. Its the only "foglight" relay that most parts stores carry. Only about $4 if I remember correctly... Other than the outline I just gave, there is no other way to bypass the factory wiring. Either they run while headlights are on, or you wire them up to run at the press of a button. Hope this helps! :cheers: -
What are these wheels called?
Zenobian_84 replied to 86custom's topic in MJ Tech: Modification and Repairs
The correct name for those wheels was "Sexy", if I'm not mistaken. ;) :cheers: -
Steelie Rims or Jeep 10 Spokes - Central FL Area
Zenobian_84 replied to Zenobian_84's topic in Wanted
Added a new rim style to the OP. Those 10 spoke rims are starting to grow on me. :thumbsup: