


Rubikahn
-
Posts
257 -
Joined
-
Last visited
Content Type
Profiles
Forums
Gallery
Everything posted by Rubikahn
-
👍
-
Perfect, ty
-
Did the PW/PL harnesses plug into the existing fuse panel or did you need to upgrade that too?
-
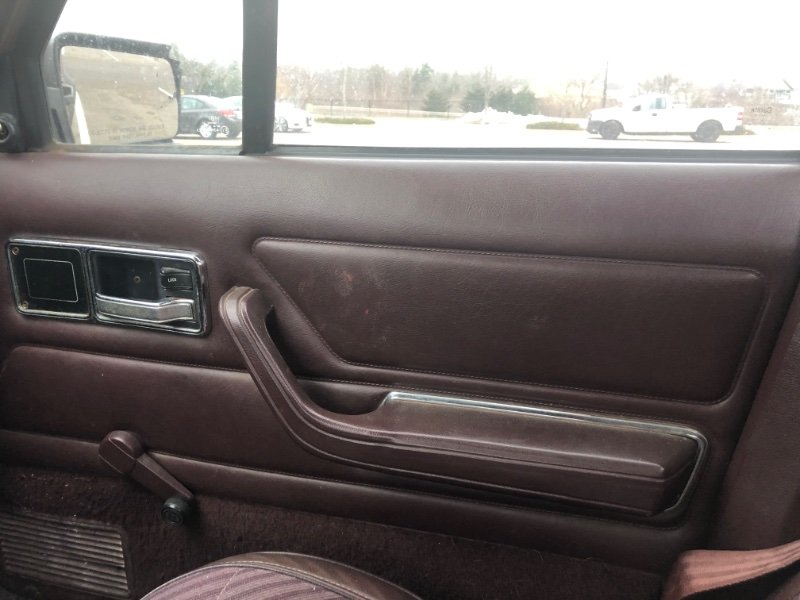
Ok, those 92 XJ panels with the cloth inserts are what I was looking to upgrade to. Looks like you have PWs and PLs too. Did you add those from the XJ as well?
-
I can’t tell from the pic if yours have the stitching?
-
So these are Laredo specific or an upgrade option?
-
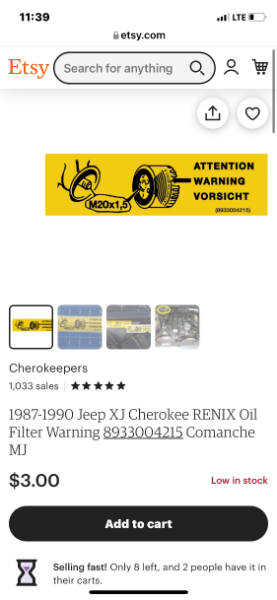
This vendor on Etsy sells them. https://www.etsy.com/listing/966485962/1987-1990-jeep-xj-cherokee-renix-oil?ref=shop_home_active_18
-
These are in my 89 Pioneer.
-
I know, right? Especially on these trucks. If they’re not common, they’re getting cleaned up and staying! 😂
-
Very much appreciated!
-
I was thinking of replacing my door cards with some XJ ones that have the cloth inserts in them, but I read somewhere that my existing panels aren’t all that common. I can’t find where I read that now. They have like fake stitching in them. Can anyone verify wether these are common or harder to find door cards?
-
I’d be in for this. I’m in SE Ma and my 89 should be drivable by then.
-
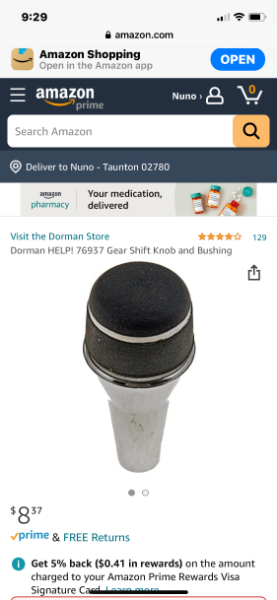
Just wanted to update the thread. This knob doesn’t not work.
-
🤣
-
Yessir!
-
Thank you, I looked up that festoon bulb on superbriteleds.com and the bulb number was 578. So I went down to O’Reillys, but couldn’t find it. Guy looked it up and said it uses a 6418 led festoon. It fit and it works so 🤷♂️
-
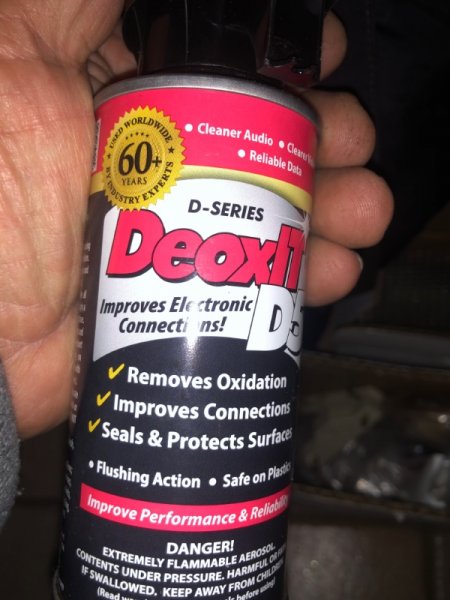
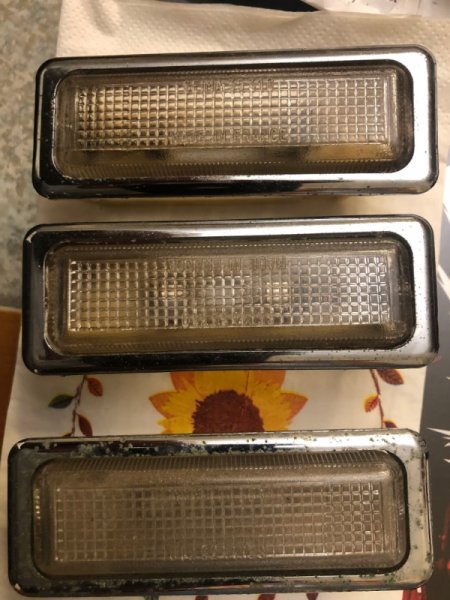
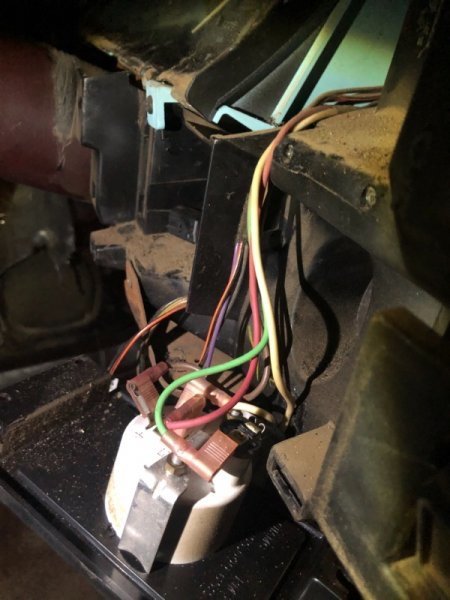
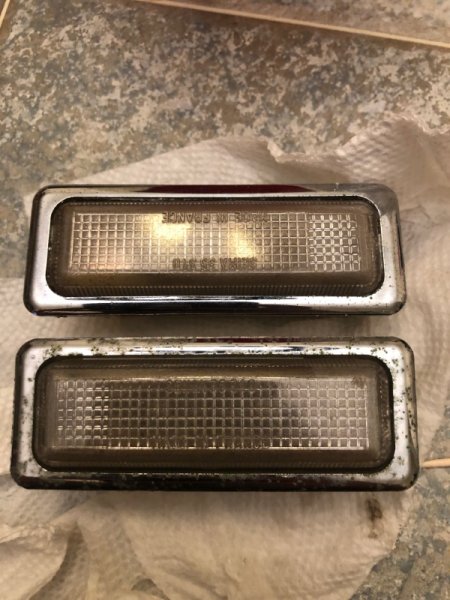
So I ended using some plastic chrome polish on the pillar light bezels after scrubbing with tooth paste. For the inside of the lens I used many Q-tips dipped in water to scrub the lens clean. Being able to flip the lens back and forth definitely helped with access to each side. Followed that up with some DeoxIT and used more Q-tips to apply as much as I could to all contact/terminal surfaces. Gonna head out and see if I can find these incandescent bulbs in led at one of the local parts stores. Pics of the three pillar lights. The one at the top and the one in the middle are the ones I cleaned. The one at the bottom is what they all pretty much looked like before I started.
-
Anything is possible. PO wired up his own temp gauge and spliced into the wiring. Can’t wait to do my cluster swap and deal with that 😡
-
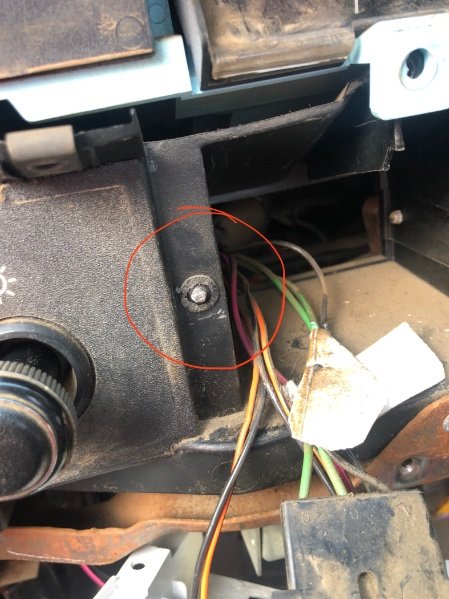
I did try an easy out and that didn’t work. Can’t believe this screw is that seized into a piece of plastic 🤬It’s not like it was outside in the elements.
-
Reviving this old thread cuz it’s crappy out and I’m trying to clean these up. Anyone know how they got the base to separate from the chrome bezel? I’ve already cleaned one with some tooth paste and tooth brush. The insides of the lens are pretty grungy so I’d like to get those clean as well.
-
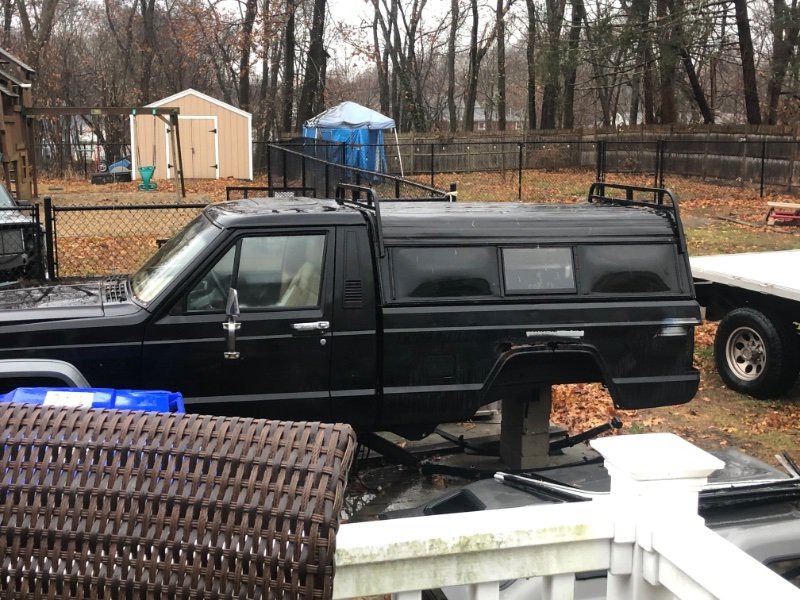
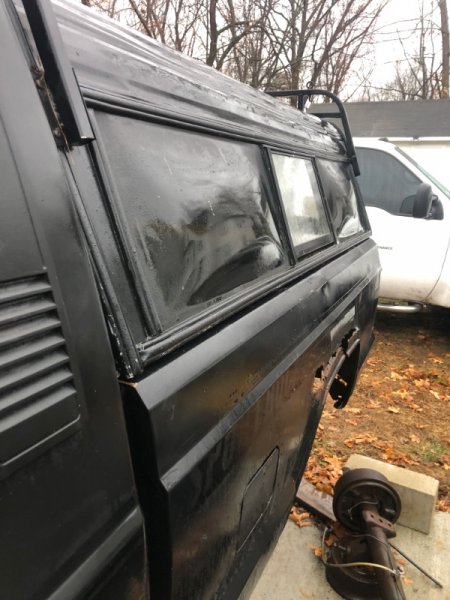
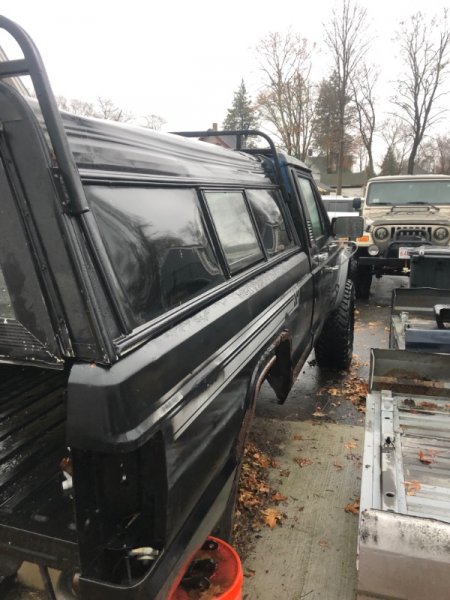
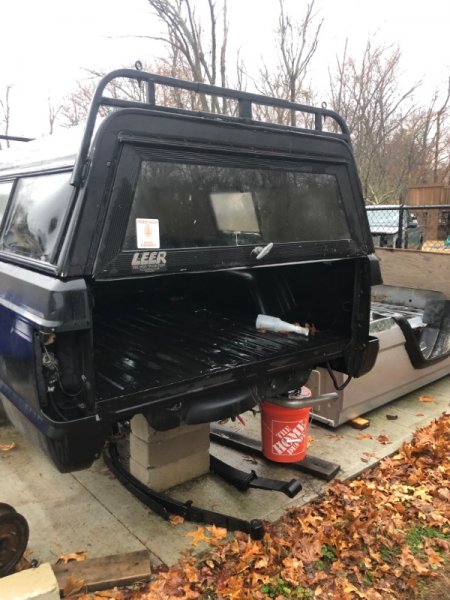
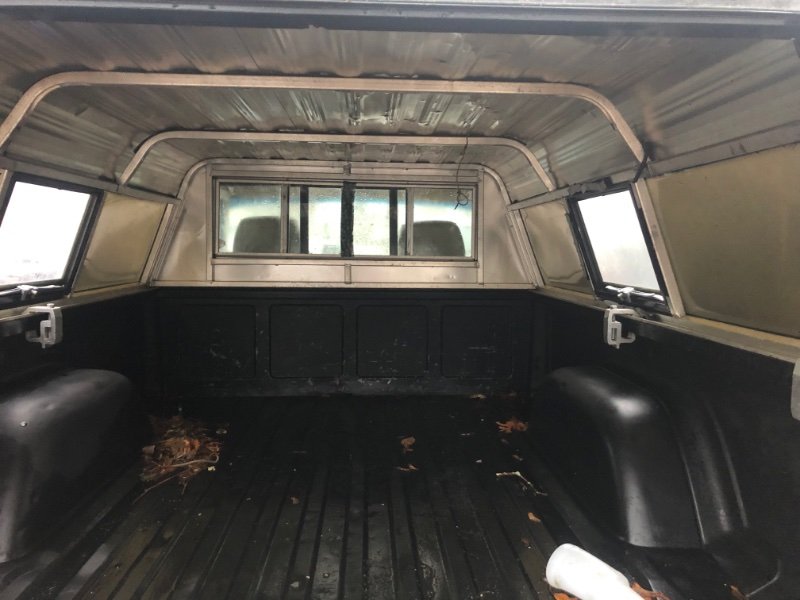
Just got home with this $50 score. I think it’s fit very well on my SWB. Latch still works, but will need to be rekeyed. It will need need struts for the back window. It has a small dent on top on the passenger side towards the rear. It’s aluminum so that should hammer right out. It has crank out side windows on each side and a sliding window at the front. This cap measures out at 20” high, 61” wide, and 75” long. Sorry, not sure what this came off of as it was sitting in the sellers yard. Ignore the fact the truck is sitting on blocks currently 🤣🤣🤣
-
Good idea using the soldering iron. I’ll give that a shot and report back. Ty
-
Thanks, yeah I was considering that but figured I’d ask here in case someone knew an easy trick to get it out. I’ve actually drilled out around rusted/broken screws on the header panel and used JB Weld for fiberglass to fill it back in. Figured that portion of the dash being plastic there may have been an easier way that I wasn’t thinking of.
-
Getting ready to install my new switch panel and the screw holding the old one in place snapped. More accurately the head snapped off. How does that even happen?? From what I know it’s just screwed into the ABS plastic. I’ve tried a pair of needle nose vise grips with no luck. Thought of using an easy out, but I’m pretty sure that would end badly, lol. I’m thinking of trying a heat gun to warm up the plastic, then try using the vise grip pliers again. Anyone else successfully get a broken screw out of the plastic portion of the dash? Any tips, tricks, help would be appreciated. Ty
-
HVAC Control Panels, Finally!
Rubikahn replied to ghetdjc320's topic in Vendors- members making products for MJs
Wow, that looks great! It looks like it’s brand new. Yeah, I’m definitely in for one.