

Tactical Bacon
-
Posts
242 -
Joined
-
Last visited
Content Type
Profiles
Forums
Gallery
Everything posted by Tactical Bacon
-
Kaede the Eliminator
Tactical Bacon replied to Tactical Bacon's topic in Member Projects: Your Comanches
Is it supposed to be punched out like that on a 1992? -
Kaede the Eliminator
Tactical Bacon replied to Tactical Bacon's topic in Member Projects: Your Comanches
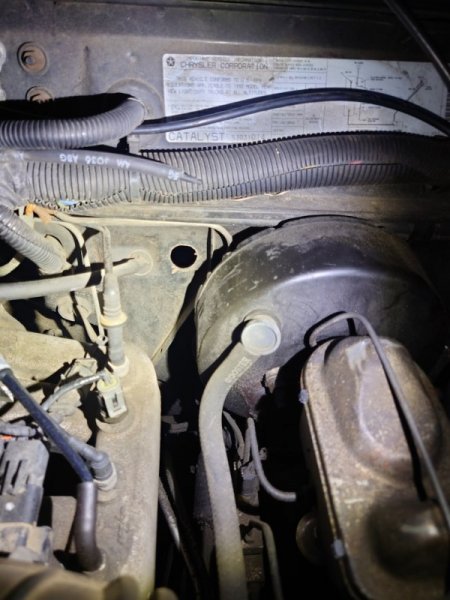
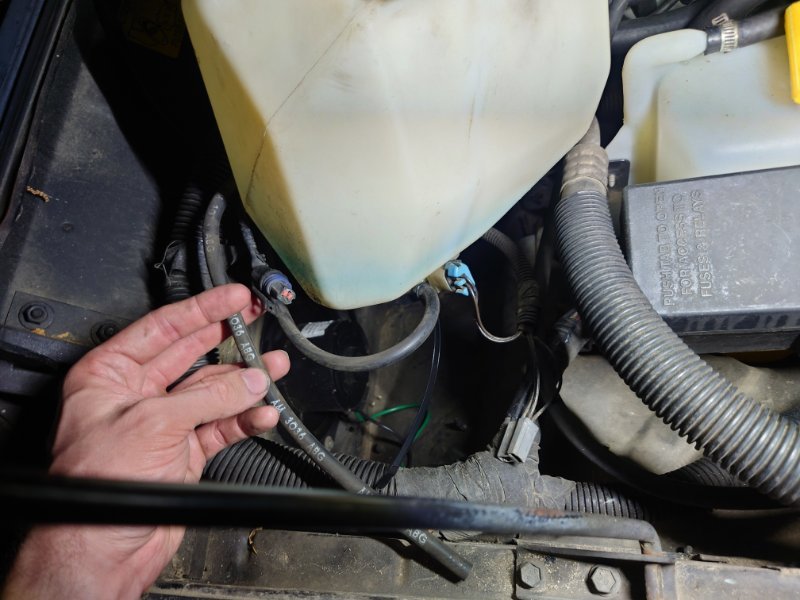
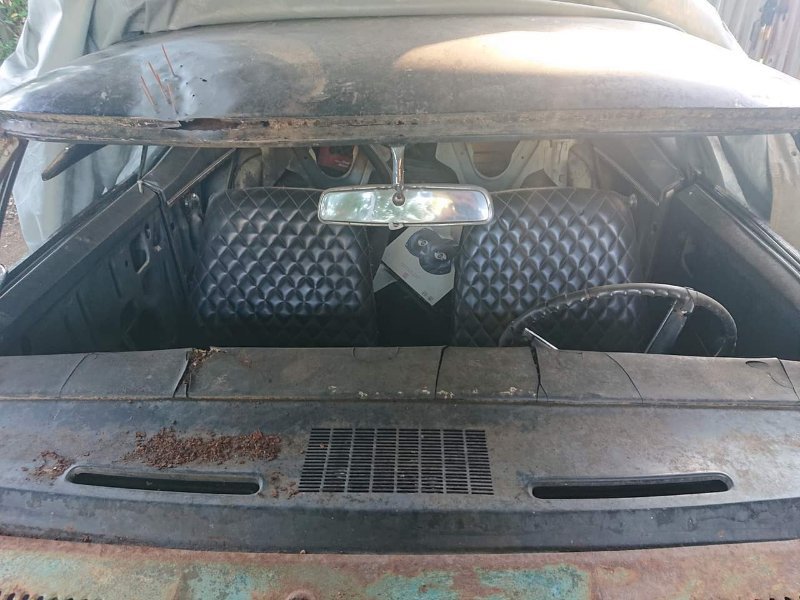
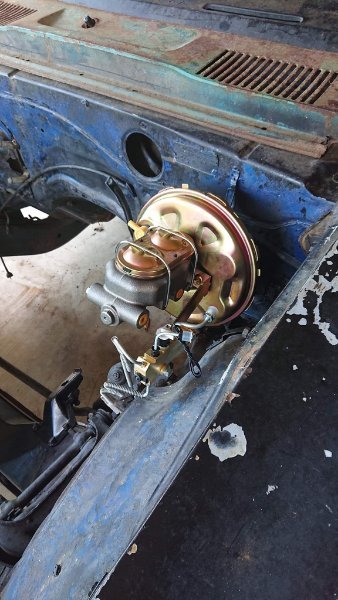
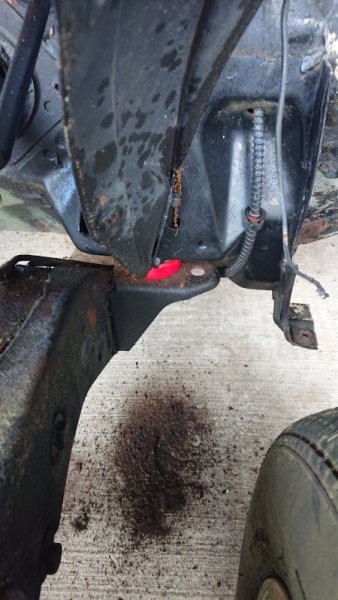
Noticed this morning that the passenger sprayer wasn't working. Now I see why. I installed a cruise control actuator two weeks ago on lunch but I'm having trouble running vacuum lines because someone relocated the vacuum canister. Also, can anyone verify this hole being on their Jeep between the booster and throttle cable? It's about an inch in diameter. For now I covered it with duck tape.

-
Kaede the Eliminator
Tactical Bacon replied to Tactical Bacon's topic in Member Projects: Your Comanches
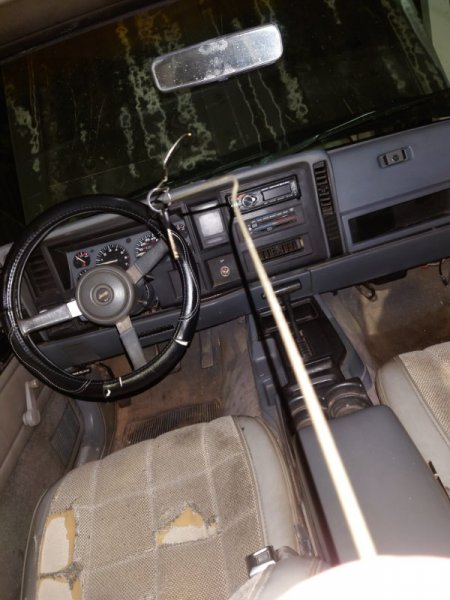
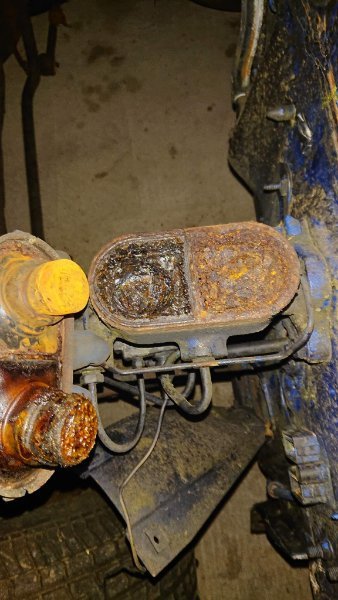
Drove the Jeep around a bit on the 5th running errands with the AC on and was rewarded with a puddle of condensation in the passenger floor. Drain doesn't seem to be clogged but I only went as far as checking with a finger. Today I got after the wipers not working right when I got home. Verified all the wiring in both the switch and body-side wiring then found a diagram for the PCB and deduced that the original delay module has a blown transistor. So for now, I'm running no delay. After that I located and unplugged the headlight delay module, re-inserted the fuse for it, and measured the voltage drop across it at 0.3 mV which comes out to a ~120 mA draw and means that the draw is in the horn wiring circuit. I also inspected my washer fluid leak at the reservoir and found that the hose wasn't even hooked to the pump. Now I have no leak and working sprayers. Interestingly, it has what seems to be the hose and electrical connector for a second pump. Lastly, I locked my keys in it and had to rustle up a coat hangar and after trying to hook a lock rod, decided it would be easier to rip the gorilla tape helping hold the rear sliding glass closed.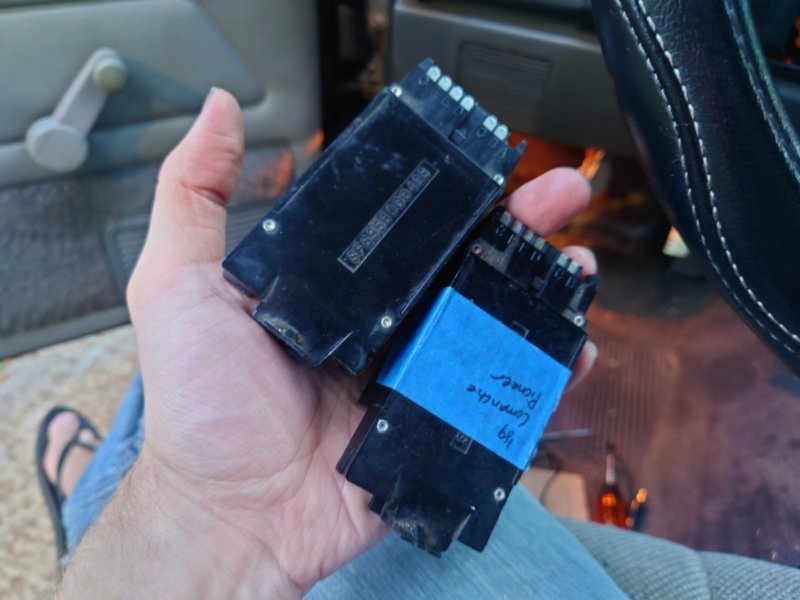
-
Money Shift - The Firebird Saga
Tactical Bacon replied to Tactical Bacon's topic in Member Projects: Other Cool Stuff
Busy few days on this one, oil pan repair seems to be holding for now, no leaks, seeps, weeps, drips, or drops. Timing cover was re-sealed to the block/oil pan, installed a new water pump, tried to install a new ATP harmonic balancer (had rust in the bore and large raised bumps that wouldn't let it slip on the crankshaft), ordered a Dorman from a local part store (found out from Summit after an original bolt snapped off below the surface that they used metric threads instead of SAE on a part that "exactly matches the fit and function of the original," and Dorman doesn't list this information themselves or include new hardware that would fit), then they were nice enough to order a replacement and warranty it out for me Sunday so I got that installed and new bolts holding the crank pulleys on. Radiator drain plug was the only leak after filling with water so a little teflon tape sealed that right up. I also was able to verify the alternator is charging (putting out about 12.6V with a loose v-belt) and even got the headlights working. I'm not sure if the fuel pump works so I'm weighing out an inline electric pump but before that I still need to install the new metal fuel line and get a replacement fuel tank for it. But before I sort the fuel system, I'm probably going to look into what's needed for the tail lights to start working. Lastly, I checked the timing last night and found that at some point I left the distributor hold down bolt loose so I got it set right around 6-8* BTDC for initial timing so I can start it once I get a fuel system in it. Plan is to adjust the lash on the valves at some point this week/weekend. -
Money Shift - The Firebird Saga
Tactical Bacon replied to Tactical Bacon's topic in Member Projects: Other Cool Stuff
Yeah, they didn't get a V6 until 1977, I just misspoke. Cool fact about the Sprint I6 they used in the first and second gen Firebirds, it was the first mass produced Inline engine that used a fiberglass reinforced timing belt instead of a timing chain or gear drive. Past few days were productive. I had a good idea and dumped half a quart of wax and grease remover in the engine to clean the inside of the oil pan and the crack in it, worked like a charm. Wiped it off, sanded it, wiped it with a blue towel sprayed with brake clean, pushed some dielectric grease in the 2 big holes in the pan and then put steelstik on it. Gave it an hour to fully cure then coated it with Kwikweld and gave that 24 hours before I dumped a quart of oil in the pan and it seems to have held without dripping or sweating for 24 hours so I dumped another 5 quarts in it after work today and now we wait to see if it'll hold. Also got the water pump pulled off, pulled the harmonic balancer then reinstalled it to keep things sealed, and now I'm waiting on replacement parts. Timing cover gasket, intake manifold gasket in case I need to pull the manifold to get it to seal to the timing cover, water pump, harmonic balancer, trans cooler lines, a new water pump divider plate, and a throttle linkage rod. -
Money Shift - The Firebird Saga
Tactical Bacon replied to Tactical Bacon's topic in Member Projects: Other Cool Stuff
Starter was fine but the solenoid was busted. I tried to jb weld it back together but it kept hanging and running the starter after I cut power to the solenoid so I swapped it out. Seller also threw in the longtubes that were on the engine so I got a free pair of Hooker Headers and installed them sans gasket. Sounds pretty frickin sweet on brake clean or a little gas down the carb. I did pull the intake and valley cover to check out the cam, hydraulic flat tappet but already broken in based on the lobes. Also, the oil pan got cracked when they loaded the engine on the pallet so it needs fixing or replacing. It's been about 44 weeks since I really worked on her, finances can get rough. Timing cover leaks at the passenger coolant passage into the block so that needs a reseal, water pump bearing is gone and the shaft wobbles like crazy. So the plan is to fix the pan if I can so I don't have to pull the engine, reseal the timing cover, replace the water pump, and then see if she'll really run on her own if I feed fuel hose into a gas can. Before she can drive she needs to run and she needs throttle linkage, a custom driveshaft, trans cooler lines, fuel tank, working lights, a few small things mounted or addressed, and hopefully I can get all that done this year.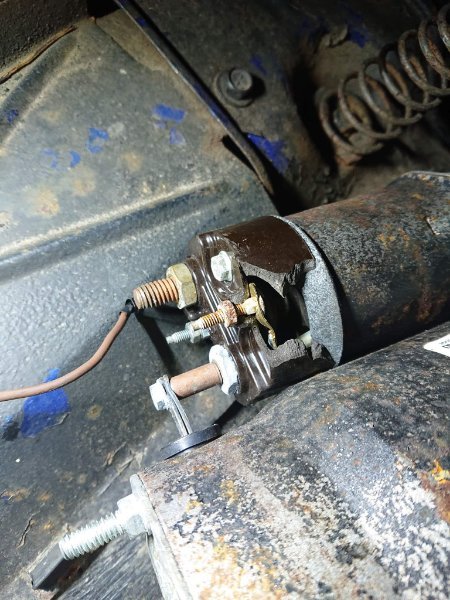

-
Money Shift - The Firebird Saga
Tactical Bacon replied to Tactical Bacon's topic in Member Projects: Other Cool Stuff
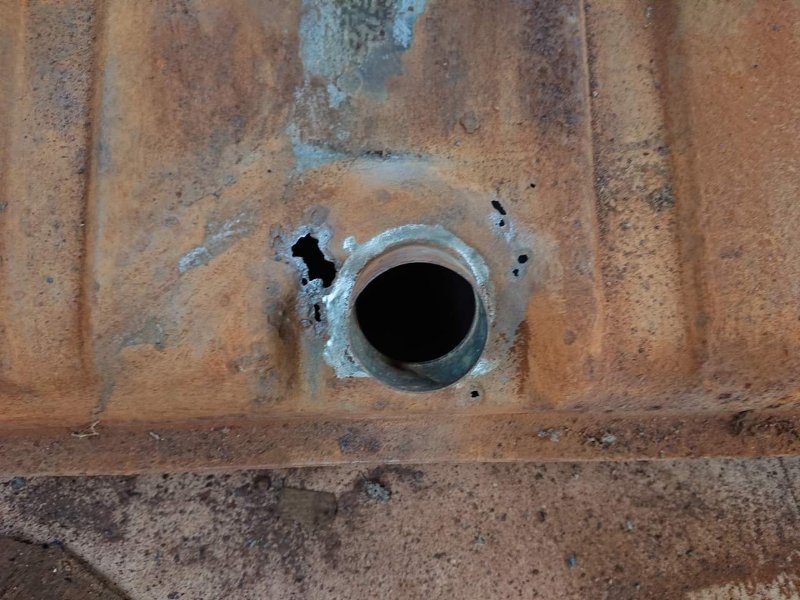
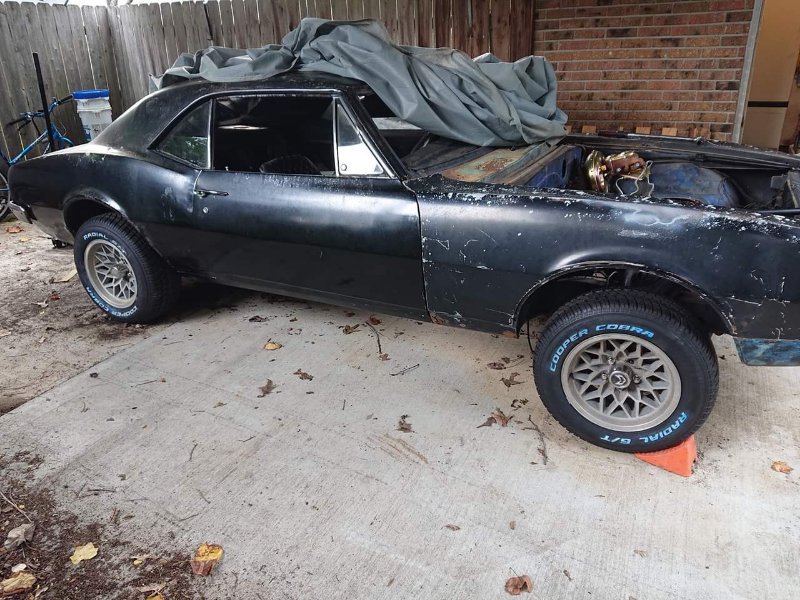
I also ordered some 235/60R15 Cooper Cobras at my new job, a local mechanic shop, because the old rubber was shot and I'd need to be able to move the car around soon. The differential was drained/mucked out and 54-year-old gear oil has to be one of the most disgusting things I ever smelled. Dropped the fuel tank to inspect it, too. The inside didn't have a speck of rust! But the outside was a different story. So that got thrown out and I haven't put new fuel hard lines in yet since I don't have a tank. But I did get the engine and trans dropped in the car and mounted!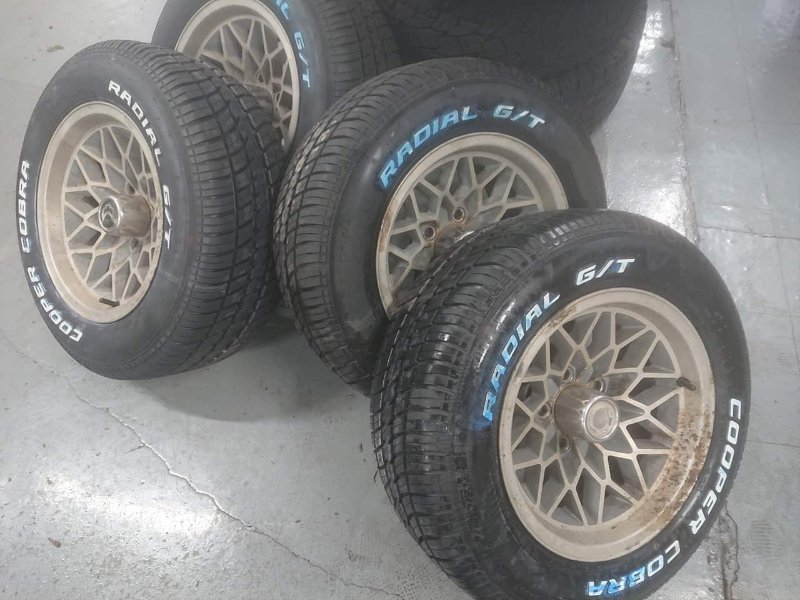
-
Money Shift - The Firebird Saga
Tactical Bacon replied to Tactical Bacon's topic in Member Projects: Other Cool Stuff
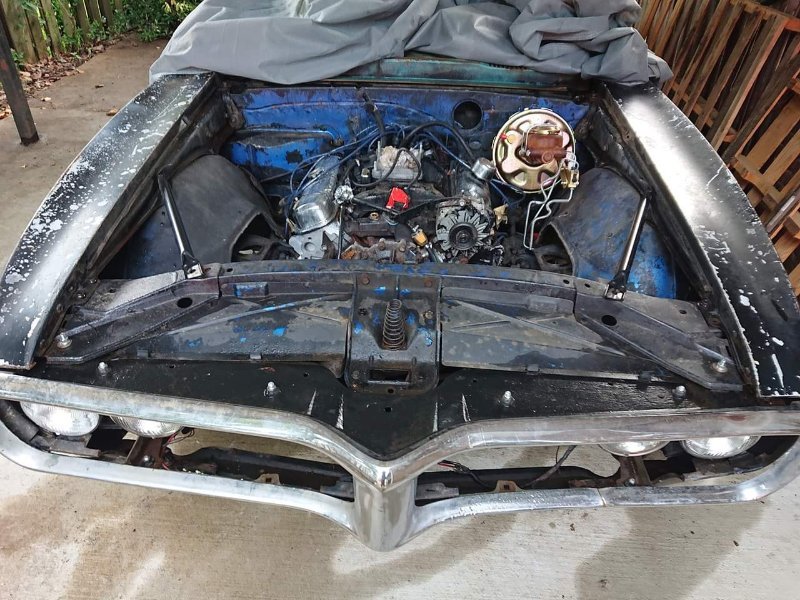
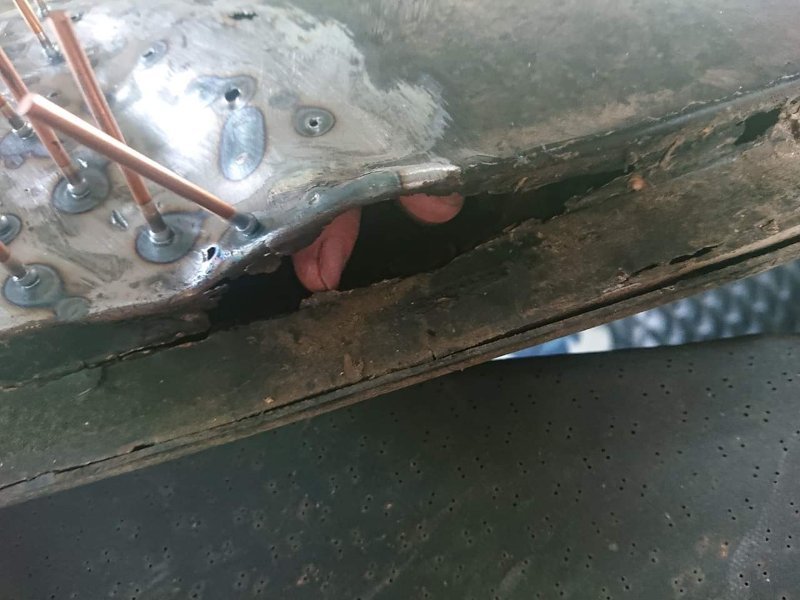
June 2021 - I finally have money at the same time I find a good Pontiac 400. Based on the casting number it's drilled and possibly tapped for a 4 bolt main but probably only has 2 bolt caps installed and originally came from a 1970-72 Catalina. It also came with a TH350 that had 12" extension housing on it, very uncommon, indicates that the Catalina was a wagon. It was freh motivation to work on the car and finally try to fix the roof. Which led me to find the cover up from a prior owner, I think the fellow before the seller based on all the evidence. And pulling the crease most of the way out made me realize how bad it actually was. So I'll be replacing the entire roof skin and support frame for the roof.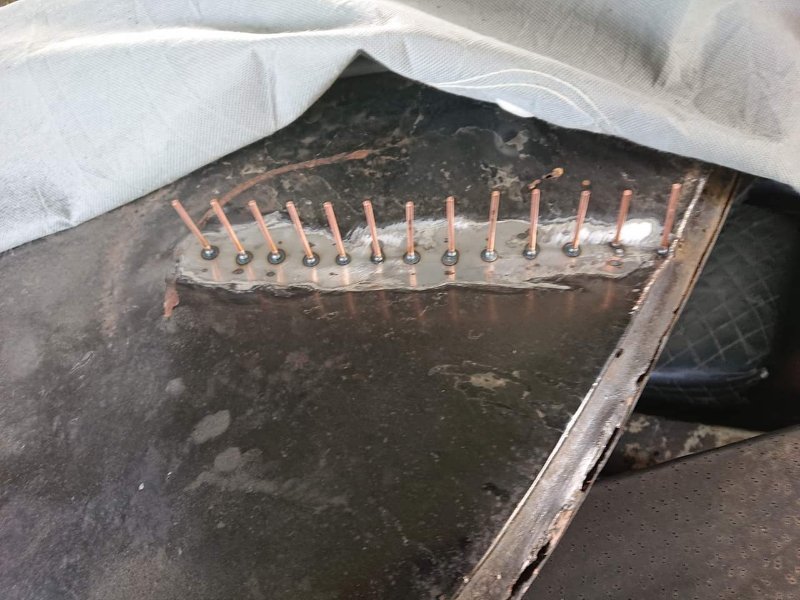
-
Money Shift - The Firebird Saga
Tactical Bacon replied to Tactical Bacon's topic in Member Projects: Other Cool Stuff
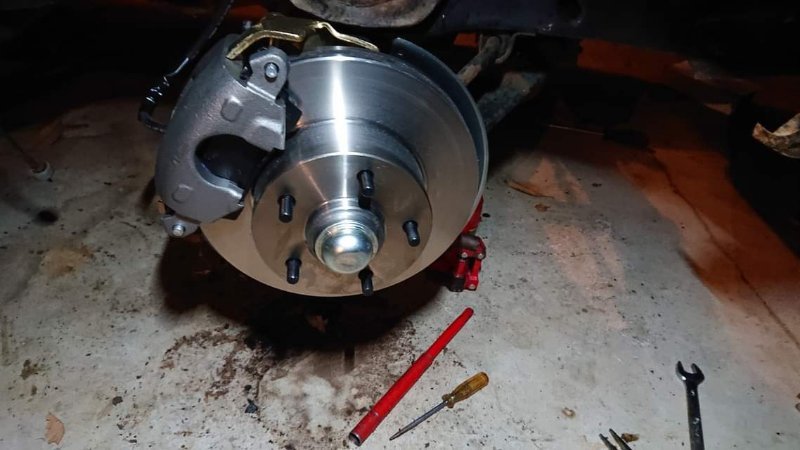
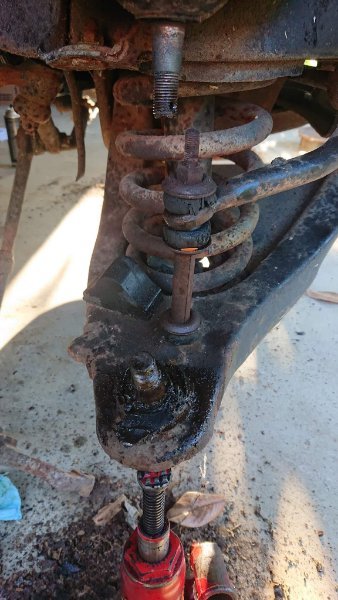
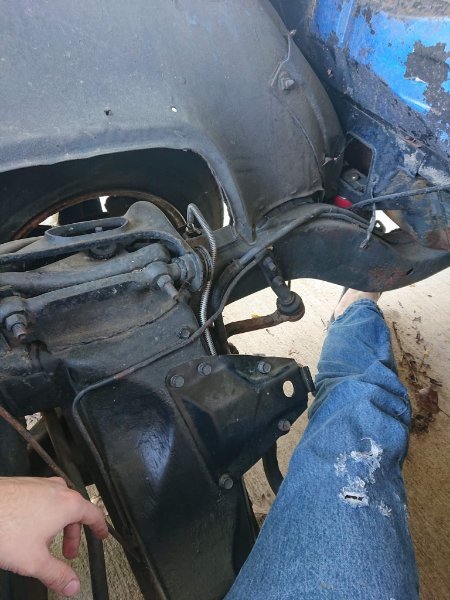
July 2020 saw me set in on the brakes. I bought a complete kit with new hardlines, booster, master cylinder, spindles, calipers, bearings, pads, rotors, and combination valve. That all got installed in one day. Lower ball joints were blown out so they got replaced the following Wednesday with Moog but the original uppers were tight af so I greased all 4 up. Rear hardware and wheel cylinders got replaced but the shoes and drums were in good shape overall so I scuffed them both and put them back on. At some point after this, I also did a rudimentary bleed on the brakes. Not the greatest but good enough for rolling it around. I also firmly bolted in the engine mount brackets that had just been loosely installed before I had to move again, though this time it was because I bought a house! At the time, I identified as a Pontiac 400. Vroom vroom! Running total for the car and parts by this point was around 5 grand.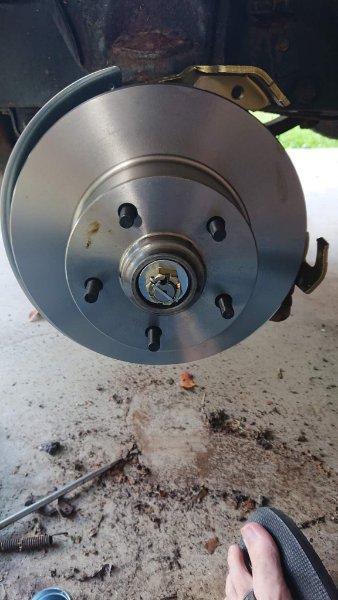
-
Money Shift - The Firebird Saga
Tactical Bacon replied to Tactical Bacon's topic in Member Projects: Other Cool Stuff
Did you know you can't install the inner fenders on these cars if the outer fenders are already on it? I found out the very next day! A week or two later I got the necessary hardware (didn't come with too many nuts or bolts) and got the rest of the front end mounted up. I also had some headlights mounted to the brackets for a few weeks at that point so they got installed, too. Not long after this I had to move because the lease ended and the richard head we were renting from decided he wanted to have a place for his brother to live and told us to buy the house or get out. At that point he started fixing the problems with the house that we'd been complaining about for months and being in our way while we were trying to pack and move. Nothing else happened to the car until the 2020.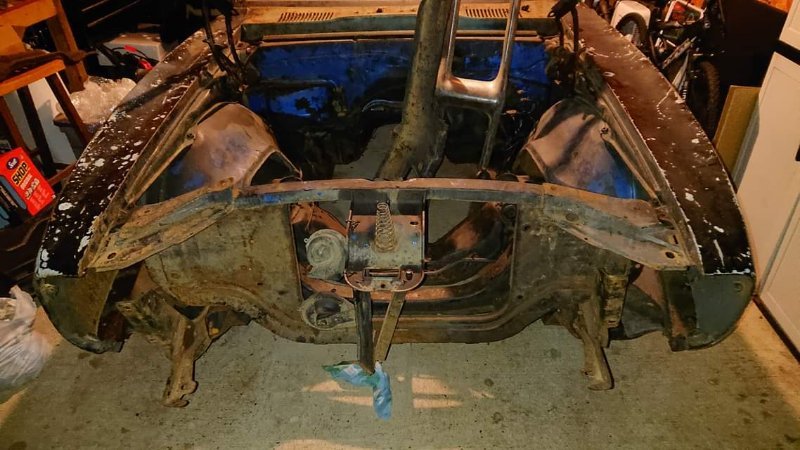
-
Money Shift - The Firebird Saga
Tactical Bacon replied to Tactical Bacon's topic in Member Projects: Other Cool Stuff
Spent some time vacuuming out the interior though really I should power wash it, still. Rear bench and door panels were shot so I threw them out. Car had drum brakes and the correct hardware for the front drums was unobtainable at the time (the rear hardware is listed as working but the auto¯adjuster is too long and will cause the fronts to lock up) and still is so I planned on converting to disc brakes in the front. Spent 7 hours a week later to assemble the tail lights, used the polyurethane body mounts I got through the part store I worked at and replaced the old body mount bushings, mounted the front seats, cleaned the windows, got the driver window back on its track, and installed the core support and fenders.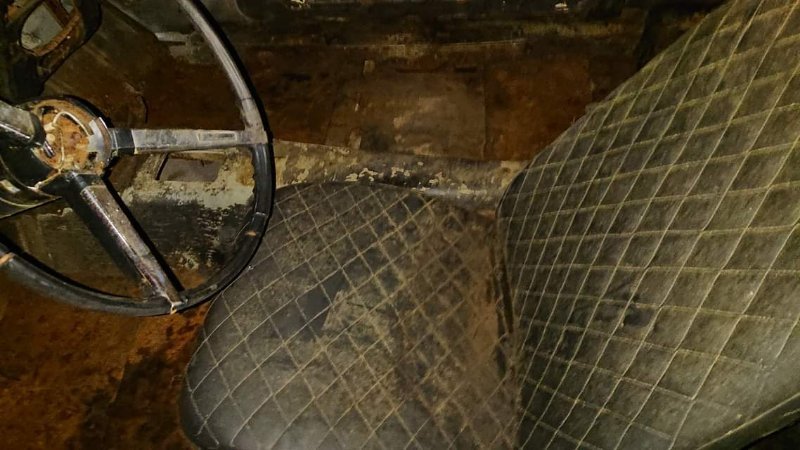
-
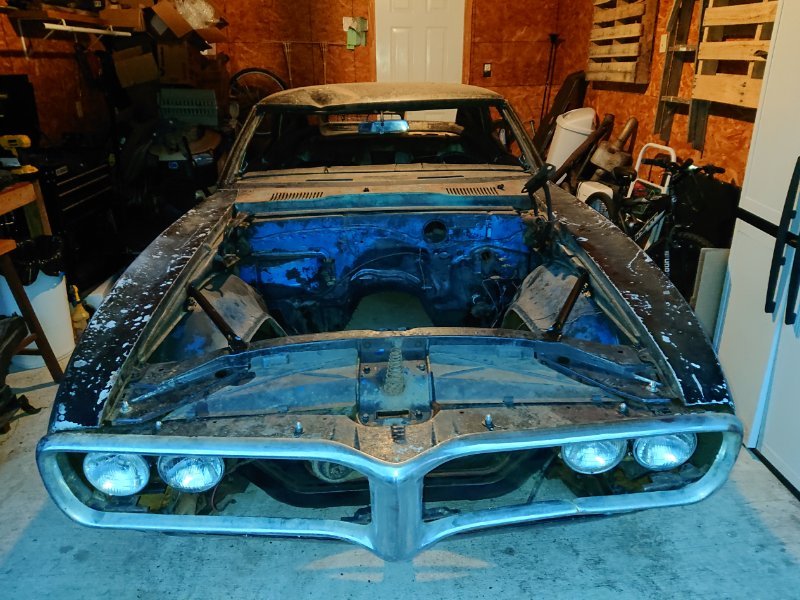
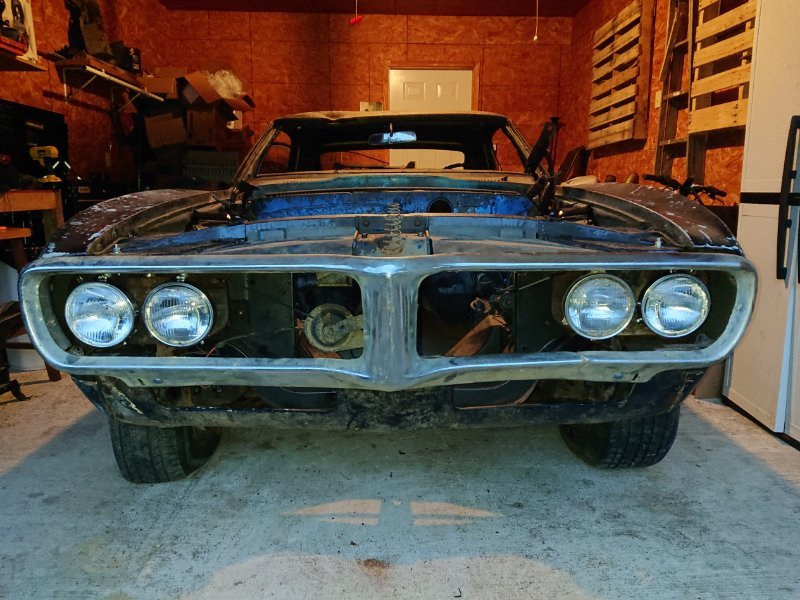
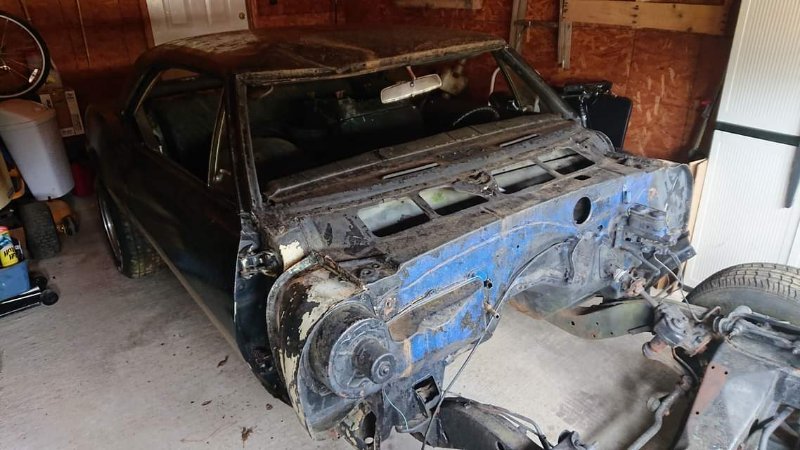
Someone suggested I create a build thread on my Firebird here. It's a 1967 Firebird 400 4 speed. Bought it as a roller, no engine or transmission. Started life painted Mayfair Maize with manual brakes and steering, the deluxe interior, and a black vinyl top. Timeline: May 2016 - Cop runs a red light at 80 mph and wrecks my 1997 Trans Am. June 2016 - Ruled my fault due to me hitting him behind the rear wheel. I retain a lawyer. January 2017 - Lawsuits are filed. March 2019 - Settle with the bastards at Jackson, TN P.D. April 2019 - Find a car on FB marketplace and go look at it. May 2019 - Get settlement check. June 1 2019 - Seller delivers the car to my garage and the saga begins. Car came with most of the front clip, a 6 cylinder hood, floorpans that had been replaced with tech-screwed sheet metal, a massive dent in the roof right at the front edge, and about 2-3 inches of loam, pecan shells, dirt, sticks, leaves, and probably some animal poop in the floor. Naturally, the very first thing I did was install a new lock cylinder in the trunk lid and find the rust in the master cylinder.
-
Kaede the Eliminator
Tactical Bacon replied to Tactical Bacon's topic in Member Projects: Your Comanches
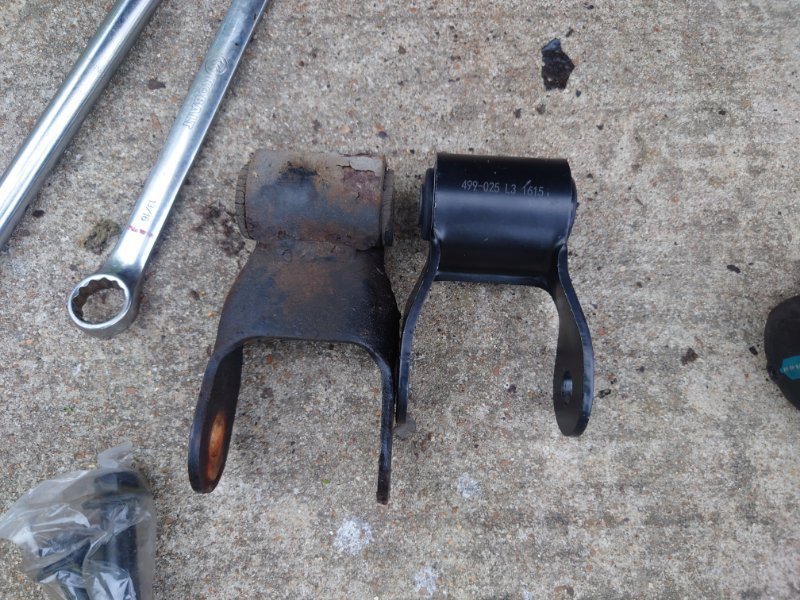
Did not know that, much obliged! Got out and cleaned up the replacement tail light assemblies and installed them. Forgot to take pictures while it was still light out, naturally. The new XJ shackles I ordered arrived while I was out there so I went ahead and installed them to lower her about an inch in the back and level the ride. Driver side is sitting about an inch lower from the years so I'll be sourcing new springs. Can't wait to add more low! Also climbed under it to swap out the fuel hose at the filter, someone put 3/8" on the outlet and it was pretty swollen so a few inches of EFI rated 5/16" has it right. Lastly, I fired it up and added a little more than a can of 134 to the system and while not total ice cubes, the ac is working and is right on the lower edge of green on the gauge. Unfortunately the last of my cans so I'll need to stock back up, some of the other cars around the house are an ounce or two low.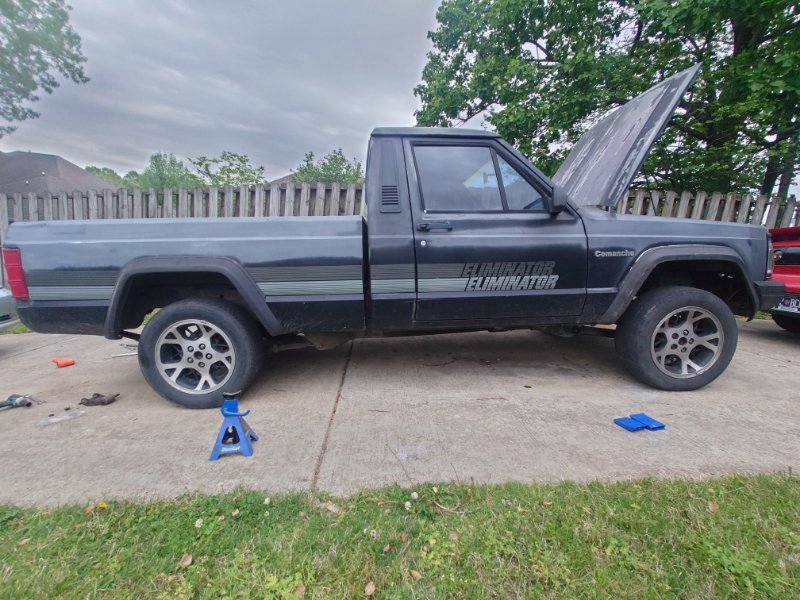
-
Kaede the Eliminator
Tactical Bacon replied to Tactical Bacon's topic in Member Projects: Your Comanches
I can't change the thread name but I did decide on a name for her, Kaede. In the past few weeks I bought a big kit of lock rod clips from Disco and replaced all the old clips in the driver door. Dumped some Slime in the DF tire because it kept leaking down to around 20 psi. Still haven't replaced the tail light assemblies so I may get out and clean/install the nicer ones today. Aside from that I've just been driving it some days to work. I also have rear spring shackles from an XJ out for delivery so that should level the suspension height between front and rear and move me towards my goals of lowering this into a bit of a sport truck. -
HITCH PLATES!
Tactical Bacon replied to krustyballer16's topic in Vendors- members making products for MJs
Subscribing to this because I missed this latest round and I need a hitch because my bumper is nfg for towing, modified to be a rollpan. Got cash set aside for a pre-built unit. -
Kaede the Eliminator
Tactical Bacon replied to Tactical Bacon's topic in Member Projects: Your Comanches
I ended up tapping the holes for M6x1.0 threads with mixed results. Some of the holes had threads that held and others didn't but in the end they all tightened down nicely to hold the flares firmly in place. I finished that up last weekend. I also found my battery to be completely dead (around 800 mV) yesterday afternoon so I tricked my smart charger into charging it overnight and after reinstalling it tracked my 140 mA draw to be in the Horn or Headlamp Delay circuits as the draw dropped to ~10 mA when I removed the fuse for those items. Too cold to stay outside and trace wires and investigate further so I left off at that point. -
Kaede the Eliminator
Tactical Bacon replied to Tactical Bacon's topic in Member Projects: Your Comanches
My buddy has an 86 long bed that's in pretty rough shape overall and eventually destined to be a trail rig so I saved some parts off it yesterday. The big score for me is the complete set of fender flares and and mounting hardware. Brackets are in decent shape, a few pieces are slightly bent and only 33 of the studs snapped removing the bolts. So I fabbed up a drilling rig from an old 2x4 that I had lying around (used to use it to help jack up my old Comanche) and spent a bit drilling out the busted studs from the driver side parts. I'm not 100% on how I'll attach the bolts to replace the studs but the holes are the perfect size to tap for 6mm bolts. So, I may do that and thread them in, then put some jb weld on top of them to hold them there. Also scored a nice pair of tail lights in better shape than my own. So they'll get a cleanup before I swap them out.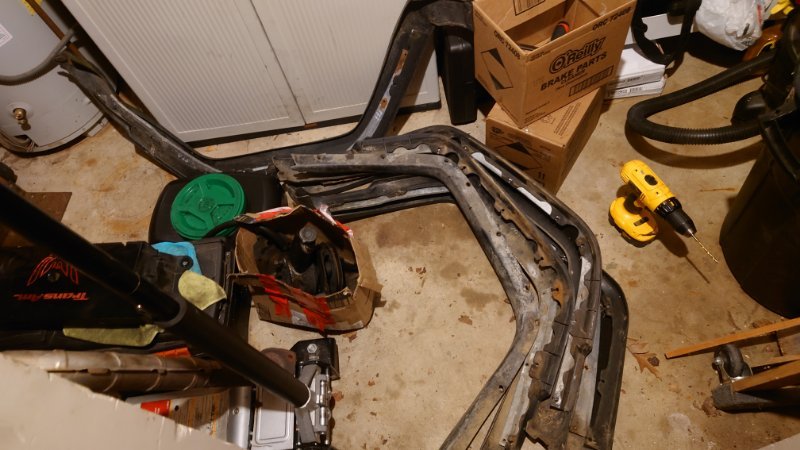
-
Refreshing Door Latches
Tactical Bacon replied to Blade's topic in MJ Tech: DIY Projects and Write-Ups
I didn't think to look for big kits of these clips. Did it look a bit like this one? Because this one seems to have the necessary clips in it and then some, -
Refreshing Door Latches
Tactical Bacon replied to Blade's topic in MJ Tech: DIY Projects and Write-Ups
Any recommendations on where to obtain new clips for these excluding the dealership wanting $5 a clip? -
Kaede the Eliminator
Tactical Bacon replied to Tactical Bacon's topic in Member Projects: Your Comanches
Small steps are steps nonetheless. I replaced the driver side B Pillar bulb without exploding it to bits. Then I flipped the passenger side since it was installed upside down. Very surprised that they were in such a good condition. I also replaced a driver tail light and back-up bulb. The glove box bulb was also missing so I put one in and it works fine.
-
Kaede the Eliminator
Tactical Bacon replied to Tactical Bacon's topic in Member Projects: Your Comanches
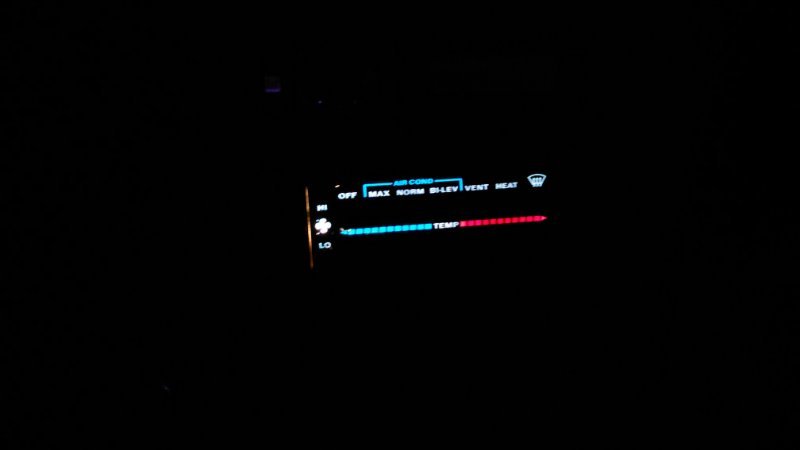
Took some time today to clean out the bed and went through all the spare parts that came with the truck. I made sure to let the tailgate down and stretch out in the bed to enjoy it. I also got it to take some freon and the compressor kicks on now but it's hard to tell how well the ac works when it's 40* outside. Also reconnected the vacuum hose to the recirculation door actuator. Next was a trip to the part store to order a new coolant temp sender since the old one is open circuit between the pin and the body. That should be here tomorrow. I also checked the oil and it was about 2 quarts low, looks like a potential timing cover leak. By the time I finished shooting the breeze with my buddy there, it was night out. All the exterior lights and dash lights work but I realized the heater controls did not. One 74 bulb later that was fixed. Bonus fix! I found the antenna cable wasn't connected to the radio so now I have reception even without an antenna on the fender. Brake fluid is blacker than night and needs a flush so I'll be taking care of that soon. Underside is getting Fluid Filmed soon to keep it rust free. Driver door speaker being dead is noticeable now that the radio has reception. I'm also going to try and find some sporty 17s since I think they'll match the look I want. I also need to find a driver rear fender flare and all the mounting hardware for all 4 flares.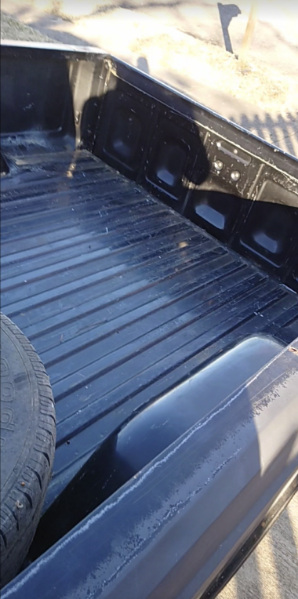
-
That's the one. Also started a build thread on this one so I'll be posting pictures there.
-
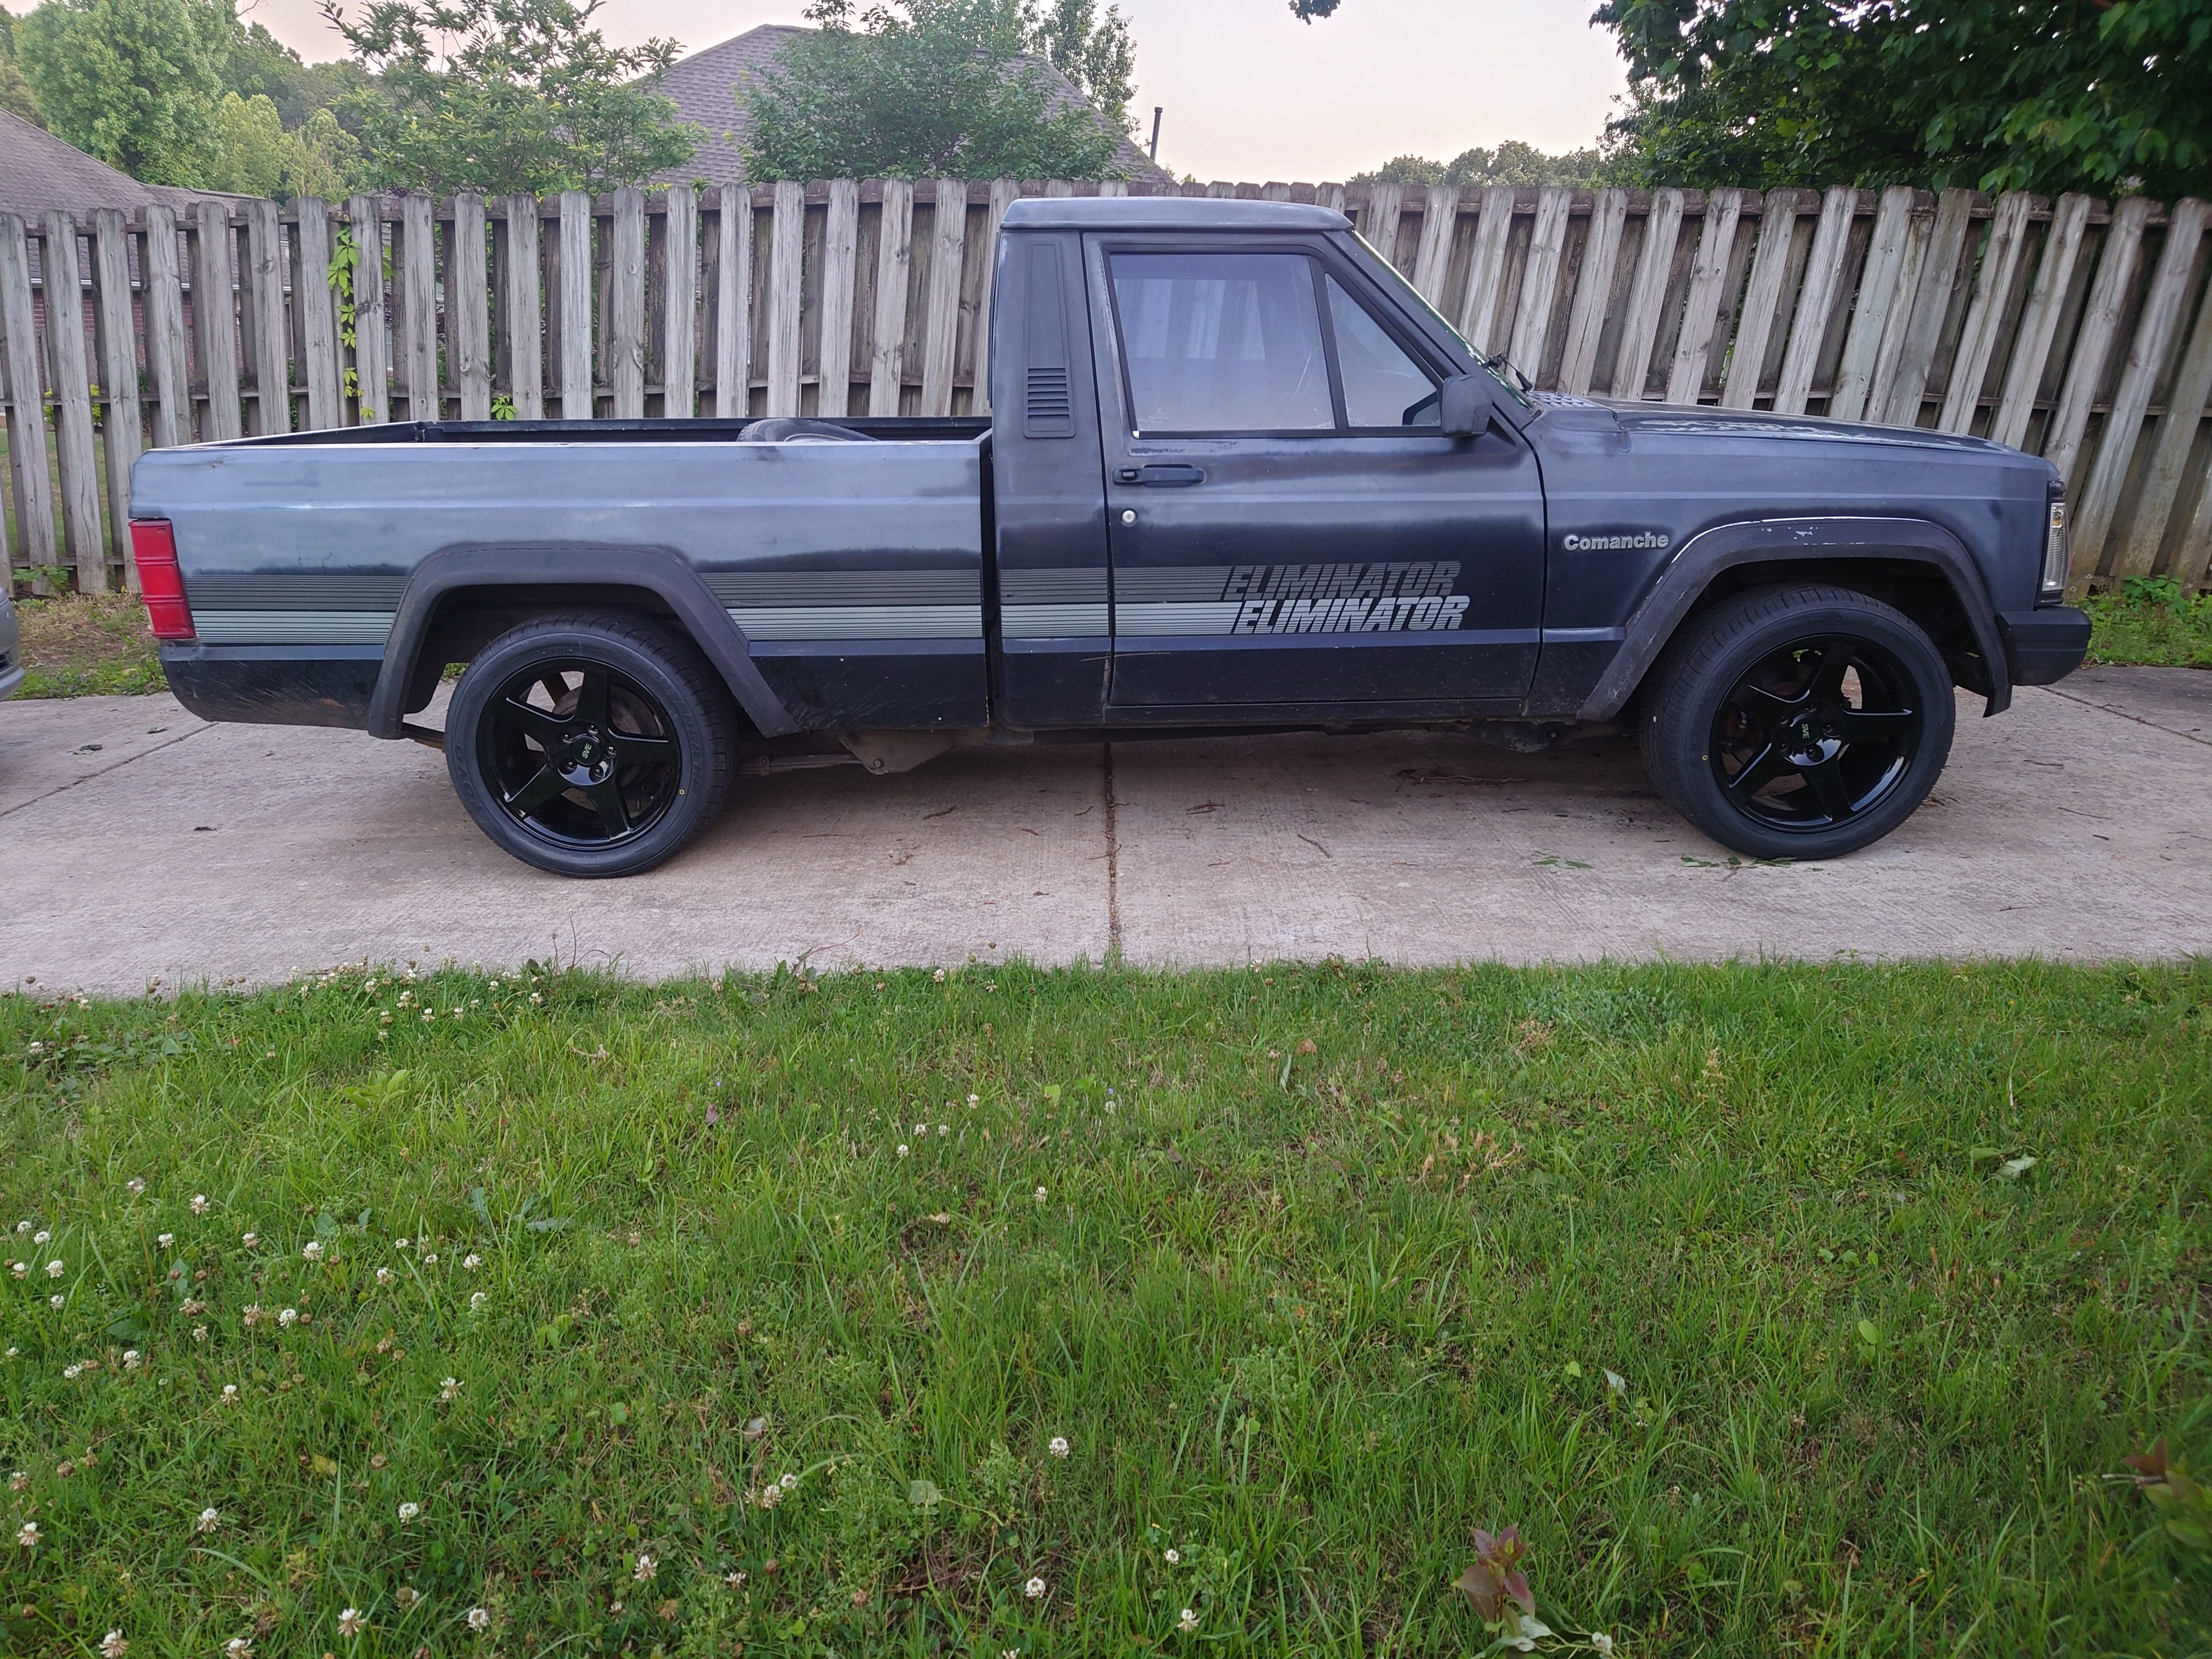
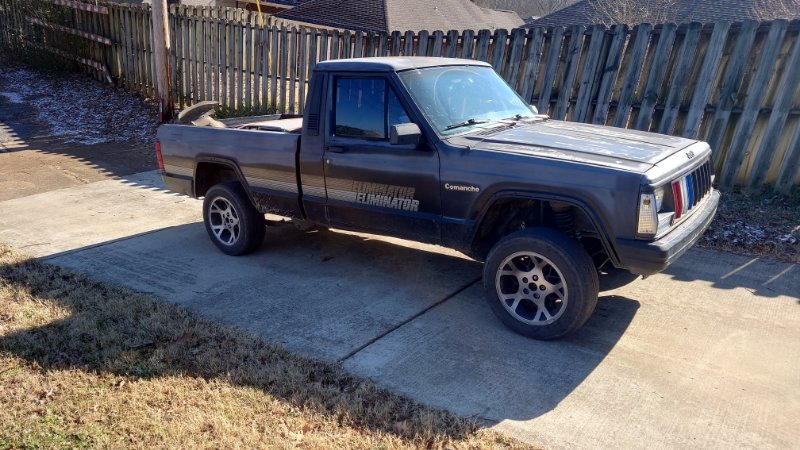
Don't have a name for her yet but figured it's attempt 2.0 since it's my second Comanche. She's a 1992 Eliminator with an AW4 and 2wd. Pictures will be coming soon. The goal is to lower her about 2" up front and 3-4" in the rear, really give her that sporty feel. That and just restoring her in general, making sure she doesn't have any rust (looks solid so far, even the floorboards), and hoping another moron driver around here doesn't t-bone this one, too. Drove her home yesterday and had trouble getting the driver door to unlock after locking it so my first few hours with it were taking the actuator out, cleaning and lubing it, and then driving around town finding and buying lock rod clips in the hope that something would work to replace the ones that broke during disassembly. I had partial success in modifying a clip for the lock rod at the inner door lock switch. I also discovered the spring for the driver handle is broken so I'm hunting up a replacement for that.
-
No pics worth posting but a build thread is definitely in order.
-
Got back in a Comanche today, a 1992 Eliminator 4.0 AW4 2wd! Traded my GS300 for it and going off the registry, I think it was with @SandMountainJeep