
Tactical Bacon
-
Posts
242 -
Joined
-
Last visited
2 Followers


Recent Profile Visitors


Tactical Bacon's Achievements
")
Comanche Aficionado (4/11)
-
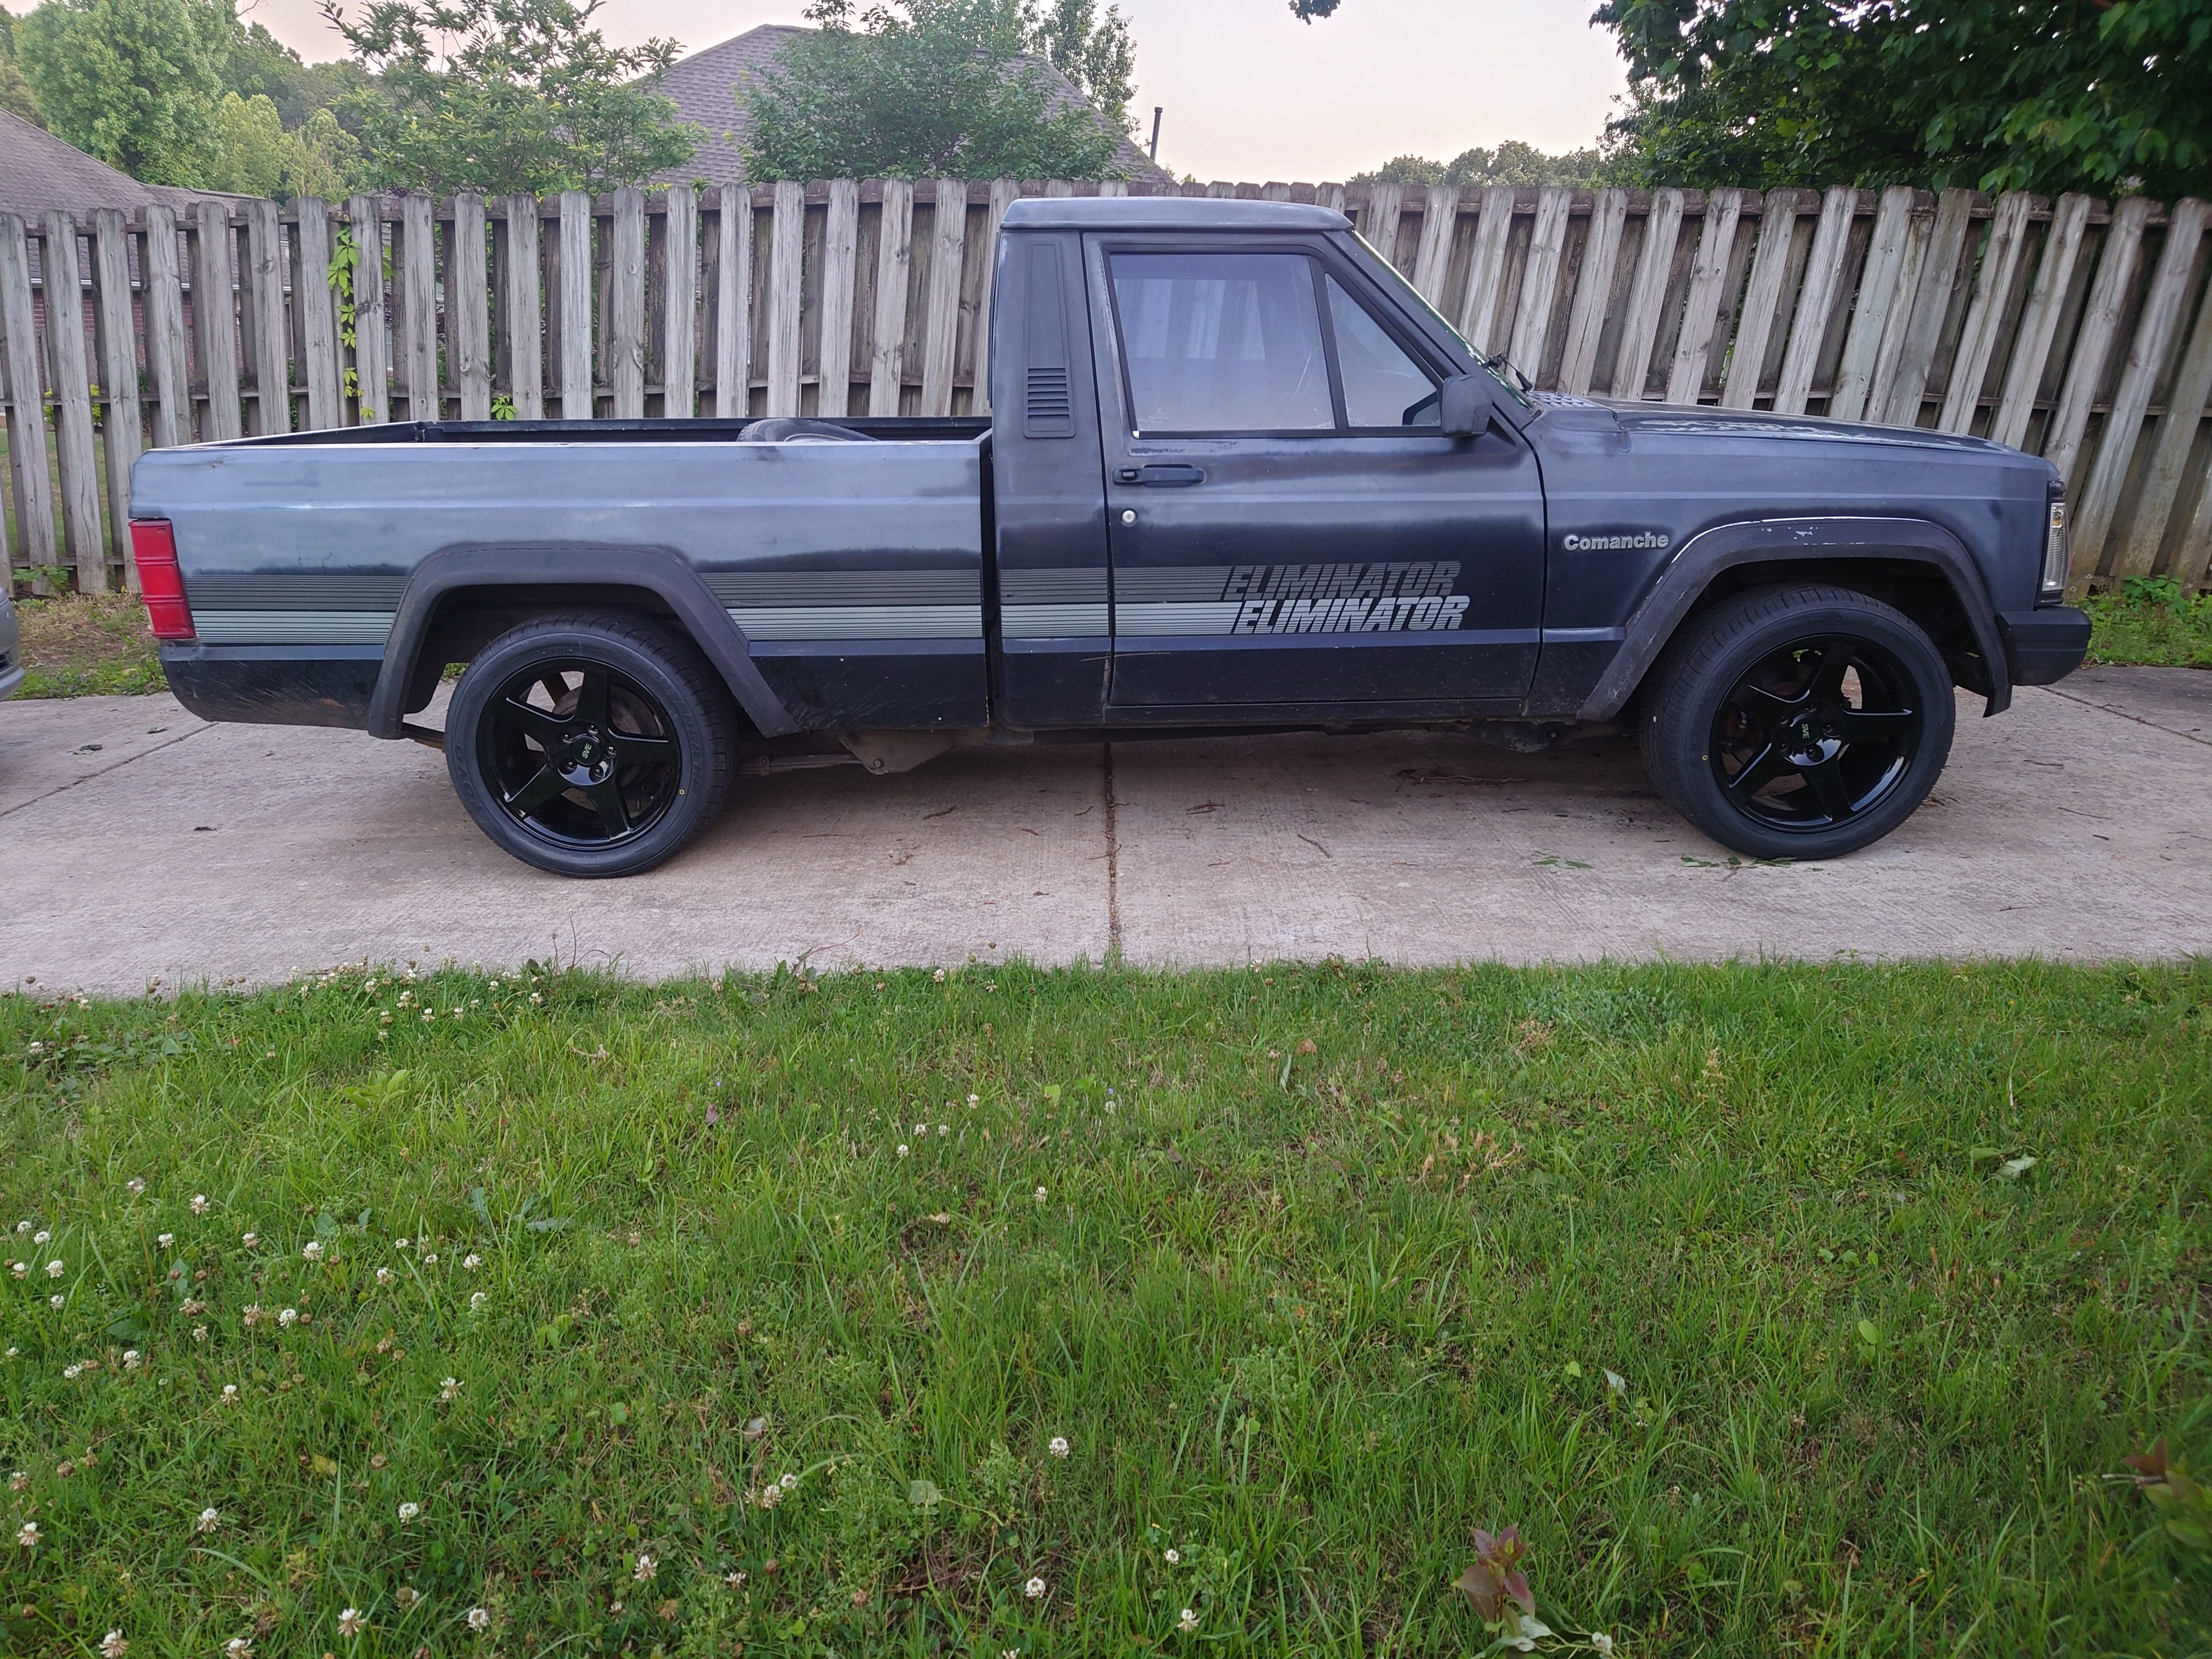
Kaede the Eliminator
Tactical Bacon replied to Tactical Bacon's topic in Member Projects: Your Comanches
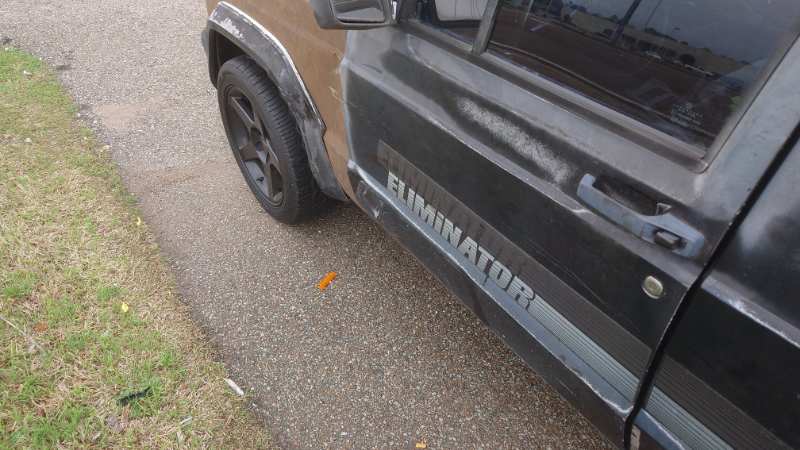
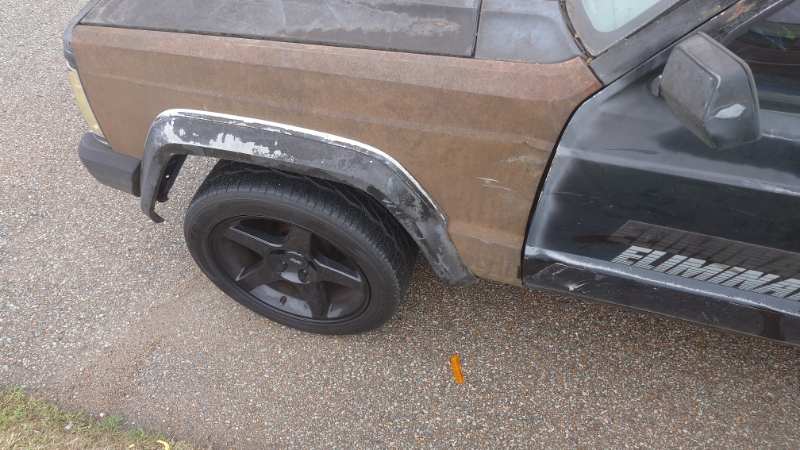
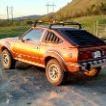
Insurance ruled the other driver 100% at fault so I got a nice check from their insurance, fixed the dent in the fender with a hammer and a 2x4, and spent part of the money on repairing my Trans Am. Another lightning round of updates since March: Applied rust treatment to the interior of the roof then put some Frost King Foil Duct insulation on it, the B-pillars, in the doors, and on the back of the cab. Replaced the interior door wipes at the same time Replaced the b-pillar light bulbs and footwell bulbs Took the Jeep to Nashville to buy some WS6 wheels for the Trans Am and the compressor locked up maybe 50 miles into the trip. Installed a new factory style accumulator and 95 XJ style compressor, condenser, evaporator, and lines (still have the factory quick disconnect line with new HNBR o-rings in it) Replaced the cigarette lighter bulb while the dash was out Painted the tailgate and need to redo it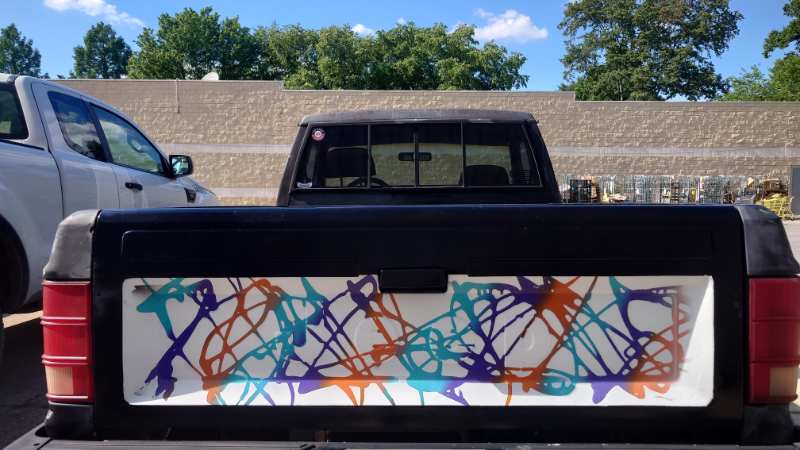
-
Getting cruise control to work again
Tactical Bacon replied to hgeranium's topic in MJ Tech: Modification and Repairs
Any idea if that's Renix only or HO, too? -
Not Another Firebird Thread
Tactical Bacon replied to Tactical Bacon's topic in Member Projects: Other Cool Stuff
You had me at obscure parts! Honestly, the only part I'm really missing is the little plastic piece that holds the security indicator light in place so it peeks through the dash panel vents. This joker right here: What year of car is the dashboard out of? I have one in the car right now but it's not in the best shape either so I'd be willing to drive the Comanche 10 hours out and back for the fun of it once I get it put back together to buy that dash. And I think all that really needs doing for the LS1 airbox to fit is leaning the radiator back some. I know I've read a few threads on the process before. Either way, I want to see pics of that green one.
-
Not Another Firebird Thread
Tactical Bacon replied to Tactical Bacon's topic in Member Projects: Other Cool Stuff
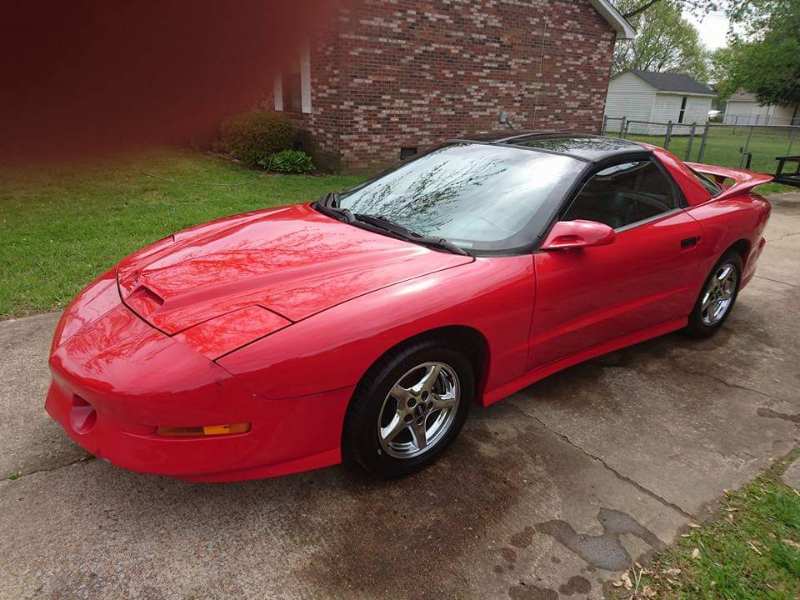
May 15, 2016 - DISASTER STRIKES A cop ran a red light at almost 80 mph in a 40. He had his lights on but no siren coming through a blind corner and I ended up t-boning him right behind his right rear wheel. It happened so fast that I had already reflexively stopped the car and the airbags were deflating by the time I realized I had been involved in a collision. He admitted fault but my insurance company ended up saying it was my fault (f*** progressive) and I only had liability. Passenger airbag destroyed the dashboard, dash panel, and windshield. Front end was ruined and the frame horn on the passenger side got deformed from the hit. I moved about a month later then sued the the city, settled out of court, spent the money on the 67 Firebird in my other thread, collected parts from the internet and the local DIY parts yard over the next 6 years or so, driving the car every now and again in various states of disrepair (gauges ziptied to the column, parking lamps ziptied to the headlight brackets, etc.). I've owned the Trans Am for almost 11 and a half years and she's followed me through 3 moves and sat patiently in a garage or under a carport for me to fix it which I recently accomplished (kinda sorta). -
Not Another Firebird Thread
Tactical Bacon replied to Tactical Bacon's topic in Member Projects: Other Cool Stuff
One of the first priorities for me was taking care of the factory u-joint that failed after about 135,000 miles. How do I know it was factory? GM injected nylon into the driveshaft and yoke to retain the u-joints once they were pressed in. A propane torch melted most of it out but I still wasn't able to press it out with a u-joint/ball joint press so I hopped in the Comanche and took it and the new Moog u-joint to the local driveshaft shop. They had it swapped in less than a minute. Over 11 years later, I still haven't greased that joint or replaced the factory front joint. I miss that '91 Pioneer in the background. The passenger front wheel bearing ended up going bad shortly after so I put in a new Moog hub (back in 2015 when they still were great parts). I sourced a set of factory fog lights for it (not pictured) and swapped in a set of HID headlights (with telescoping bulbs so I'd have low and high beams). I also dropped $300 for a set of honeycomb taillights from a 98-02 Firebird on ebay to replace the cracked up factory tail lamps and did the CETA (Collector's Edition Trans Am) mod with plastidip for the rear bumper (the black lower center section). I noticed at some point I had some slack in the the driveline still, like a loose u-joint. An investigation yielded results that the issue was inside the differential and felt like an improperly shimmed carrier. It seemed reasonable, a previous owner had replaced the factory 3.42s with 4.10s. I took it to someone who did diffs on the side to re-shim it and it turned out the pin bore in the carrier for the center pin was wallowed out and oblong in shape. That resulted in my buying an Eaton Trutrac carrier with an entirely helical gearset. Past that, it was mainly just driving it when the weather was nice and enjoying the car. I took it to Nashville in March 2015 to see Bob Seger w/ my mom. I tried my hand at tuning the computer and bricked it (and coincidentally the laptop died a day or two later). That early OBD2 stuff isn't very resilient. There's also an easy 5 WHP to be made with these cars, you bypass the coolant pipe in the throttle body. And I put in LED tail lights along with electronic flashers for the turn signal and hazards to eliminate the hyperflash. I also took it to Memphis and I think I hit a piece of road debris I didn't see because when I got where I was going, the parking brake stopped working. Putting it on a lift at work revealed at least one of the rear cables and I think the front cable was completely destroyed. It also bent the parking brake cable bracket (a problem I just fixed recently with my newly acquired welder) so after 3 new cables installed, the parking brake still didn't work. -
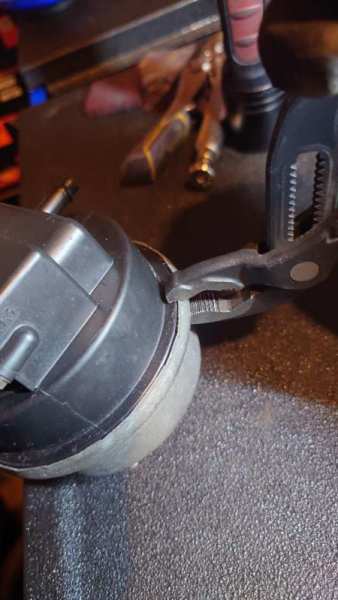
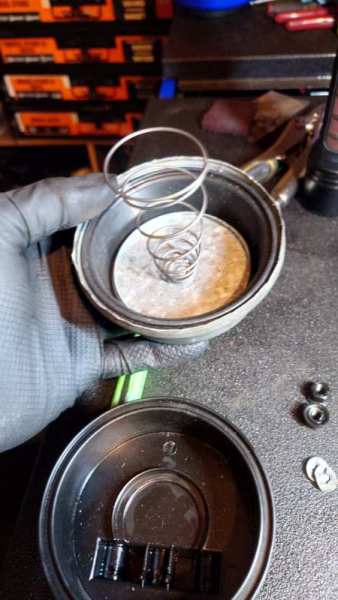
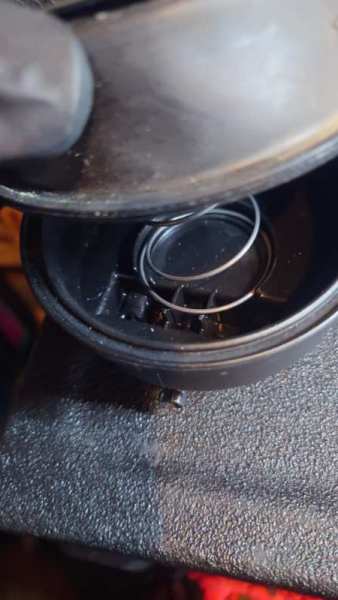
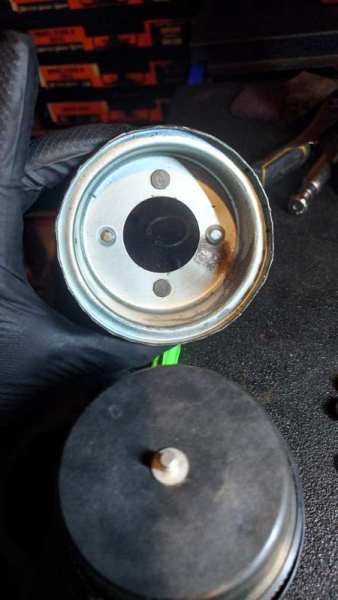
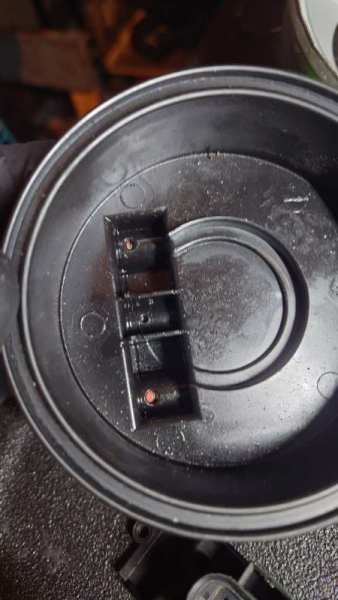
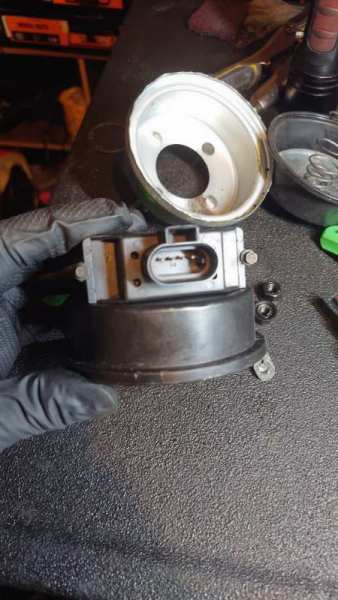
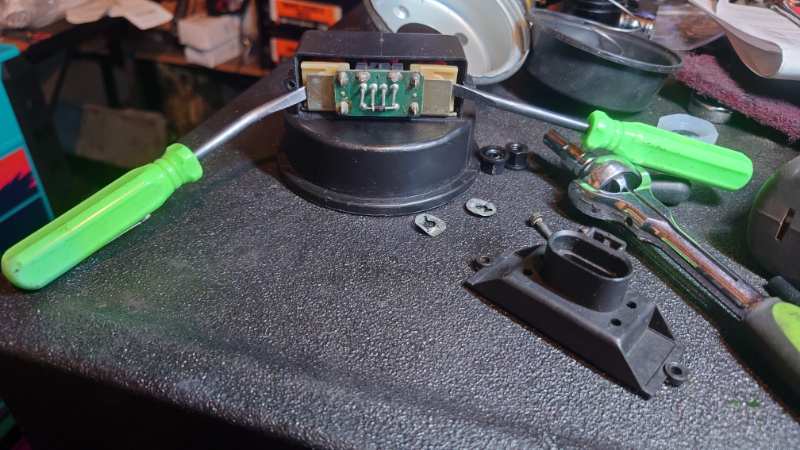
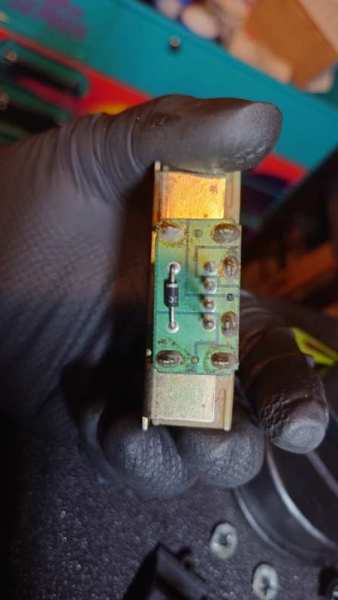
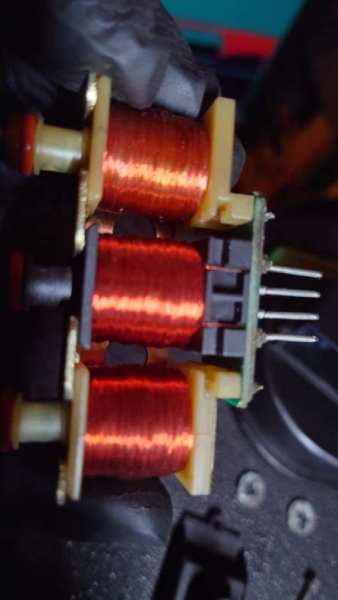
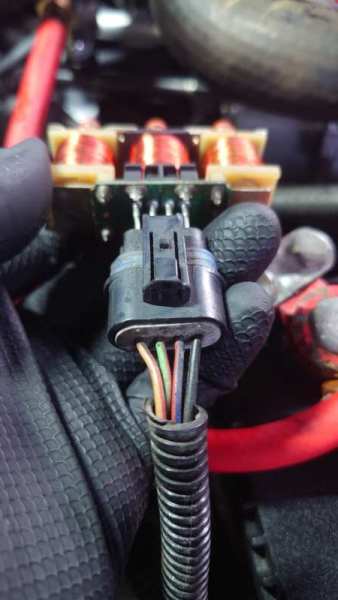
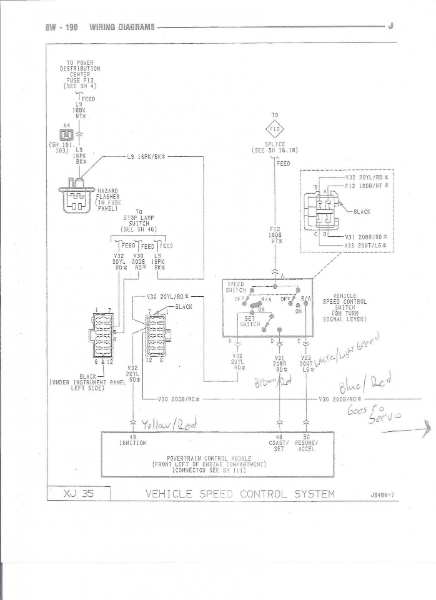
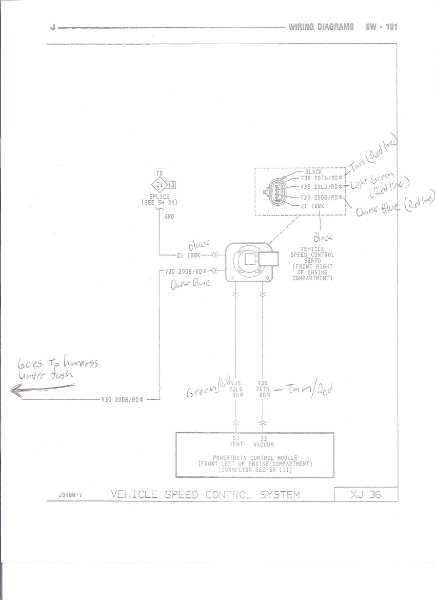
This write-up is applicable to the 91-92 MJ and 91-96 XJ with a 4.0 engine. It may also be applicable to Renix era cruise control servos and vehicles equipped with other engines. Tools Required: 10mm socket 3/16" socket Two small flat blade screw drivers or miniature pry bars Needle nose pliers Channel locks Begin by using your 10mm socket to remove the nuts securing the servo to the bracket. Once they're off, there may be two retainer washers holding the studs in the bracket. Use a screwdriver or needle nose to pry them away. Remove them from the studs and you can take the servo out of the bracket. Removal of the battery is not required. The cone at the end of the actuator cable can be slid down and the hairpin that retains the cable to the servo pulled out. Once you have it on the bench, use the channel locks to slowly work your way around, prying the lip of the bucket outwards. Don't put pressure on the plastic, just grab the lip of the metal bucket with the teeth of your pliers and bend it outwards until the plastic half separates from it. You can then inspect the diaphragm for any tears or punctures. Then you can move to disassembling the electrical portion of it if need be. There should be 3 small holes in the underside of the plastic half. Spray a little Liquid Wrench or a similar lubricant in each hole to lubricate the o-rings inside each tube. Next, use your 3/16" socket to remove the screws holding the electrical connector cover in place. Once you slide it off, use a small screwdriver under the left and right sides of the metal plate under the circuit board to pry the actuator assembly out of the plastic. Once it's high enough, you can just grab it and pull it out. You can test for continuity between where the copper winding wires are soldered to the board for each solenoid. I had a resistance of about 1200 ohms. There's also a diode on the board so set your Multimeter to Diode Mode. According to the wiring diagrams I found, tan/red is 12V for the vacuum circuit, green/red is vent, blue/red comes from under the dash (still figuring out how it plays in), and black is ground. Once you finish, reinstall the actuators into the plastic, wiggling it back and forth to get them lined up in their holes. A little silicone grease on the o-rings helps them like any other o-ring. Put the diaphragm back in the bucket and line up the spring on its backside with the ring on the plastic half and then press them together, making sure the lip on the diaphragm lines up with the groove in the plastic half. These don't appear to have been assembled with any adhesives. You can use some electrical tape wrapped around the servo to hold it together then slowly work your way around the lip again, using your pliers to roll the bucket back over the plastic half of the servo. Then reinstall your servo back in the Jeep in reverse of removal. Congratulations, you've rebuilt your cruise control servo.
-
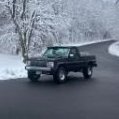
January 2015 - I feel the need. The need for speed! I had previously owned a 1995 Firebird Formula, LT1 engine, 6 speed manual, 172 mph, that I sold to pay off some debt in late 2013. I was still basically dead broke, driving my 1991 Comanche Pioneer with the destroyed bed and tailgate from where I got t-boned (also 2013),when I got my inheritance from my grandma, a whopping $3100. I immediately started looking for something fast. The dream was (and still is) a triple black 2002 Trans Am WS6 six speed but they were (and still are) way out of my budget. This bird showed up on FB Marketplace a little over an hour away from home so I set up a day, hitched a ride with a friend, and went down to look at it. I talked him down to $3700, borrowed $100 from my friend, and jumped in it to drive 80 miles back home with no plate. That trip was a small nightmare. The plug for the distributor had a broken clip so the PO tried to rtv the pigtail to it. When it got hot, the rtv swelled and pushed it out, causing the car to die at a red light. Pushed it off the road, yanked the rtv and weather seal off, fished it back in down behind the water pump, and away we went again. Once we were about 15 miles from home, a state trooper got in behind me and followed me for a little bit and had me sweating. Right after he decided he didn't want to follow me anymore, the factory rear u-joint failed, started vibrating above 55 mph. My friend took off ahead of me to get to work and I parked it for a week when I got home.
-
Money Shift - The Firebird Saga
Tactical Bacon replied to Tactical Bacon's topic in Member Projects: Other Cool Stuff
October 2022 - I sold this car for about a $6000 loss. I had slowly fallen out of love with the project and the damage to the roof just haunted me for my lack of skill, equipment, and lack of funds. On top of that, space was at a premium with me having three other vehicles, my brother and mom having one each, a 5x10 utility trailer, and the occasional project car coming through for me to fix and flip. There's enough room to fit 5 cars in the driveway but that blocks my riding mower from going through the gate into the backyard so normally it maxes out at 4. I had also managed to find an OEM bumper cover and dash panel for my Trans Am so it started to get some love. It took shelter under the carport from that point on. I suppose I'll make a thread on her now.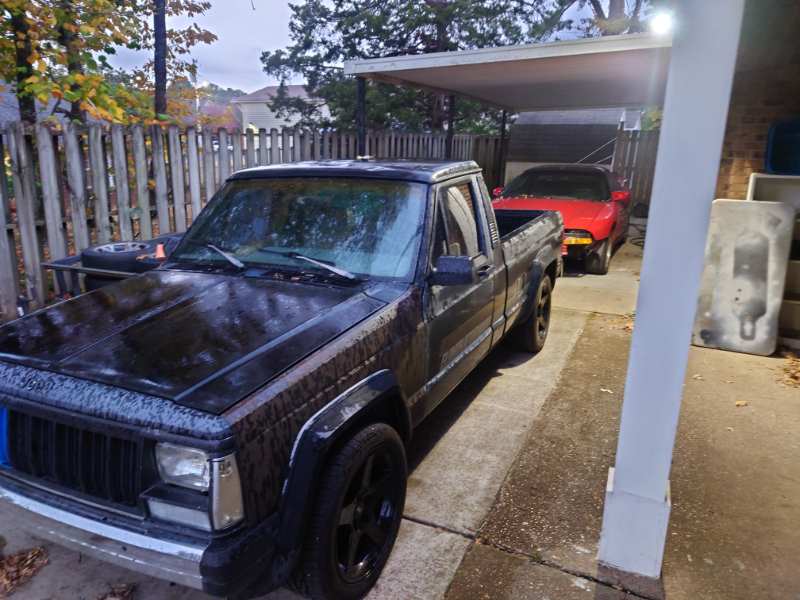
-
Short Bed Tailpipe
Tactical Bacon replied to Tactical Bacon's topic in MJ Tech: Modification and Repairs
Tailpipe fits on very nicely, the hangers are shaped differently than stock but are located correctly and fit into the isolators easily. The only issue I ran into during installation is from the oversized muffler on the truck that's clearly for another vehicle, way too long. -
Short Bed Tailpipe
Tactical Bacon replied to Tactical Bacon's topic in MJ Tech: Modification and Repairs
They do exist! I ordered one before posting on here the other day and it just arrived.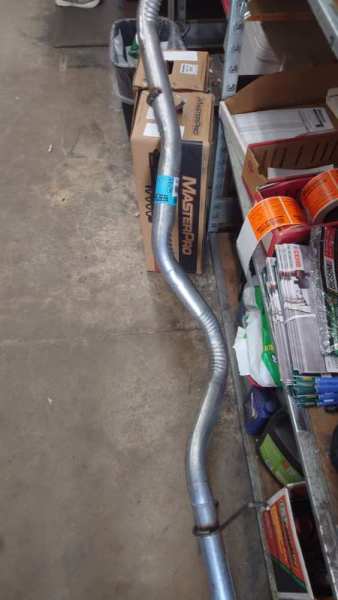
-
Walker shows one 46701 tailpipe available for order through O'Reilly Auto Parts, $74.99 plus $52.04 shipping. Get it while it's hot.
-
I'd love to have some louvers for my Manche.
-
Unusual AW4 Issue
Tactical Bacon replied to Tactical Bacon's topic in MJ Tech: Modification and Repairs
Found a used, working OSS on FB, installed it last night, test drove this morning, Jeep shifts again. Didn't get it up fast enough to test for TCC lockup but she's 100% got the first 3 gears. I still have no idea why it had 1st and 4th gear before I fixed the wiring, though. -
Injector replacement
Tactical Bacon replied to Cossed78's topic in MJ Tech: Modification and Repairs
The improvements people detect are either illusory or a result of replacing old, worn, and/or faulty injectors. Will the aftermarket 4/6/12 hole injectors work? Absolutely! Will you gain horsepower or fuel economy over stock? No. Possibly better throttle response. That all being said, I would 100% recommend replacing the injectors on your Jeep if they're original. The Renix era injectors are known to split and leak fuel, potentially causing an engine fire. -
Kaede the Eliminator
Tactical Bacon replied to Tactical Bacon's topic in Member Projects: Your Comanches
Got sideswiped today in the same place I got sideswiped back in 2018 by another old woman in another gray import when I had my 1998 XJ.