


Gjeep
-
Posts
1221 -
Joined
-
Last visited
-
Days Won
3
Content Type
Profiles
Forums
Gallery
Everything posted by Gjeep
-
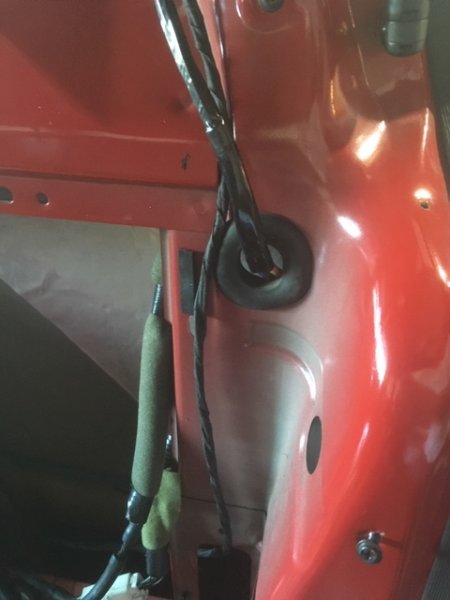
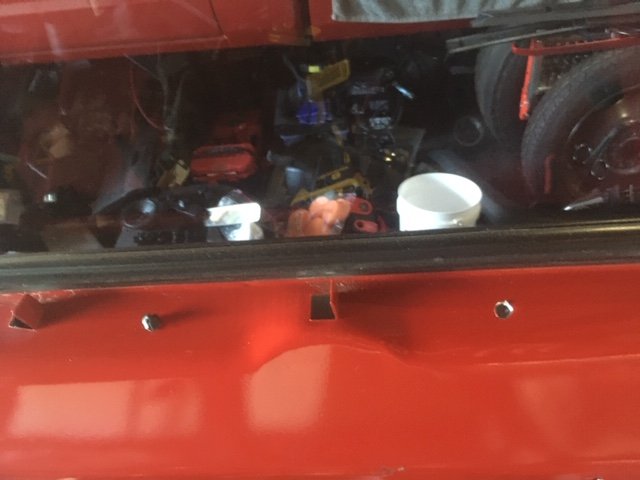
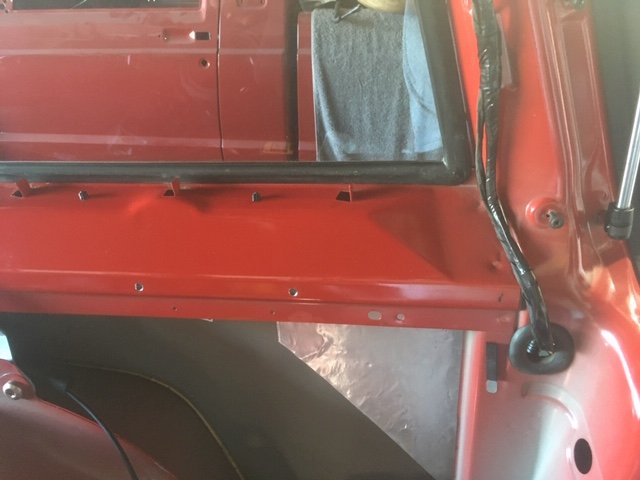
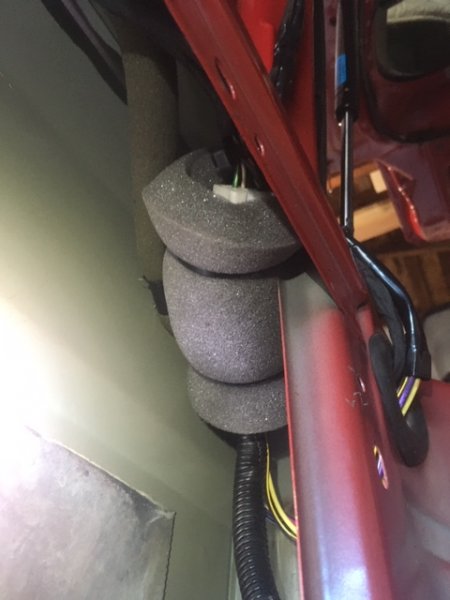
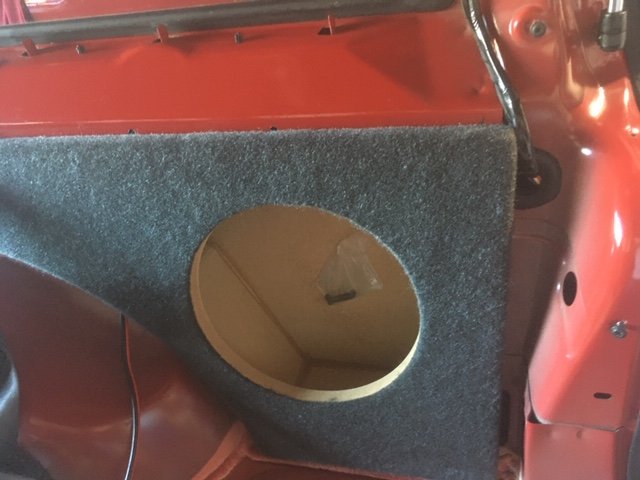
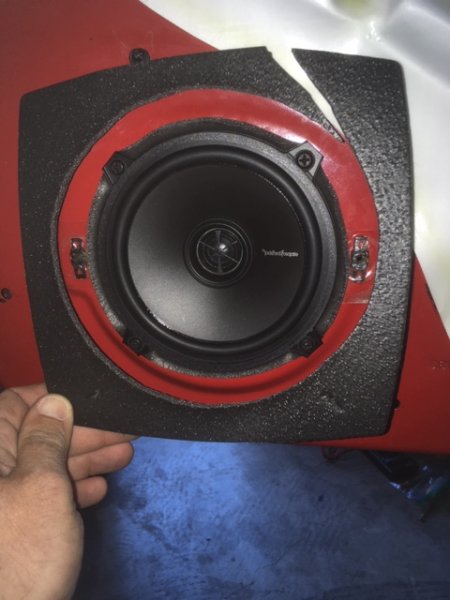
Kudos to SubThump for designing a high quality true subwoofer enclosure for the XJ that looks like it belongs there (from the factory). It takes some doing to get things shuffled around and installed properly, but worth the time and effort. To start, all the wires in that passenger quarter panel area need to be attached up high and out of the way. Best way to do this is drill a hole (adding a grommet to protect the wires) and re-route the wires above. I drilled two holes up high on the inner sheet metal to ziptie tree the wires to. Then I bundled up the wires in foam so they wouldn't bang around. And tucked it up under the area above the tailight. Here's the sub enclosure in place, but not attached yet...I've drilled 3 mounting holes but plan on adding nutserts to the sheetmetal for longevity. And 1/2" vibro-acoustic matting will be added between the enclosure and sheetmetal to prevent unwanted vibes when it's thumping. A 10" Rockford Punch sub will fill the hole.

-
Clean MJ. Congrats!
-
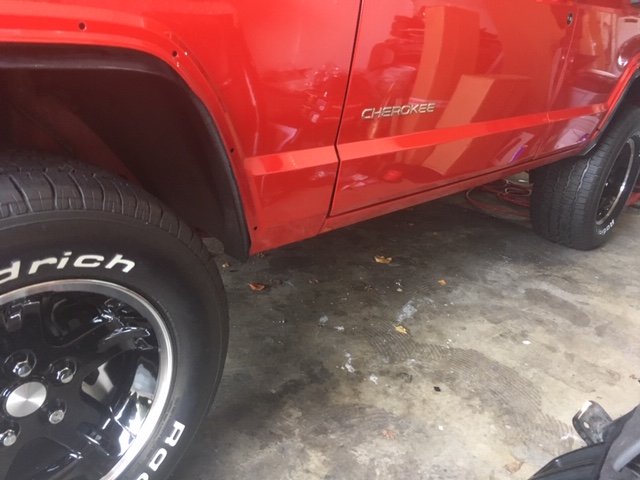
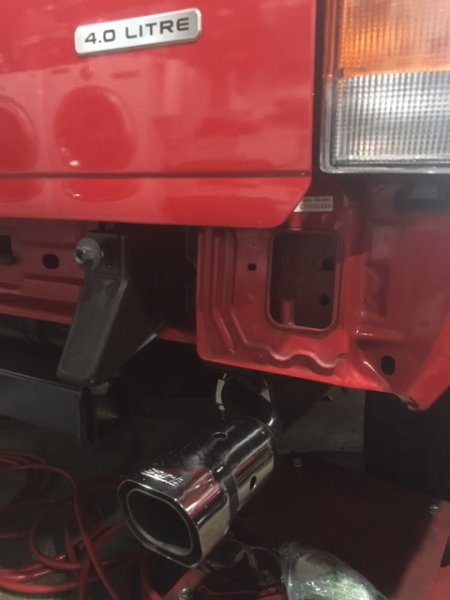
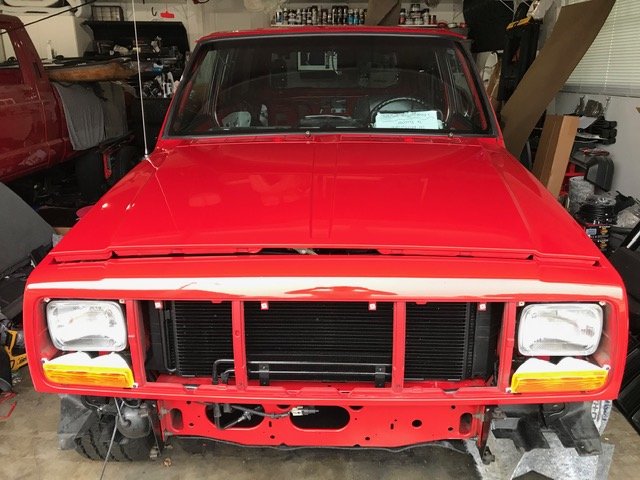
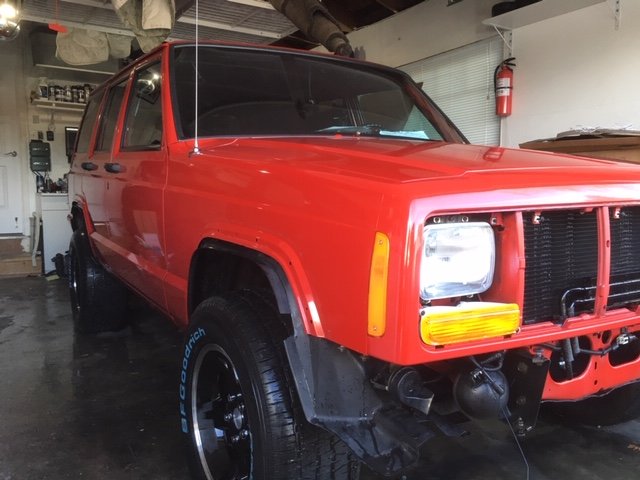
Getting to the details...It's hard to tell from these photo's, but I went with '01 XJ brushed chrome raised lettering to compliment the Borla exhaust tip and outer edge polished surface of my Ravine rims. Originally almost all of these emblems were decals on '97/'98 XJ's. I prefer how the raised letter set looks. After placing those on the truck, I gave it a thorough waxing. Roof rack rails and crossbars are at the powder coating company so they look factory fresh upon re-installation. Next up is installing the grille and license plate brow. Then prep and paint all the exterior trim before putting it back on.

-
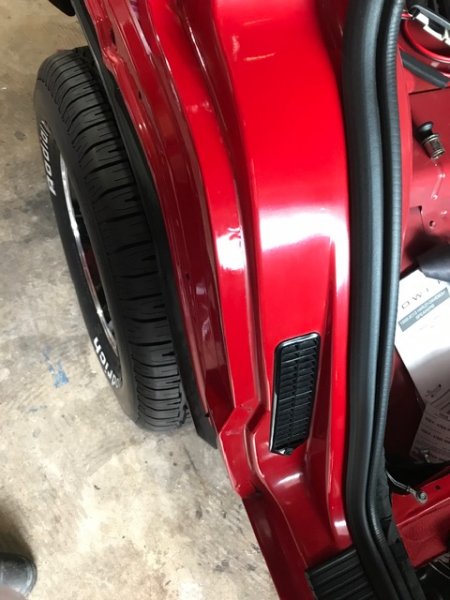
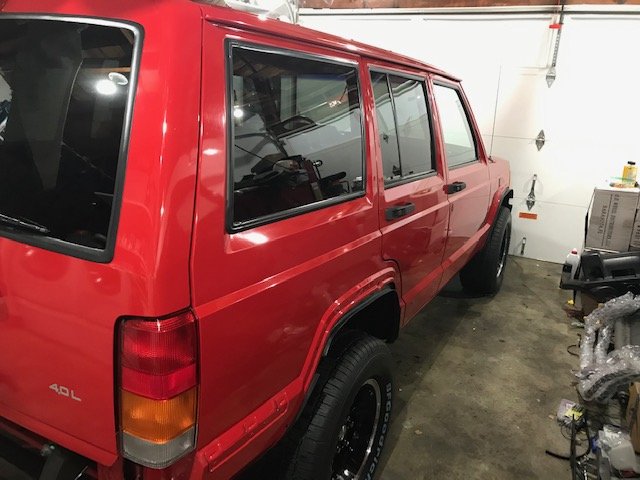
I didn't think it was possible for this red to get any brighter but after a day and 1/2 of polishing the exterior and door jambs, it is. Now for wax. Also replaced the Rockford speakers I had with another set of Rockford's. Oddly enough the new set of coaxial speakers are specifically made for Harley Touring motorcycles, but they are a perfect fit for the XJ and are double the sound (watts) as the others. Dialed in the amps with these and the sub and the sound is bad @$$ for such a small system.
-
91 Eliminator 83K miles refresh with NOS parts
Gjeep replied to Red Mistress's topic in Member Projects: Your Comanches
My vote is chief with the outboard winch. And the MJ with the hidden winch. Some thing about the 2dr XJ long quarter panel glass that won’t look right with the extended front bumper. -
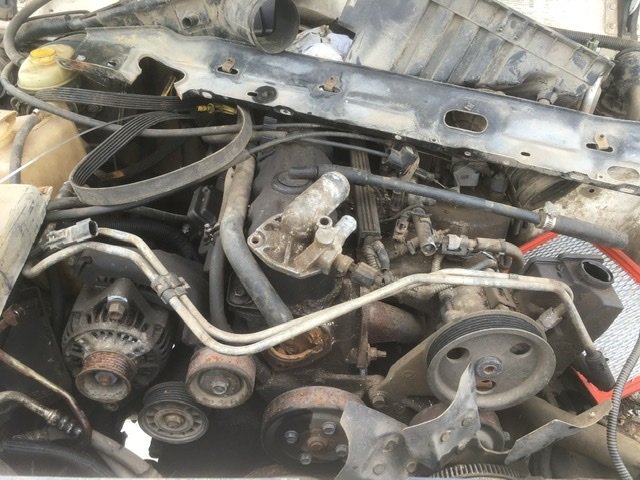
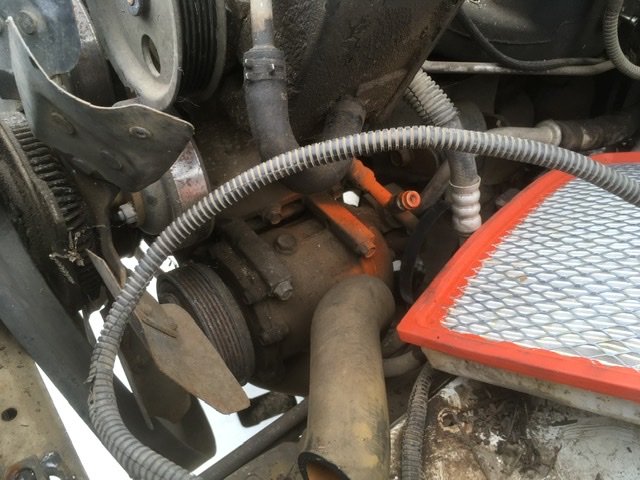
That’s a 97+ xj evaporator core. Not the right one.
-
Moss Landing CA Pick n Pull ‘01 RHD XJ
Gjeep replied to Gjeep's topic in Craigslist/eBay... i.e. Not Your Stuff
I was surprised they didn't move the spare tire to the opposite side for RHD. -
I’ve never seen one in the flesh. Here’s some pics I took.
-
I don’t know what Team Cherokee is selling now, but the ones I got from them 5 years back were Mopar, right down to the round ‘Made in Canada’ sticker. Also, ZJ insulation said ‘Jeep’ on them. Never XJ.
-
Team cherokee has the insulation.
-
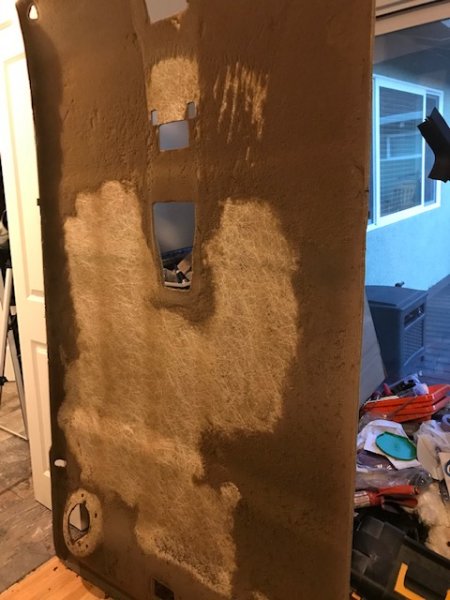
I gave the XJ a good wash today. Looks sharp, but there's a couple things I want to polish out before re-assembling. Just need to remove the door handles and emblems -- and I'll be set to polish, then wax away. Also started removing the old foam from the '01 XJ headliner I'm going to use. Nothing NOS out there in the land of headliners (aside from one for a '98 XJ which is the older style headliner I'm moving away from). Also got the splash guard up. I've learned to put 1/4" x 1" stainless steel washers as this helps prevent damage of rubber when removing and prevents the hole from cracking/ stretching.
-
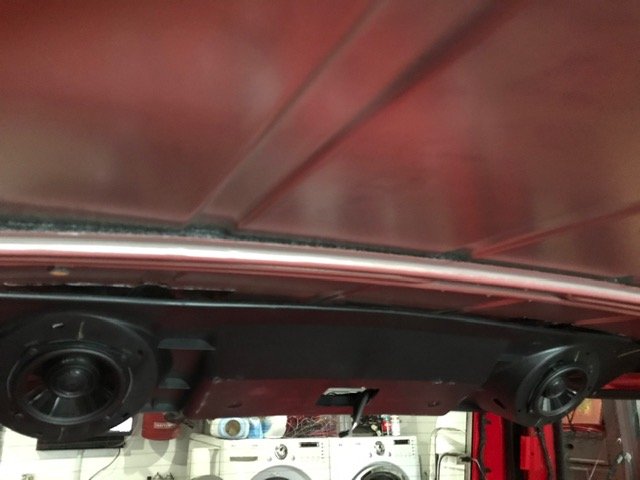
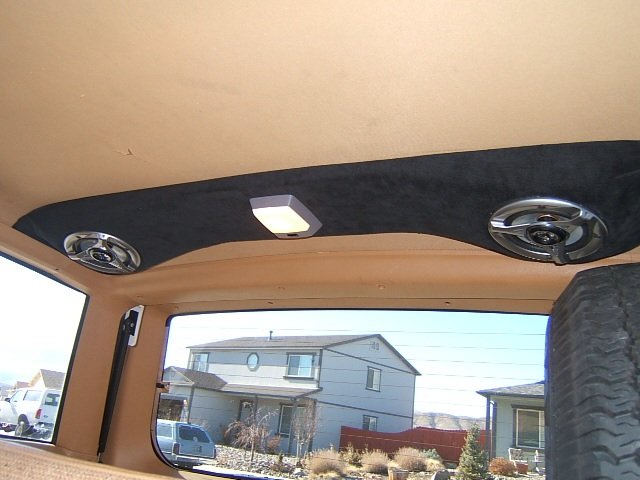
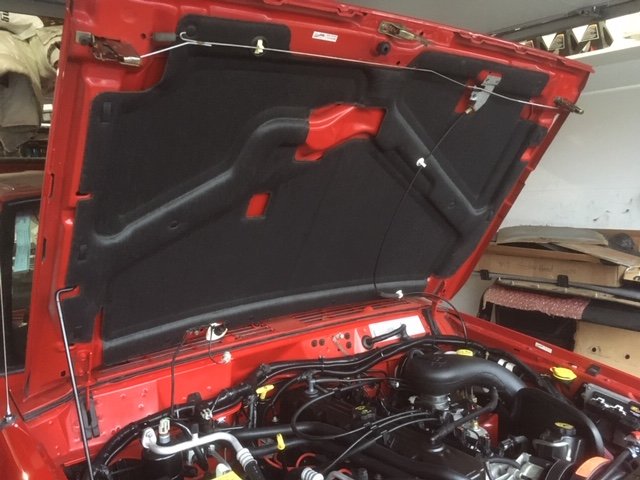
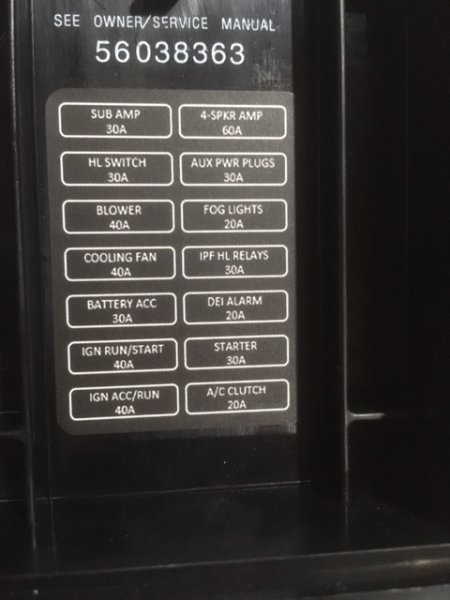
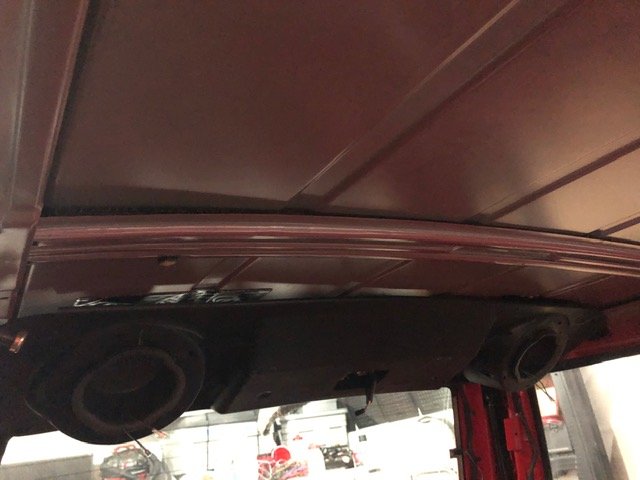
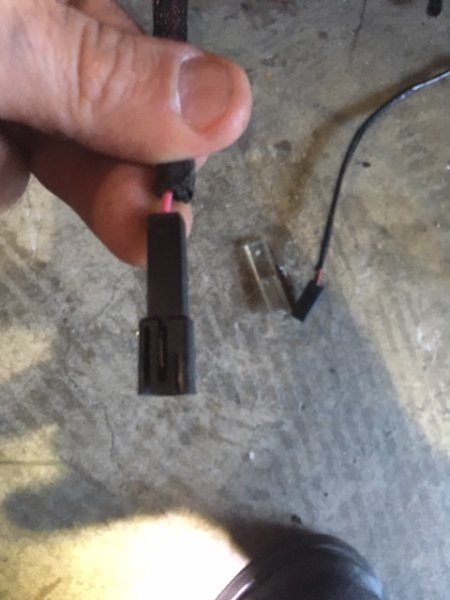
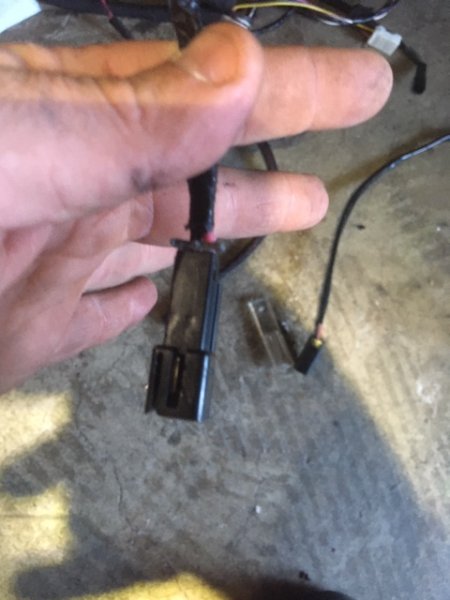
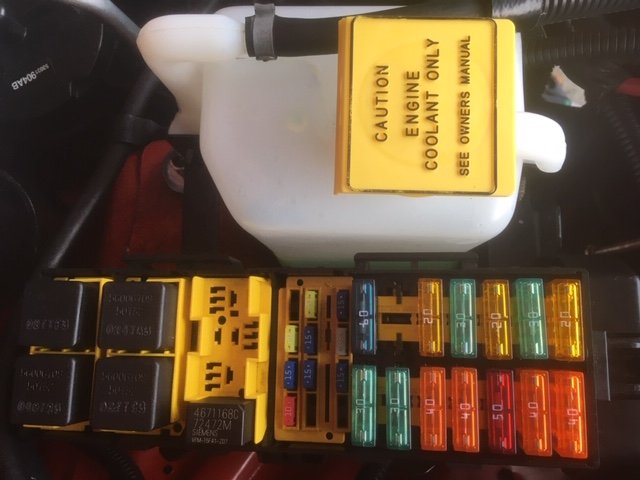
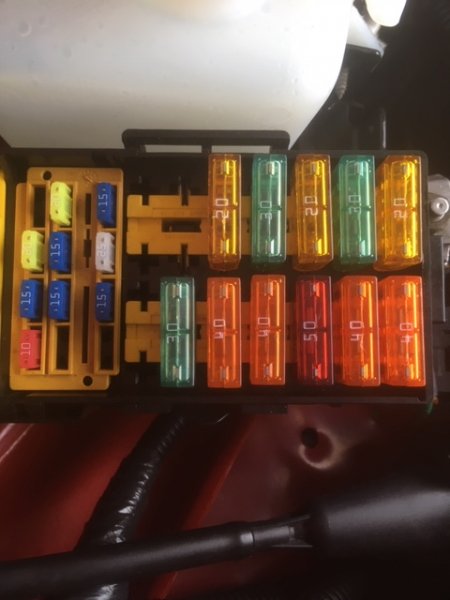
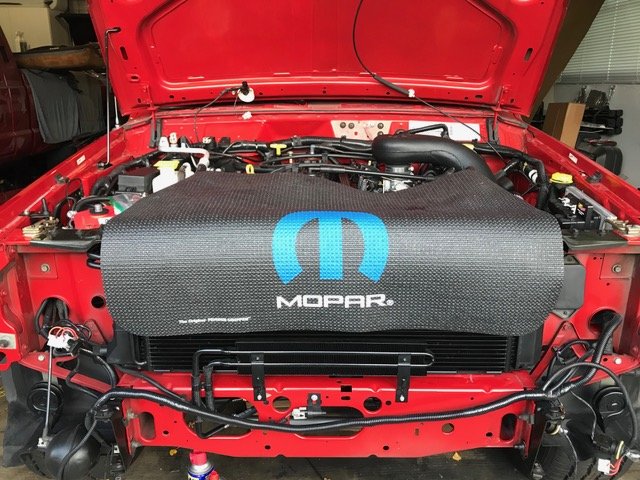
Got a couple things done on the XJ today...Installed under hood insulation. Also installed the 2001 XJ rear sound bar internals. Headliner to come once I recover it in agate. My original sound bar was the first gen design ('94-'98) that Jeep introduced which essentially sat on top of the headliner and was held up by the cargo area dome light ('84-'98 XJ era). I upgraded to the newer style full headliner ('99-'01) design because the speaker bar 'guts' are hidden under the one piece headliner -- and the associated cargo light matches the overhead console lighting better. Below is a photo of the first gen sound bar (not mine) and the newer one I'm work-in-progress installing. My I updated PDC labels arrived today and I placed it over the original fuse layout. Took about 5 or 6 tries to get it straight, but finally did. And now I know what's what. And lastly, my latest project is a factory overhead console that I'm installing a microphone in for hands-free calls. The little microphone bezel I'm using is from a BMW 3-series, but their OEM microphone won't plug directly into my aftermarket radio as the BMW is a 3 wire connection and my radio is a plug in 3.5mm jack. I was lucky enough to find a vendor in Germany who sells a replacement microphone that's a direct replacement fit into the BMW microphone bezel and has a 3.5mm jack needed...Now it’s just a matter of patience waiting for it to ship over here. ETA is early February. Below is a pic of my tester console...I have a NOS one that I'm going to recover agate to match the headliner and visors.
.JPG.bcde1e6b34f85b2a3584c008c825be20.JPG)
-
They’re grizzly rims. Oem Jeep. First debut 1996 cherokee classic. Then in 97 the TJ wrangler got them.
-
91 Eliminator 83K miles refresh with NOS parts
Gjeep replied to Red Mistress's topic in Member Projects: Your Comanches
In 91 the outer rivets on those rims disappeared. I actually liked the look of the renix era eliminator rims a little better. -
Hey Fiatslug -- yep I've still got the black XJ. All original drivetrain aside from replacing the 0331 head back at 80K...currently it's at 430K. It's my daily runner. Back to the '97 XJ -- I've finished up the overhead console wiring. No idea how many times Jeep went back and forth over the years with a power & ground and then a power only wire for the vanity mirrored sun visors. On the 97+ XJ’s – ’97 & ’98 only had a power wire to mirror light and grounded off the metal touching the roof where the sun visor attached. Mid-year ’99-’01 Jeep was back to using power & ground for the mirror. Basically, since I used ’97 overhead wiring, I needed to add a ground and swapped the connectors to a two-plug OEM style. The ’98 ZJ 5.9L agate vanity mirrors I'll be using are a power & ground style… That’s done, but took more doing than I expected. So much for plug and play on the simple things. For the front doors, I trimmed out Boom Mat baffles to fit without excess remaining on the inner door. If I didn’t trim it, the door panel wouldn’t sit flush against the metal. This speaker baffle is supposed to keep the bass better, but main reason I did it was to protect the speaker form the elements. I’ve also been prepping the exterior black trim for paint. Though the flares, bodyside molding, and bumper ends are NOS I still paint them before mounting them up. The XJ black plastic fades out fast in the occasional California sun. I use SEM Original Trim Black. I used it on my ’01 XJ and it has lasted close to 10 years so far without and fade, flake or any touch up needed. Absolutely great stuff, but as always, proper prep is important. But…before all the trim can be installed a thorough polishing of the paint is in order, so I’ve stripped the XJ of all exterior items – mirrors, door handles, roof rack, etc. And once that’s done new emblems will be installed all around.
-
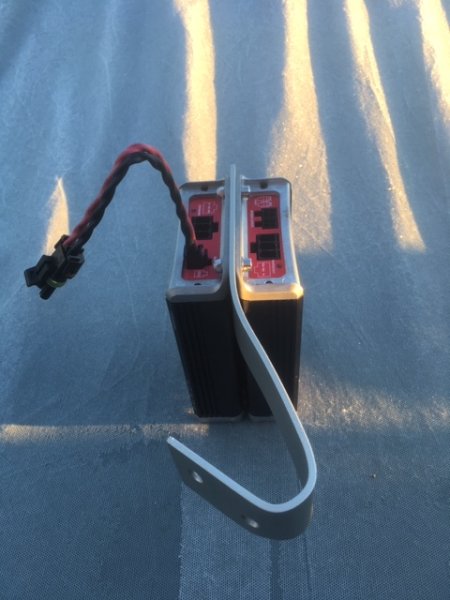
Here's the detail on the amps -- one runs the 4 speakers and the other the sub. Super compact (1.5" x 4.25" x 6.75" ) and have had great reviews since released. PBR400x4D Rockford Fosgate Punch Compact Amplifier (100Wx4 @ 2ohm; front & rear) PBR300x1 Rockford Fosgate Punch Compact Amplifier (300Wx1 @ 1ohm; subwoofer) Working as fast as I can for a perfectionist... I've got 2 MJ's to complete after this -- '92 then '89.
-
Best replacement radiator?
Gjeep replied to mark corbitt's topic in MJ Tech: Modification and Repairs
Not sure if your budget but there’s a molar NOS remix era radiator on ebay now. -
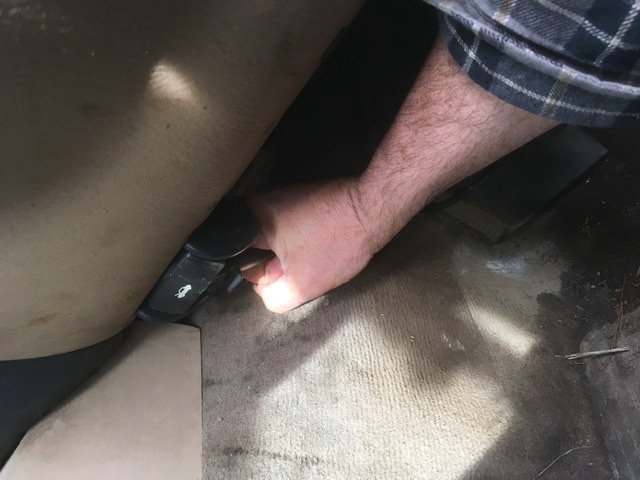
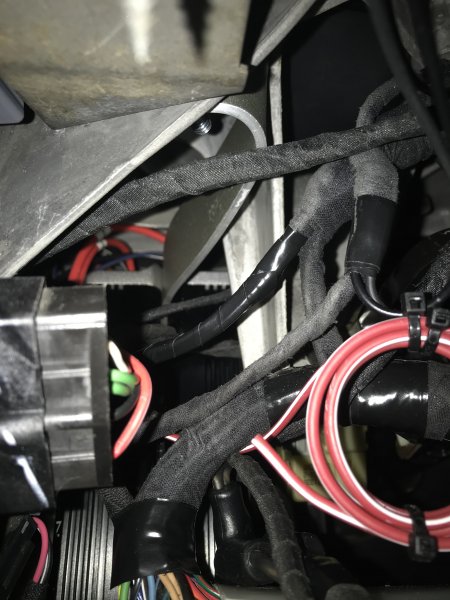
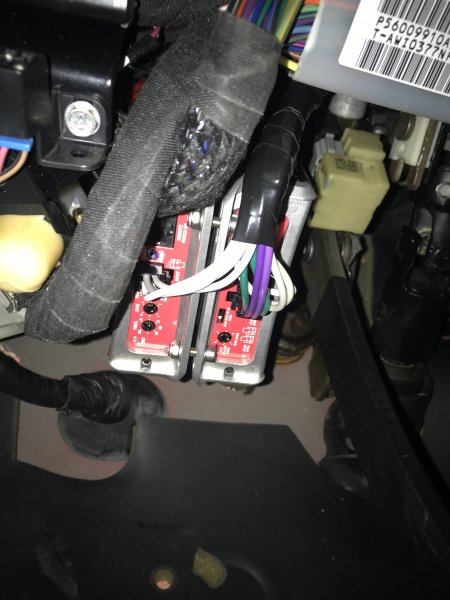
Finally, the amp set up is installed. And it took some doing...At first I thought I could attach the amp on the bracket with cables connected topside, but no luck -- too many other wires in the way. I ended up positioning myself upside-down with my head pinned to the accelerator pedal for about 45 mins getting things connected topside on the amplifiers. Took patience, but it looks clean. (FYI - that lasso of wire is a spare power line I ran from the PDC.)

-
99 XJ - Pick n Pull SJ South, CA
Gjeep replied to Gjeep's topic in Craigslist/eBay... i.e. Not Your Stuff
Engine is gone. -
Normally wouldn’t post an XJ find at a wrecking yard, but no doubt this thing has maybe 70k on it. Interior is nearly showroom clean. Agate dark gray color. Carpet like new. Passenger front end hit something hard, but engine and transmission probably still good. 2wd, 4.0L.
-
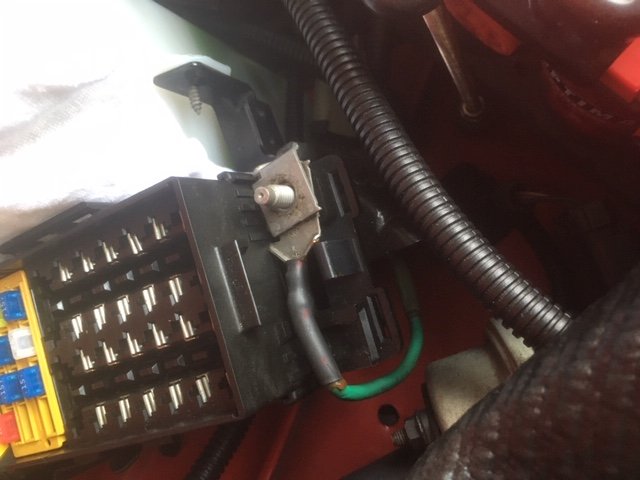
I should have trusted my gut a couple months back when I first disassembled the PDC and added relay terminals for the alarm, fog lights, etc...There were 2 extra spots that I had a feeling I'd use, but didn't tap at the time and run a wire to the interior. Sure enough I need 2 more Max fuse locations for the 2 amplifiers I'm running, 10 AWG. So I held my breath and carefully disassembled the pieces to the PDC once again. The plastic pins that hold the terminals and the various other assembly points of the PDC break easily. Got lucky again and no breakage. I'll be creating a mapping label to attach under the PDC lid so I don't forget what everything does... (There's one open/ spare Max fuse location available in the PDC and I ran a 12 AWG under the dash so I don't have to do this again!) Before to after pics below.
-
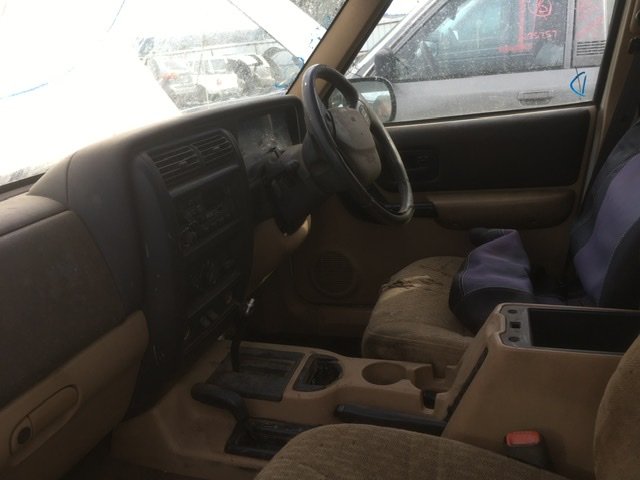
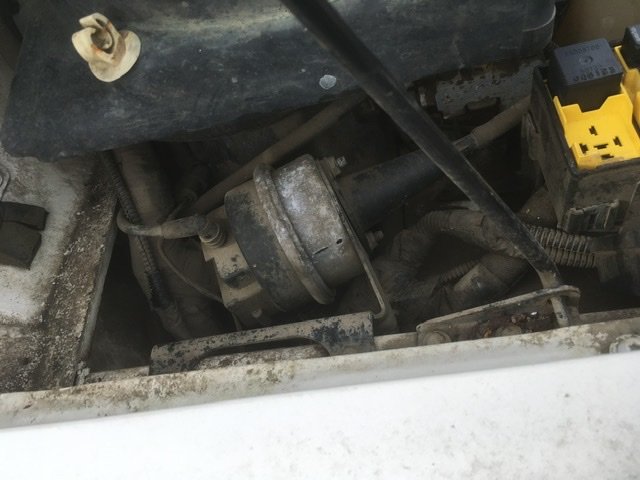
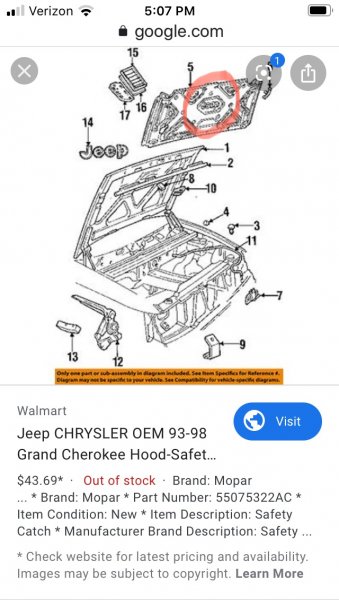
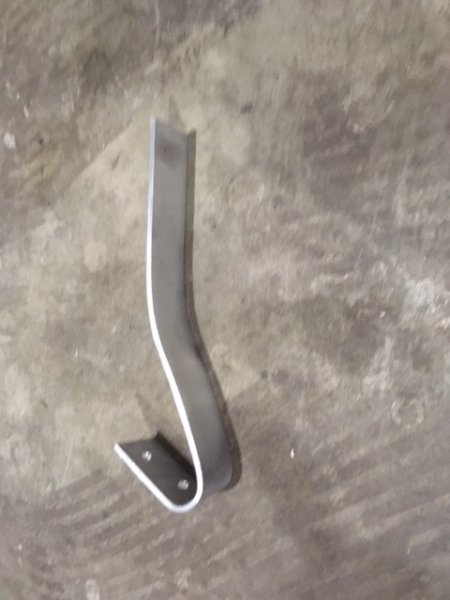
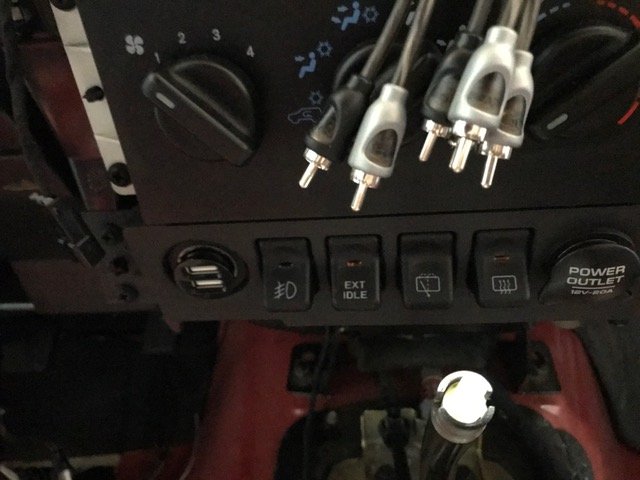
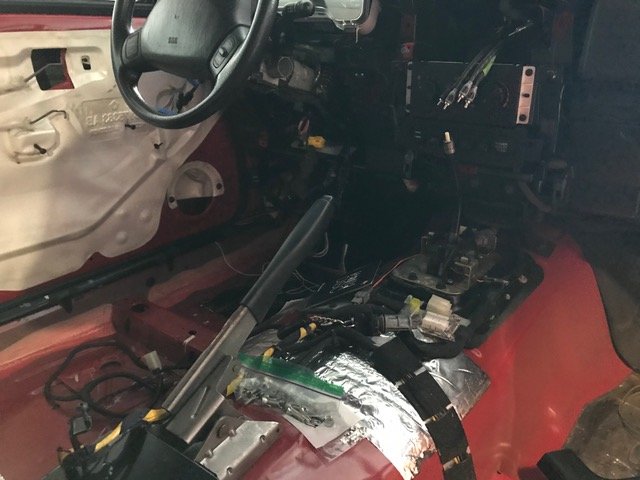
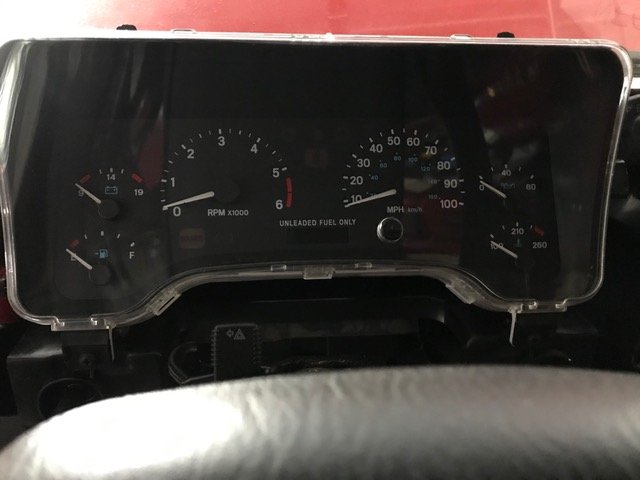
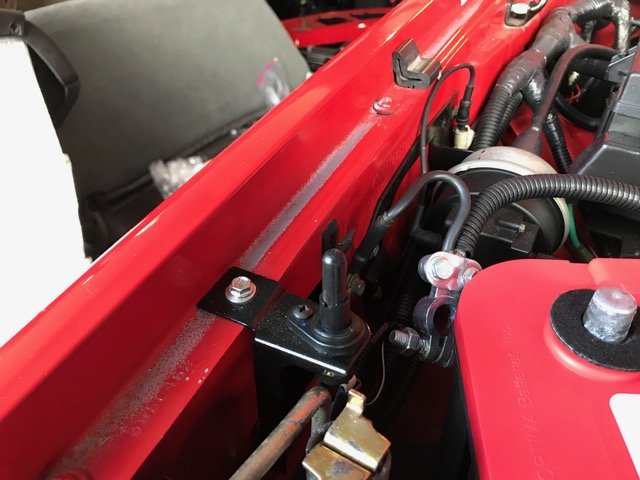
Been working on the XJ as I can...Just about buttoned up all the new electrical -- seats, overhead console, rocker switches now in place, and new audio wiring throughout (though keeping oem wires in place and un-hacked should I ever go back to factory). It took some time to route the new wires, especially the audio so it's tucked away neatly. I bent up a piece of aluminum to hang the Rockford Punch amplifiers from under the drivers side dashboard in the empty space to the left of the steering column. I installed a new factory steering wheel and reconnected the airbag. The TJ instrument cluster is in place and everything should be good to go so no codes get thrown upon initial re-start. Under the hood is a 91/92-era only XJ factory security bracket with a hood sense trigger. This is the same setup as I'm running on my MJ's with a DEI alarm/ starter kill. Earlier this week I removed the factory saddle headliner and carefully pulled the fabric that it was covered in using a heat gun – main board, sun visors, and sound bar. Since I’m adding an overhead console to the roof set up, that too will get covered in new fabric. Since I’m revising the color on the sun visors the molded plastic mirrors were swapped out for ZJ 5.9L agate color mirrors. The ZJ 5.9L was the only Jeep that uses the same mirror set up as the XJ and came in the agate color. Since I’m recovering the headliner in a slate material (instead of the XJ light gray 'quartz' color offered from the factory with the agate interior) I needed to match things up. While playing with the overhead wiring I added a tiny microphone for Bluetooth calls. I've also Dynamat-ed the bare floorboard and roof sheetmetal for the sake of sound. And on the front end, I consolidated the factory headlight/ turn signal wiring, ARB relay, and driving light wiring in to one neat loom instead of having 3.
-
Wasn't quite sure where to post this... but as I've gotten to know and seek to find every single electrical terminal in my Jeeps over the years, I've finally found a website that has a number of the 97+ XJ style electrical terminals (as well as the '84-'96 era XJ). In addition to terminals, they also have and can source OEM connectors. For those of us who are sticklers in keeping our electrical 'clean', this is a great site. Been using it tracking down things for my '97 XJ build. https://connectorexperts.com/c-1458515-terminals.html
-
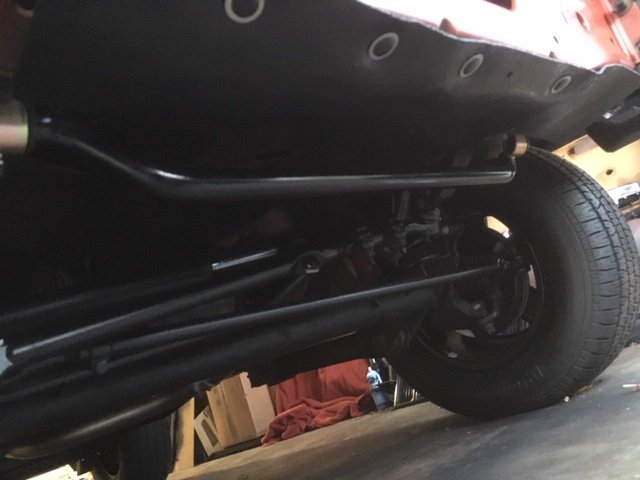
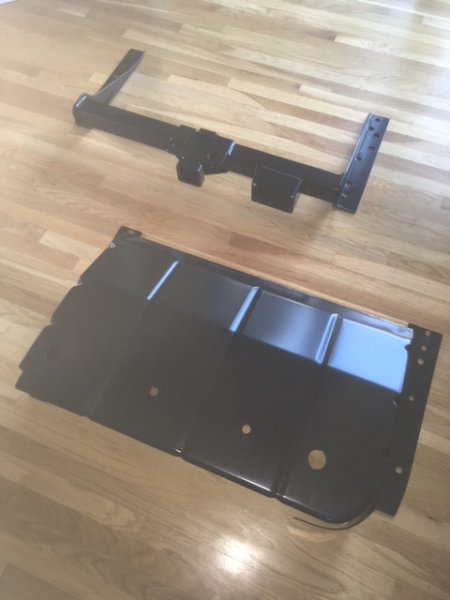
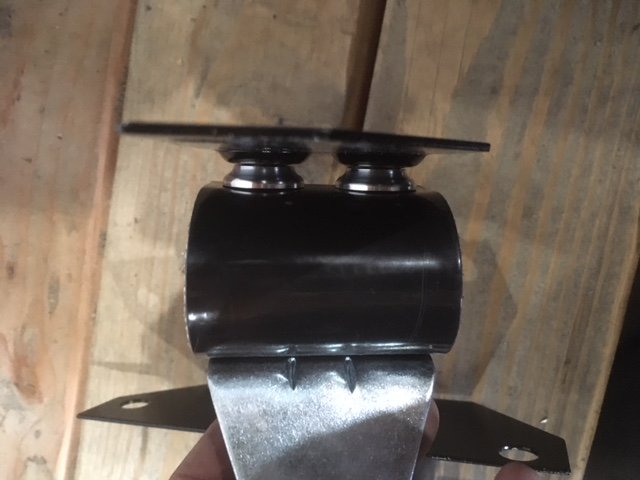
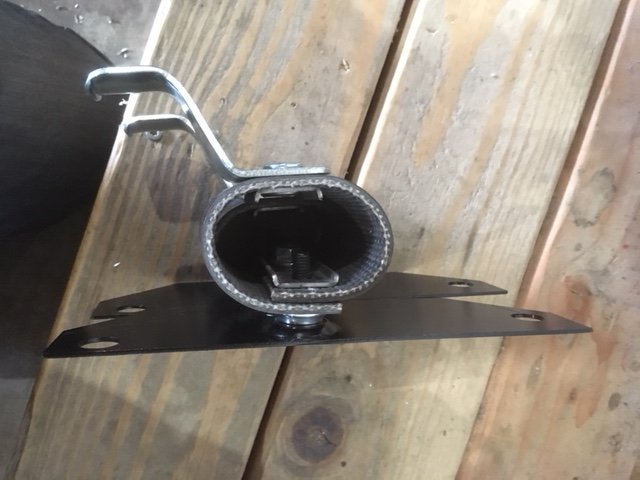
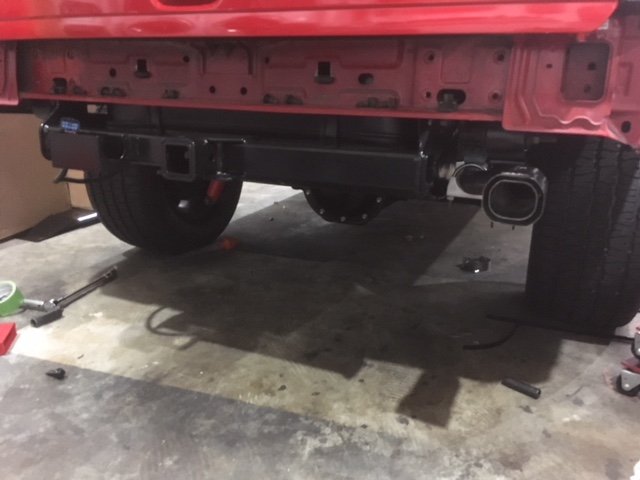
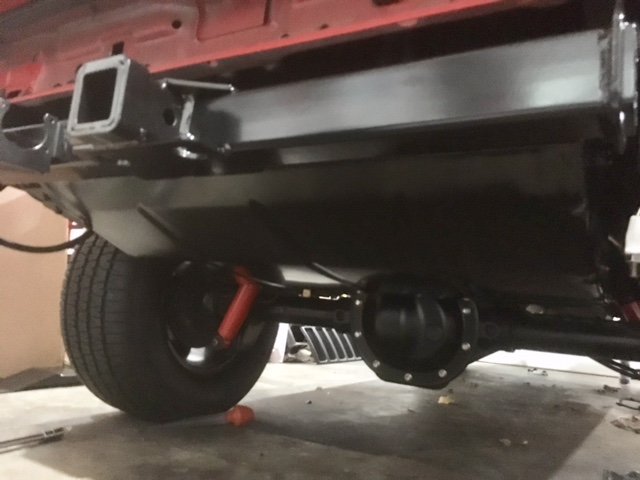
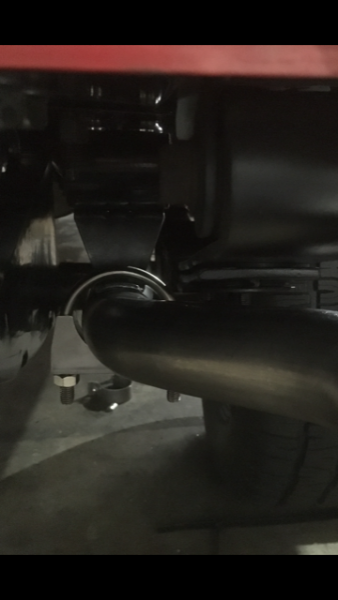
Freshly back from powder-coating came the fuel tank skid plate and factory hitch…and thanks to an assortment of jacks, stands, and pry bars they’re up. This XJ didn’t come from either when new. Thanks to Eagle for checking out the order of assembly from the factory – skid plate first, then hitch. Torqued to 55 ft lbs. Still need to add the electrical connector and button a couple other things up. Slight modification had to be made to the 4wd variant of the factory exhaust hanger. ¼” tall aluminum spacers were added so there was just a little more space between the exhaust and the leaf springs. Back to interior electrical add-in’s and on’s…
-
2 Wheel Drive Transmission
Gjeep replied to Phillip Gwin's topic in MJ Tech: Modification and Repairs
You'll need a 4wd trans.