


GonzoTheGreat
-
Posts
300 -
Joined
-
Last visited
Content Type
Profiles
Forums
Gallery
Everything posted by GonzoTheGreat
-

Keep it Stock Stupid
GonzoTheGreat replied to GonzoTheGreat's topic in Member Projects: Your Comanches
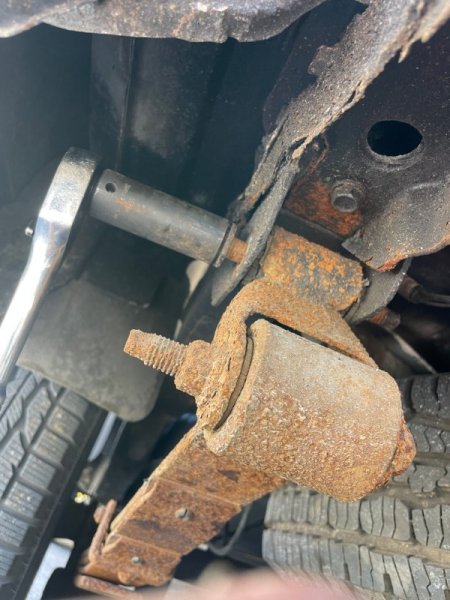
It was a degree above freezing this afternoon, so I took advantage of the warmth and swapped coils and isolators, control arms, and those UCA axle-side bushings. The truck finally sits level, side to side, and the new bushings all around got rid of my highway shimmy.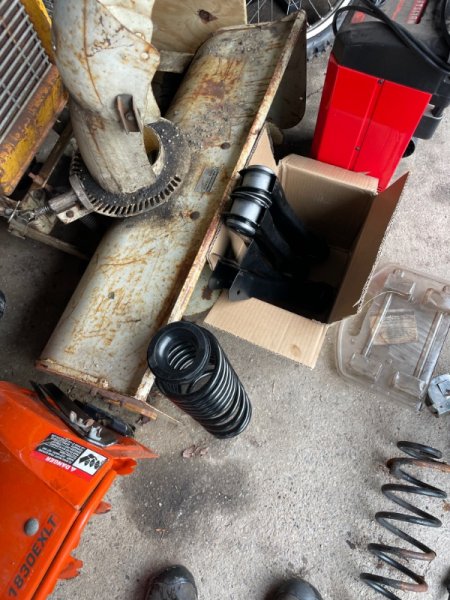
-
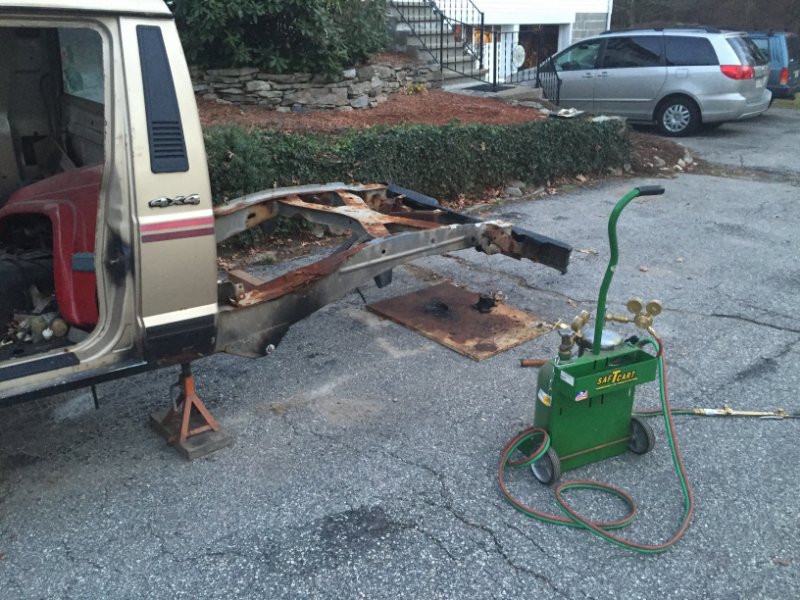
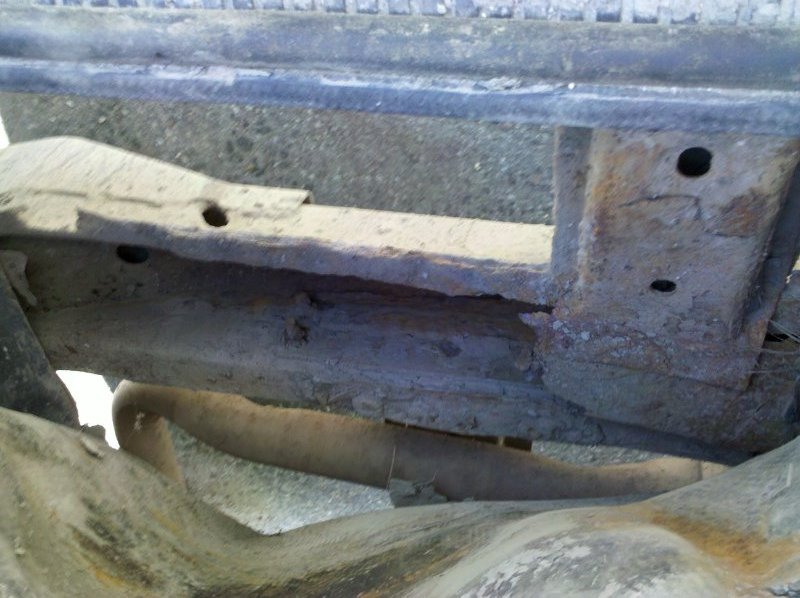
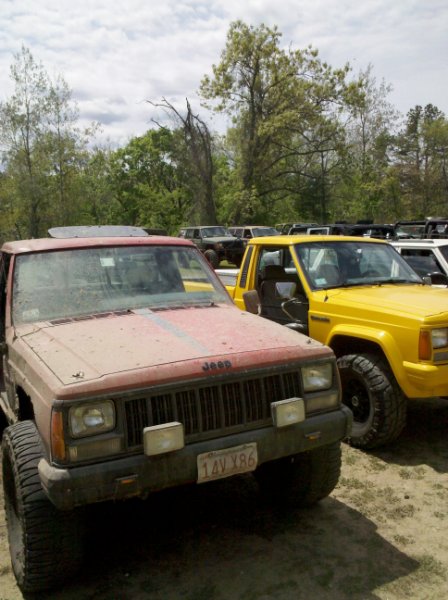
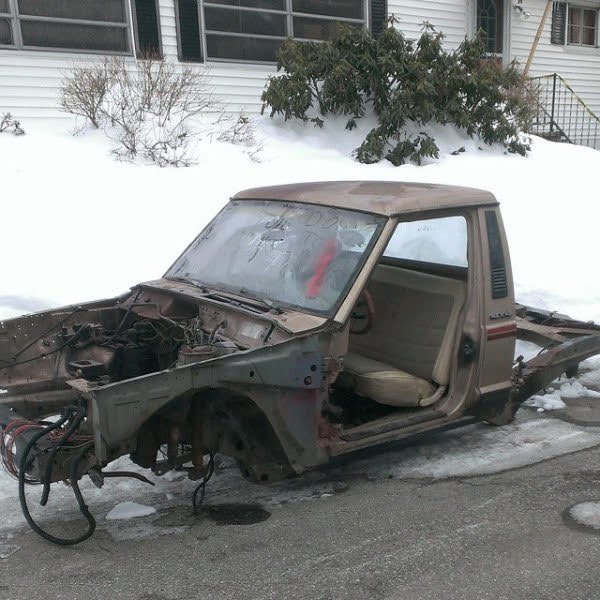
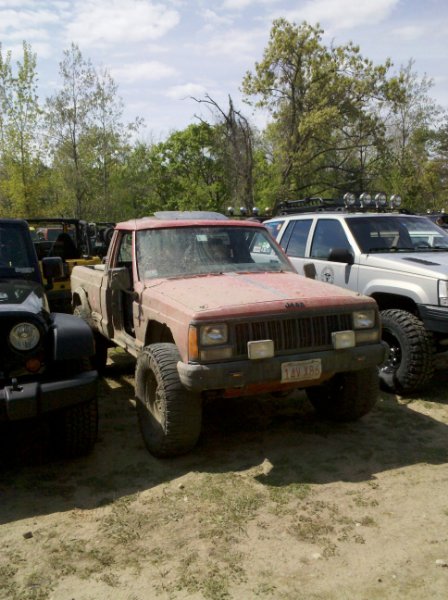
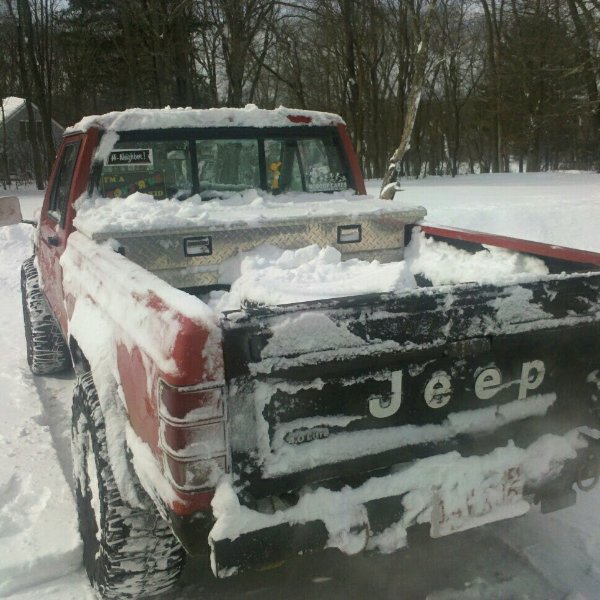
Yeah, I had blast with that thing. The rust problem was getting a little too severe. I had a leaf perch crush up into the frame, and got that fixed. The floors were never there, but the trans tunnel, rockers, and a lot of structural steel were rotted out too. I was still driving it everywhere because I was 20something and dumb I just cut back on the offroading. I went to a few go topless days and GAJRs I never did find out who that yellow one is. I decided the rust was beyond repair, so I picked up a donor chassis to start putting my new axles etc. into: It was a sad sack when I got it. And no it's not blood. It's spray paint.
-
Keep it Stock Stupid
GonzoTheGreat replied to GonzoTheGreat's topic in Member Projects: Your Comanches
Thanks! I'm happy with how it turned out I had to narrow the bit between the taillights 3" and I screwed it onto some plastic 2x4s to meet the bed rail width. The cap is just a couple inches too wide to fit directly. Fitment was perfect. I've got about an eighth to a quarter inch clearance against each taillight. I also siliconed the 2x4s before screwing them on, and I ran rubber strips between the bed rails and the cap, so hopefully it's fairly water-tight. I've also had a significant sag to the drivers side since I got the truck. So I swapped in new leaf springs today, and that helped. I've got new coils to put in when tomorrow's snowmaggedon is over. I also put in a pair of shackles that are an inch longer than stock, because I had them lying around. It sits high in the rear, but I figure once I have new coils in, and the bed loaded up with all my tools and crap, it'll probably level out. I was planning on fighting every bushing bolt. I expected them to all be seized to the inner sleeves, but I was shocked to find that only one of them gave me trouble, and with a little heat, it popped right out! I'm not used to working on project vehicles with only 60k miles. This is nice.
-
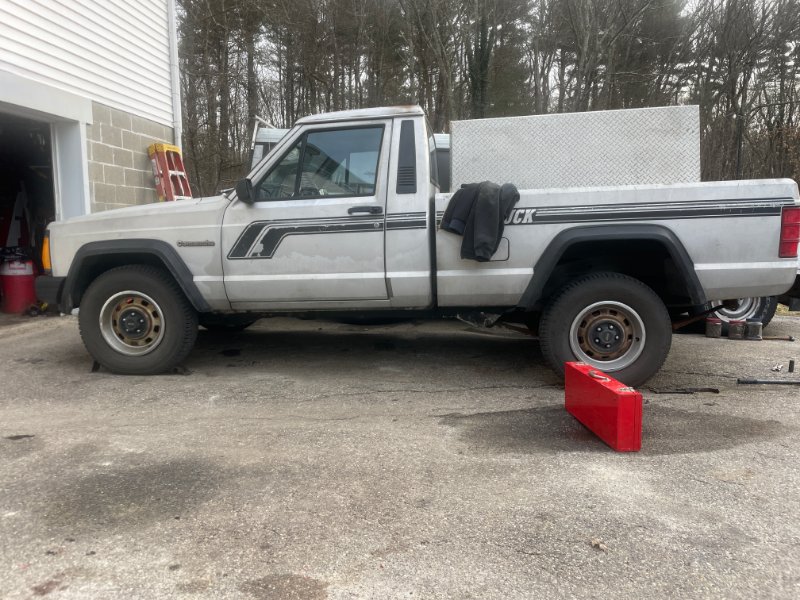
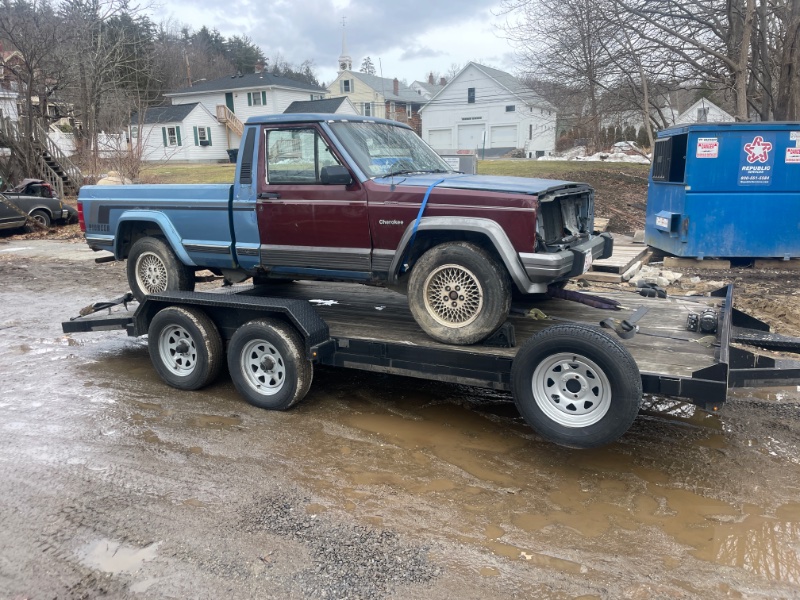
Well I may have been a bad influence yesterday, but my buddy just bought this one and dragged it home. The short term plan is to get it up and running as-is, for run-around-town homeowner duties.
-
Project “Tomahawk”
GonzoTheGreat replied to ghetdjc320's topic in MJ Hardcore Tech: Epic Journeys to Greatness
That's a real bummer. You're attention to detail, and commitment to perfection have been inspiring. I know I'm not the only one who has followed your builds, drooling at home. I hope this one goes to a good owner, and continues to get the same level of dedication that you've put in. -
I had read that, and when I looked last year they were out of stock, but they were back last week, and: Hah! Yeah, no. Maybe you should buy a whole truck load and start a secondary market in Canada! My local Napa was also able to order it within a few days, PN: “EXH 46701“ Maybe that’s an option
-
I just bought the short bed one, 46701, this week. $35 shipping. It showed up today in good shape. Walker’s not going to last as long as stainless, but it’s a lot cheaper than a custom exhaust. The last one I did in my ‘88 lined up great with the hangers and everything.
-
Thanks! I owe a lot to the folks on this forum, past and present.
-
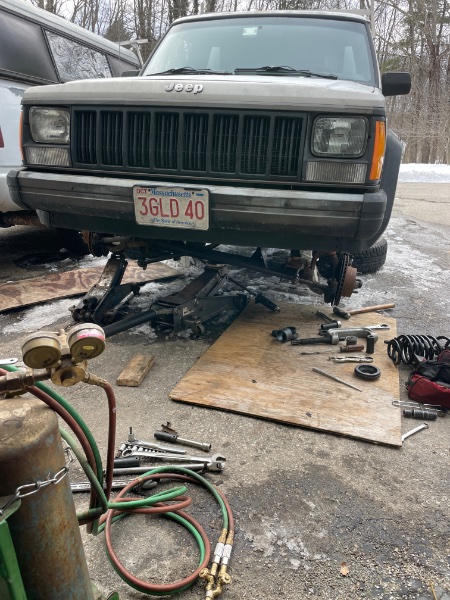
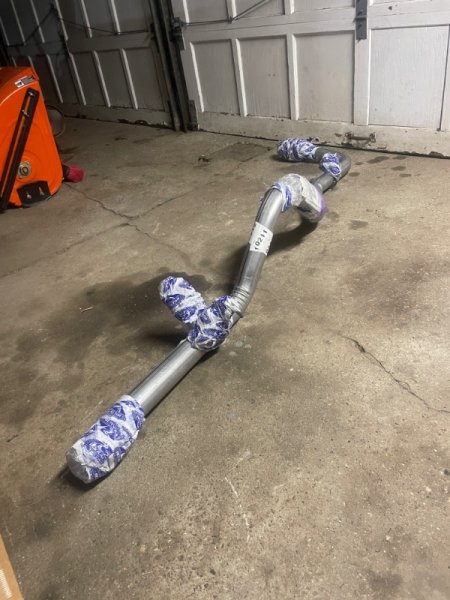
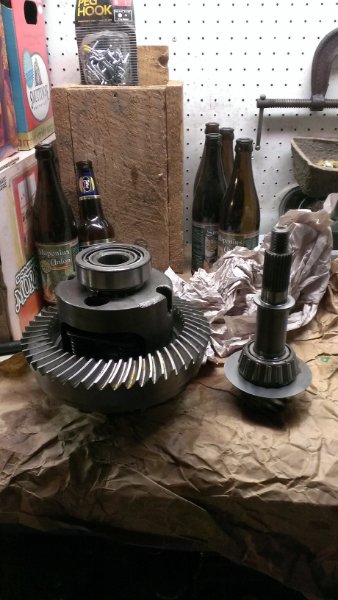
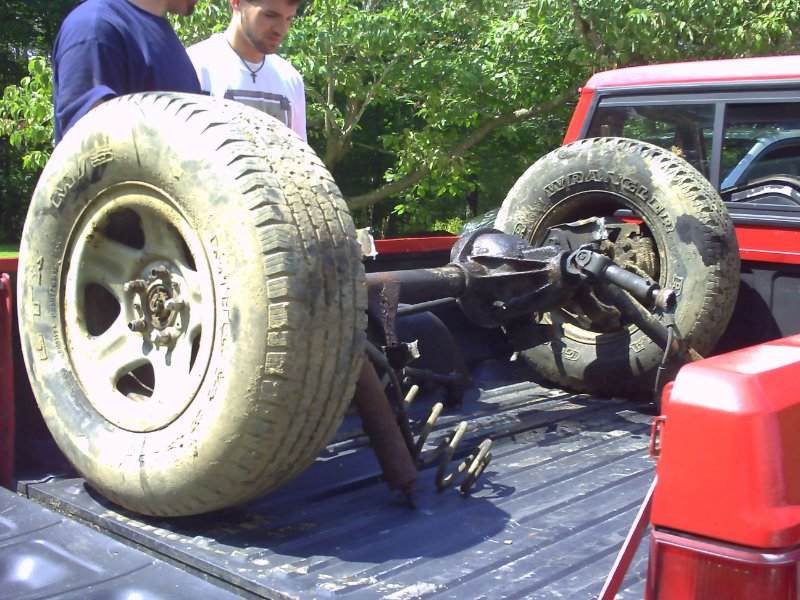
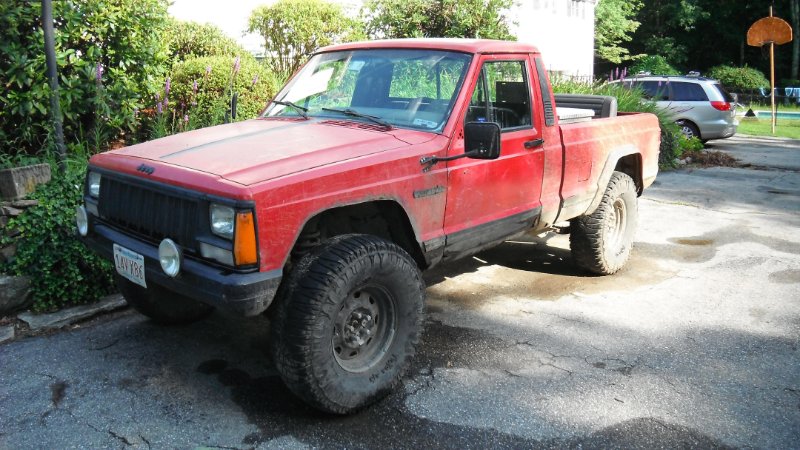
I got a good deal on a wagoneer dana 44 that already had brackets set up for a quadralink suspension. I regeared to 4.56 and added posi. It was my first time setting up gears, so I learned a lot as I went. I figured I'd try it myself on the front end, so if it exploded I could always limp away in RWD. For the rear, I snagged a Toyota 8" out of a junkyard Tacoma. That solved any issues with matching lug patterns, and It was easy enough to send out the third member to have it re-geared. Plus, it has a factory e-locker. Pretty cool. I checked under a Toyota Previa at a junkyard just for giggles, and it turns out the driveshaft uses 1310 u-joints, and the flange bolts up to the 8" axle. So I nabbed the driveshaft flange, and now I have a minivan part for my wheeling rig, of which I am proud. While mucking around with new axles, I was still daily driving and tinkering with the truck. I added a C-rok steering box stiffener, because I plan to size up the tires. Also, I found a pic of the rear bumper after it was painted. Notice the CJ-7 jump seat in the bed that I borrowed from my brother
-
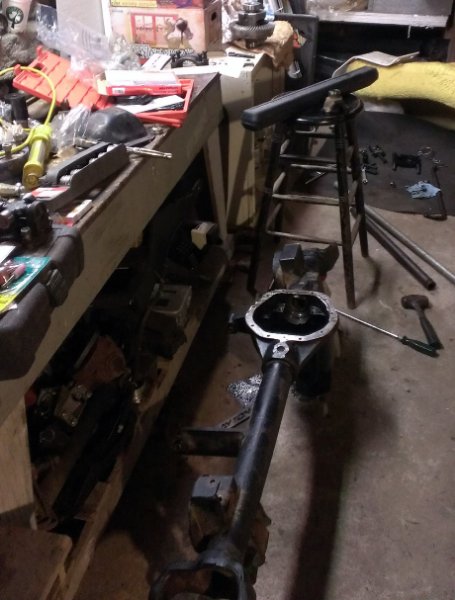
The 33s on a stock drivetrain were taking their toll. The Peugeot was the first to surrender. It started spitting fluid out of the input seal, so I decided to just jump right in with an external slave ax15 to avoid any further issues. The wheel bearings didn't like the 33s either. I got super lucky when the rear gave out, I was pulling into the driveway as the roller bearings when flying. The dana 30 would have been ok I think, but that one had a dragging caliper To be fair, as a young 20something, I beat the bag out of those axles. To anyone who says you can't run 33s on a dana 35 with 3.07 gears: ...well you're right, but you can have a lot of fun before it goes. It was, however, time to shop for new axles...
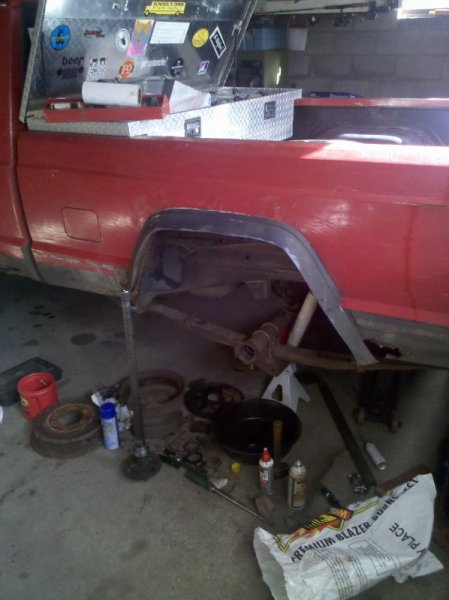

-
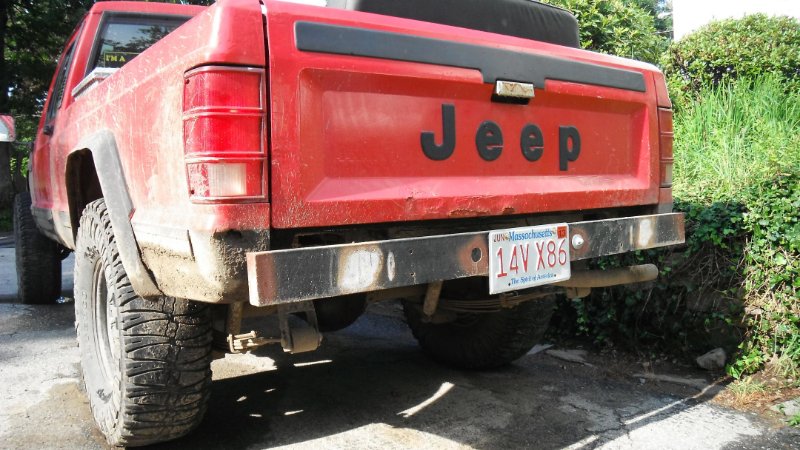
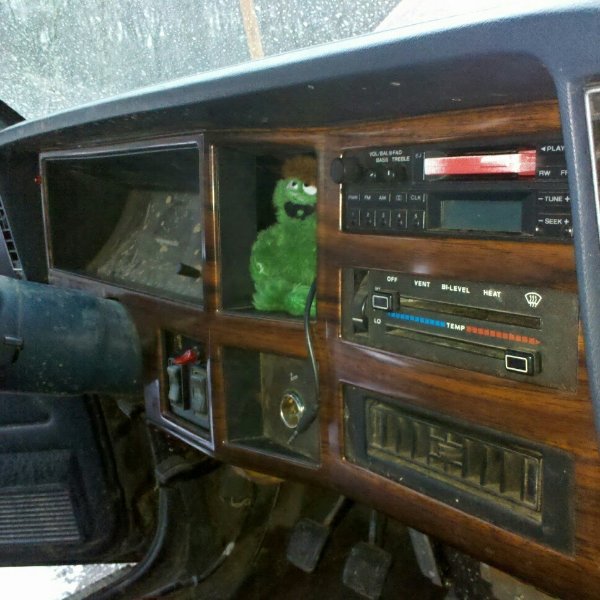
I don't have a whole lot of pics from those old days of the flip phone, but I did a bunch of little mods, like moving the alternator to the AC bracket, running the intake up to the wiper cowl, dual electric fans, Brown dog motor mounts, and cutting in a sunroof. Rot was a serious issue with this truck, and the front axle brackets were rough. One of the coil mounts was ready to crumble. I picked up a 95 XJ axle, with no rot, and no CAD as a bonus. At some point, I decided to say goodbye to the stock bumper. It was mostly held together with bondo. My brother and I made a new one out of some spare C channel. It's not fancy, but it's solid, and it's beefy enough to knock down small trees, hypothetically of course I guess I never got a picture after it was painted with both lights in, but you get the idea. Then there was the most significant mod of the whole build: I think the woodgrain bezel added 30hp and at least 2 inches of ground clearance. You can also see the aux cord I spliced into the stock radio inputs. Oscar held my ipod while we were offroading.
-
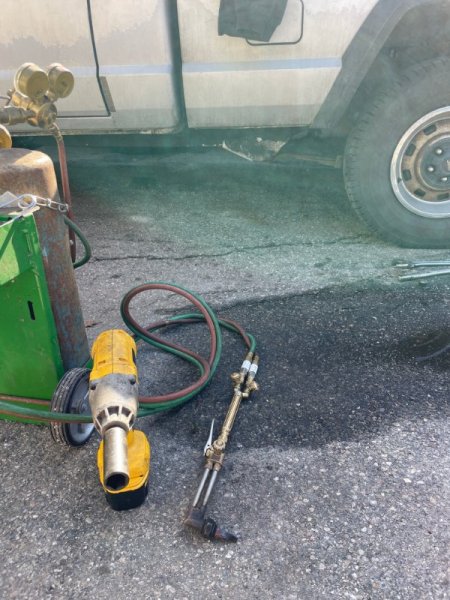
Because those of us from the rusty parts know there is no hope for that fitting... But really, a flare nut wrench makes a big difference preventing stripped fittings. You can always resort to vice grips, but that's not a pretty ending.
-
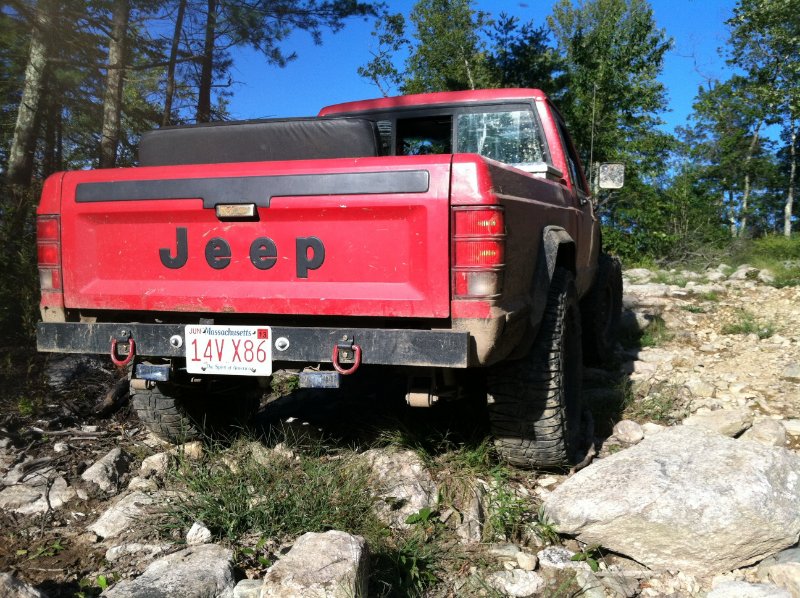
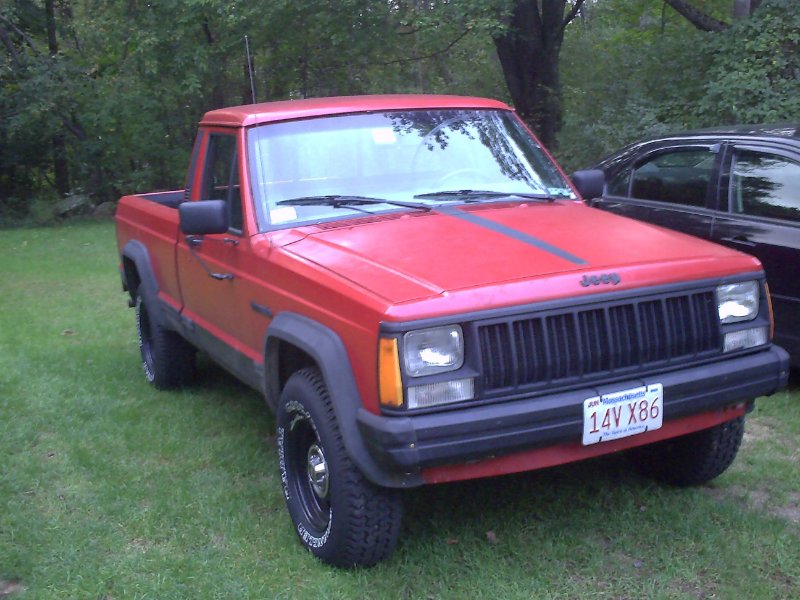
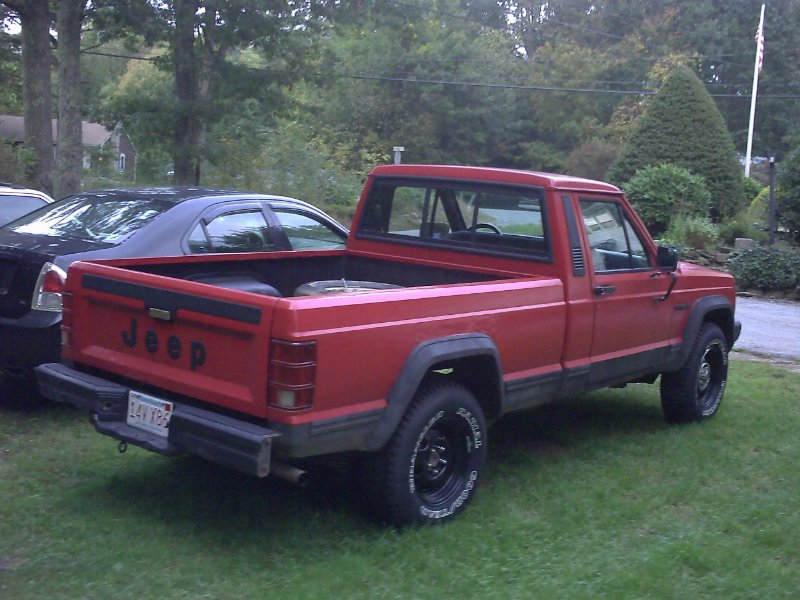
For the last 14 years, this forum has taught me an incredible amount things, and fueled a financially unhealthy, but otherwise satisfying addiction to these silly trucks. I've read and learned a lot, but I haven't shared much, so this thread will try to document "the one that started it all" back in like 2010. Spoiler alert: Yes I still have it; No it doesn't run; I'm working on it... Here it is back in, I think, the summer of 2011. Specs at the time: '88 Pioneer edition stock 4.0L Peugeot 5 speed NP231 Dana 30/35 It was pretty much all stock, besides some "cosmetic upgrades" from the PO, including a lot of "body work." As @jpnjim put it, it was a "15 footer." Any closer than that, and it looked rough. Think: spray foam, pop rivets, and paint roller. It was enough to get me going. Being a kid at the time, obviously the first thing I did was throw in some 2" coils and shackles, and cram some half bald 33's under the hacked up fenders. Luckily, there was so much rot, the front fenders were almost opened up enough on their own. Then I screwed some TJ mirrors to the fenders so I could take the doors off.
-
This is the hard data I was hoping for. Thanks @cruiser54!!
-
Keep it Stock Stupid
GonzoTheGreat replied to GonzoTheGreat's topic in Member Projects: Your Comanches
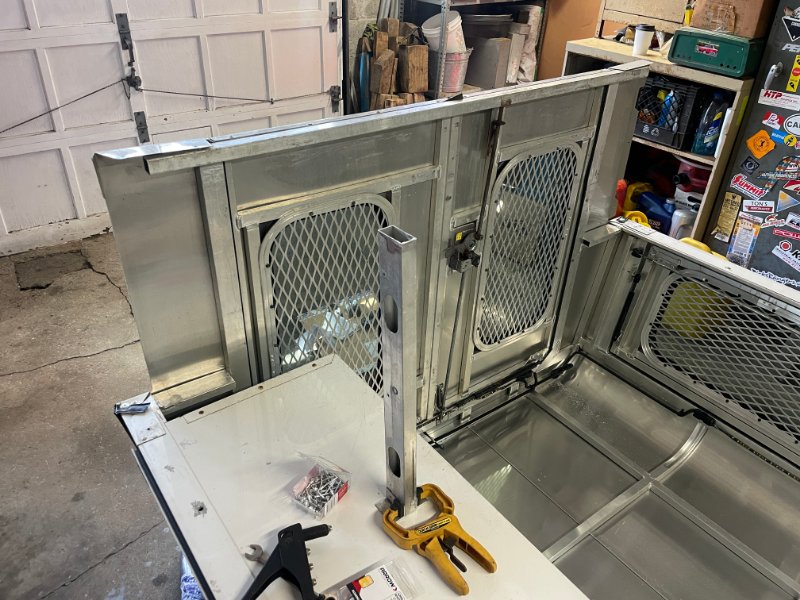
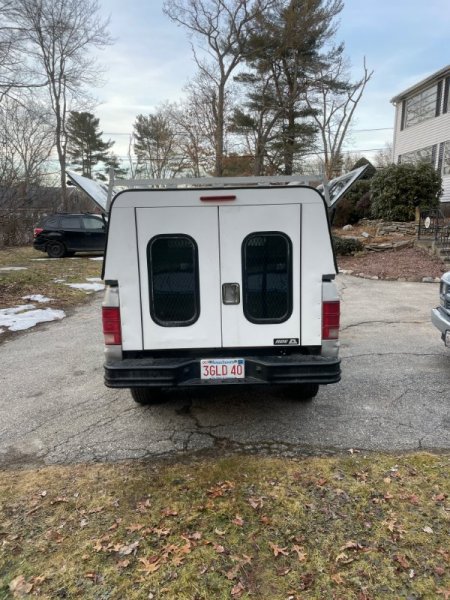
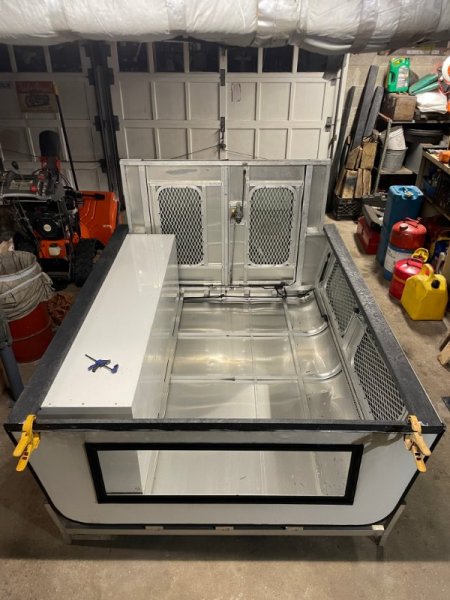
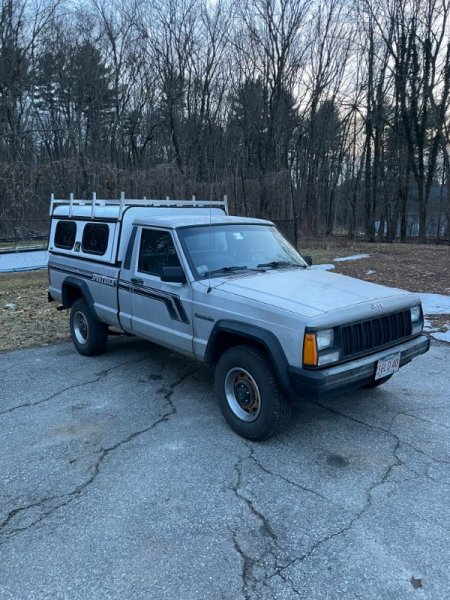
Aaaand I’ve officially gone full grampa on this truck. The Chevy on the other side actually is my Grampa’s old truck, so the mismatched bed cap with homemade adaptors is really following the family legacy. I’ll be starting a long road trip in a few weeks, and I wanted something secure that I can camp in, when needed. The cap is ARE brand, originally made for a 20teens Nissan Frontier. Length is perfect, width between taillights and width overall are close, but need some adjustment. It has LED strips inside, so I might find a way to make those work, and I have a couple spare taillight harness connectors, so I should be able make the high mount brake light work without cutting the original harness.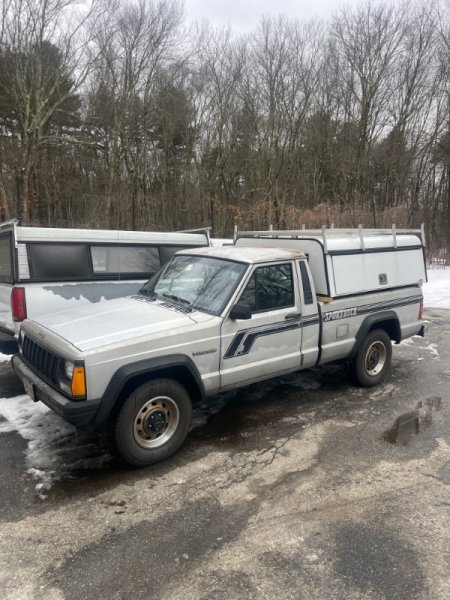
-
Lower Door Weatherstrip??
GonzoTheGreat replied to HOrnbrod's topic in MJ Tech: Modification and Repairs
I’m gonna dig up this thread to ask if anyone knows of a modern day source for this “water shield” rubber strip. I’ve dug around the internet a bit, but I’m not having any luck. -
Keep it Stock Stupid
GonzoTheGreat replied to GonzoTheGreat's topic in Member Projects: Your Comanches
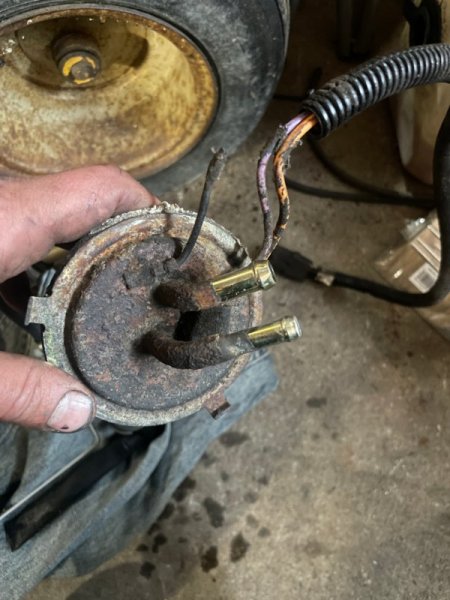
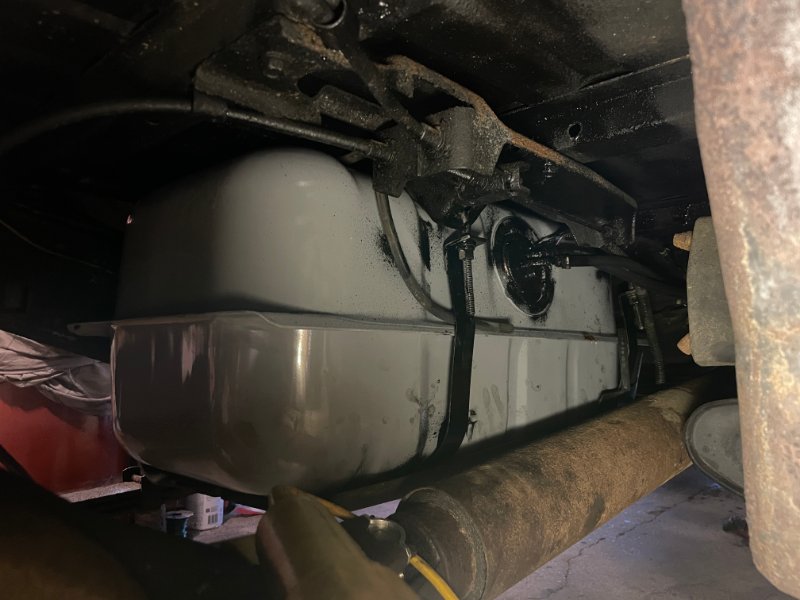
A couple other small things I've been working on: I did a wiper motor refresh, with new linkage bushings and ground wire I got a lot of gas fumes with a full tank, so I spent some time with the fuel system. The tank had a couple pinholes, so I put in a new tank, with new breathers and hoses. I have no idea how my fuel pump was grounding. Mice had chewed the wire off. It must have been chassis grounding through the lock ring! The pump and sender were still working fine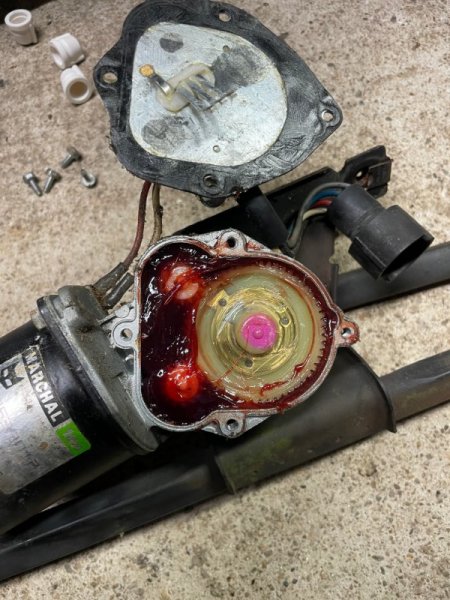
-
I’ve heard this argument. Can you explain? Is the risk that it would lock up the rear too easily on an MJ with an empty bed, being proportioned for the heavier rear body of an XJ?
-
Keep it Stock Stupid
GonzoTheGreat replied to GonzoTheGreat's topic in Member Projects: Your Comanches
Thanks! Here’s the Napa part number. It’s also available on rock auto and a couple other places on the internet. I think the same bushing was used in quite a few different transmissions, so it seems readily available. -
Rear drums from 84 to 01. There was never a rear disc option. I've been running an XJ proportioning valve in the daily with no issues.
-
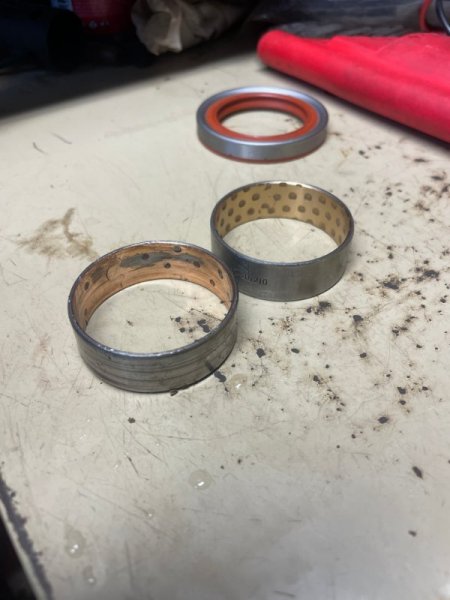
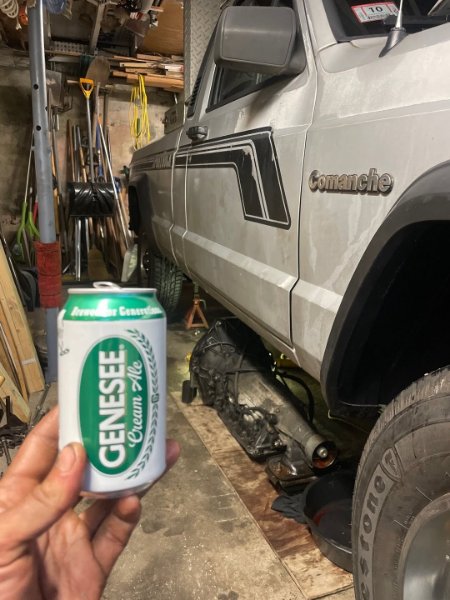
Keep it Stock Stupid
GonzoTheGreat replied to GonzoTheGreat's topic in Member Projects: Your Comanches
It's been a minute. I haven't been around much, but this week I finally replaced the leaky tranny seal. It turns out the brass/steel bushing that centers the torque converter in the fluid pump had spun loose and wedged itself into the fluid pump seal. It also turns out, that just replacing the seal and leaving the whipped out bushing is not ok, as I had read on Jeepforum... It also also turns out that a thin, little bushing like that is a real PITA to drive in properly, but all's well that ends well. This reminds me why I typically drive vehicles without a slushbox behind the engine. I'm repeatedly tempted to do a 5 speed swap, But the plan is still to keep this one generally in stock configuration...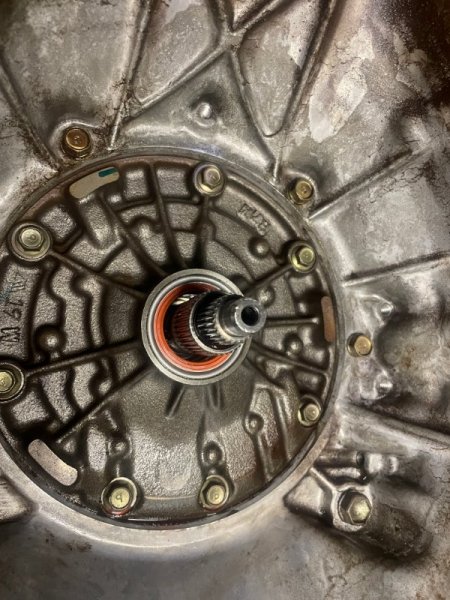
-
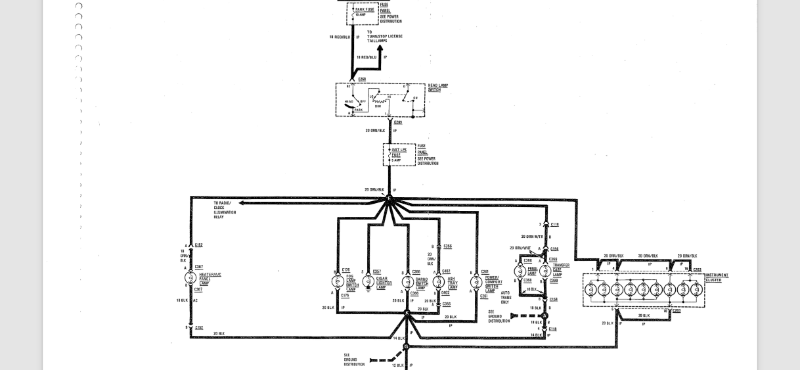
Well the pic got real grainy, but it’s page 61 of the electrical manual. There’s a little troubleshooting info in there too. Here’s a link to download the manual:
-
That happened to me when the dimmer rheostat in the headlight switch snapped and shorted to the dash frame. are you blowing the 10a park light fuse, or the 5a instrument light fuse? if it’s the 10a, start looking for a short in your headlight switch, or directionals and rear lights. if its the 5a, something in the dash lighting is probably shorted.
-
1997 and later windshield rubber trim
GonzoTheGreat replied to tarmac2dirt's topic in MJ Tech: Modification and Repairs
I cut off the little nubs so I could get the wire wheel in easier to clean the rust, but it doesn’t have to be done for clearance. There’s at least twice the space needed around them. -
Pretty sure @kastein had something like this, but I think his was a little classier.