


GonzoTheGreat
-
Posts
300 -
Joined
-
Last visited
Content Type
Profiles
Forums
Gallery
Everything posted by GonzoTheGreat
-

CAD: XJ MJ Dash Switch Blank
GonzoTheGreat replied to Salvagedcircuit's topic in MJ Tech: Modification and Repairs
Thanks for drawing this stuff up and publishing it. It’s good see these bits and bobs digitally preserved. -
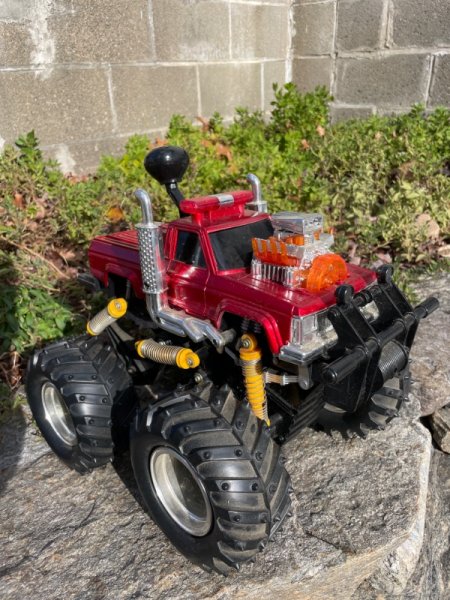
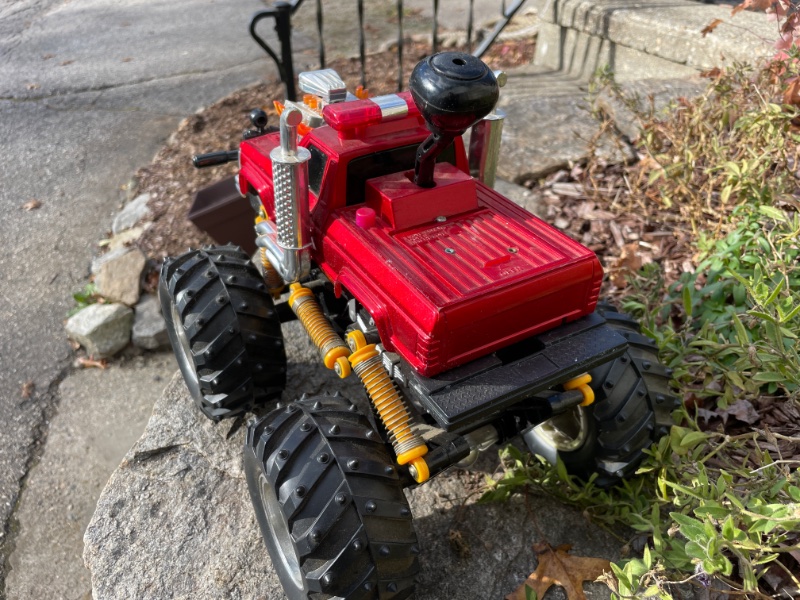
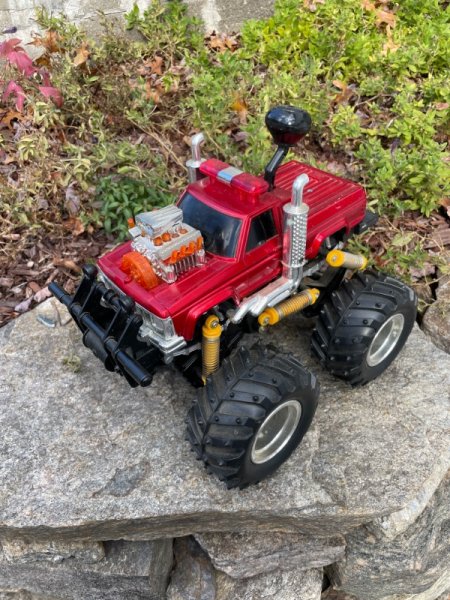
Lifted big block MJ - light bar, stacks and blower
GonzoTheGreat replied to GonzoTheGreat's topic in The Pub
Wow! That’s super cool! I’m jealous! I’m glad to see it’s not alone in the world. I knew somebody on here would know something about it. -
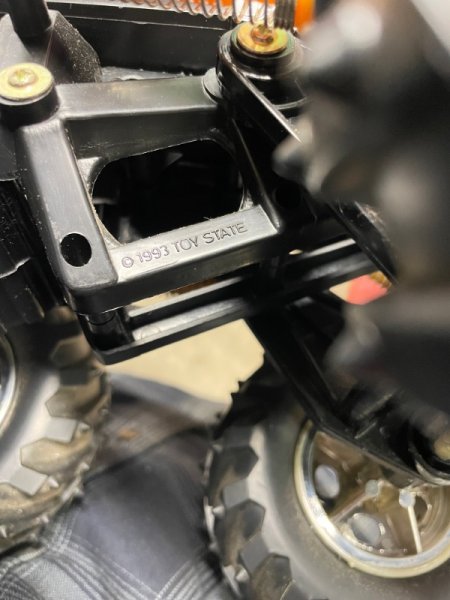
Ok. That’s a slightly deceiving title, but technically true. It’s not stock MJ ride height… My buddy found this toy from when he was a kid. If I hadn’t gotten into Comanches, he never would have known what it is. There’s no mistaking the body lines, grill, and cab vents. I can’t find any info about it on the internet. The only branding is “1993 Toy state” on the swing arm. Has anyone seen one of these before?
-
AW4 torque converter bushing
GonzoTheGreat replied to GonzoTheGreat's topic in MJ Tech: Modification and Repairs
Okay. If anyone else ever needs this it’s this part and it cross references with this one from Napa. -
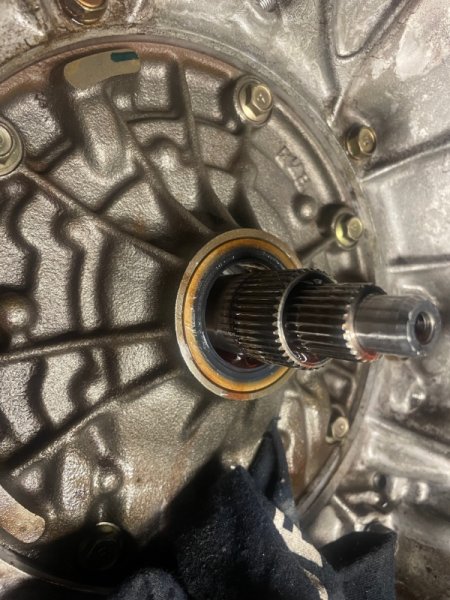
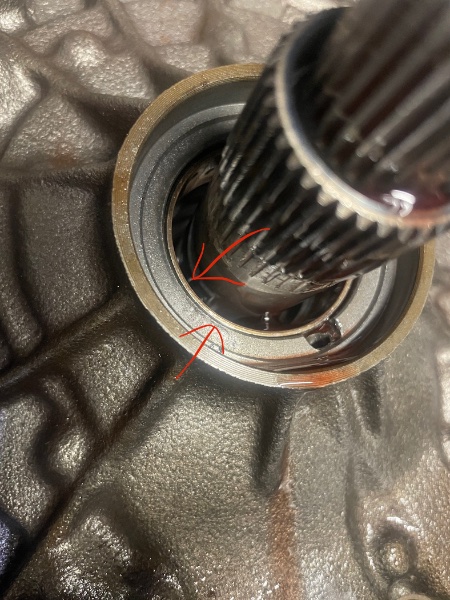
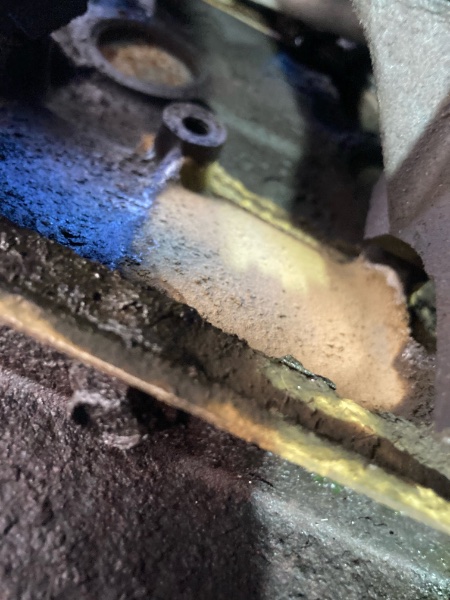
After a recent engine swap, my aw4 developed a significant leak from the bell housing. The torque converter had stuck in the pilot bushing when I split the engine/trans, so I assumed I had screwed up the seal when I put the torque converter back in. I took the tranny down today, and the seal appeared ok at a glance, but then there seemed to be a piece of metal in it. It turns out there’s a thin bushing in there that had worked it’s way up into the seal. I tapped the bushing back into place, but there is no reason it won’t walk out again. I would like to install a new bushing, but I’m having a hard time finding a part number for it. It doesn’t seem to be listed in this manual, or anywhere else I’ve looked. Has anyone replaced this bushing, or know anything about it?
-
Turn signal gremlin
GonzoTheGreat replied to Whitaker717's topic in MJ Tech: Modification and Repairs
Also there’s this: -
Turn signal gremlin
GonzoTheGreat replied to Whitaker717's topic in MJ Tech: Modification and Repairs
It’s probably corrosion in the turn signal socket. You can try to clean the contacts, but you might be better off finding the later style turn signal sockets and splicing them in. That’s what I did, and I’ve had no problems since. I'm not sure what year it changed, maybe ‘91, but the later ones are sealed better from the weather. -
I was in the same boat. The PO had mixed and matched all kinds of random screws. I picked up a couple little bags of these from Napa off the trim clip rack, and used them for the top of the lower dash, the dash bezel, and switch plates, clock, etc. They look factory.
-
Keep it Stock Stupid
GonzoTheGreat replied to GonzoTheGreat's topic in Member Projects: Your Comanches
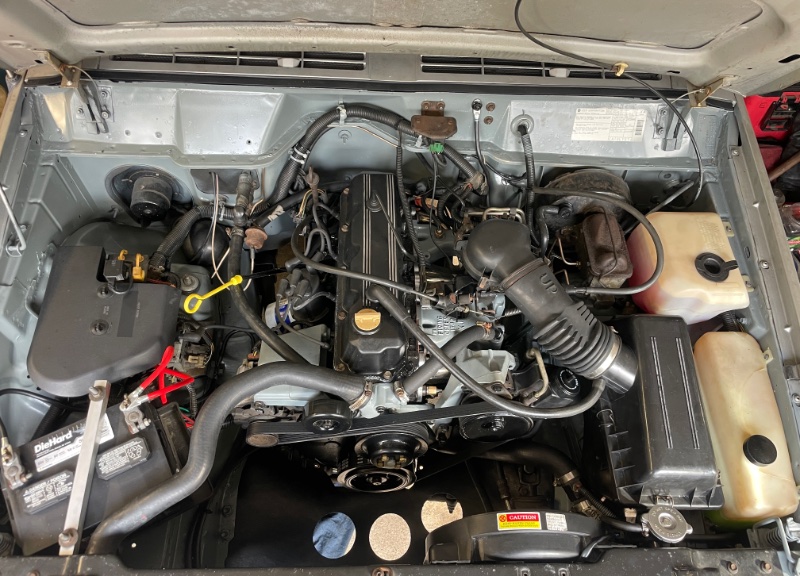
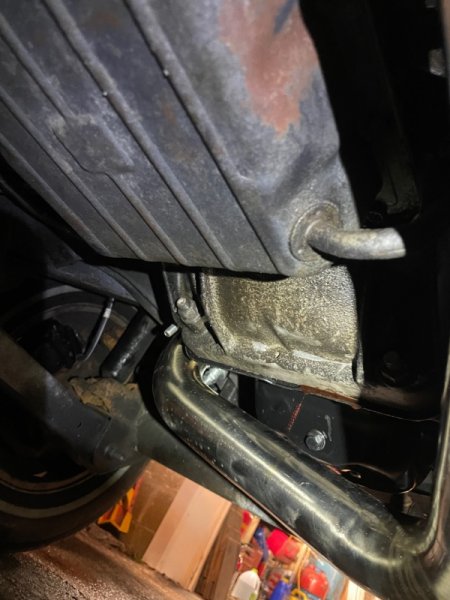
This past week I cleaned the engine bay while I had it empty, and gave it a quick spritz with gray engine enamel. Then I got the drivetrain put back in and gave everything a good cleaning as I put it all together. I had gone with a 4.0 radiator with an electric fan last year when the original rad was leaking. I think it cleans up the engine bay quite a bit. It’s weird how much more space there is with a 2.5 under the hood. I also tried out the Detroit muscle splash shields. The engine bay one is definitely made for a 4.0, and the 2.5 one must have been quite a bit different. It fit ok, but I wouldn’t do it again with a 2.5. The wheel well shields were perfect though. My original fender liners have slowly been shedding pieces, so I sprayed the wheel wells with fluid film, and covered them up with repop rock auto liners and the Detroit muscle splash shields. I also spent quite a bit of time on the brakes. Someone had bypassed the load sensing valve at some point by tee-ing the rear lines together. The inner workings of that system have always mystified me, and since there is no valve anymore, I swapped the distribution block for an XJ junkyard unit, and a single line to the rear. The rubber lines were disintegrating, and the fittings were in rough shape. I also had done pads/rotors/bearings 2 months ago, and found the passenger side caliper was stiff and dragging. So I did all new CuNi lines from the master cylinder down, new rubber lines, and new calipers, getting rid of two compression fitting from a PO in the process. Thankfully the fittings broke loose on the wheel cylinders. Shoes, drums, and hardware were all in great shape. I put in new bleeders in the rear, because one was starting to round off. I bled everything this evening, and I was finally able to move and stop under the truck’s own power! No major issues at first. I had to tighten a coolant hose clamp, and the steering wheel is a little off, but I swapped in a power steering box from a different truck so I’ll adjust the drag link later. Brakes worked, power steering worked, engine came up to temp no problem, I drove around the block just fine. Everything was going suspiciously well. …and then I noticed a steady dribble of ATF coming from the bell housing It was dark and cold out, so I’m gonna leave that one for tomorrow. I’ll probably have to drop the tranny and do an input seal. The torque converter was stuck in the flex plate when I split the tranny from the old engine, so it did come off the input shaft, but then I gently slid it back on, and that was that. Apparently that was enough to f up the seal.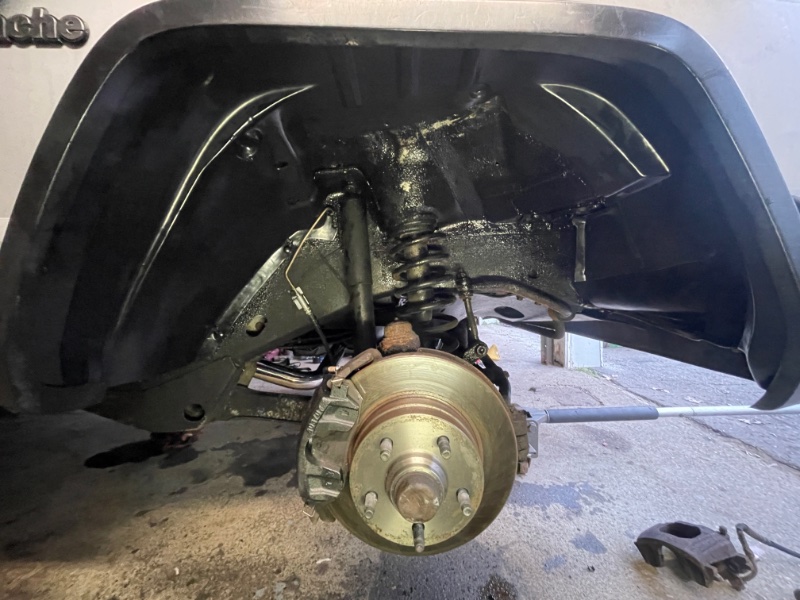
-
Keep it Stock Stupid
GonzoTheGreat replied to GonzoTheGreat's topic in Member Projects: Your Comanches
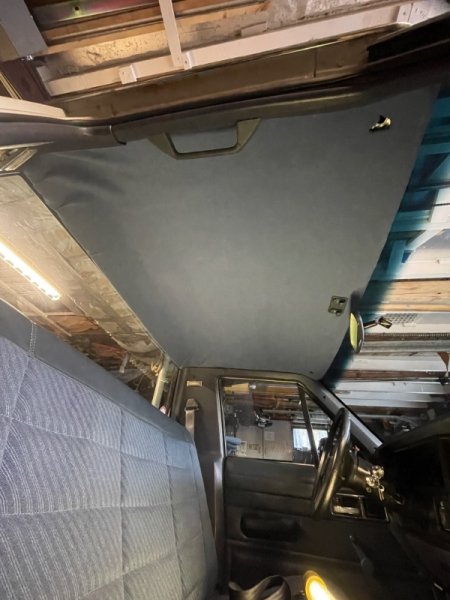
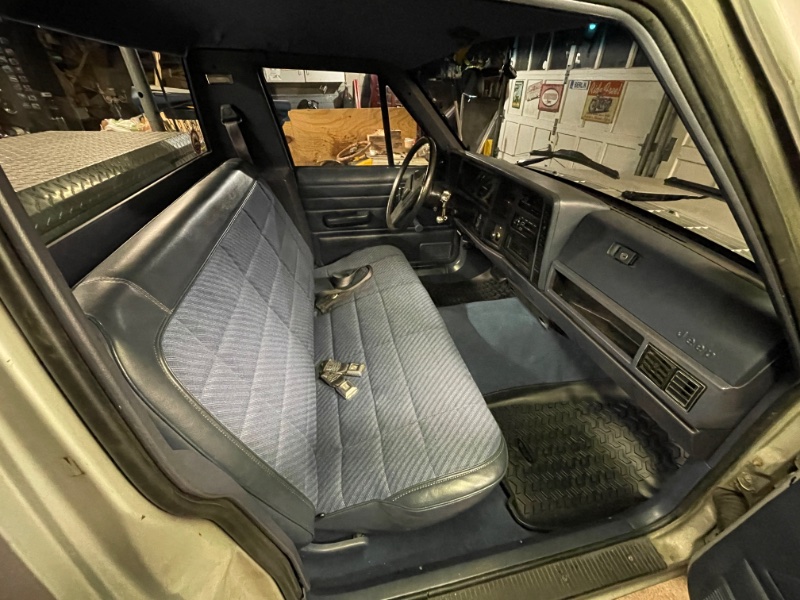
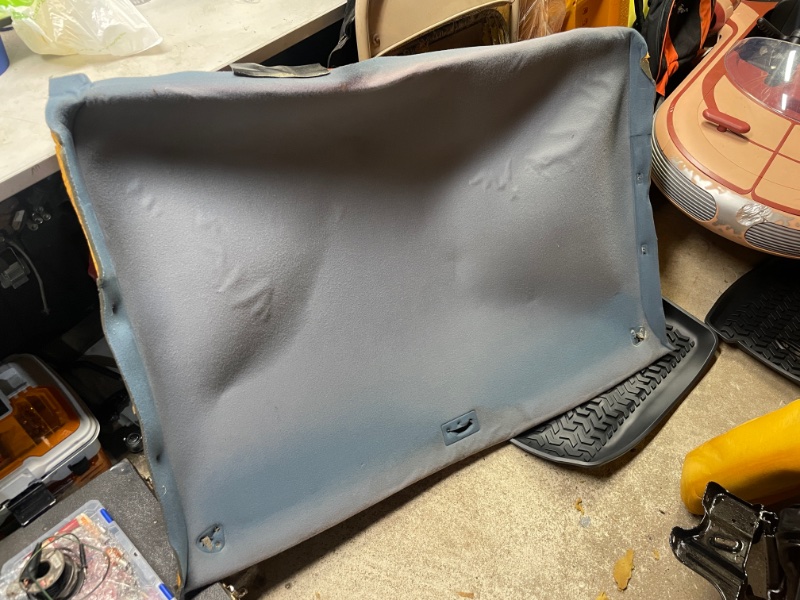
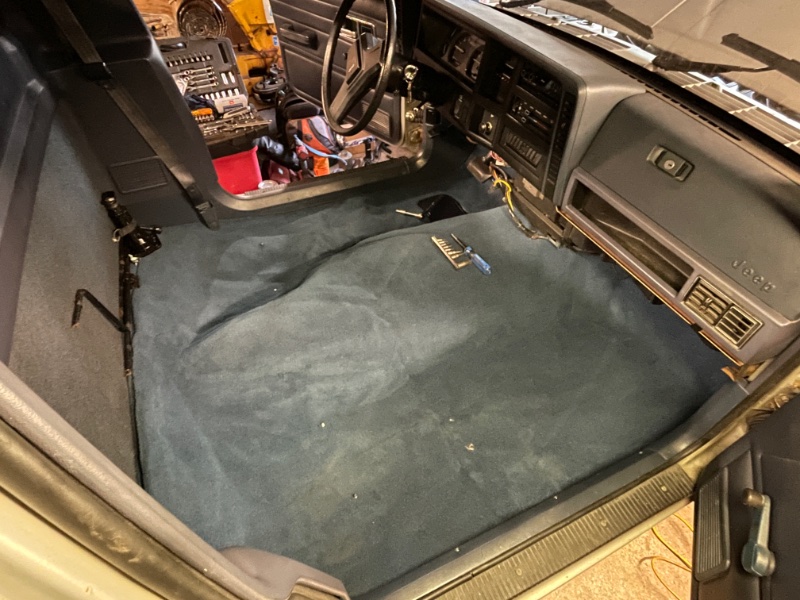
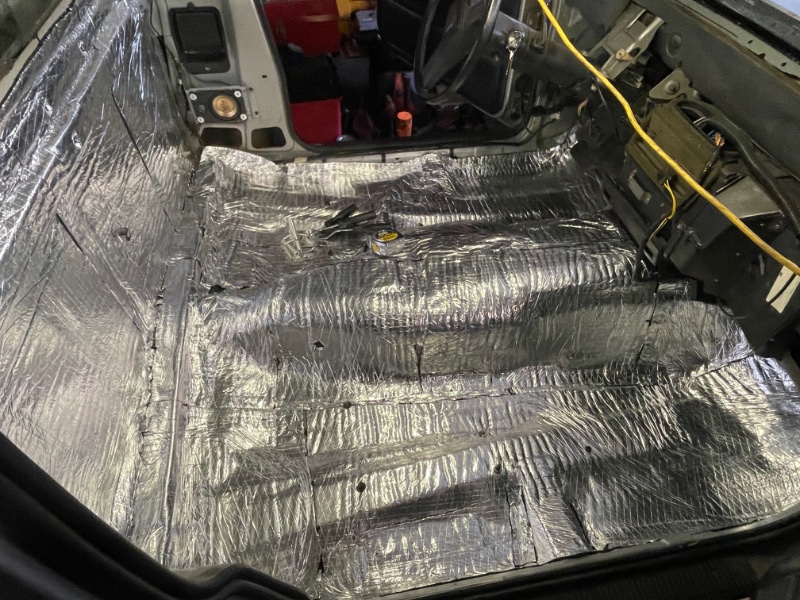
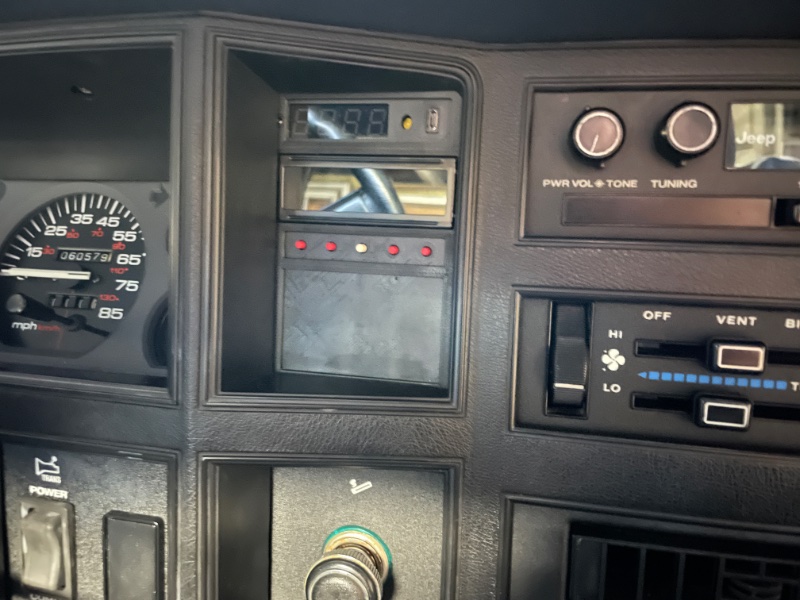
Thanks! I thought of your dad when I found this one because it’s another Grampa special. I got to see yours in person many years ago when I sold him a sport bar. I got the interior put back together last night. I sound deadened the cab before putting in an ACC carpet. The original vinyl floor was all cracked up. I wasn’t super thrilled with the carpet fitment, but hopefully over time it will settle in. the bench fabric cleaned up nice with some power washing. I also installed the full gauge cluster. I had to cut out the tach to allow for the shift indicator. Probably the most intimidating project for me so far was the headliner. it had been reskinned before with what looks like a blanket. Lo and behold, I screwed it up. It looks a lot better in the pic than in person, and it’s still better than what was in there, so I think I’ll live with it until the next SMS group buy. Oh I also added an REM II which I’m super stoked about.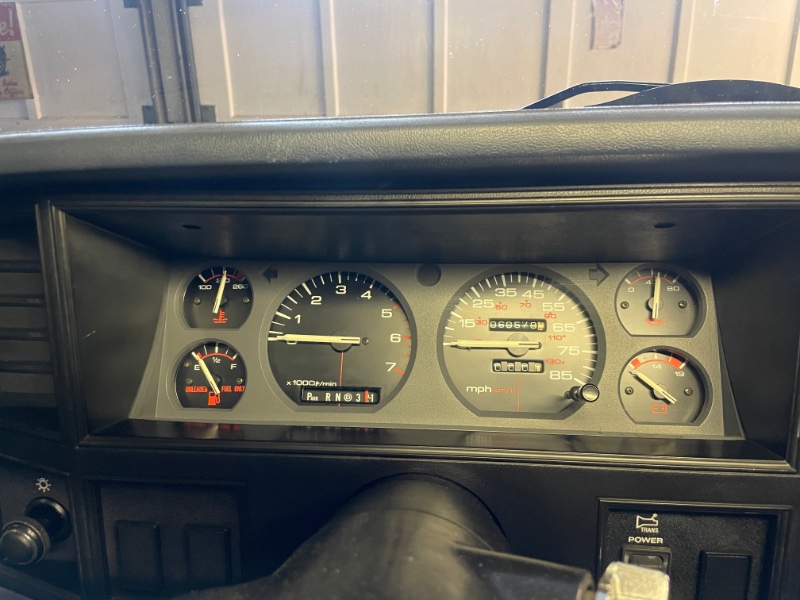


-
Keep it Stock Stupid
GonzoTheGreat replied to GonzoTheGreat's topic in Member Projects: Your Comanches
Two holes over the intake side had split the long way and the cracks traveled 3-4 inches. It was beyond saving. I’m not sure how it happened, since the bolts have shoulders which prevents over-tightening. The aftermarket one is really flimsy, but I couldn’t justify paying for an aluminum one. I still have the Chrysler one that’s on the original cracked engine. If I have any leaks with the aftermarket, I may end up swapping them in the future. -
Keep it Stock Stupid
GonzoTheGreat replied to GonzoTheGreat's topic in Member Projects: Your Comanches
Unfortunately, it was shattered around two of the bolt holes when I got it. -
Keep it Stock Stupid
GonzoTheGreat replied to GonzoTheGreat's topic in Member Projects: Your Comanches
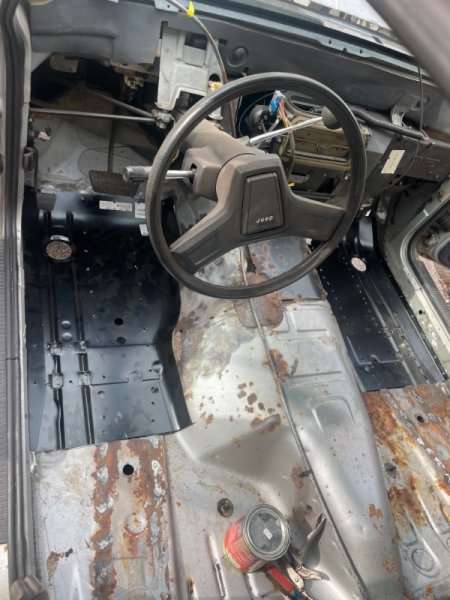
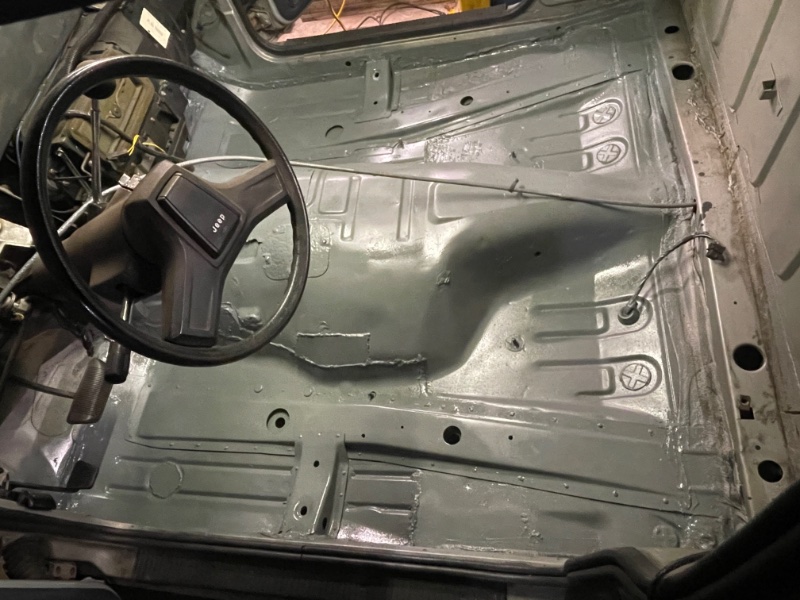
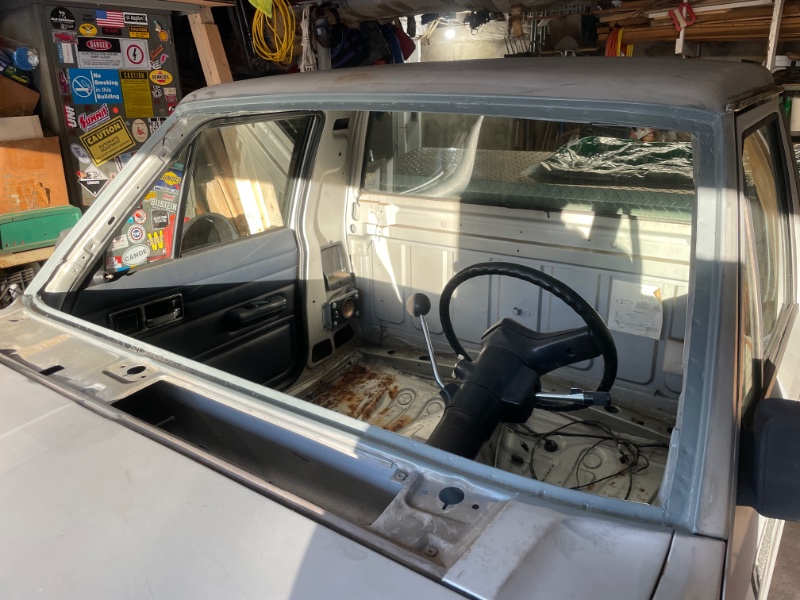
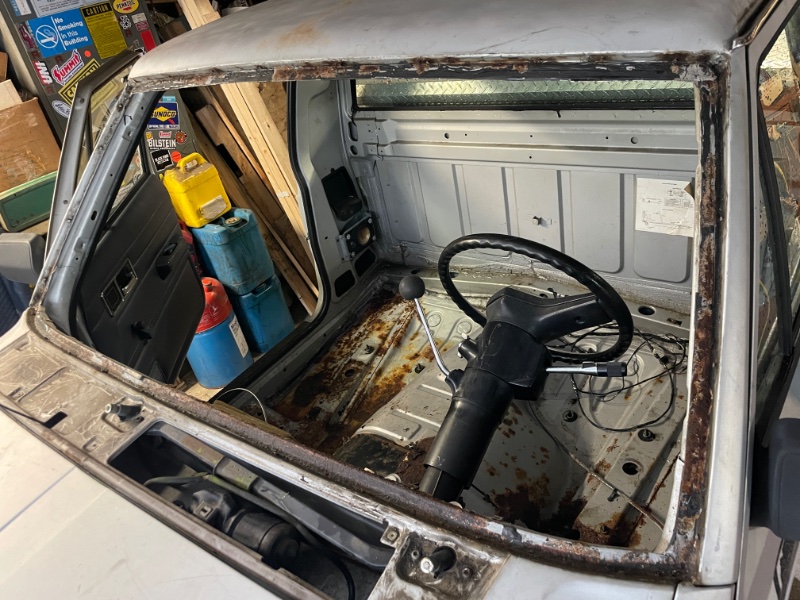
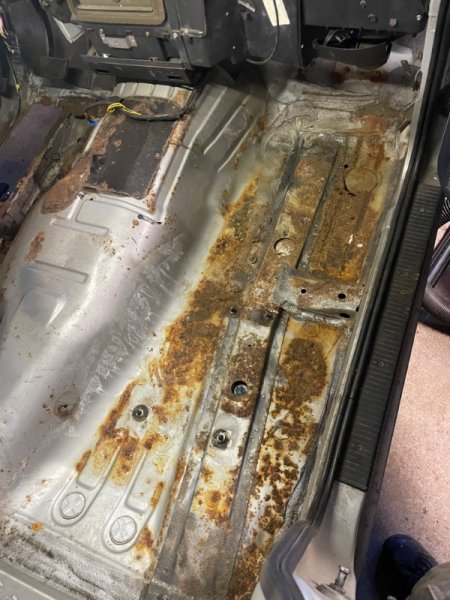
Everything got cleaned up, with POR15 inside and out, then seam sealer and a couple coats of spray paint on the inside, and rubberized undercoating underneath. I used Key Parts pans and frame caps. They fit very nicely and required only minimal modifications. The pans were pretty close to the original, but as I understand it, they are actually for an XJ. The frame caps were perfect duplicates of the originals. The windshield frame cleaned up nicely, and I purchased a late model XJ rubber gasket that the windshield guys put in when they did the glass. It came out great!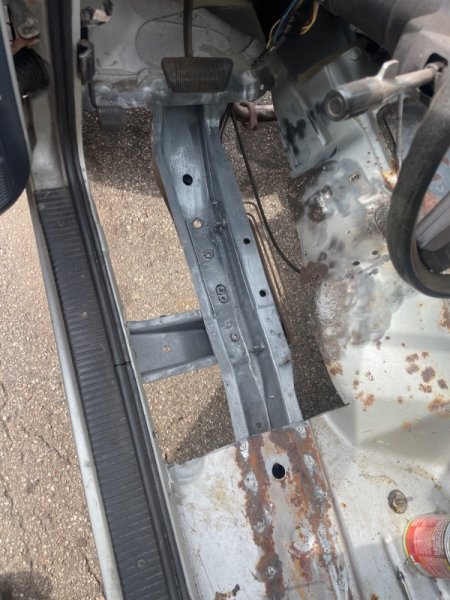

-
Keep it Stock Stupid
GonzoTheGreat replied to GonzoTheGreat's topic in Member Projects: Your Comanches
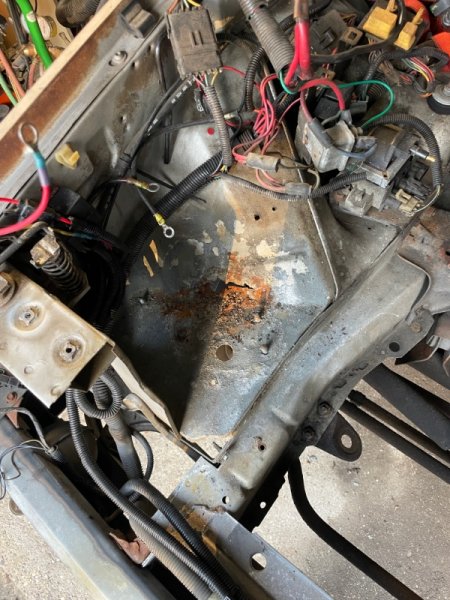
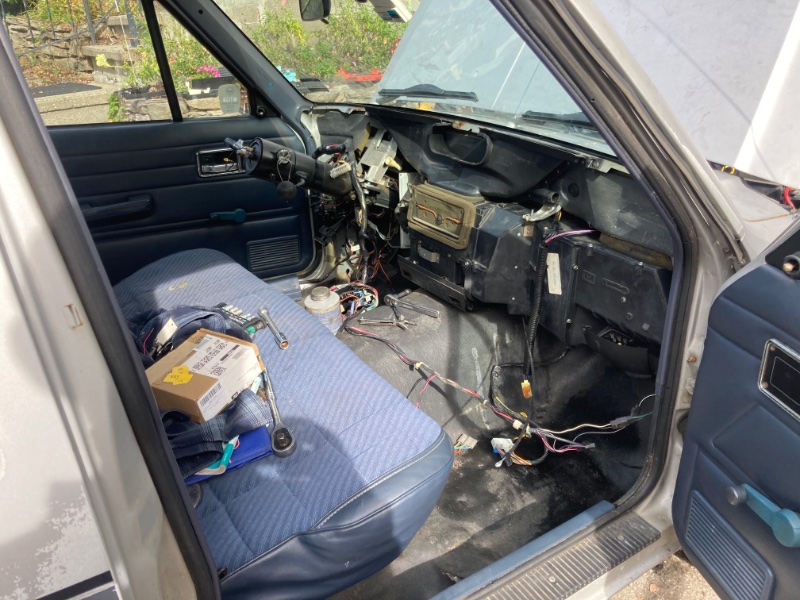
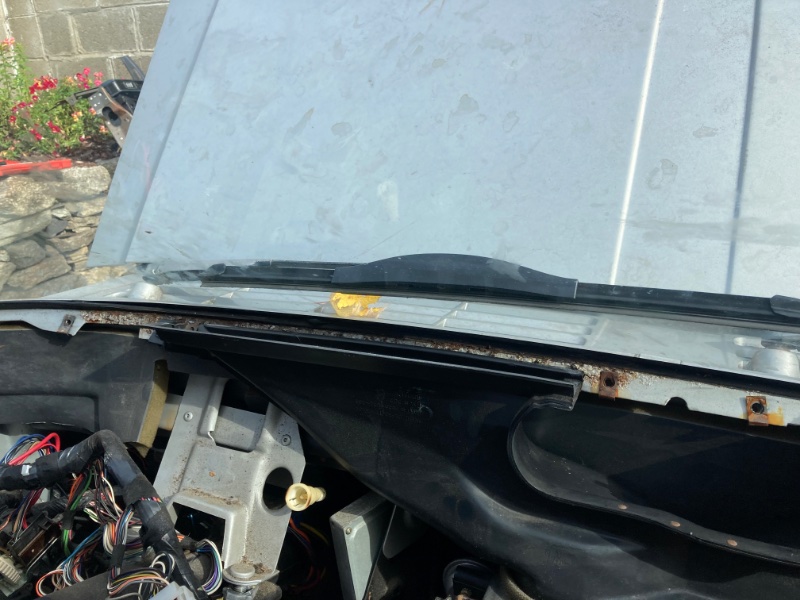
I had some free time, so two weeks ago, I pulled almost everything out of the cab and engine bay. The windshield frame was super crusty, and there were several small holes. The floors, honestly weren’t as bad as I expected. The inside of the frame rails was almost spotless. Nevertheless, it took me a couple days to hack out and replace all the nasty stuff. only a little hole under the battery tray under the hood. Otherwise no serious rot in the engine bay.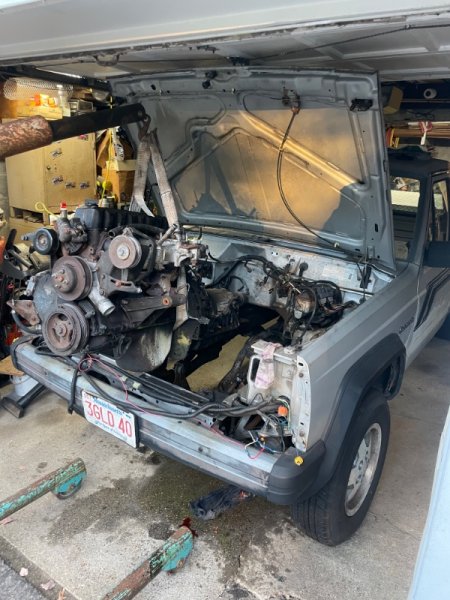

-
Keep it Stock Stupid
GonzoTheGreat replied to GonzoTheGreat's topic in Member Projects: Your Comanches
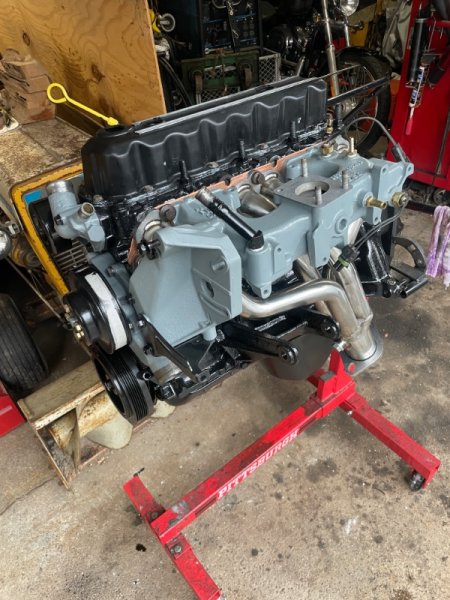
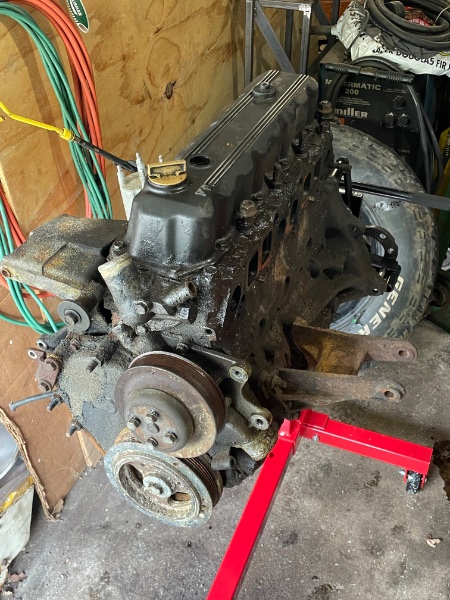
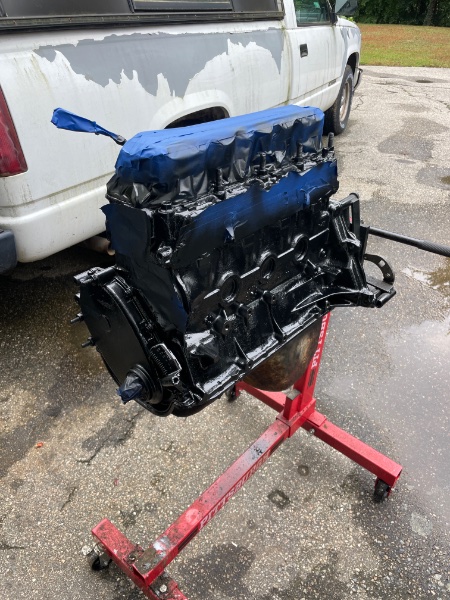
I hadn’t, but I just started. Pretty cool stuff! thanks! It was nice to see so much sheet metal intact. I spent some time spiffying up the new engine over the past month. I had only planned on replacing a few wear items, but it kind of snowballed into a bit more. I put in new oil and water temp senders for a full gauge cluster swap, as well as replacing/cleaning up basically everything external on the engine. Plus the exhaust header because why not.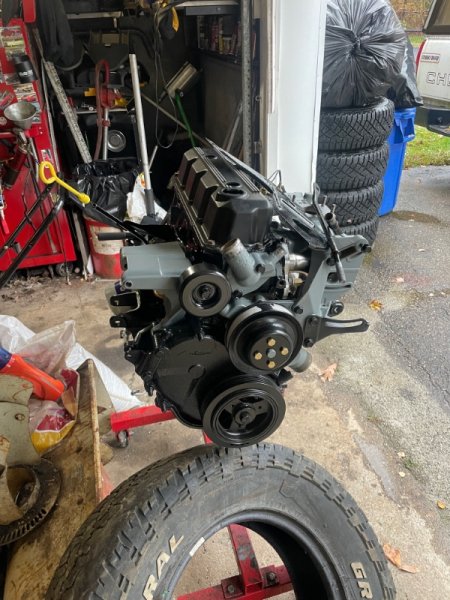
-
Keep it Stock Stupid
GonzoTheGreat replied to GonzoTheGreat's topic in Member Projects: Your Comanches
The gray loctite bought me a few months while I prepped a new-to-me engine. Thanks to @Kkilmer87 I should have the new one running tomorrow. I’ll post updates. So I guess it’s sorta true when they say JB Weld will fix cracked engines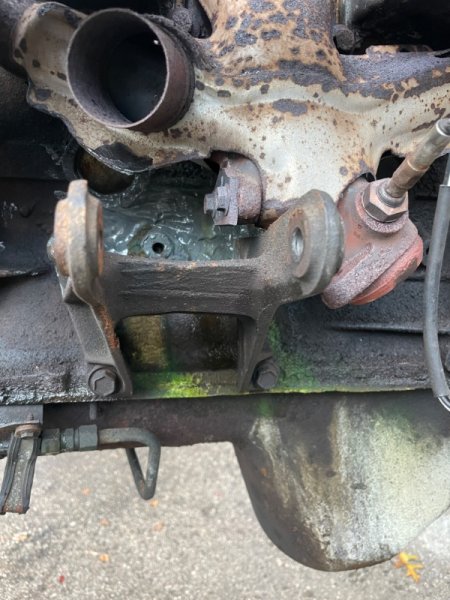
-
Keep it Stock Stupid
GonzoTheGreat replied to GonzoTheGreat's topic in Member Projects: Your Comanches
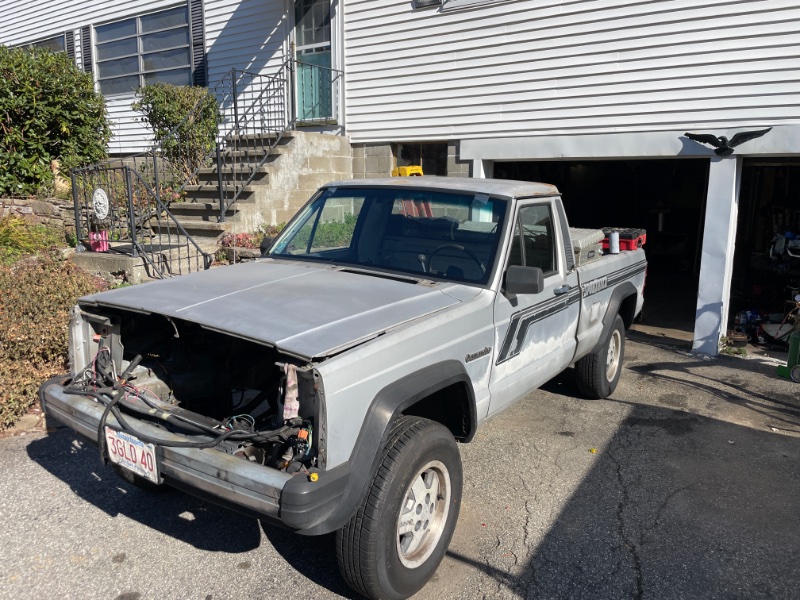
I started off with basic tune up stuff, plugs/wires/cap/rotor, it needed tires, and the battery cables were in typical shape for a 34 year old vehicle. Since the two side mirrors were the size of a quarter, and the rear view had lost most of its shiny stuff, I got 3 “new” junkyard mirrors, and picked up a decent toolbox. I bought a set of snow tires for the steelies, and put summer tires on an old set of alloys. the only thing left was to track down a slow coolant leak. I never left a puddle, and there was no oil contamination, so I went ahead with a heater core. Turns out the windshield has been leaking for A LONG time. It was rusted across the entire bottom edge, and most of the top. I also still had the coolant leak, and it turned out to be a cracked block. The drips landed on the exhaust down pipe, hence no puddle. I had planned to keep the major components original on this one, but I guess the Jeep has other plans.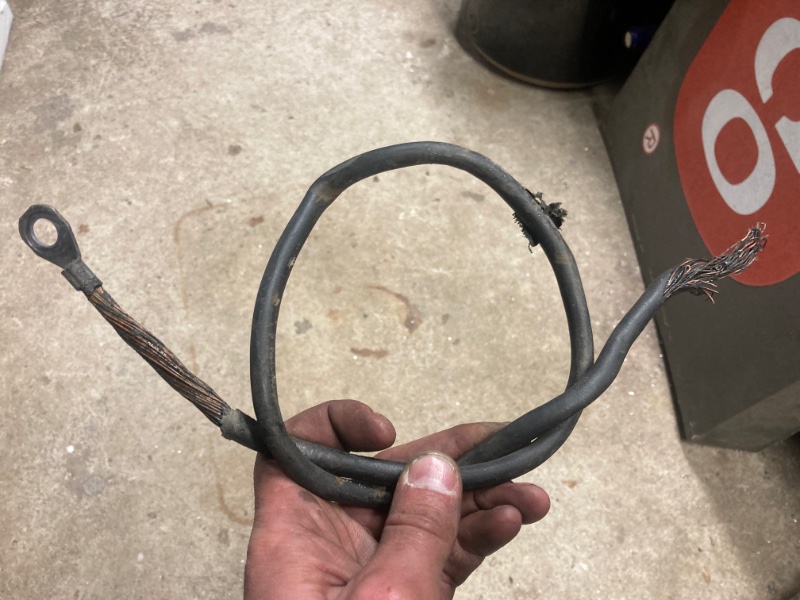
-
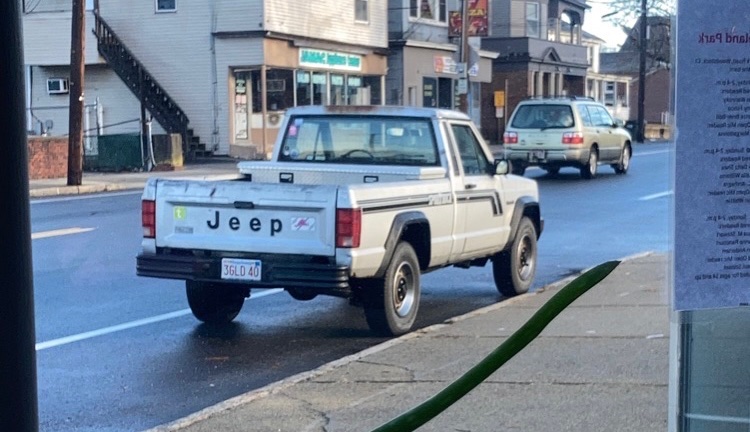
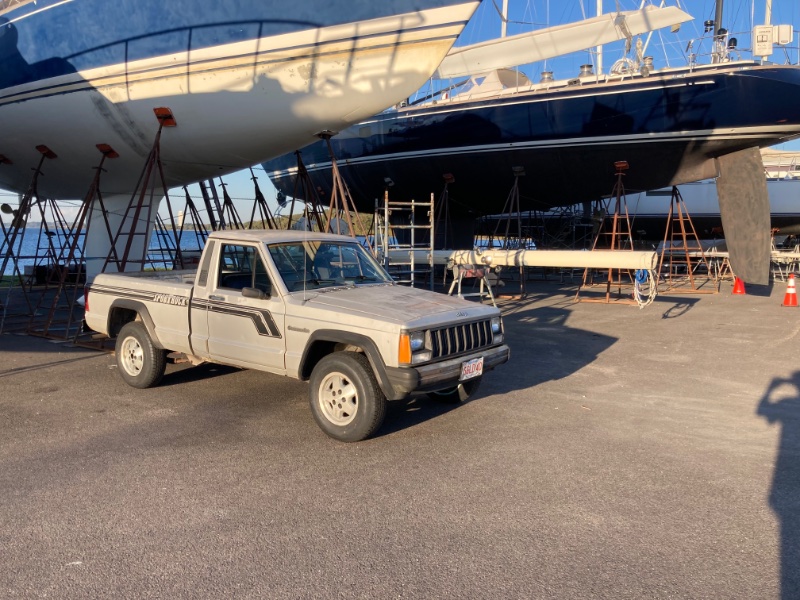
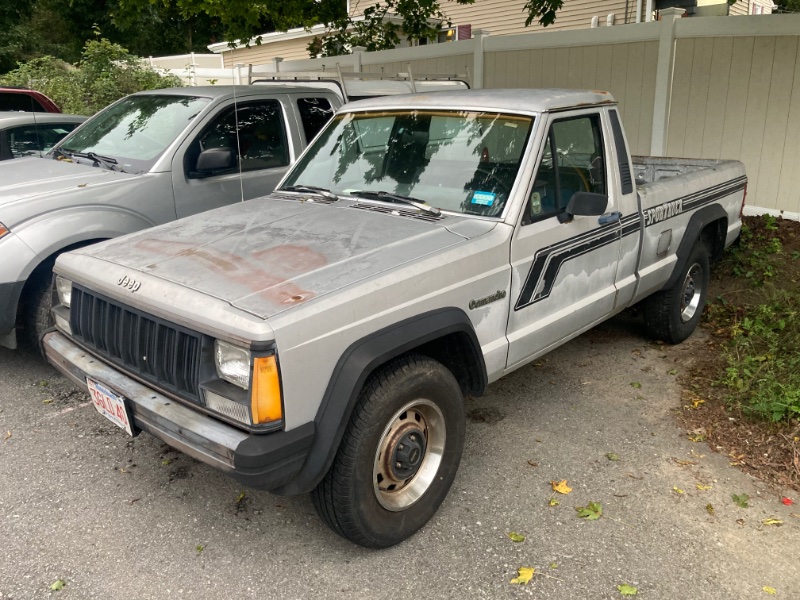
I’ve been a lurker here for over a decade now, but I have yet to start a build thread. I figure it’s about time. The other 2 and a half Comanches I own are more fun, but this one is what I have the most pictures of, and over the last two weeks it’s had a bit of an overhaul. So here we go. Last year I bought an ‘89 2.5L aw4 2WD with only 50k mi on the ticker. It had zero options besides the automatic, ie: manual steering, AM radio, cigar lighter delete, etc. It only had one stock side mirror, and a useless aftermarket other-side mirror. It was as “base model” as it gets; the old man special. For a New England truck it has amazingly little rust. It’s the only one I’ve seen around here without at least blisters on the rockers, and everything but the floors was solid. The guy who used to own it spent his winters in FL, so it basically just made dump runs during the summer months. The plan was to keep it stock, daily drive it, and stick to basic maintenance only.
-
Fuse Block Ganged Buss Bars
GonzoTheGreat replied to Dandxj's topic in MJ Tech: Modification and Repairs
I think he means these guys, but idk what crimper is narrow enough to get in there. You only need to squeeze one of them though. That’s what the buss is for. Solder would work.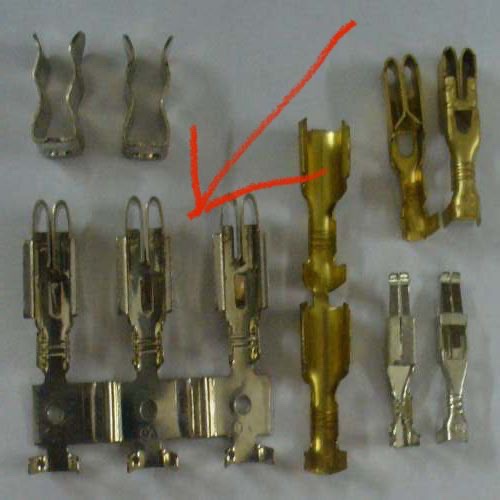
-
bluetooth amp thoughts?
GonzoTheGreat replied to Pete M's topic in MJ Tech: Modification and Repairs
Sorry, I think I fixed it now. -
bluetooth amp thoughts?
GonzoTheGreat replied to Pete M's topic in MJ Tech: Modification and Repairs
Amp I’ve had good luck with this one so far. I hid it under my dash and wired it into rear speakers, so I could keep my factory AM system untouched. It’s not super small, but the price is right, and it gets pretty loud. It syncs to my phone on start up, so I don’t have to push any buttons or anything. -
The plug should screw up from underneath to shut off flow. The end is exposed because you would put a hose on it to drain the radiator into a bucket or something.
-
Kind of hard to see in the pic, but if it’s on the opposite corner from your filler neck, yes, that’s the drain petcock. There should be a stopper in there. They typically screw up from underneath that flange.
-
I went several years ago when it was in Munson, and there were half a dozen MJs. And we definitely got more respect than the bolt on, quadratec, “zombie apocalypse” type wranglers.
-
I’d be down if it’s toward the end of April.