A-V Posted September 4, 2007 Posted September 4, 2007 I'll go thru the beginning stages of my Comanche project to kick this topic off. After that I'll be adding constant updates on the progress. There she comes. Found at an online auction site and taken into custidy by a friend of mine. This Jeep was something I had been looking to find for years, so I just had to have it and after some discussions on the matter he was willing to part with it (as he was going to part it out). Needless to say - Price was right, although my friend had been scaring me in advance about the mess the Jeep was and how the pictures make it look a lot better than it was. Do note my friend's very nice truck pulling my truck.. ;) That's about 10% of all Finnish Comanches in one picture... Looking decent from this point of view, but the body of the truck was a mess. Six different shades of red, which had been taped, painted, taped with airducttape, painted, bondoed, painted and taped some more. Seemed like whomever owned this truck previously had no clue on how to repair rust. Basicly only thing intact about the outside of the truck was the front grille (although faded and corner pieces were cracked and glued several times with even less success than the taped over rust) and well... left taillight was pretty decent too. From the side you can start guessing the amount of rust on the truck. Basicly it was so full of rust 'flowers' that it was impossible to find a 4 x 4 inch spot without rust (if you don't count in the recently replaced front fender). Even the ceiling was rusted. You just gotta love finnish road-salting and the previous owner for never washing the truck. And no, I am not going over the top with how rusted the truck was, the pictures do lie more than a 1000 words... Broken taillight, out of shape bend bumper and dented out bed with surface rust everywhere. The bed was decorated with a 'do-it-yourself' rollbar, made out of waterpipes couple straight pieces and 2 bends and spraypainted over a few times. So tasteful and elegant I decided it was the first thing I'd get rid of. The entire bed was a lovely collection of different brands of spraypaint, some boiled, some cracked and some gloss others silk finished. :D But hey, it was a starting point to build myself a daily driver that'll haul @$$ and a couple other things as well. For more info on the truck itself.. see next post..
A-V Posted September 4, 2007 Author Posted September 4, 2007 So the truck itself. Jeep Comanche Custom Built in 1985 (exact date found in inner front-fender brace). AMC 2.5liter four cylinder gasoline engine with fuel injection 4-speed manual transmission, supposedly a T-4, not 100% sure though. Dana 35C rear with heavy duty springs. Rearwheel drive (not 4x4). And off to work. Rust had to be taken out of the equation to begin with. So after replacing the lower portions of the bed (about 15 inches x 30 inches on both sides) with new sheetmetal I sanded the bed sides down POR15'd the rust flowers afterwards and kept on finding more and more tape to remove with a handheld heaterblower (no clue on what it's called in english..heh). I almost sanded the whole bed down to the metal and then soon after painted it flat-black. The tailgate was so rusted I sandblasted it and painted that as well. Pity I didn't take pics of the starting process with the sheetmetal work, it was all done in 2 days so didn't really have time to think. For the paint here, I used an industrial strength primer paint. Here you can also spot the original wheels to this car which I instantly got a liking to (even though they weren't in such a great condition), but I started hunting the center caps on Ebay. Another mate of mine started hinting that he might be able to do some magic to the wheels with a few cleaning acids and special paints to boot (he's a professional in the chemical industry painting). The grille had seen better days so I ordered a new one at a local dealer with new corners to match. Here you can also spot the new headlights.
A-V Posted September 4, 2007 Author Posted September 4, 2007 Around this time it was time to organize the AMC Euromeet 2006 in my hometown of Pori, Finland. I had about 2 miles to the party so I decided to move the car there to show off even though the only brakes working on the car was the handbrake. About half of the people there hadn't even seen a Comanche, much less a 2WD one with a four cylinder fuel injected engine. Brakes on the truck were pretty bad, meaning 2 blocked rear cylinders, 2 cut brakelines, no master cylinder at all and I was also missing the brake divider-block (proportioning valve?) from the engineroom AND one front saddle had eaten it's bleeding screw. I am guessing someone had sold off the 'most expensive' part (a direct replacement for those horrendrous ABS brakes in Cherokees found all around Finland) in the truck before auctioning the Jeep off. After Euromeet I limped back to the garage. At this point I had about a 3 month break from my schedule on this truck. I was lying on my back in the driver's legroom working on installing a master cylinder when getting up I accidentally released the parking brake pedal. The pedal hit me square in the head, about 1/6 inch away from my left eye, causing a skull fracture in 2 places, blacked out eye and nearly losing my sight in the progress. It all healed OK, but for some strange reason I decided to give this project some time outside in the rain. But... After a few months I rediscovered my motivation. So with newfound motivation I finished the cabin in the same style as the bed. Repairing rust with welding new pieces made from sheetmetal and melting tin to seal the welds. After that some bondo (max of 1/8 inch mind you) and the primerpaint. It should be ready for final sanding and real paint later on next year. The front grille arrived and it took me 5 minutes to get it installed and I gotta tell u mates, it REALLY brought some motivation to get this truck finished for this winter. After the front was looking good, I made a rolled pan for the rear to replace the bumper. New exhaust pipe was also ordered and installed making the car nicely quiet for a daily driver. And yeah, still no brakes on this car - so no driving either.
A-V Posted September 4, 2007 Author Posted September 4, 2007 After some thinking I agreed with that friend of mine to let him try his best with the original wheels and he provided me with temp-wheels from his Cherokee Limited. The temporary wheels looked quite decent, but definately not what I had in mind... While Ebaying I found new COMANCHE emblems for the left side and the rear. Thankfully I found the Custom emblems in the cabin under the seat (those might have been more difficult to find). Also found cromed mirrors on Ebay and I cleaned out the windshield surround and polished it up. I was having trouble finding non-ABS brake-master cylinder to the car, even the dealers lacked in them so I tried out a Dodge pickup master cylinder which 'by word of mouth' should have fit. And yes - it did fit it - But with my luck being what it is, of course it didn't work. The brakes refused to bleed and work as they should have, even after I bought a new proportioning valve. A bit pissed off at this I decided to turn my attention to other matters on the car. Interior was the word. The car came with vinyl bucket seats, which of course were ripped apart and torn here and there. Even if I fixed them up they weren't really what I wanted to haul me, my wife and my dog around so I started looking for a bench seat. Which seemed an impossible thing to find with Comanches being so rare in Finland. But I got lucky. One of the Finnnish Comanches turned up 'for sale' and the guy advertised the car 'with leather buckets (from a cherokee limited)' but the original bench seat was also included in the deal. As you may guess I rang him up and convinced him to sell me the bench seat and a few days later I drove 200 miles across Finland to retrieve it from sitting outside under a tree. Blind luck. Too bad the sofa was the wrong color, but it was "carefree-vinyl" so I decided to get it anyway - it wasn't likely that I'd find another one anytime soon. Good wash, cleaning and some vinyl paint it was soon looking a whole lot better. And didn't take a whole lot of time to dry in the sunshine and get it installed... ;)
A-V Posted September 4, 2007 Author Posted September 4, 2007 After a month or two I finally acquired a fitting master-cylinder to pair up with the new proportioning valve. Although not a direct 'bolt-on' it was from a 1999 Jeep Cherokee and I got the master cylinder+booster+pedals along with my purchase. After some investigating I found out that it fit in perfectly after I shortened the shaft between the original brake pedal and the booster by 6 inches. Quick bleeding and WOW. All brakes work (no brake lights though...). Before this I had redone all brake lines, hoses, rear brake cylinders, rear brake shoes and drilled out and re-done the broken front saddle bleeding screw. And yes, had my share of good and strong finnish swear-words to top all of it off. I REALLY hate working on brakes (even though I redone brakes for some 10 different AMCs). Feelings after finding out that the brakes really did work and perfectly were fantastic.
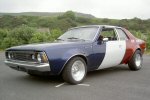
A-V Posted September 4, 2007 Author Posted September 4, 2007 And soon after it was time for the biggest US-car meeting in Finland (and biggest one day event in Europe: 7000 cars) - The Forssa Pick-Nick which has been my traditional 'test-drive-trip' for several of my other cars (including the Hornet I still have). But before the trip a couple other things had to be fixed. The heater motor wasn't turning so I took it apart and found the heater motor from the wife's Cherokee that I replaced some time ago for being too noisy. Took a few parts from the Comanche motor and rest from the cherokee motor and welded it back up and after tons of CRC 'rust-off' it started to work OK. After this a quick electrics checkout on the interior and I managed to get the idiot-lights working (well almost all) and after replacing a wiper arm I got the wipers working. A few new water hoses to the engine, new alternator, new belts, oils, filters, cooling fluids, and so.. 100 miles to Forssa (temporarily registered for traffic with 'moving plates' available in Finland as registering a car for traffic is a complete checkout of every single system on the car which I wasn't ready for yet). On the way to Forssa the waterpump started leaking, but kept on turning thru the trip so adding about a half a gallon per 40 miles it was OK and trip went well. Also I started hearing some rattling noises from the timing chain cover, but gladfully that didn't turn worse on the trip. Around this time I noticed how good and cheap the car was to drive around. I got about 28MPG on the first trip.
A-V Posted September 4, 2007 Author Posted September 4, 2007 Two days after Forssa Pick-Nick I got the wheels back from my mate. I had requested something 'almost black but shiny'. My friend had done an EXCELLENT job on the wheels and with the Ebay-found center caps to finish the look off.. Oh yeh, and new tires as well... I'm pretty happy with the look now. Or what do you think? Also replaced the waterpump, timing chain gears+fastener+chain and took out the air conditioning (which wasn't working anyhow), installed the brakelight switch from 1999 Cherokee and I just have a few small things to get done before the traffic-inspection. It'll be a winter-daily-driver for me (as I drive the Hornet during summers and my wife got her Cherokee). ;)
comanche 88 Posted September 4, 2007 Posted September 4, 2007 Wow, looking good in all its blackness, those wheels really helped the look. I'm always impressed when i see how much effort some people put into rescuing these cars from what would othervise be certain death.
Pete M Posted September 4, 2007 Posted September 4, 2007 Nice truck. :D If you ever get the project itch again, there's always the 4wd conversion. :brows:
DansGreyMj Posted September 4, 2007 Posted September 4, 2007 i like it, it looked almost like a rat rod with those white walls though.
dfreeman616 Posted September 4, 2007 Posted September 4, 2007 i like it, especially those rims :cheers:
ORCA Posted September 4, 2007 Posted September 4, 2007 This is by far the sickest slammed manche i've ever seen! Nice work man!
A-V Posted September 5, 2007 Author Posted September 5, 2007 Thanks for the positive feedback mates. ;) The truck is no way near completed, but I'm propably driving it 'as-as' thru this winter. Although I'm putting on white side markers to replace the orange ones (as I get them delivered here) and installing a full set of gauges from a Cherokee Limited. Next summer I'll propably pop the tires under the wife's 'soon-to-be' Jeep Patriot and throw some lower tires under this one (although not the kind you saw in the first pics), bring the body down some 8-10 inches and get it painted (gloss black with red scallops). I've got some pics (found here and elsewhere on the Internet) of Street Comanche and it's bodykit so I am thinking of doing something along those lines (although toning it down a notch or two keeping it 'classy'). As you might guess the 4x4 conversion wouldn't really be necessary with that look. I'll be using an ATV for offroading which fits on the back of this truck... The engine itself will receive a turbocharger with a big intercooler next summer and if that doesn't work out I do have a spare AMC 290cid with 360heads and I'm thinkin of getting that fuel injected using GM EFI parts. Swapping the engine/transmission combo is so easy with 2WD...
A-V Posted September 5, 2007 Author Posted September 5, 2007 Oh yes, and I am looking for a decent price front crome bumper and cromed doorhandles... ;)
DirtyComanche Posted September 5, 2007 Posted September 5, 2007 I like how those rims came out. I had a set that I was going to do that to, but they wound up going to the aluminum scrapper in the end (I didn't see the money, too much stuff around so I gave them away). If I get a nice MJ, I'll have to do that.
A-V Posted September 5, 2007 Author Posted September 5, 2007 I like how those rims came out. I had a set that I was going to do that to, but they wound up going to the aluminum scrapper in the end (I didn't see the money, too much stuff around so I gave them away). If I get a nice MJ, I'll have to do that. The wheels were done in a couple phases. At first they plastic-rubbleblasted (same as sandblasting but with small plastic particles so it doesn't eat up the metal at all) to clear all paint and oxidation. After this they were sanded down to clear any marks or chips in the wheels ending up with a smooth finish on the 'spokes' and a rough finish on other areas. After this an powdercoat of special alumnium primer paint was applied. After an oven treatment they were painted to 'Chrysler's Dark Graphite Grey' and oven treated again and finally clearcoated a few times. They are basicly as good as new and are just as durable. The whole progress ended up costing me about 100 USD so it was definately worth it.
A-V Posted September 17, 2007 Author Posted September 17, 2007 Updates! Managed to fix my problems with the truck's electrics. Biggest problem was that the flashers weren't working on the right side if you had lights on (but were working nicely without lights) and they seemed to jam every once in a while. Problem wasn't the flasher or anything else that was to be expected, but someone had jammed a one terminal bulb into a 2-terminal bulb holder in the rear lights (the middle one) and propably the same geezer had also routed a + wire for his hifi-stereo-system (with one mono speaker on the left side) from the flasher relay wire, meaning that it wasn't connecting 100% anymore due to the lack of radio at the moment. Incredible job, but he must be the same hero who after braking the oil pressure sending unit replaced it with chemical metal, a beer bottle cap, wood jabs and some airduct tape AND metal wire (the WHOLE SET! ...and the sending unit costing a total of 15 USD over here). Oh well, but the problem is now solved and I'm hopefully getting the car inspected for traffic today after lunch. Wife's Cherokee sold in 6 hours after leaving an ad on the web, so I gotta get this car running and fast, becouse the Patriot most likely isn't arriving this week and she's gotta drive something to work. She has already let me know that she isn't gonna be driving this truck to work once the Patriot arrives.. Oh well, more fun for me... :rotf: Anyone else had a similar comment from your better half? ;) btw, those clear corner lights were well worth the trouble 8) ps. center caps on the wheels are off, becouse the nuts were too long in the rear to hold the cap securely - fixing this issue today.
DirtyComanche Posted September 17, 2007 Posted September 17, 2007 Managed to fix my problems with the truck's electrics. Biggest problem was that the flashers weren't working on the right side if you had lights on (but were working nicely without lights) and they seemed to jam every once in a while. Problem wasn't the flasher or anything else that was to be expected, but someone had jammed a one terminal bulb into a 2-terminal bulb holder in the rear lights (the middle one) and propably the same geezer had also routed a + wire for his hifi-stereo-system (with one mono speaker on the left side) from the flasher relay wire, meaning that it wasn't connecting 100% anymore due to the lack of radio at the moment. Incredible job, but he must be the same hero who after braking the oil pressure sending unit replaced it with chemical metal, a beer bottle cap, wood jabs and some airduct tape AND metal wire (the WHOLE SET! ...and the sending unit costing a total of 15 USD over here). Oh well, but the problem is now solved and I'm hopefully getting the car inspected for traffic today after lunch.. I love previous owners that are awesome mechanics! And I thought I'd seem and done some hack things. The MJs looking great. Good luck with the inspection.
A-V Posted September 18, 2007 Author Posted September 18, 2007 where did you find that amc badge? 8) A fellow was selling them in AMC Euromeet Norway last month. He had just a few left and from what I gathered he'd purchased them from a vendor in Kenosha this summer. I really dig the badge and just had to get it for my AMC built Comanche :wrench: I'll get a closer pic of it for ya. It's a bit incorrect, due to the white part is missing from the amc emblem (it's black on this one), still it looks good.
A-V Posted September 18, 2007 Author Posted September 18, 2007 And updates as well. Inspection went well, even though got rejected due to 3 things wrong with the car. Rightside hand brake wasn't working enough (propably cable rusted stuck), rear licenseplace light was missing (hadn't thought of it at all) and chassisnumber (VIN) wasn't stamped into the metal (just the normal tags from factory, and finnish car bureau tends to be really nasty on chassis numbers being 'stamped' not bolted on or printed - supposibly making it 'unremoveable or some other such nonsense). Good news is that the underbody is rust free, engine emissions are excellent, all joints are ok and brakes work fine (except that parking brake...). These were really the things I was worried about. Already got the chassis number stamped (a set of metal chisels and a hammer - used with permission of the car inspection bureau..heheeh) and the rear licenseplate light installed. Hoping to fix the parking brake cable today and getting it re-inspected so I can get my license plates... You're propably getting an idea here how strict the inspection system is... :nuts:
1986Comanche Posted September 20, 2007 Posted September 20, 2007 Your Comanche is actually a 1986. They didn't make a 1985 Comanche. The first year of the Comanche is 1986. They did build some of them in 1985 for the 1986 model year.
A-V Posted September 24, 2007 Author Posted September 24, 2007 Your Comanche is actually a 1986. They didn't make a 1985 Comanche. The first year of the Comanche is 1986. They did build some of them in 1985 for the 1986 model year. I'm aware of this and I was hoping someone would point it out ;) My truck is one of those built in 1985 (I have final assembly date marked in the engine compartment with a white marker and all tags I've found are 1985, except for the VIN which is 1986. :D
A-V Posted September 25, 2007 Author Posted September 25, 2007 here's the pic of that badge, it attaches with 2 plastic screws from the back. cost was some 5USD

Recommended Posts
Create an account or sign in to comment
You need to be a member in order to leave a comment
Create an account
Sign up for a new account in our community. It's easy!
Register a new accountSign in
Already have an account? Sign in here.
Sign In Now