kryptronic Posted November 25, 2018 Posted November 25, 2018 This is the Black Aggie 2013 Jeep Wrangler Unlimited Rubicon (JKUR) build thread. The JK Wrangler was introduced in 2007 to replace the TJ model, making it the third generator of the Wrangler platform. Meet Black Aggie Vehicle: 2013 Jeep Wrangler Unlimited Rubicon (JKUR) VIN: 1C4BJWFG5DL667230 Engine: 3.6L Pentastar Transmission: NSG370 (Six Speed Manual) Transfer Case: NV241OR Front Axel: Dana 44 4.10 Gears Rear Axel: Dana 44 4.10 Gears Build Date: May 2013 Purchase Date: August 1, 2013 Purchase Date Mileage: 17 Chrysler Build Sheet *A7 Cloth Seats w/Adj. Head Restraints 0 Black AAJ Connectivity Group AHQ Max Tow Package AJPS Power Convenience Group APAS Monotone Paint BABS 160 Amp Alternator BC2S 600 Amp Maintenance Free Battery BNBS Electronic Stability Control BNGS Hill Start Assist BNMP Traction Control BNSP Electronic Roll Mitigation BNTS Trailer Sway Damping BPTP Hydraulic Assist Brake Booster BRWS 4-Wheel Disc Brakes CACS Low Back Bucket Seats CDBS Reclining Front Seats CDHP Driver Height Adjuster Seat CFNS Rear 60/40 Folding Seat CGXS RR Head Restraints Outboard Seating CG3S Advanced Multistage Front Air Bags CKES Front Seat Area Carpet CKFP Rear Seat/Wheelhouse/Cargo Carpet CKLS Cargo Compartment Floor Mat CKTS Cargo Tie Down Loops CLES Front & Rear Floor Mats CLMS Sport Bar w/Full Padding CSMP Front Seat Back Map Pockets CSQS Rear Passenger Assist Handles Kit CS2P Freedom Panel Storage Bag CUFS Full Length Floor Console CURS Rear Compartment Covered Storage CUYS Storage Tray CVCP Chrome/Leather Wrapped Shift Knob DBBC All Manual Transmissions DEH 6-Speed Manual NSG370 Transmission DHWS 4:1 Rock-Trac HD Part Time 4WD Sys DJSS Next Gen. Dana 44 HD Front Axle DMFP 4.10 Rear Axle Ratio DRZS Next Gen. Dana 44 HD Rear Axle DSES Tru-Lok Front & Rear Axles ERB 3.6L V6 24V VVT Engine GBBS Tinted Windshield Glass GCBS Front Door Tinted Glass GCDS Deep Tint Sunscreen Windows GCFS Full Metal Doors w/Roll-up Windows GFAP Rear Window Defroster GNUS Sliding Sun Visors w/Mirrors GNXS Auto Dim Mirror w/Reading Lamp GTBS Power Heated Mirrors GXMP Remote Keyless Entry GXXS Sentry Key Theft Deterrent System HAAS Air Conditioning HGAS Hood Insulation JA2S Premium Instrument Cluster w/Tach JCDS 100 MPH Primary Speedometer JFJS Temperature & Compass Gauge JHAS Var Intermittent Windshield Wipers JHBP Rear Window Wiper/Washer JJBS Dual Note Electric Horns JJJS 12V Auxiliary Power Outlet JKAS Glove Box JKVS 115V Auxiliary Power Outlet JLNP GPS Navigation JPBS Power Locks JPM Heated Front Seats JPYP Pwr Windows, Front 1-Touch Down LAXS Front Passenger Seat Belt Alert LAZP Vehicle Information Center LCLS Front Dome w/On/Off Switch Lamp LHES Rear Dome w/On/Off Switch Lamp LMAS Halogen Headlamps LMGS Automatic Headlamps LNJS Front Fog Lamps LPSS CHMSL Lamp LSAP Security Alarm MBAS Black Front Bumper MB5S Black Rear Bumper MEFS Rock Rails MFRS Black Front Frame Overlay MFTS Body Color Grille MGQS Rubicon Badge MGXS Wrangler Unlimited Badge MT2S Trail Rated Badge MUGS Accent Color Fender Flares MVCS Jeep Badge MX3 Black 3-Piece Hard Top MX9P Delete Sunrider Soft Top NAS 50 State Emissions NF5S 22.5 Gallon Fuel Tank NHAP Engine Oil Cooler NHMS Speed Control PX8 Black Clear Coat QX8S Black Clear Coat RC9S Alpine 9-Spkr w/All WeatherSubwoofer RDDS Fixed Long Mast Antenna RDZS Steering Wheel Mounted Audio Ctrls RFHP 6.5" Touchscreen Display RHB Radio 430 NAV RSCS SIRIUS Satellite Radio RSMP SiriusXM Travel Link RSPP Uconnect Voice Command w/Bluetooth RSUP Audio Jack Input for Mobile Devices RSXP Remote USB Port SBAS Power Steering SCVS Leather Wrapped Steering Wheel SDDS Performance Suspension SHCS Rear Stabilizer Bar SHGS Electronic Front Sway Bar Disconnect SUAS Tilt Steering Column TBBS Full Size Spare Tire TBRS Outside Tire Carrier TT7S LT255/75R17C BSW Off Road Tires TZGP BF Goodrich Brand Tires WFAS 17X7.5 Polished Mineral Gray Whl WKBP Matching Spare Wheel WLZC All Aluminum Wheels XCTS Coat Hooks XEES Fuel Tank Skid Plate Shield XEFS Transfer Case Skid Plate Shield XEWS 2 Front & 1 Rear Tow Hooks XFNP Class II Receiver Hitch XFUP Trailer Tow w/4-Pin Connector Wiring XGMP Tire Pressure Monitoring Display XJFS Tethered Fuel Filler Cap XJGS Non Locking Fuel Filler Cap XKDS 'Why Buy' Label XLNS English/USA Language XPFS Protective Coating and Remover XRFP 40GB Hard Drive w/28GB Available XSCS Bright Interior Accents X8ZS Seat Parts Module X81S Instrument Panel Parts Module X83S Front End Parts Module X86S Complete Chassis Parts Module X88S Tire & Wheel Parts Module X9AP For More Info, Call 888-539-7474 X9BP 1-Yr. SiriusXM Radio Service X9FP 1-Yr. SiriusXM Travel Link Service X92S Complete Body in White Parts Module X94S Complete Painted Body Module YAAS Build To U.S. Mkt. Specifications History In 2008, I purchased a 2008 Wrangler Unlimited Sahara (JKUS) which I always intended on building out once it was paid off. Then in 2012, a moron too busy texting on a mobile phone to pay attention to the road slammed into the back of it. Damage was to the rear of the Sahara - not too bad. I was making a left off of a main road onto my street and the aforementioned moron slammed her Mercedes into it going around 35 MPH. Her car was totaled, and she was whisked away to the local hospital in an ambulance. Later we found she was OK, and sustained no life threatening injuries. My neck hurt for a couple of days, and my son bruised his hand on the dash. This is why we drive Jeeps: The Jeep was sent away to the local body shop for about a month and came back whole again. After the accident I paid off the Sahara within a few months, then I started looking into what it would take to get some bigger shoes on it and start building it out. In 2011, Jeep updated the interior of the JK platform. In 2012 they upgraded the drivetrain by ditching the anemic 3.8L for the 3.6L Pentastar. After considering options like re-gearing and trussing axles, getting proper lockers, etc., I decided to put my build plans on hold, and get a new Rubicon. The 2012+ models were better suited for the plans I had. I could dump a bunch of money into the Sahara, or buy a Rubicon, pay that off, then build it. So that's what I did. It came with a hardtop, but one of the first pics I have of it from 2013 was prior to a beach day: Within the first few weeks of purchasing Black Aggie, I made a few minor mods. I added a low-profile offroad antenna. I also swapped my Mopar rubber floor mats from the Sahara over, and added a Yakima roof rack to the hard top to carry surfboards (pads were Dakine). It killed me to drill into the hardtop of a vehicle with less than 100 miles on it, but I did it and it turned out great. To this day there are no issues with the rack or installation. And it will carry a surfboard and 200 LBS of other stuff going down Interstate 95 at 90 MPH with no issue or excess noise.
kryptronic Posted November 25, 2018 Author Posted November 25, 2018 Why Black Aggie? I was going to be building a scary black Jeep, and Black Aggie provided me with plenty to fear as a kid. Black Aggie is the name of the protagonist in scary ghost story I heard as a kid during the 70's growing up in the Baltimore, MD area. The story, as it was relayed to me, could have been the plot premise for the 1992 movie Candyman. Say Black Aggie's name in front of a mirror, and she'll come and get you. I remember staying awake at night and having nightmares about Black Aggie for weeks on end. What's the Real Story? Is there anything quite as eerie as cemetery statuary? Always solemn and often beautiful, it consistently gives off an uncomfortable "alive and watching" vibe. I mean, who doesn't love the feeling of being among the living dead? So it is no shock that the locals let their imaginations run wild at the sight of the grave statue know as Black Aggie. The bronze sculpture, which sat in Pikesville, MD's Druid Ridge Cemetery for over 40 years, is a haunting depiction of a woman with a huge black hood that obscures most of her stoic face. To call her scary would be kind. The statue was placed in Druid Ridge in 1925 at the grave site of Felix Angus, a decorated Union Army general and publisher of the Baltimore American newspaper who died at the age of 86. While planning the Angus family grave site, he purchased the statue in 1905 from a sculptor named Eduard Pauch. Tales of horror that started as gossipy whispers turned to parlor room chatter and then to local newspaper stories and the legend of Black Aggie was born. So what were those stories? Well, run these visuals: her eyes glowing red at the stroke of midnight, the dead rising from their graves to gather round her, her cold metal arms coming to life and clutching a young boy who is frightened to death. As time went on, Aggie's reputation grew and her site became a popular spot for trespassing teens. It was rumored that a local fraternity used her for hazing. Poor pledges would have to spend the night in her arms! My father says he spent the night in Aggie's arms one night around 1966. With the young visitors, more modern stories began to circulate. In the end, the raucous teens and their vandalism proved to be too much for good old Black Aggie. In 1967, at the cemetery's urging, Angus' descendants donated the statue to the Smithsonian, but the museum relegated the statue to storage. In 1998, the General Services Administration placed her in a sunny courtyard outside of the federal courthouse in Washington. There she sits, in a pretty landscaped patch. She almost looks peaceful... until night falls, of course. Source: The Baltimore Fishbowl October 28, 2011 (Edited)
kryptronic Posted November 25, 2018 Author Posted November 25, 2018 Five Years and a Whole Lotta Nothing Going On I have a rule: I will not put aftermarket parts or otherwise modify or enhance a vehicle which I don't own outright. Following this rule delayed this build by nearly 10 years. I started with a 2008 Sahara, paid that off in 2013 and then traded it in on the 2013 Rubicon. In 2013 I made the decision to hold off any build plans until 2018 and do it with the right vehicle. So other than a new antenna, floormats and a roof rack, nothing much happened to the Rubicon from 2013-2018. Over the years I developed a huge disdain for mud tires. The BFG Mud Terrains that came with the Rubicon new were pretty much worn out and cupped badly by around 25,000 miles. I Replaced four of them with a similar size BFG All Terrain KO2s at around 30,000 miles. I got them off the local Craigslist - they were barely used, cheap and would work nicely until replaced with something bigger. Here are the last nearly stock photos of the Jeep taken in late 2017. In December of 2017, I paid it off, and started buying parts for the build, with around 40,000 miles on the odometer.
kryptronic Posted November 25, 2018 Author Posted November 25, 2018 Armor: LOD Armor Lite Front Bumper Over the five years I owned the Rubicon, it became quite clear to me that if I was going to let anyone else drive it, it needed armor. You can see in a few of the earlier pics a few dings in the plastic factory bumpers. Both passenger side - one up front, one in the rear. Never happened with me behind the wheel. So I wanted steel bumpers. I started out by removing the factory plastic bumper and tow hooks. The I used a vacuum pump relocation kit from LOD to relocate the vacuum pump further behind the bumper. This was completely unnecessary as the bumper would have fit fine without relocating the vacuum pump. If I had chosen a bumper where a winch installed between the frame rails, it would have been necessary. The recipe included a new LOD Armor Lite front bumper (mid-width size), and the matching LOD bull bar and skid plate. The bumper allowed for the reuse of the factory fog lights. Here it is installed, still needing d-rings as recovery points.
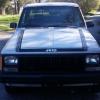
kryptronic Posted November 25, 2018 Author Posted November 25, 2018 Mopar Rubicon 10A Power Dome Hood When I bought Black Aggie in 2013, Jeep was celebrating it's 10th anniversary for the Rubicon model, which debuted with the TJ in 2003. The 10th anniversary Rubicon (10A package) featured steel bumpers, a special power dome hood, and other goodies like Anvil paint and red accents. I fell in love with the hood the first time I saw one, so I had to get one. I had my cousin, who owns a body shop in Catonsville, MD, paint it in PX8 black to match the rest of the Jeep. Install was simple and took only about 30 minutes. The new hood eliminated hood flutter at highway speeds, which was a huge plus.
kryptronic Posted November 25, 2018 Author Posted November 25, 2018 Armor: LOD Rear Bumper and ACE Rock Sliders Next, I added sliders, and armored the rear end. I chose to go with ACE Engineering rock sliders. These sliders bolt nicely up against the frame body mounts, and can be used as high lift jack points. They also bolt under stock Rubi rails, which I already had. I also got original Mopar Rubicon stickers to put on the new hood, and a pair of Rugged Ridge cowl covers to protect the cowl from doors swinging open too far. I selected a rear bumper to match the front. Both bumpers are from LOD's armor lite series, which uses thinner steel in some places to cut down on weight, thus improving gas mileage (or not hurting it, at least). Where possible I went with the lightest components possible. Here we are before pulling off the stock bumper, surrounded by boxes of goodies: And after assembly. The kit included the rear bumper, a door linked tire carrier which would be good for up to a 37" spare, and a third brake light relocation kit. I could hang off the tire carrier without any issues. Very stout setup.
kryptronic Posted November 25, 2018 Author Posted November 25, 2018 Armor: Poison Spyder Crusher Flares Next up was a new set of flares. I did my research and after looking at tons of options, I chose to go with Poison Spyder Crusher flares. I went with standard width, and chose aluminum instead of steel (for weight savings). I also had my cousin in Baltimore paint the flares PX8 black to match everything else. The installation of these flares was the most labor intensive installation of bolt on parts I have ever done. If I had to do it again, I probably wouldn't. But they turned out nice. Here are a few pics with the stock plastic flares removed. And here they are installed. These things have supports that tie the flares into the frame. You can literally lay the Jeep on it's side without body damage - and can use them as steps. They will support my weight, and probably a lot more. Here we're looking at tire coverage with stock wheels and slightly larger than stock tires. We're finally getting there...
kryptronic Posted November 25, 2018 Author Posted November 25, 2018 Old Man Emu Lift and 35" BFGs - Finally! What's better than an Old Man Emu suspension system? Nothing. I know a few guys on here that feel the same way. I went with the Old Man Emu 2.5" lift for Black Aggie. After speaking with the helpful people at ARB, I decided to go with the light duty version of their lift. According to ARB, because I went with aluminum flares and the LOD armor lite bumpers, I would not be carrying enough weight to justify the heavy duty version. Installation was as simple as any coil sprung suspension install is. Required installing new shocks, springs, a track bar relocation bracket, new stainless steel extended brake lines, and new longer rear sway bar links. The stock rear sway bar links were moved to the front (they're longer), and I used an AEV Procal module to set the speedometer correctly. At the same time as the lift was installed, I put on new tires and wheels. For the tires, I chose 35x12.5x17 BFG All Terrain KO2s (my favorite). For the wheels, I went with Quadratec Hard Rock wheels in black with a machined face. They looks almost identical to the stock wheels I took off, except they're black instead of gunmetal, and were built to the same specifications that AEV uses: 17x8.5" with a 5.2" offset. They allow 12.5" tires to fit nicely under stock flares. Here we are, almost done. D-rings made it onto the bumpers at some point too: Here are a few pics I took showing tire coverage. Here in Pennsylvania we have annual inspections where they check both safety and emissions. Part of the safety inspection is ensuring the tires are under the flares. When I spoke to the guys at Quadratec (which is also in PA), the guy in charge of developing the wheels said they specifically chose the AEV specs to keep larger tires under the flares, and legal in PA.
kryptronic Posted November 25, 2018 Author Posted November 25, 2018 Ace Engineering Fender Liners The last thing I needed to do to complete the build was mostly cosmetic. I installed fender liners from Ace Engineering in the front and rear fender wells. The liners are intended to keep the engine compartment clean, and also cut down on wind noise. Here are a few install pics. The front liners needed to be modified to fit with the Poision Spyder Crusher flares. Here they are installed:
kryptronic Posted November 25, 2018 Author Posted November 25, 2018 All Finished Up (For Now) This build ran from January through May of 2018. I took a few breaks here and there, and had to wait two months for Quadratec to release the Hard Rock wheels I bought, but it went quickly. It was a fun, quick build that I did with bolt on parts in my spare time. Nothing special - nobody really cares too much about JKs. But for me, it's a build I'm glad to have completed. It was ten years in the making. Here are a few finished pics: I don't have any further build plans for this Jeep. Black Aggie will stay like this for years to come. She's my daily driver, and with 43,000 miles on the odometer at this point, she's got plenty of life left in her. If anyone has any questions about any of the work I did, or would like any more info, please post a reply. I'll update this thread if and when anything more happens to Black Aggie. Thanks for reading.
HOrnbrod Posted November 25, 2018 Posted November 25, 2018 Man, those flares and wheel wells look nice.
Pete M Posted November 25, 2018 Posted November 25, 2018 lots of great decisions in there! love it am I the only one that read "scary black Jeep" and spent the next few minutes of reading saying "please no angry eyes, please no angry eyes..."
JMO413 Posted November 25, 2018 Posted November 25, 2018 55 minutes ago, Pete M said: lots of great decisions in there! love it am I the only one that read "scary black Jeep" and spent the next few minutes of reading saying "please no angry eyes, please no angry eyes..." You are not the only one happy to not see angry eyes!
kryptronic Posted November 25, 2018 Author Posted November 25, 2018 1 hour ago, HOrnbrod said: Man, those flares and wheel wells look nice. Thanks, Hornbrod. 50 minutes ago, Pete M said: am I the only one that read "scary black Jeep" and spent the next few minutes of reading saying "please no angry eyes, please no angry eyes..." 47 minutes ago, JMO413 said: You are not the only one happy to now see angry eyes! Oh hell no. I almost put in the initial post that there would be no unibrow or angry eyes, so move along if that's what you're into. But I didn't even feel like mentioning it. Scary as in: If you're in an econobox you will definitely think twice before cutting me off. There are some things that I could never do, and that's one of them. It'd be a slap in the face to the designers at Jeep.
MeanLemons Posted December 14, 2018 Posted December 14, 2018 Very nice. I have a particular preference for black jeeps and this one hit the spot just perfectly.
kryptronic Posted February 9, 2021 Author Posted February 9, 2021 2020 Update This is just a quick update on Black Aggie. She's been running great and just turned 60,000 miles on the odometer. I had two issues this past year with her. She started throwing ODBII code P0128, so I had to replace the thermostat. It was stuck open. The other issue was with the right rear axle seal on the D44 - it was leaking. Both items were fixed, and everything else is great with the truck. She just passed state inspection and is good to go through January 2022. I had a soft top on it for a brief minute during the summer. My little dog thinks he's going for a ride.

Recommended Posts
Create an account or sign in to comment
You need to be a member in order to leave a comment
Create an account
Sign up for a new account in our community. It's easy!
Register a new accountSign in
Already have an account? Sign in here.
Sign In Now