

UNL1MTD
-
Posts
490 -
Joined
-
Last visited
Content Type
Profiles
Forums
Gallery
Everything posted by UNL1MTD
-
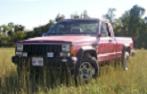
i know its just an illusion but if you look quickly with the new paint job, it really looks like the 'DIY4X' cut out reads 'PINK'. Sorry just had to comment, its like the third time I've seen the pic and the third time I had to correct myself.
-
School me on 2wd front brakes
UNL1MTD replied to UNL1MTD's topic in MJ Tech: Modification and Repairs
thanks for the advice -
I'm about ready to replace all the components (sans calipers) that make up my front brakes. Being that I have a 2wd axle, its new to me as I've only ever serviced a 4wd front axle for new brakes. At the part store, for each side I got two bearings, a seal, rotors, pads, and wheel bearing grease. I've read over the Haynes manual, but the whole process is still cloudy to me. I'm sure it will make more sense once its all apart, but I figured that asking for pointers before I got started couldn't hurt. First off, am I missing any parts? The manual isn't specific on what happens to the spindle when the rotor is removed. Will it want to fall out or is it pressed int the knuckle some how? Will the caliper need to be removed from the knuckle to get the rotor off or just opened as shown to insert new pads? I'll be able to 'load' the rotors with bearings and seal then slide it onto the spindle correct? Is the retaining nut for the spindle really only torqued to 15 ft/lbs? That seems ridiculously low because the 4wd version is at 150 ft/lbs or more. I'm working on an '87, not sure that that matters (more so its a 2wd). If I can think of more questions, I'll just tag them on. -Sean
-
This happened to me (near exactly) when I bought my first MJ. Luckily the guy I bought it from whom accidently signed the title was honest enough to retitle the vehicle in his name (thereby getting him on the title) and then giving me the new title. This mistake costs him about 60 bucks in DMV fees. Short of it, guy had to retitle it for a fee in order to get a new title to sell it to me legally.
-
complete bummer, no dead mice ... going to continue to put out traps at night as I did find some chewed up acorns on the fan pulley bracket off the block ... damn mice are outsmarting me
-
Yep, peanut butter works great. The donor XJ became host to some varments. Put the trap in the battery tray. First night caught one, then three more over a weeks time. Got those heavy duty plastic spring traps from lowes. They worked almost too good as the underside of the hood looked like a horror film setting with blood splatters. lol I hope the spring traps catch some, would laugh my @$$ off if it looked like a crime scene. I wish I put one in the engine bay. Definitely have to try that when I get back. Still have no idea, get back to the truck Saturday night. Keeping my fingers crossed for some dead varmats.
-
well, I ended up laying 4 spring traps and some posion :D put one on the bench since I saw they were chewing it up, 2 on the floors and 1 in the bed. put out some posion on each side too. I'm hoping for atleast 2 dead mice by the time I get back this weekend. I didn't even think of closing the vents, I'm 99% that they are because I had the window down. Lets hope that they are.
-
Been noticing some mice outside in the driveway the past couple weeks. Today I was picking up inside the MJ and noticed a paper towel was torn up and there was mice $#!& all around. I've been infiltrated! I'm flabbergasted a bit because I have been driving the MJ atleast twice a week for the past month. This appears to be recent, so hopefully no damage has been done. The parts MJ I had was lived in by some mice and they abosultely ran a muck in there from chewing up the plastic trim to eating wires. Anways, I gotta go out of town for three days and plan on laying some mouse traps to see if I can't nip this in the butt now. Any places inside/outside you guys would recommend as good spots to leave a couple traps? I've got six to place. Coiencidently I've already killed one by running it over 3 days ago. I'm not letting these little $#!&ters take away my truck!
-
I pretty sure if some one came up to me with 2.5k in cash they could have my truck without me fussing at all. Its pretty much what I got into it. I would definitely turn right around and buy another though. Another one thats 4wd and an auto.
-
While we're on the subject of Oil Filters...
UNL1MTD replied to Carl'sMJ's topic in MJ Tech: Modification and Repairs
x2 on both the TJ and MJ -
its 3.15 for regular here in Dahlgren, VA.
-
Once again It Don't want to start !
UNL1MTD replied to NewToJeeps's topic in MJ Tech: Modification and Repairs
congrats, I wish I got paid everytime I made a repair. Even if its just 1 cent. -
Once again It Don't want to start !
UNL1MTD replied to NewToJeeps's topic in MJ Tech: Modification and Repairs
There should be a cable from your battery to the post on the solenoid, so you shouldn't need that jumper wire you are using. Or if you have that wire already, which it sounds like, and you need this wire. [if you can take a picture of the whole jumper deal and post that would clear up the confusion] Then the existing wire is making a poor contact at either the battery or solenoid. In regards to the long start, these trucks normally have a long start. On average mine is 5-6 seconds. It has something to do with the cps needing the engine to crank before it gets a reading, I'm not too sure. But, 15 sec does seem excessive. -
Once again It Don't want to start !
UNL1MTD replied to NewToJeeps's topic in MJ Tech: Modification and Repairs
Based on this I would have to assume you have a bad conection from your battery to your starter solenoid. Take it off the post, use a stiff brush and make sure the connection is clean. But that only is a guess to it not clicking or anything. You do seem to have an extra long start at 15 secs. I'm not sure I follow when you say 'jumper across terminals.' Are you bypassing something? -
Once again It Don't want to start !
UNL1MTD replied to NewToJeeps's topic in MJ Tech: Modification and Repairs
what is it doing not doing? Like do you hear the solenoid click? Is the starter cranking? Do you have a excessively long crank (greater than 8 sec)? Does she catch and die? I know when i first got mine, I had to use cables to jump the motor, ended up being corrosion on the cables/terminals. I would also recommend making sure you have a clean conencting on the starting solenoid post. When I swapped battery cables I had this on the post but just not right and it wouldn't start. -
I guess you could try re-inserting the fuse again. That sucks, I'm trying to figure out the illumination of my clock that I just put it. Currently its on in the background to keep time. I turn the key it lights up. I turn on the lights, it turns off. :nuts: Maybe try disconnecting your neg battery cable for a couple minutes? Not sure what that would do, besides give you something to try.
-
just to be overly clear - you can't replace your diff internals with those and expect it to work. They are from two different diffs and you can't mismatch your pinion with his ring gear or your bearing caps for his, etc. You will want to buy master install kits for both axles and pay a professional to swap your open carriers for those limited slip carriers. Also as Eagle metioned you will need to rebuild the clutch packs in trac-lock. Total cost for paying a pro to set up your diffs will be close to 900 with install kits if not more. The reason you pay a pro is because rarely do people doing their first time get it right and the equipment needed to do this job is more than the cost to pay someone. Limited slips will definitely help with wheeling, its just that when most people chuck down the coin to pay a pro to install they re-gear (helps with bigger tires) and install full carrier lockers (better than limited slips for heavy offroad use). Plus putting any money into a D35 (except fluid and brakes) is a waste of money, period.
-
I had luck by snipping the line at the nut and using a six sided socket to pop it lose. Open ended wrenches really aren't the right tool for this. So either flared wrenchs like CW mentioned or if you can deal with replacing the line, snip and six sided socket.
-
Project Tetanus - H4s & Herculiner
UNL1MTD replied to UNL1MTD's topic in Member Projects: Your Comanches
Interesting development -:wall: Clock works and is bright, but when I turn on my headlights the clock turns off completely. As soon as I turn the headlights back on the clock comes back to life at 1:00. :???: I'm guessing I'm going to have to re-wire the plug again, big fun. Maybe I messed up a ground or need to run off the headlights for the switched 12v. Any guesses? :hmm: I definitely wish I tested this prior to buttoning it all up, ohwell. edit- well I finally got around to fixing this. I ringed out the truck's clock plug incorrectly. I fixed the pinout above so that is accurate. All is good now. -
Project Tetanus - H4s & Herculiner
UNL1MTD replied to UNL1MTD's topic in Member Projects: Your Comanches
Got the factory clock install yesterday. The install wasn't just plug and play, but not exactly hard either. I did just change the bulb, then try and plug it in, and was shocked that it actually did come alive, but the bulb never lit up and I couldn't adjust the time. I knew from online documentation that the clock I had was from an '89 (http://gojeep.willyshotrod.com/HowtoDashClock.htm). That being said it was wired A - Blue/Black - ground C - Red/Gray - constant 12v D - Black - ground H - Blue/white - switched 12v There was no wiring diagram available for my year truck (87). So I had to ring out my plug. A - Black - ground B - Orange/Black - ground C - Red - constant 12v F - Orange/Yellow - switched 12v (source - ignition) G - Blue - switch 12v (source - headlights) Instead of re-wiring the truck, I opted to change 3 pins around on the clock since it would be 1 billion times easier to work on. I opted to used switch power from the ignition, which means the clock will be bright when the truck is on. I changed it to. A - Black - ground C - Red/Gray - constant 12v B - Blue/Black - ground F - Blue/white - switched 12v This matched colors and function on the other side. Plugged it in, screwed it down and it was good to go. I also added the extra ground for my battery today. This gives the battery a quick ground to the chassis, instead of having to travel through the black and to the firewall. -
I got stock tj rubicon front shocks for free and bought the cheapest monroes from advanced (20 each). I'm very happy with the ride, happier with the price. Assuming the sensatracs are better, then I can only imagine it being an even better ride.
-
Thanks for the tips, I'm going to have to call the dealer and get the squared off o-ring as I don't have that one. I'm assuming its a similar design to the 4.0, what I'll be working on.
-
curious about your distributor leak. Was it actually leaking inside to the cap? Mine is doing that and I'm hoping all I need to do is replace the seal (oring from the dealer) where is mates to the engine. Was this the case for yours or did you determine the leak was from something else? Thanks, Sean
-
Project Tetanus - H4s & Herculiner
UNL1MTD replied to UNL1MTD's topic in Member Projects: Your Comanches
went out and checked, the 'crack' wipped right off, so I guess it was just some built up dirt. Good eye though. -
I got the 3 main calbes (B- to Engine Block, B+ to Starter, B+ to Solenoid), the Engine to Firewall ground, and the B- to Fenderwell ground. I haven't installed the other grounds yet. Jon said that since I haven't added a super alternator that this was a good setup for me. Also ordered a set of battery clamps from him.