

Dechion
-
Posts
155 -
Joined
-
Last visited
Content Type
Profiles
Forums
Gallery
Everything posted by Dechion
-
She sounds pretty good, now just a few more odds and ends and I can actually take it out for a spin.
-
Rest assured next time I hit up the junk yard I'll be picking one up to have on the shelf.
-
It... Is.... Alive! Thanks for the help folks. The Distributor did it.
-
Well, I am banking on the cam position sensor. After looking at what a new plate would cost, and at what it owuld cost me to go to the JY and pick one up, I ended up just picking up a rebuilt distributor complete with sensor. With a coupon I had sitting at the house it was only like $11 more than just the sensor would have been. I'll update later after I get it installed.
-
Not that I doubt you, but that part in the distributor would stop the spark at the coil from happening? I am starting to wonder if I have more than one problem.
-
Would that be the plastic plate located under the rotor button?
-
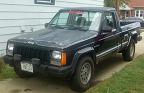
Yep, you read it right. I know it's an MJ board, but there's folks here that know Jeeps and I needs me some halp! I am working on the "wagon queen family truckster" AKA the '94 XJ I picked up to tote the kids from point a to b (with possible side trips through a mud hole, it's a 4WD as well). Here's the deal, A week or so ago I pulled an XJ that the rancher was going to scrap out of the snowbank it was living in. It was along side the barn for several months, anyhow I had a flat bed dump it in my (regrettabley unheated) garadge. Accordign to the PO, (who I don't think would lie to me as he is a friend of the family), it ran last Oct when it was parked there. The original problem was a busted hinge weld on the drivers door, so his daughter parked it and started driving her Wangler. Well, I managed to get the door repaired (pix in the DIY section) so thats no longer an issue. Now my problem is that it has no spark. So far I have ruled out plugs, cap, and rotor. (they are getting replaced anyhow, but no spark at the coil) I also put a meter across the CPS and Ohm'ed it out as good. On the K ohms setting it reads open from pin b to c in the connector at least. I am thinking looking up a procedure to bench test the coil, though it does not appear to be getting any power. I really don't think thats the problem, but one never knows. I checked every fuse I could find with no luck as well. Any advice on where to go from here? Edit: I should probably mention that it's a '94 4WD XJ with a 5 speed manual and a 4.0L motor.
-
If I was into FPS I would be all over it, but I burned out hard on Team Fortress some years back. Now if you ever decide to wander into MMO land let me know.
-
I think they might fit in the Priority Mail Medium Flat Rate Box (FRB2), which has dimensions of 13-5/8" x 11-7/8" x 3-3/8". I don't know if those are inside dimensions or overall dimensions, but if they're inside, then yes, it'll fit: I've got those boxes at home - I'll see if I can squeeze it in there... Those boxes are $10.95 (at the post office) or $10.50 (online) for shipping. It'll probably be worth it for 1/4" thick plates since they'll have some weight... Working at the post office has a few advantages, like not having to wonder. I used the cardboard template I happened to have at work with me of the full side plate (still planning on the adapter brackets at some point) and test fitted it in the medium flat rate box after I got off work. Looks like it will nest in there quite nicely, at least my cardstock one did. Got pix of it, but can't post from here.
-
Ok, last night at Advance was certainly different. I go in looking for parts for my "i'm trying to bring back from the dead" project XJ. In this case a plugs, cap, and rotor, since they kinda sat out in the weather not running for like 7 months through the winter. :ack: Anyhow, when I told him what parts I was looking at and what vehicle they were he asked if I had any spark at all. When I told him no he came right out with the high likelyhood that it was my CPS, told me how much they cost, and told me how to ohm it out in the Jeep to see if it was bad. He also knew offhand that there were two different distributors used in '94 and that the caps are not interchageable, so he reccomended I take pix of the wires, note locations, and then bring in the cap to match it up. :thumbsup: All this without even walking over to his computer. :bowdown: I thanked him and headed home to do me some testing. :wrench: (In case anyone is curious CPS ohms out good, cap and rotor look fine but will be replaced anyhow, still no spark) :fs1:
-
This might be an interesting thread, or might die a lonely death as people let it slide into obscurity. We shall see. Either way, I fgured I would post about one of those moments that made me just tilt my head and look funny at the guy at the parts counter. Hopefully I'm not the only one with a story or two. Once upon a time I walk into the local parts store with a battery and a starter, needing both tested. Starter spins up fine, thats a good thing. Then we get to the battery. The guy puts it on his tester, which spits out a little piece of paper telling him it's good, but needs charged. So far so good. Thats when I explain to the guy that the battery has been sitting on a charger, not even sitting in a car, for a full 24 hours before the test. Parts guy: Well then, it's your alternator. Lets get you a new one. Me: You realize it was on a charger for an entire day right? Parts guy: Yep. Must have a bad alternator, it's not charging. Me: It's not the alternator, it wasn't even connected to the alternator while I was charging it. Parts guy: Well then, thats your problem. It had a bad connection. You should reconnect it and try again. Me: You're kidding me right? *looking around for the hidden camera* You do understand I had it on a battery charger right? Not in the car? Parts guy: *holds up the slip of paper from his computer* This says you have a bad alternator. Me: Never mind.
-
If I am understanding the situation right I had a similar issue when the winter started to set in here. All I did was increase my idle slightly and the problem went away. Now granted, I probably just compensated for whatever is actually wrong, but I just want to get through the winter. For now I am only working on things that I can't keep limping along until spring. (Like the XJ thats in my garage refusing to start for instance)
-
Thats my plan, both on the passenger side door of the Cherokee and both doors on my MJ. The kit for reinforcing the hinge so it doesn't fail at the weld only requires the plate on inboard side of the hinge to be riveted, so you don't even have to take the door off. Drill two holes, tighten five screws, put in two pop rivets. Sounds like about a half hours work to me.
-
Engine block ground maybe? sounds bizzare. I would just check every ground I could find for starters.
-
It's something I have thought about as well. Obviously it would depend on the price and such, but there woudl certainly be interest. Hell, you've seen my rear bumper. It's kind of a mess.
-
So far I have used the drawings to make a heavy cardstock replica of the side plate. Once I am able to get my hands on one of the Reese hitches that is not actually installed on something I will be making a template for the adaptor plates. Once I get that done I will be posting the scan of it as a high rez picture on my blog, along with a carpenters square in the picture next to it so folks can be sure of the scale.
-
One thing that worked well for me when my old laptop died was getting a seperate hard drive enclosure. I think it cost me like $15 at Best Buy. Pulled the hard drive, dropped it in, and it became a US hard drive I could access from other computers. Now I just use it like a 250Gig flash drive :thumbsup: On the riding front... All my bikes have motors now :jump:
-
Ok, so how many of you out there have snapped off a door hinge? Always seems to be the top hinge on the drivers door, right? Well guess what, it happened to me. One thing I ill own up to up front, though the repair is exactly the same on an MJ, the pix I took are from when I did the repair on my daughters Cherokee. Same door, same hinge, same repair kit, but the one on my MJ is still holding up. Also, bear with me. This is the first project I have tried to document, and the pix are too close up, and too large. I'll take better next time. Anyhow, moving on... It all started with something that looked remarkably like this: Actually, it still had a fender and such on it when I started this whole process. For what it's worth, you can actually do the entire repair by just removing the door. Her lower hinge bolts were not going anywhere however, and rather than risk snapping them off in the door I opted to go at it from the fender side instead. It worked, but was more work than just popping off the door if you can get it off. So, seeing what I had to work with I did a bit of research. I found a Chrysler Tech bulliten that listed a repair kit for the problem. Actually two different ones. (Tech Bulletin 23-017-02 dated 5/20/02) The first (Mopar part # 05083060AA) is for a weld that is starting to give way, but still holding. I used the second one, it is designed for repairing hinges where 75% or more of the weld has failed. (Mopar part # 05083061AA) If I could have just taken the door off instead of half the front of the Jeep I guesstimate the repair would have taken about 2-3 hours, including readjusting the door and such. So I go to the dealership and drop $35 on a part and wait for it to come in. While I am doing that I pull off the old hinge and clean it up a bit. A few days later her comes my kit. Two plates, four rivets, and five screws. Damn, $35 sure does not go as far as it used to. Now here is the part where I kinda goofed up. I didn't take nearly as many pix as I should have. It pretty self explanitory how it all goes together though. First I threw a few little crappy tack welds onto the hinge, just to hold it in place while the bracket gets installed. Yes they are ugly and would likely fail if a mouse sneezed on them, but they served thier purpose. It's hard to do better when you can't find your welding helmet. Moving on... Put the two halves of the bracket on finger tight in the only place it will fit. Starting with the top hole in the fender side of the bracket, drill it out with a 17/64 drill bit. Then using a heavy duty riveter (I had to rent one locally, cost like $5 for 4 hours) pop in the top rivet.It will pull in the bracket a bit. Before drilling out the bottom rivet hole you are going to want to pull out the door closed switch, otherwise you will drill right into it. You don't have to take it all the way out if you are careful, just loosen it up and shift the wires to the side. When you are done with those two rivets your brace should look like this. Now, go ahead and put your door switch back in, otherwise it will just be in the way. Tighten up the screws that hold the two halves of the brace together at this point. Since one half is already hard mounted, we want to make sure the other side is ecxactly where it needs to be before we start drilling more holes. Once that is done, go ahead and drill the last two holes for the rivets that go on the door side of the bracket. When those are in place it should look like this: If you had it off, or just disconnected the top hinge like I did, reattach the door. Make sure you use the new flat headed screws for the door as well, they give the clearance for everything to close. Other than readjusting the door hinge to close right you are done. A pretty simple repair really.
-
Learned how to fix a torn off door hinge with the mopar kit.
-
Not sure where you are located, but there are three good tail lights at the Wadsworth Ill Pick-N-Pull for $20-$25 each. At least they were there Wednsday when I made the trip down. No idea when I might be headed back, but if you are close enough they are sitting there waiting for you.
-
Rubicon Rims and Tires?
Dechion replied to CubsCarAudio's topic in MJ Tech: Modification and Repairs
I know you are looking for the rims s well, but try just finding tires for now. (it's only a couple months as you said) When I got mine it already had a set of 235-75-15's on it, and I am plenty happy with those. -
Nice find.
-
4.0 HO / 2WD / manual trans / long bed / blue / bucket seats w/ center console Currently sitting at the Pick-N-Pull in wadsworth, Ill. Has a good drop in bedliner, one good tail light, no cargo light, interior is pretty well shot, seats missing, center console wrecked.
-
Eliminator. 4.0 HO / 4WD / manual trans / short bed / black / bench seat Currently sitting at the Pick-N-Pull in wadsworth, Ill. Has a good drop in bedliner, a couple good tail lights, no cargo light, interior has been pillaged pretty well.
-
I'd probably have you covered. I believe that I have the lock cylinders for the doors, ignition, and glove box. If you do I'll take you up on that next time I see you =)