Gojira94
-
Posts
677 -
Joined
-
Last visited
Content Type
Profiles
Forums
Gallery
Everything posted by Gojira94
-

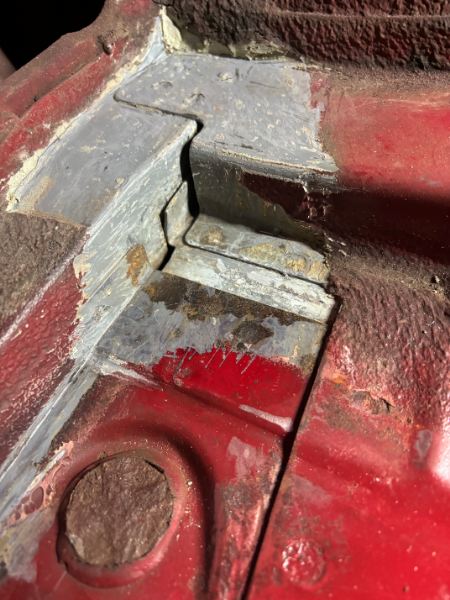
Here we go again steering brace
Gojira94 replied to Aussiemj's topic in MJ Tech: Modification and Repairs
-
Here we go again steering brace
Gojira94 replied to Aussiemj's topic in MJ Tech: Modification and Repairs
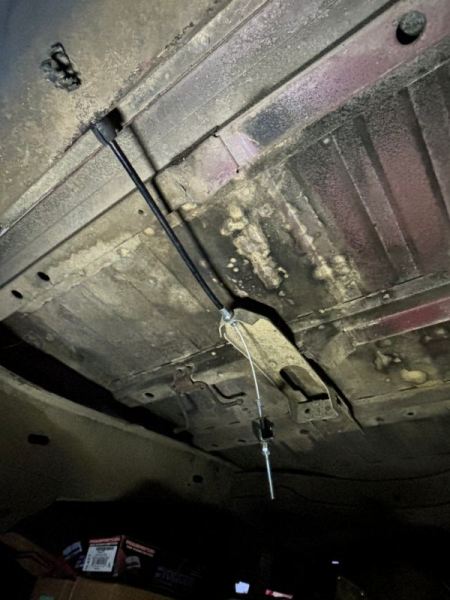
The other one also attaches at the column in the same spot, and the other end goes under the upper/ forward-most parking brake assembly bracket bolt. I'll reply back shortly with a pic for reference. -
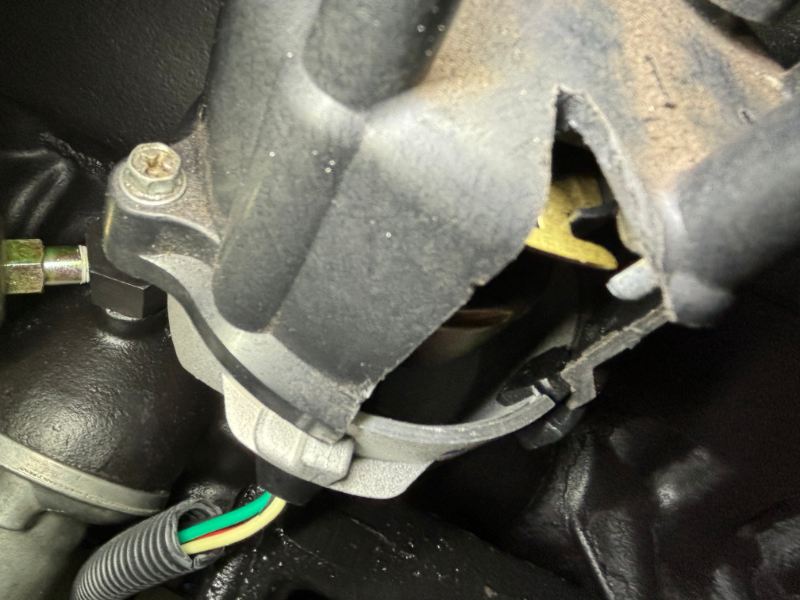
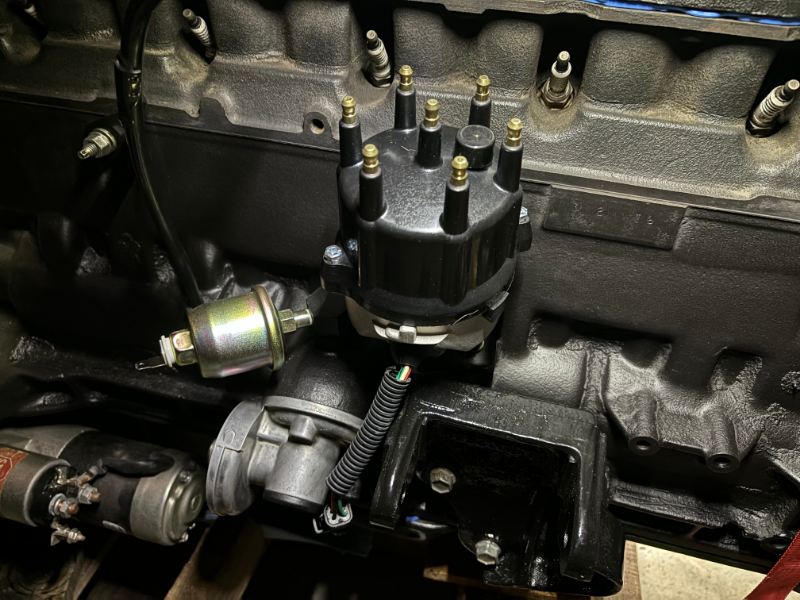
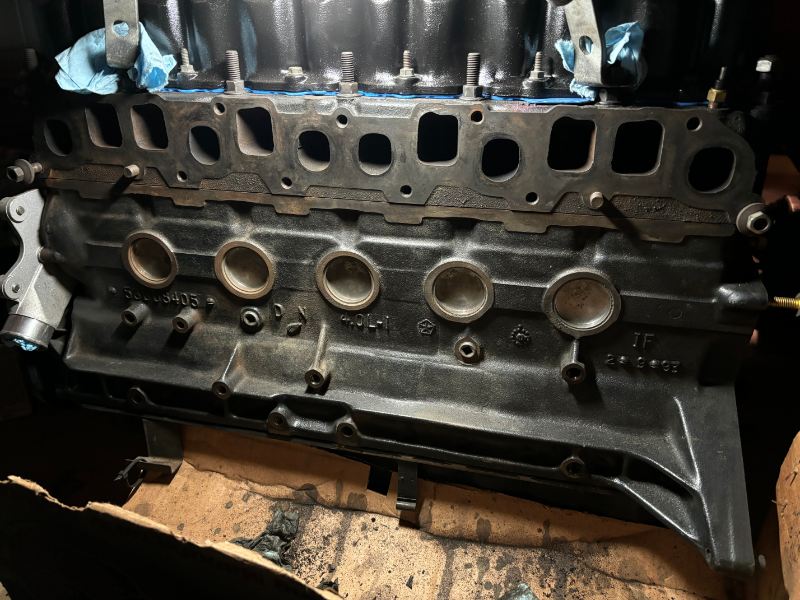
Distributor indexing... I took a chance on the Autozone Duralast Gold unit, since it has a lifetime warranty. It's been in a box waiting to be evaluated for over a year. Out of the box, the indexing on this one was about 4 or 5 degrees off from where Cruiser54 describes as "... just departing from the #1 spark plug wire post terminal." After the prescribed modification to the distributor body, this is where it is now: Passenger side of the engine- distributor, new Crown OPSU, oil filter adapter and starter installed. Final item is the CTS on the driver's side. Though mostly drained, there's still coolant in the block. Since this is a 93 HO engine, I'm patiently waiting for the 5/16" pipe plug socket to arrive to tackle the plug. It's been there for almost 32 years and I don't want to risk damaging it and creating a bigger headache with a shaved 3/8" socket adapter. I can tilt the engine with the hoist and shift the remaining coolant aft of the plug location.
-
Front Suspension Replacement
Gojira94 replied to RiversideMJ's topic in MJ Tech: Modification and Repairs
Just asking- if OP has the older design knuckles and a PO of the truck put on a tie rod and TREs for a later truck, could that be the reason he’s short on adjustment range? -
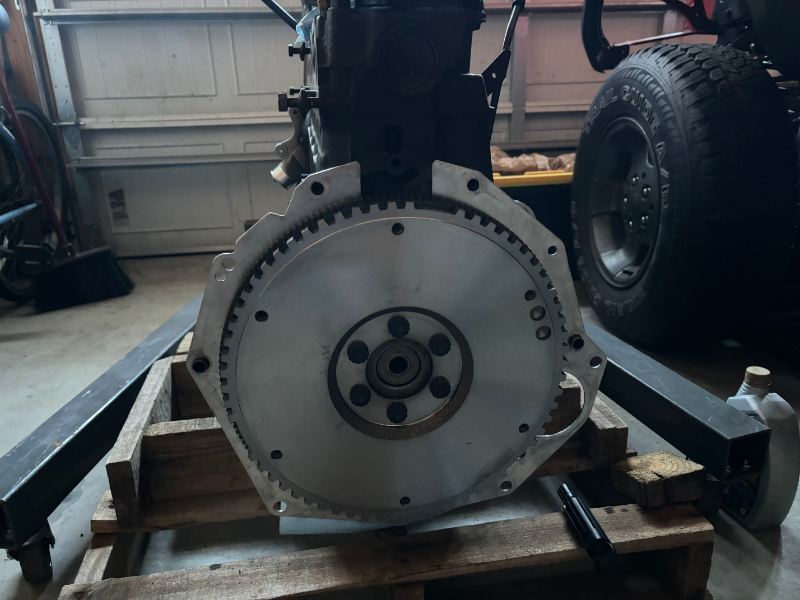
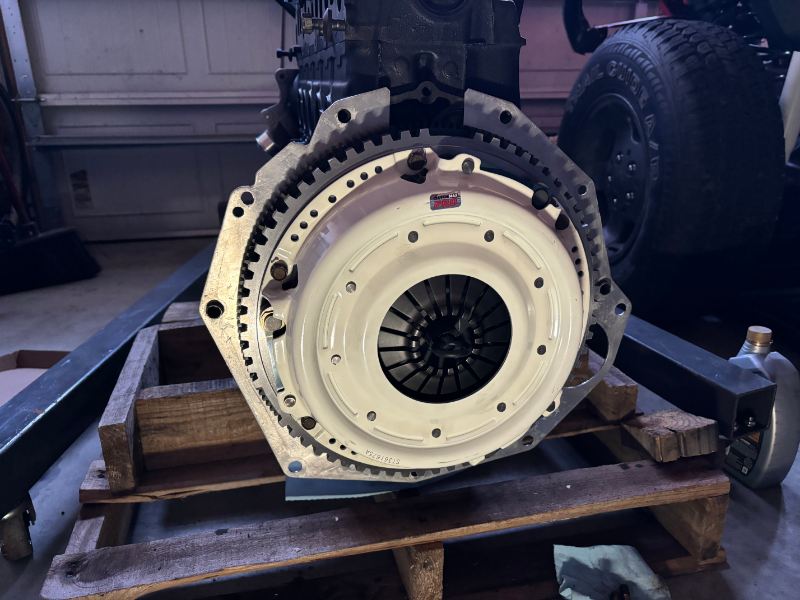
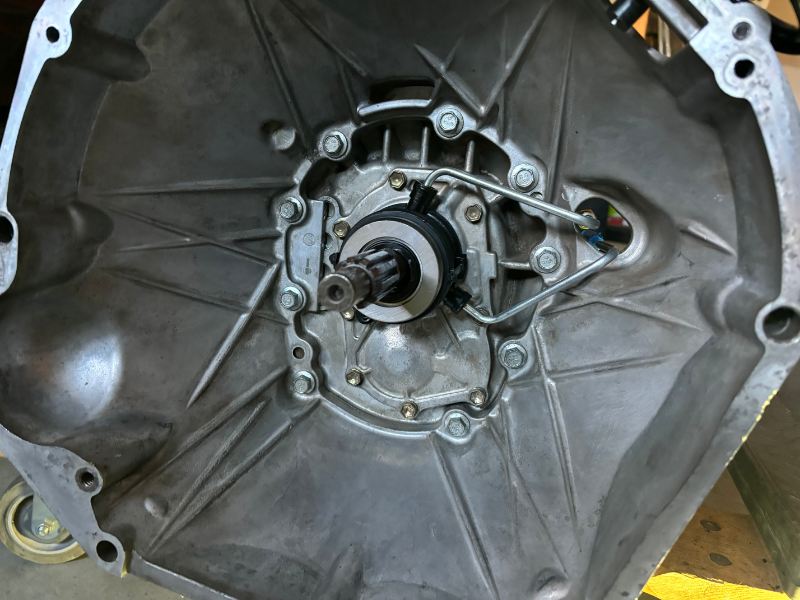
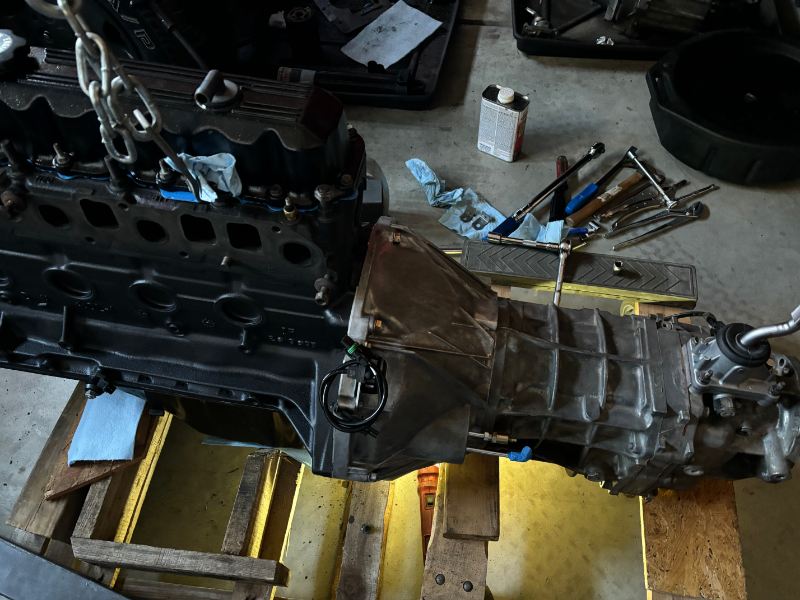
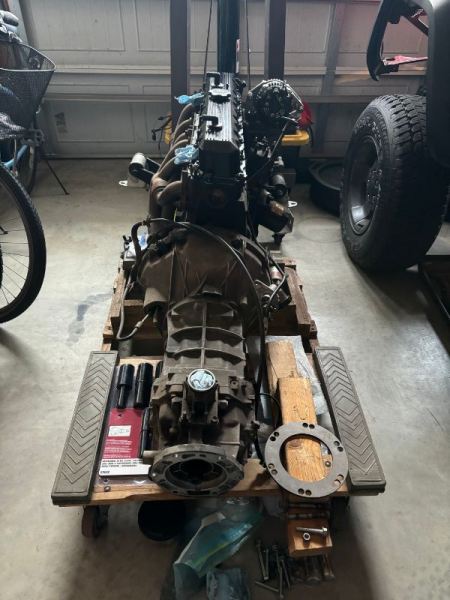
Flywheel, disc, pressure plate, internal slave, and back together again. OPSU will be here tomorrow, need to verify the indexing on the dizzy.
-
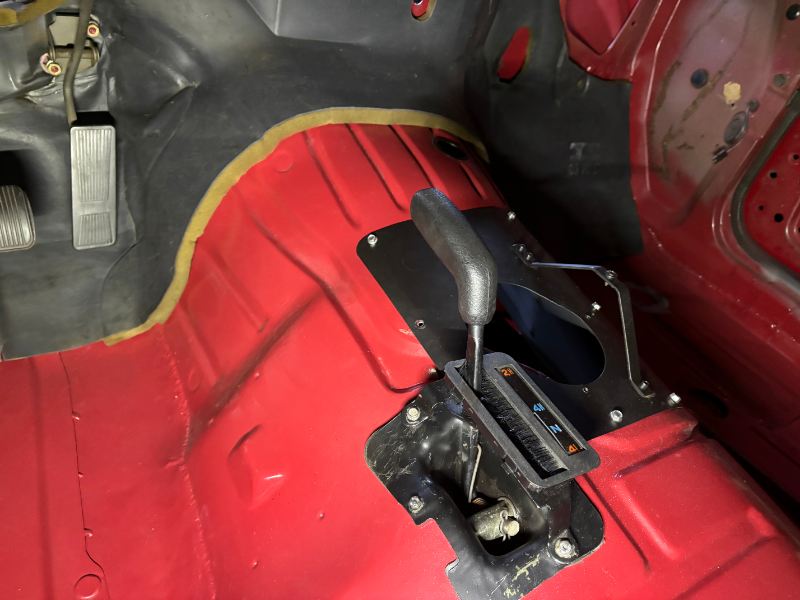
NOS TJ shift tower installed. The lever obviously is reversible, and I have both TJ and an XJ sticks to get it like I want it, once installed. High altitude CPS (Standard Motor Products PC87), We'll see how it acts... I'm now ready to install (new Renix) flywheel and clutch parts, marry engine and trans back together, and install.
-
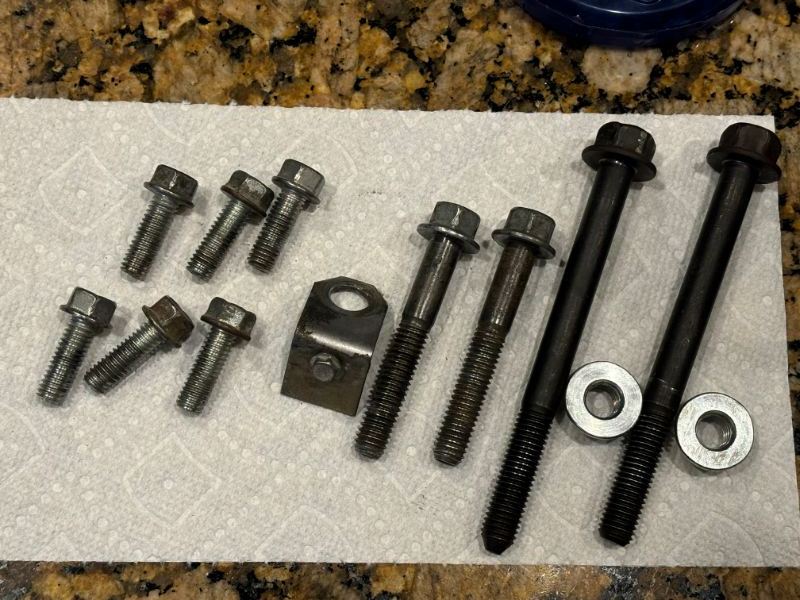
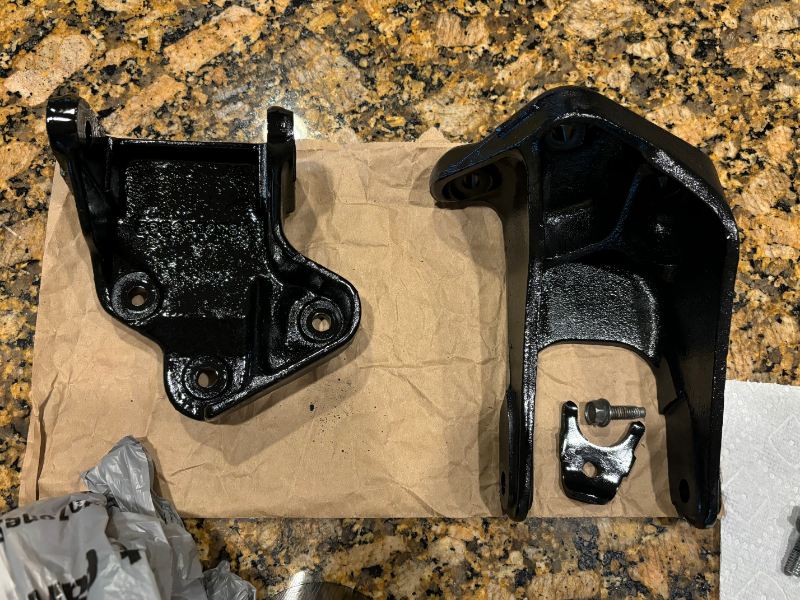
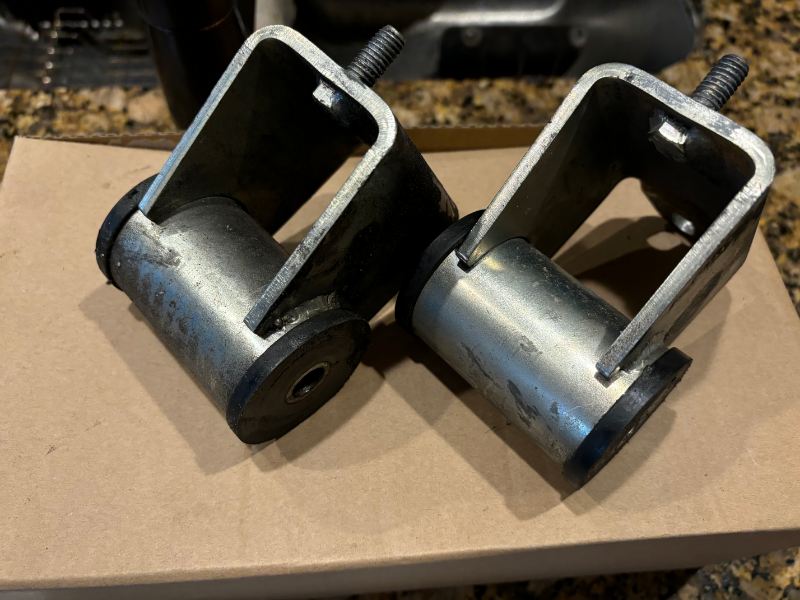
Engine mounts and brackets/ hardware. A good steel brush scrub and DE1635 for the brackets and acetone soak for the fasteners: The mounts look like Nolathane. They need a light cleaning before going back on. The 3 items in the middle are trans to inspection plate fastener items. The bracket to block bolts I may replace. They smelled like yesterday's shrimp when they came out. No kidding. Some foul form of threadlocker...
-
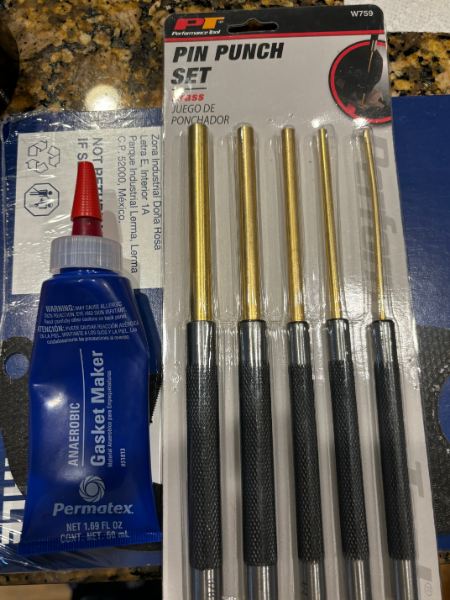
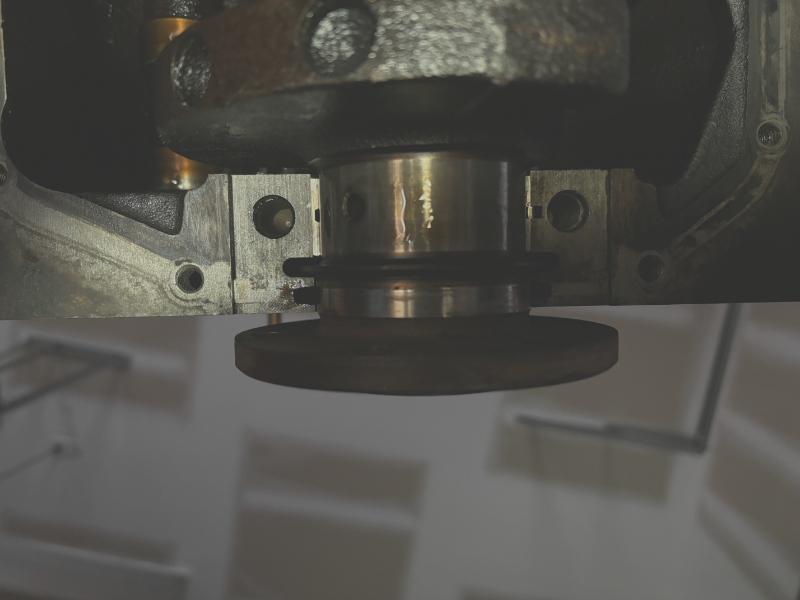
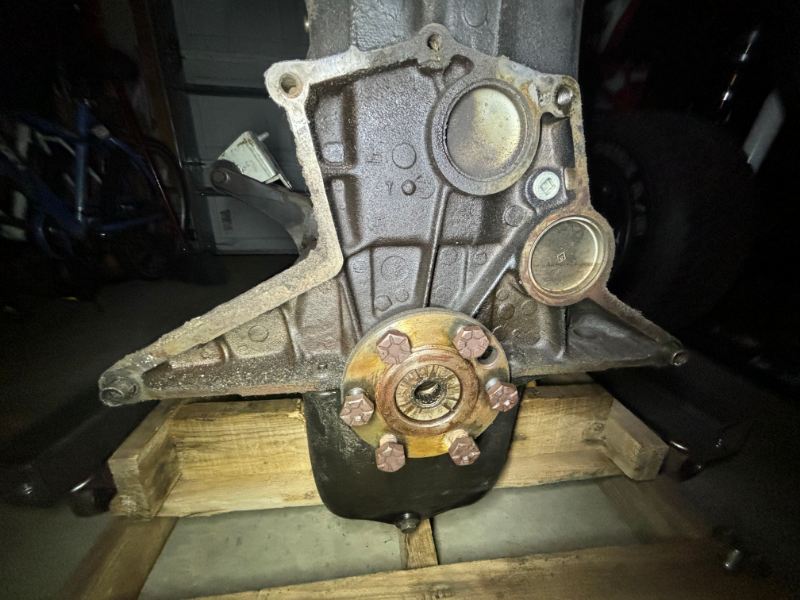
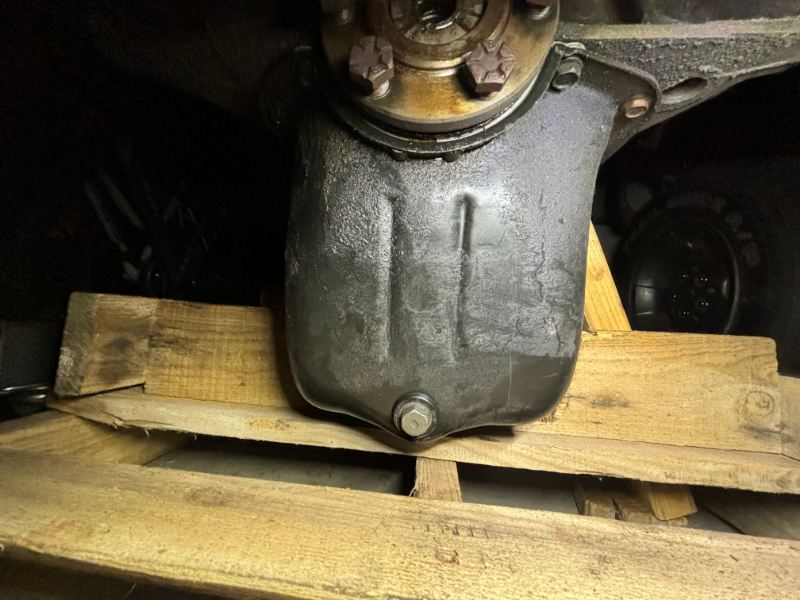
This pin punch set is a nice addition to my toolbox for future rear mains and what not. The thinnest one was the best fit but too long for the purpose and bent with hammer strikes. I may shorten it for future use. The next size up did the trick without nicking anything up though. You can still see some of the original anaerobic sealer in the outer edges of the cap register. A second pass of cleaning got all of this spotless and ready. I forgot to take pics of the work on the cap. It still had the machinist's ridge on the rear of the seal ridge, took care of that while I was at it, per Fel-Pro's instruction. The bearing has very light wear and good uniform surface, so nothing said to stop and tear it all down for new bearings/ rings. Old seal was a bit crispy. There were signs of seepage on the back of the block, in the bellhousing and along the bottom of the trans. I think most of it was due to the crud that remained in the seal ridge in the cap, after the last rear main install, preventing a proper seat of the seal. Nice surprise inside, an almost new Melling pump. Standard volume, standard pressure.
-
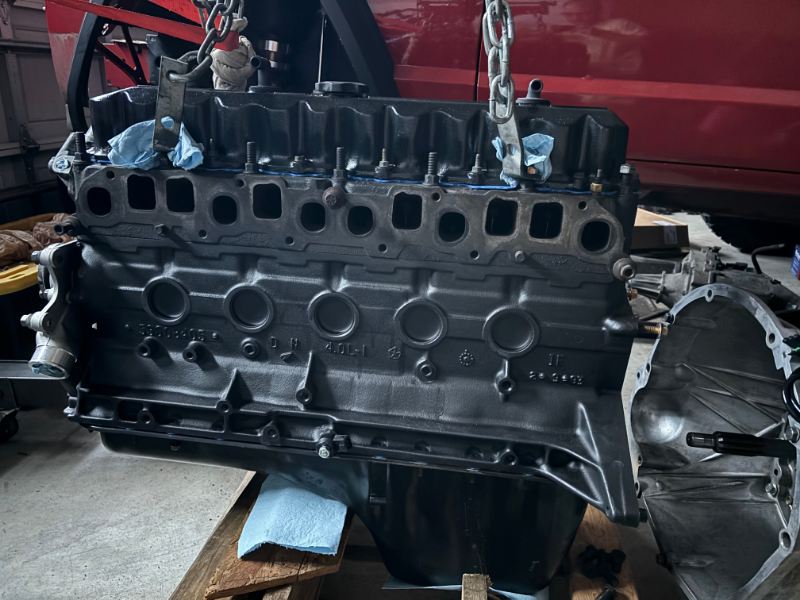
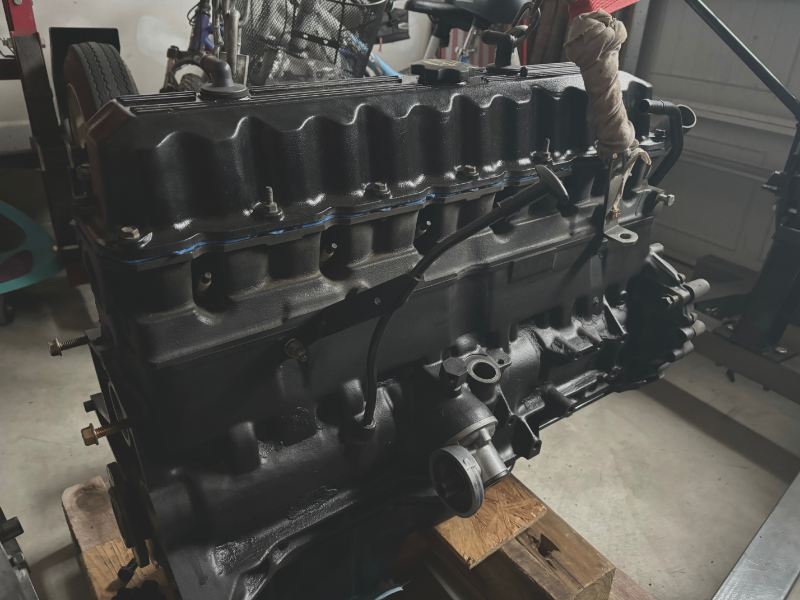
A lot of progress this weekend. Finished external cleaning and painting and replaced the rear main and oil pan gasket. Installed the knock sensor and oil filter adapter with new o-rings.
-
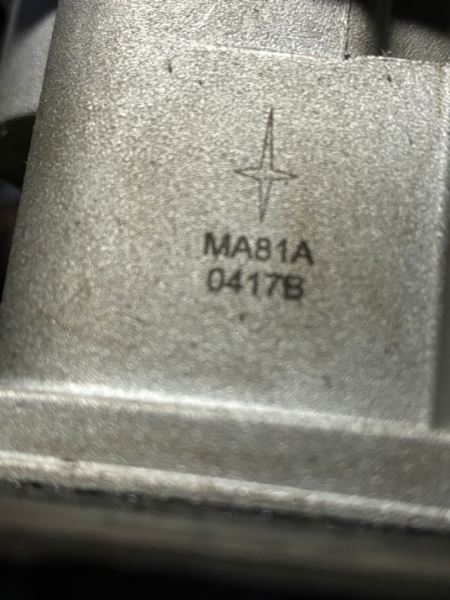
Getting cleaned up before I drop the pan for the rear main. One side done. Block was cast during the night shift of Feb. 9, 1993.
-
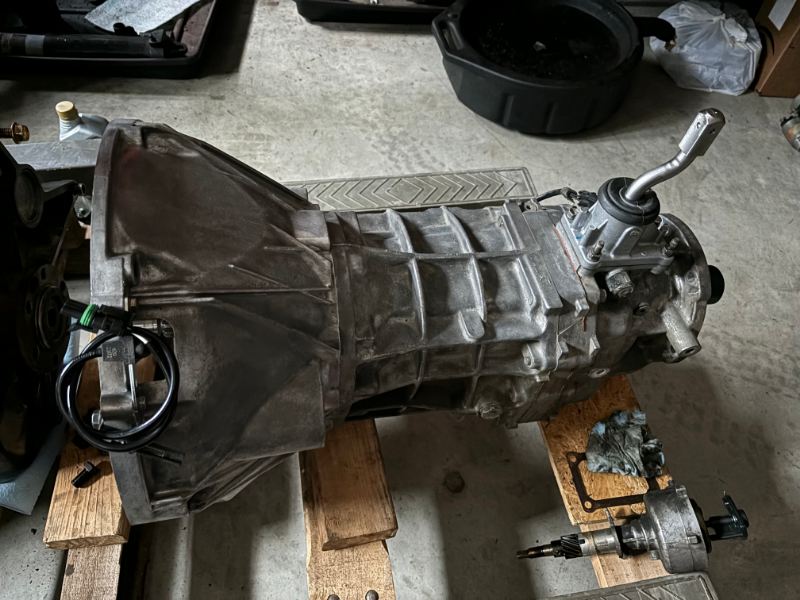
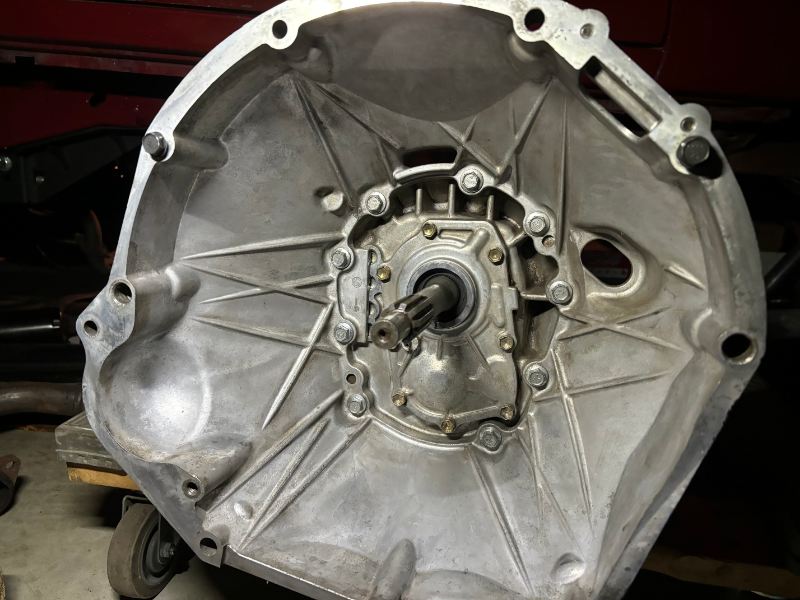
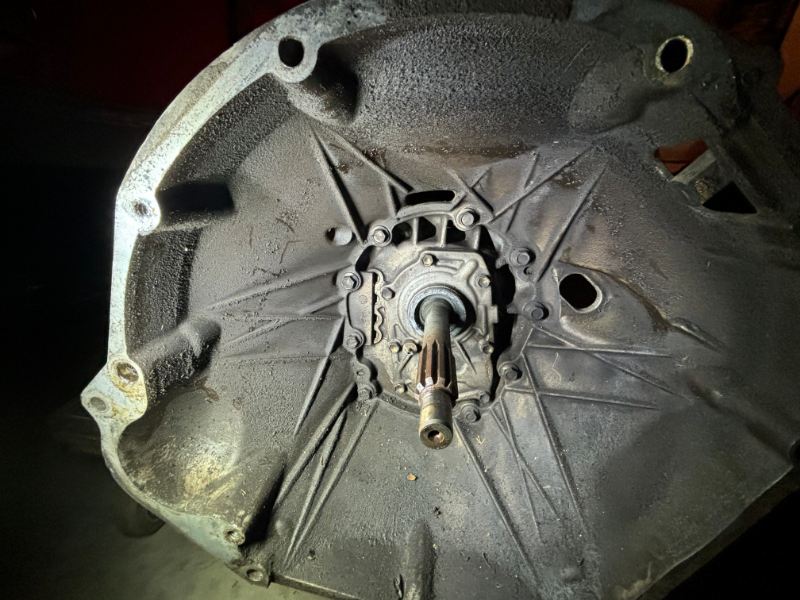
Trans is ready for clutch parts. Started cleaning the outside of the case last night, finished everything up just a bit ago. Pulled the bellhousing to make pulling the input seal/ bearing cover easier. Just need to swap the shift tower (taller one from a TJ with a shorter throw). Engine cleanup and Craigslist rebuild ~tssst... tssst~ is next.
-
Thank you, sir... trying to speed things up now!
-
Project Morris: The 89 to 99 Comanche Long Bed
Gojira94 replied to RuBacon's topic in Member Projects: Your Comanches
You've managed to get more done in 4 months than I have in 2 1/2 years... awesome work! -
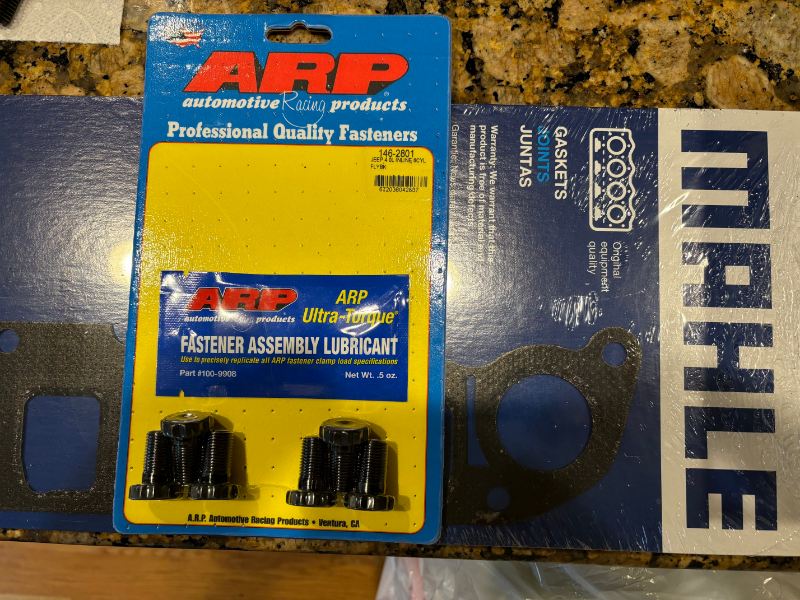
Here's what's next- cleanup, rear main, input shaft seal, new pilot bearing. The clutch kit and HO flywheel that came out were pretty new but I'd already gotten a new clutch, Renix flywheel and ARP bolts.
-
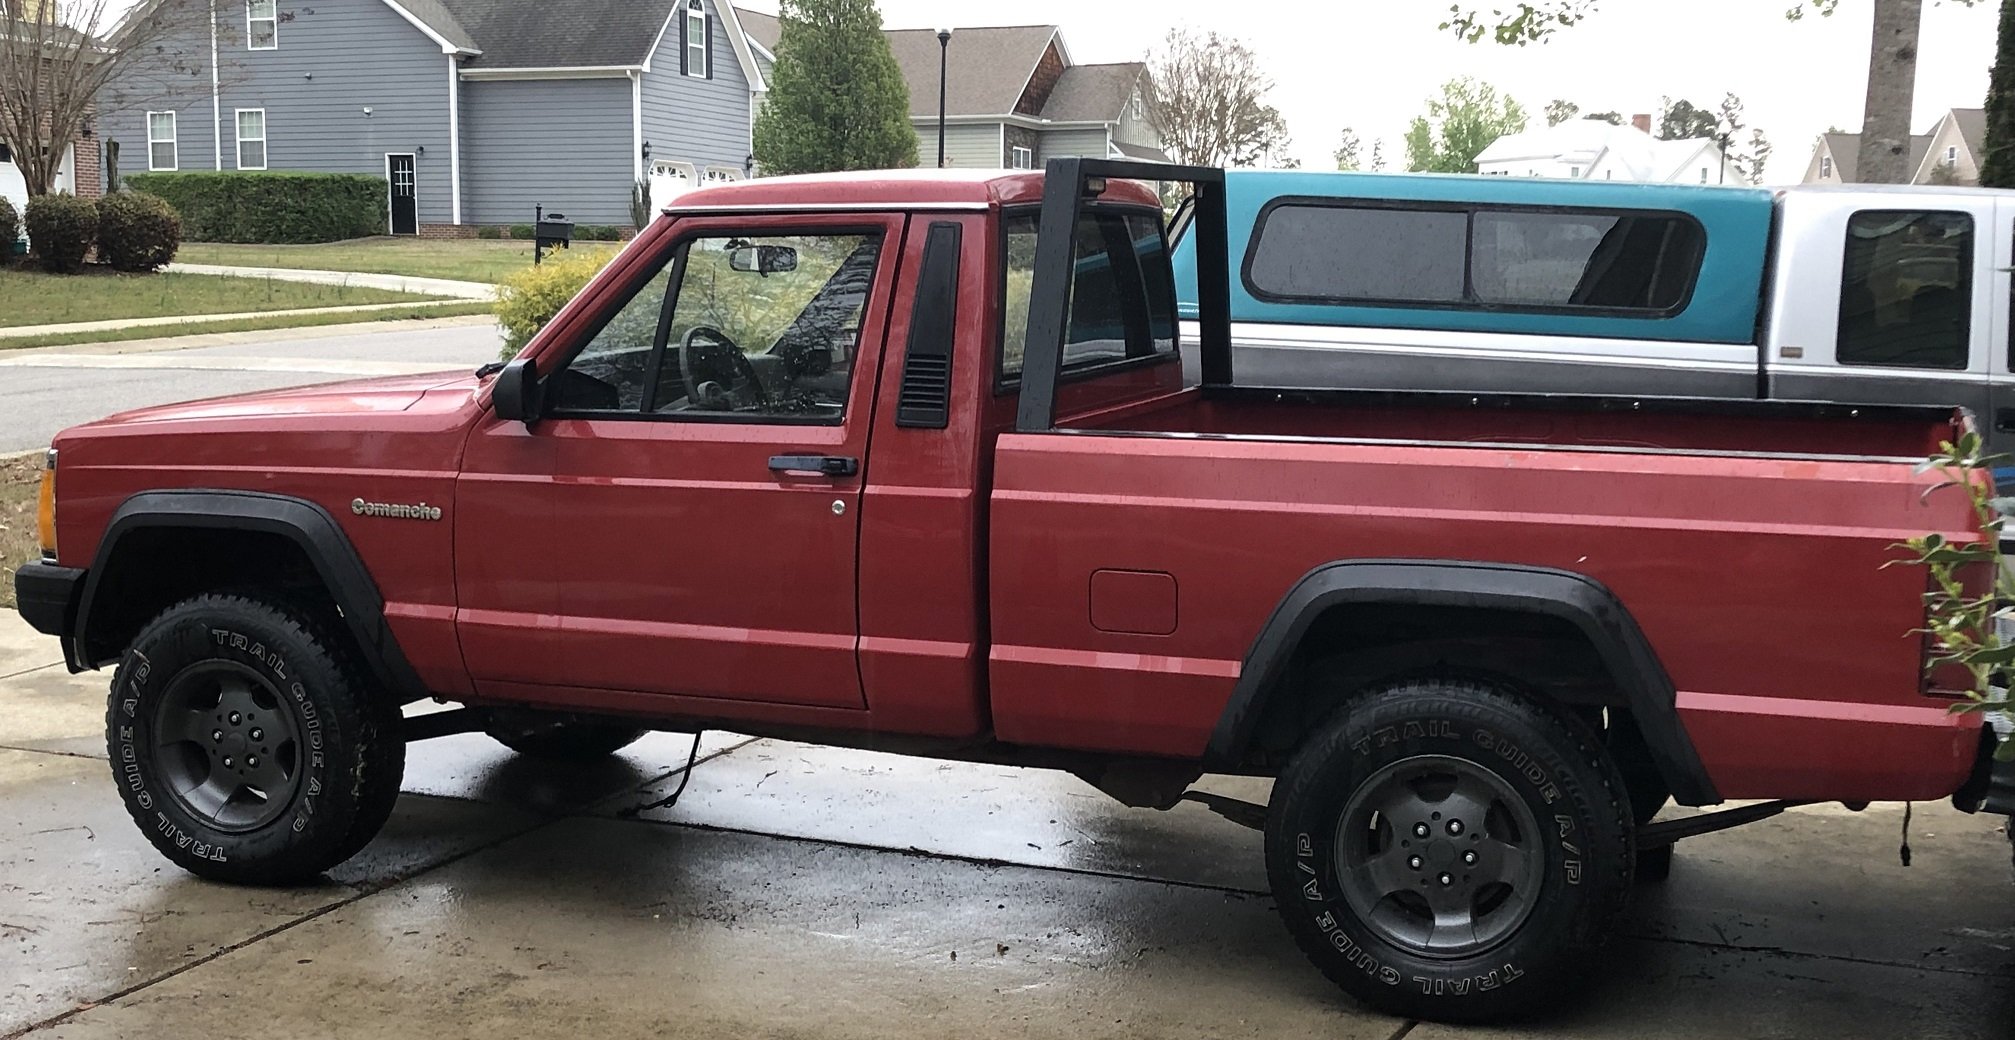
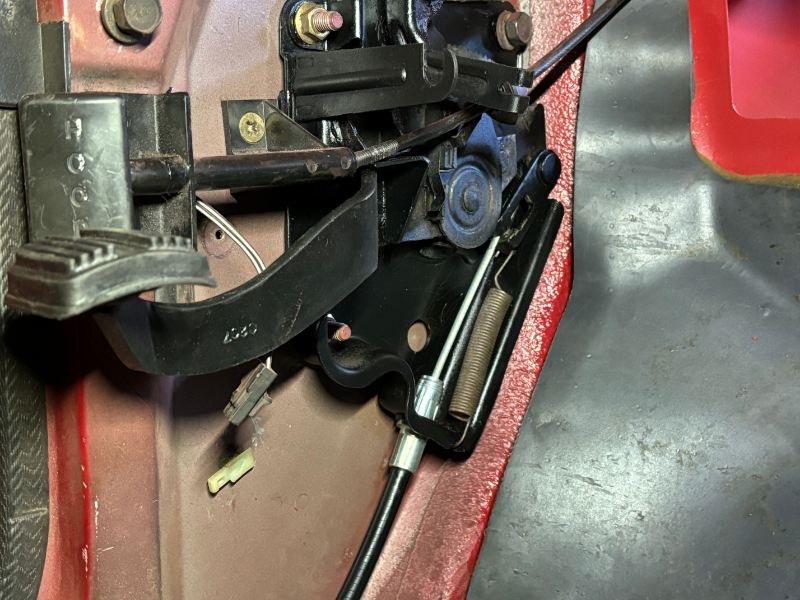
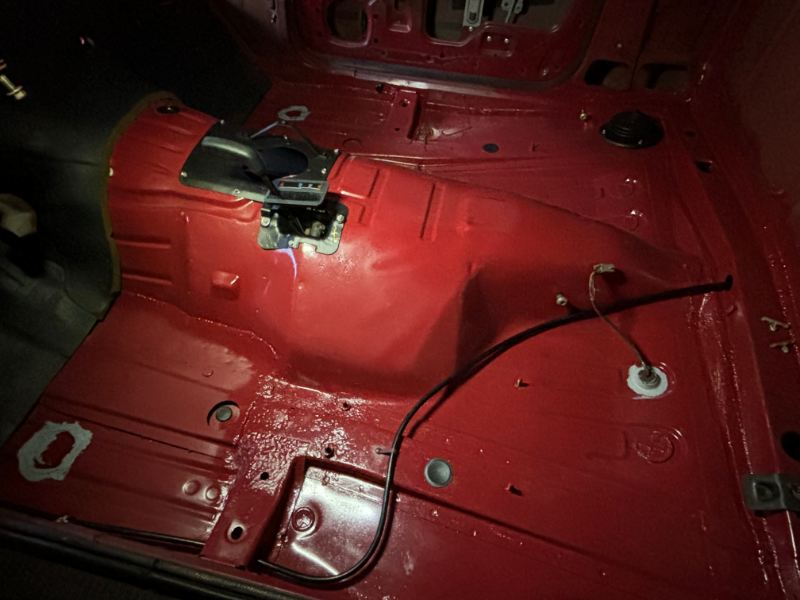
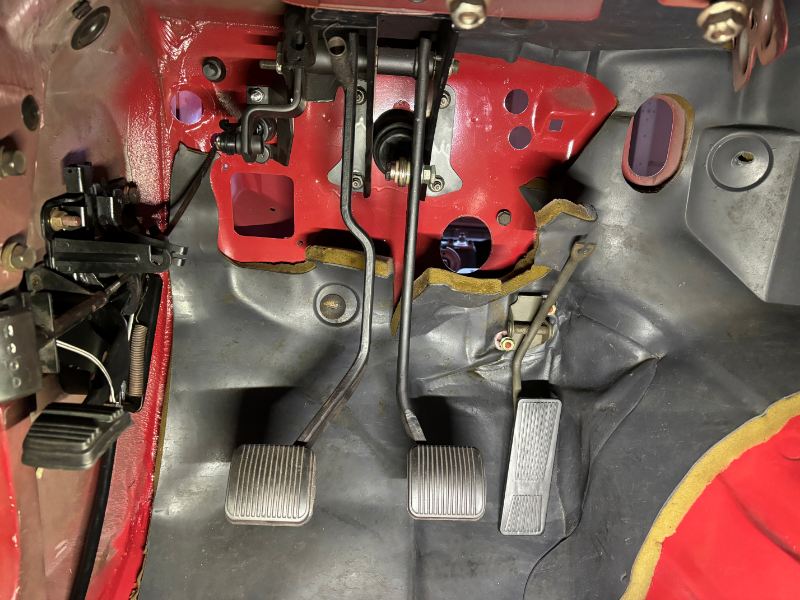
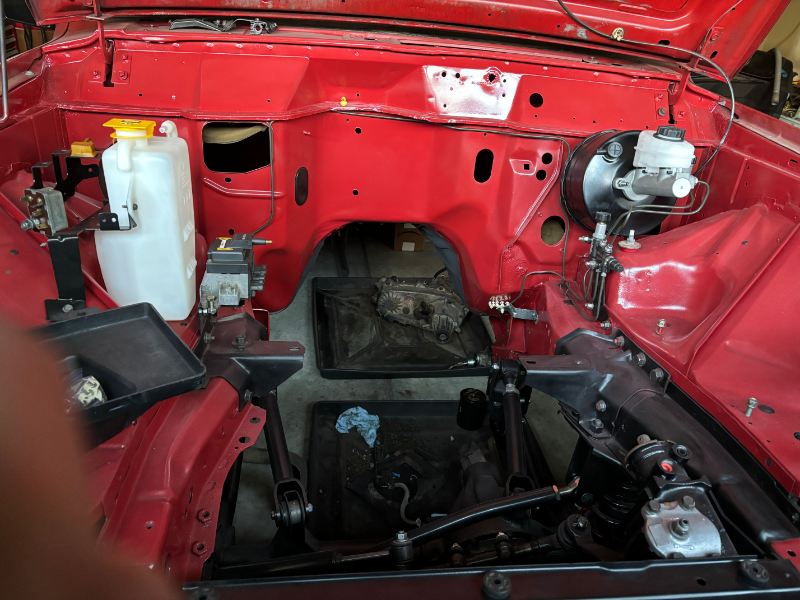
Decent progress day yesterday. Started with the parking brake cable. It's a Bendix C1474, 100% nylon outer sleeve, seems good quality. I did have to shave the sides of the anchor stud a hair to get it to fit into the cable receiver aperture. Got the firewall pad cleaned and installed and final mounting for the pedals: The 4WD shift lever came from a 98 XJ quite some time ago, has the 'fat' handle so I had to take it apart to fit the indicator plate. New SS fasteners for all of it: Brake master, clutch master, valve and lines installed. Modded brackets for expansion tank and relay center/ starter solenoid installed for good. I'll pull the coil/ module back off for clearance during engine install (next order of business):
-
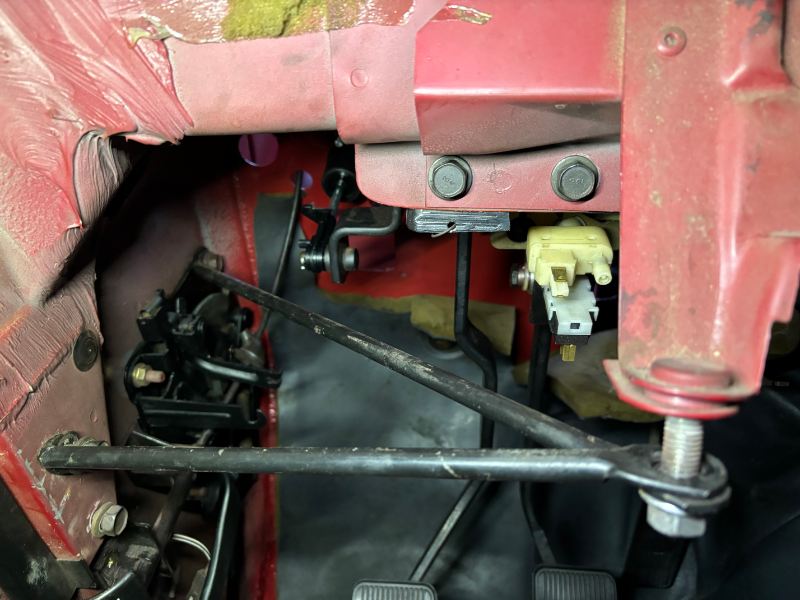
I had questions as I was getting my front suspension/ steering gear set up a few months ago. When I rebuilt my box, I counted box input shaft turns left and right and centered it before installation. It seemed to me the old 'twist the drag link sleeve' method to straighten the steering wheel would move the Pitman arm out of ideal center for equal travel left and right. This video seems to confirm that. It's done on a CJ, but the parts and concept are still the same though:
-
1989 Fuel Pump replacement
Gojira94 replied to Jeepers8606's topic in MJ Tech: Modification and Repairs
The MTS unit uses a pump that "Replaces Airtex # E7006". Airtex E7006 is a roller-vane style pump and the one in the MTS unit appears also to be a roller-vane pump. If MTS' pump is comparable to the Airtex E7006, it can be expected to be about 45GPH (170lph) free flow. 170lph is at the upper end of requirements for an early 4.0 running 29-39psi from idle to WOT, but should be able to deliver enough fuel when restricted/ regulated up to 49psi. The MTS unit has a return provision, but that can certainly be left capped for a returnless setup, if that's indeed what you have. You can always upgrade to a turbine style pump later, with a small bit of modification to fitment of the pump to the sending unit. And to gogmorgo's point, the MTS unit's sender is made for 87-90 gauges, and sends from about 2 ohms (empty) to about 115 ohms (full). I don't know if HO 91-96 is just backwards on the wires at the gauge, uses a different set of resistance values, or both. -
Finally... some mechanical work. Painted valve cover, new gasket. TC removed, prepping for TC re-clock (YJ tranny)

-
I’d start with odorless mineral spirits and see how that spray-over reacts. Mineral spirits are not as fast working or severely cutting like acetone. More time to work without getting into what’s below.
-
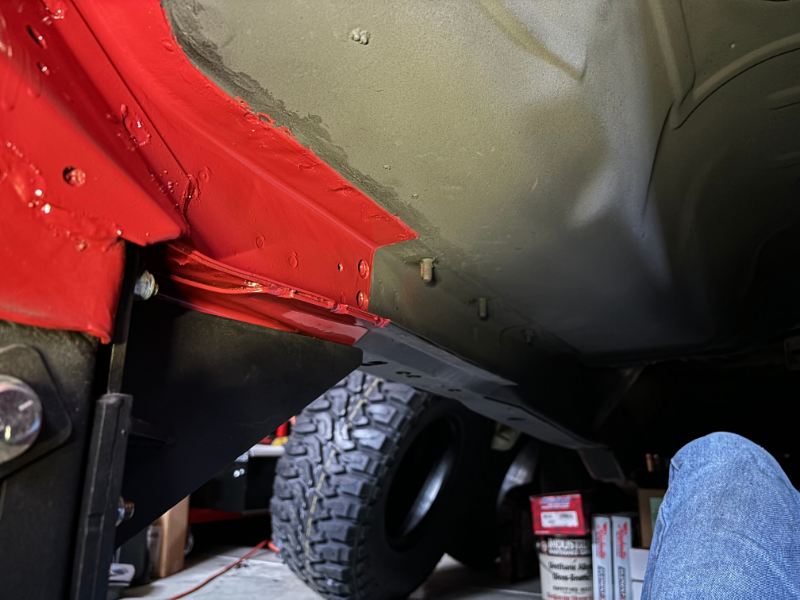
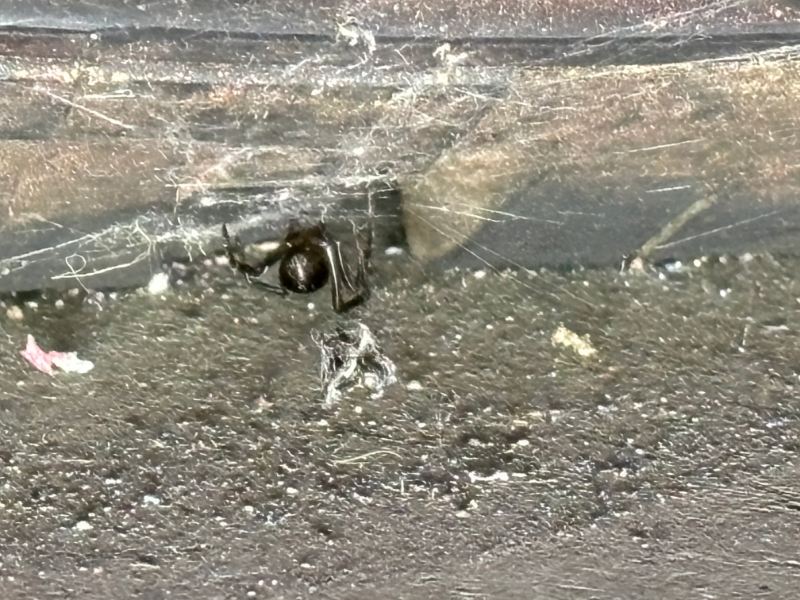
Got the underside about like I want it. A little work left to do on the bottom and outer side of the driver's side uniframe but I can start engine and interior work now. Dropped my light while I was taking these pics, looked over and saw HER. I never kill anything if I can possibly help it, but SHE got doused with brake cleaner.

-
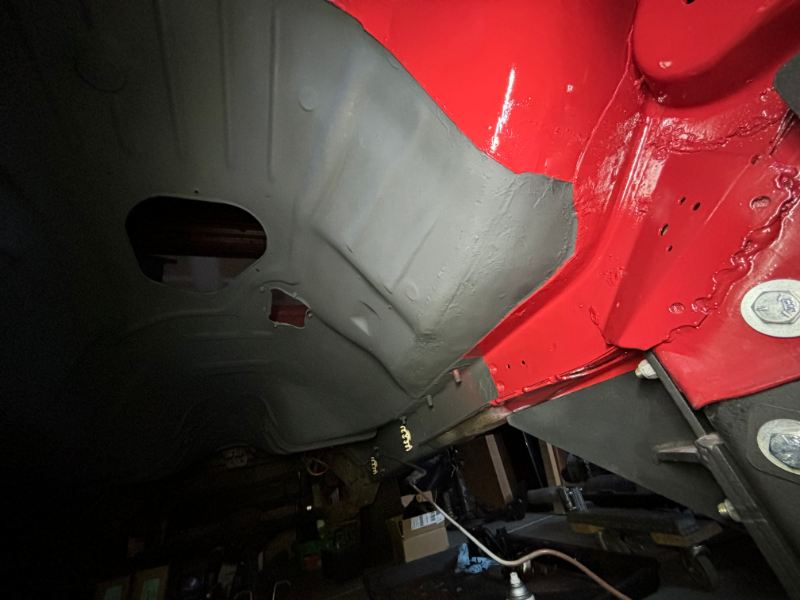
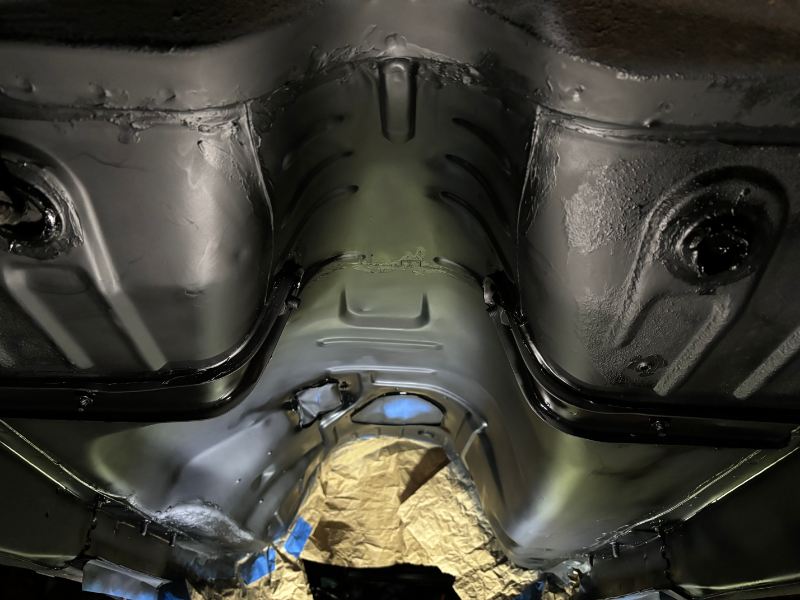
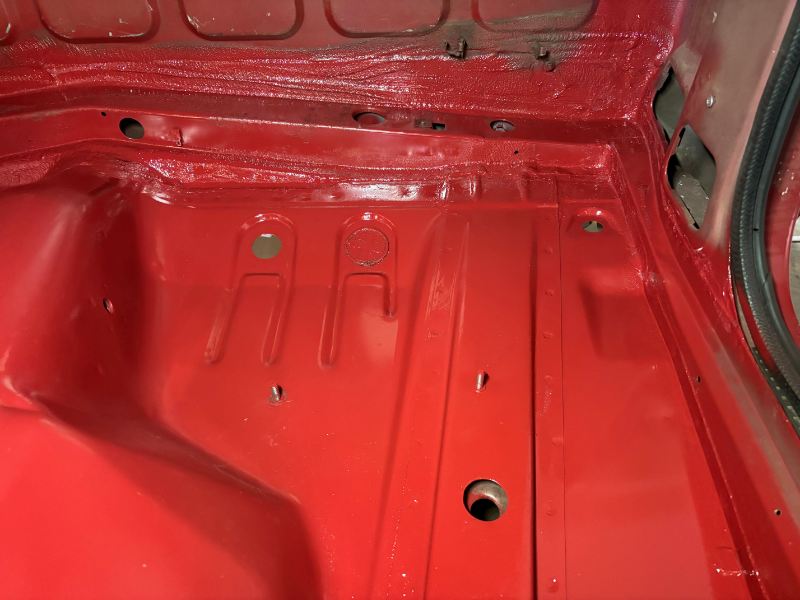
Finally, it's all clean! Primed and ready for seam sealer. I didn't get a pic of the seams afterward, but it's sealed up tighter than Dick's hatband. I dare say the damned thing would float for 2 days. Every place where metal comes together underneath, it's scrubbed, cleaned, primed and sealed. Even all the joins for the seatbelt anchor braces at the floor pan and at the frame rail. Even the studs for the crossmember braces are filled. Those come from the topside from the longitudinal braces through the floor pan, so yeah. I'll buy a mirror and watch myself starve to death before I do all this again... Flat black enamel laid down as an adhesion promoter for the Raptor undercoating. The paint is still drying in this pic, laid it down about 20 minutes before. Tomorrow, undercoat.
-
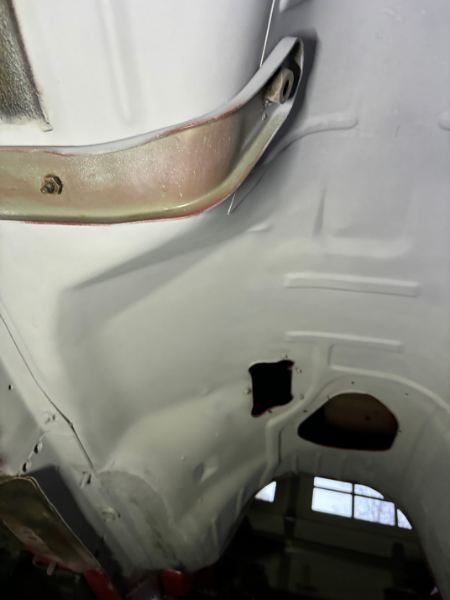
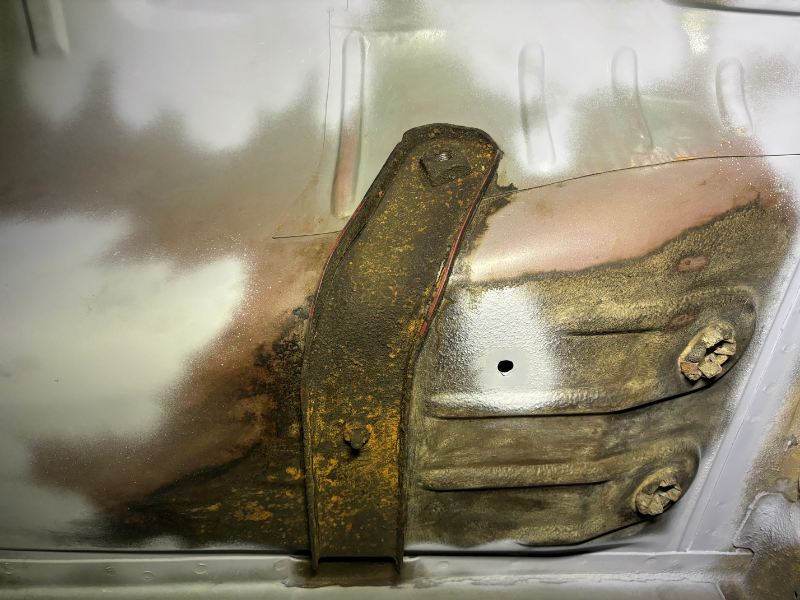
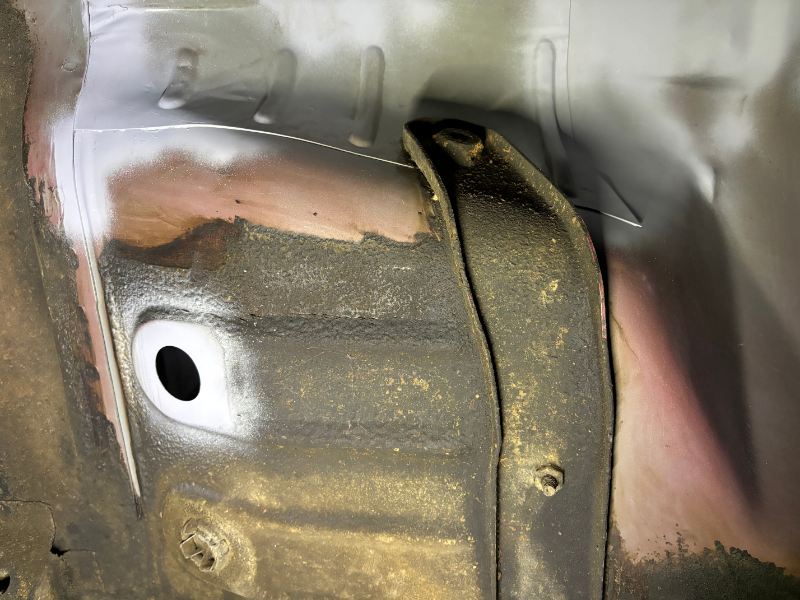
Bottom side. Some decent progress. Found a few small spots of very minor rust, like size of a nickel or smaller. The dirt that remains in crevices is a sandy sort, mixed with cast off fluids and softened factory undercoat. The last challenge is getting all that out of the space between the seatbelt anchor straps and the floor. Guitar string or piano wire should help get that out, followed by a spritz of brake cleaner to flush it out. Then some more seam sealer work, a black enamel over all of it, followed by fresh undercoat.
-
Thank you! I've spent more time doing this than I cared to. I have new vinyl plugs for the various and sundry holes as well. The metal ones turned out to be too far gone to trust. The bottom side is coming along and is sealed quite well where the patches are but I'm not quite ready to present that work yet lol.
-
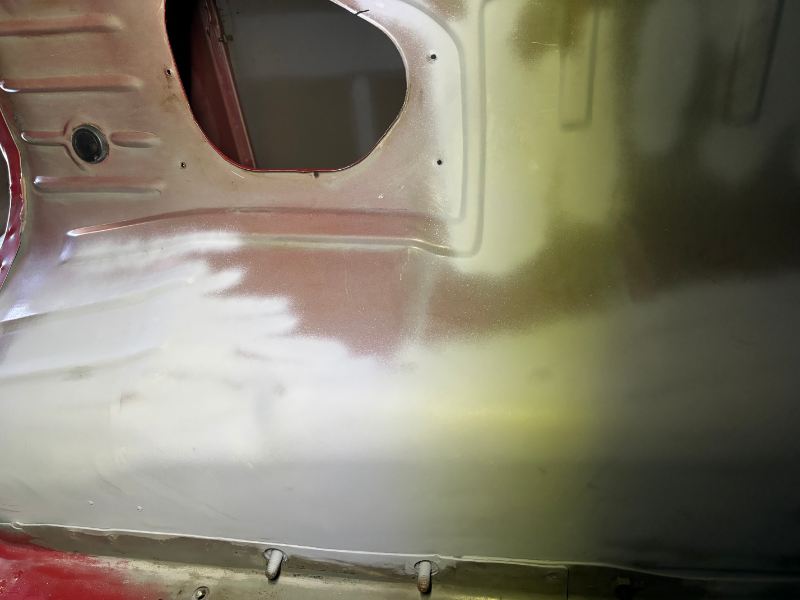
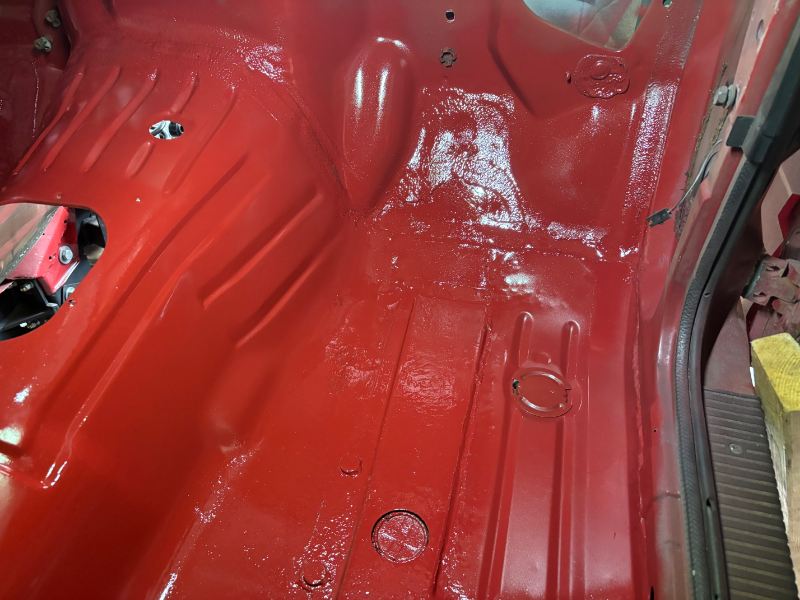
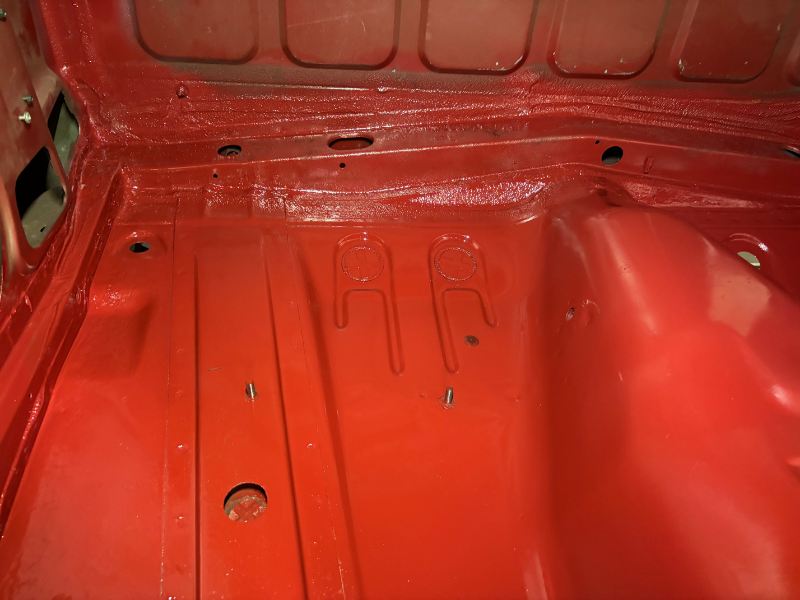
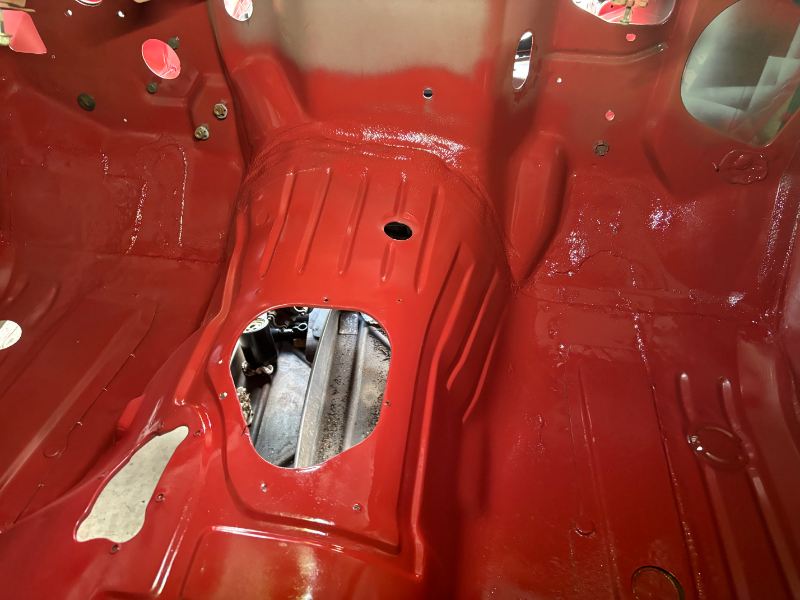
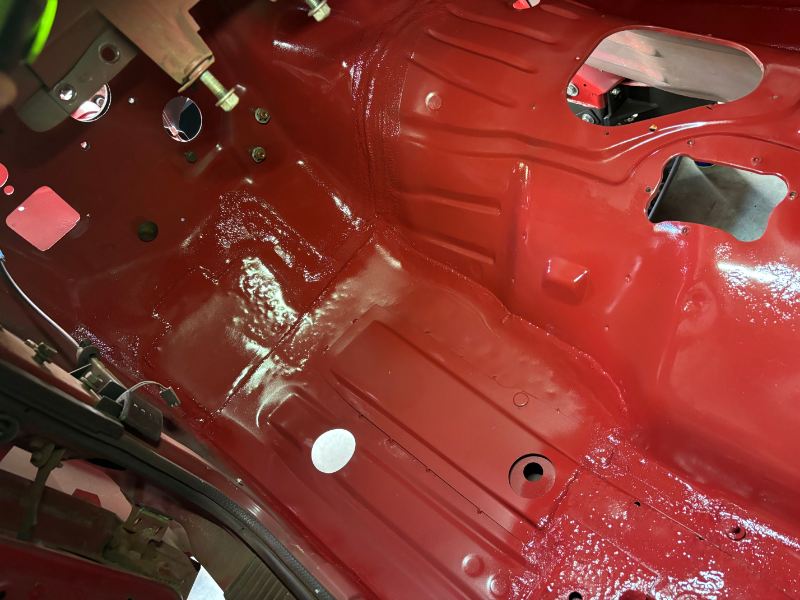
Topside of floor... is DONE. Now onto doing exploratory forays into the bottom seams for cleaning, addressing any small rust spots and likely pathways for water intrusion and sealing them up.
-
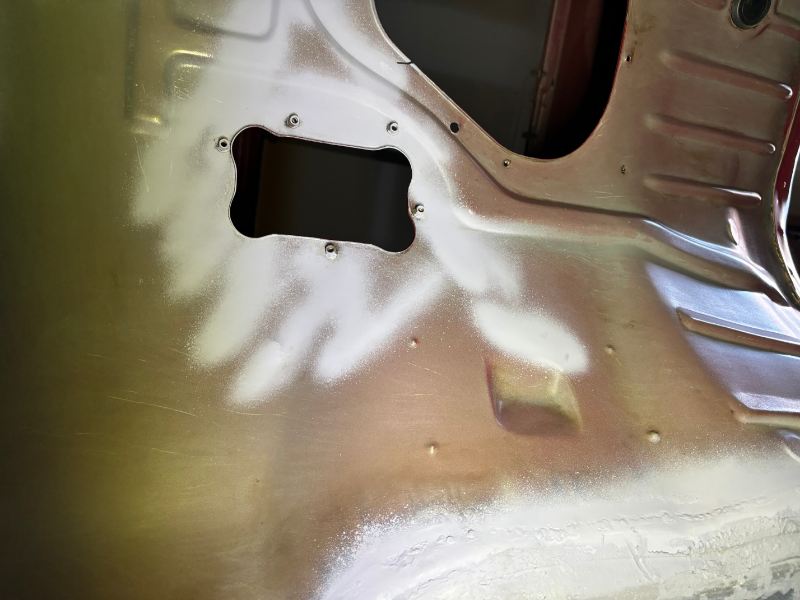
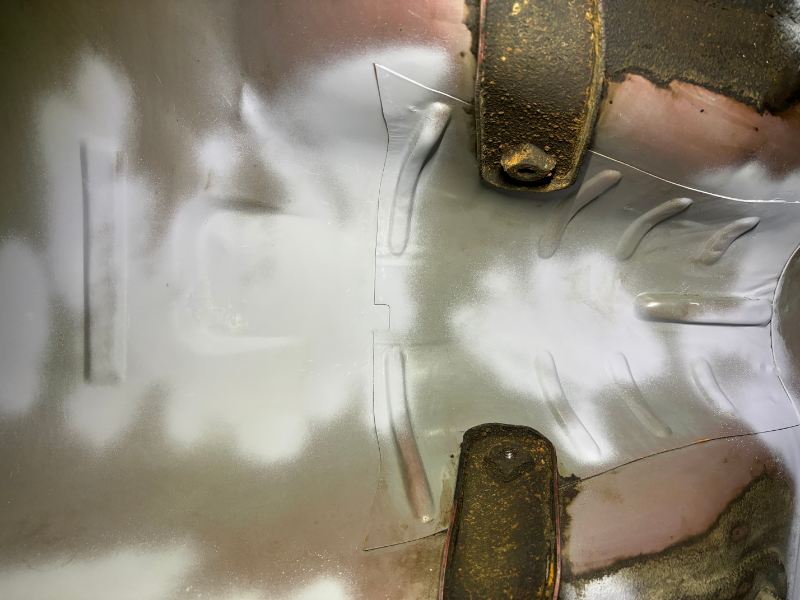
Passenger rear corner- no real issues here. Clean off the light rust scale and seam seal the hell out of it. Now working on the driver's side looking for the same.