Gojira94
-
Posts
677 -
Joined
-
Last visited
Content Type
Profiles
Forums
Gallery
Everything posted by Gojira94
-
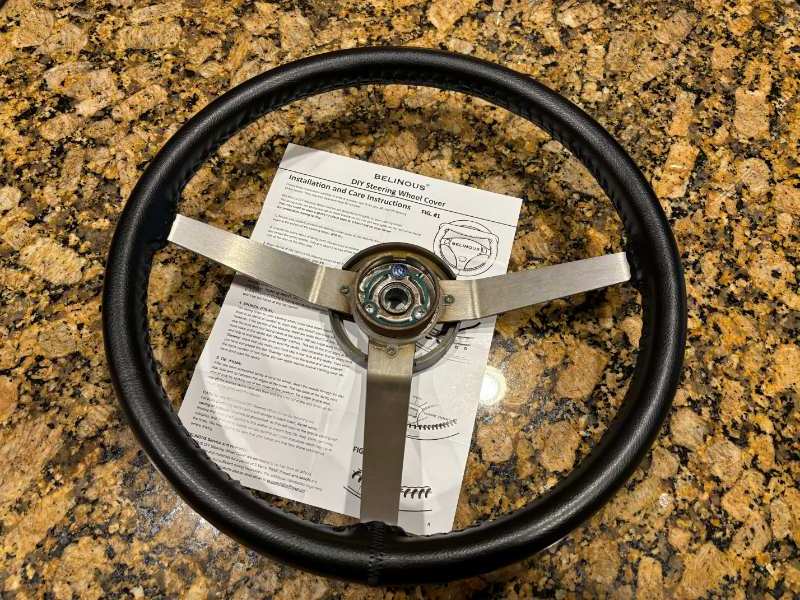
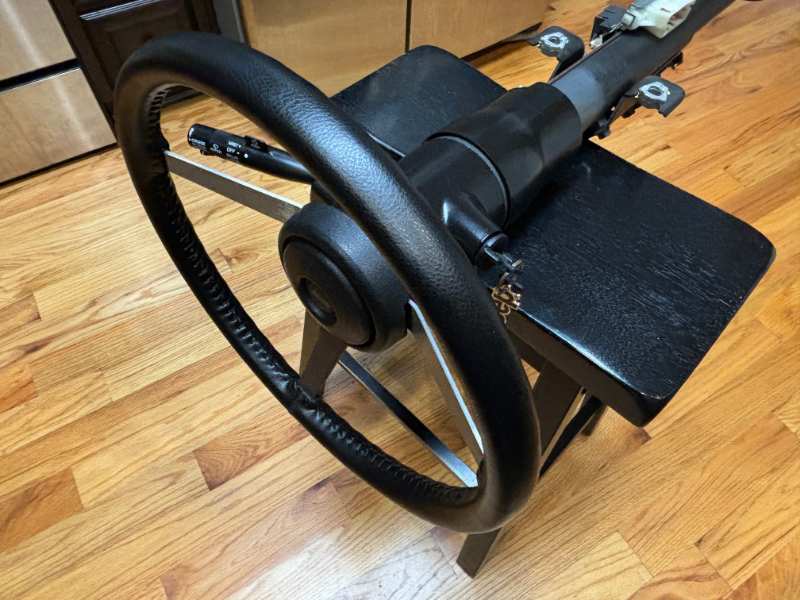
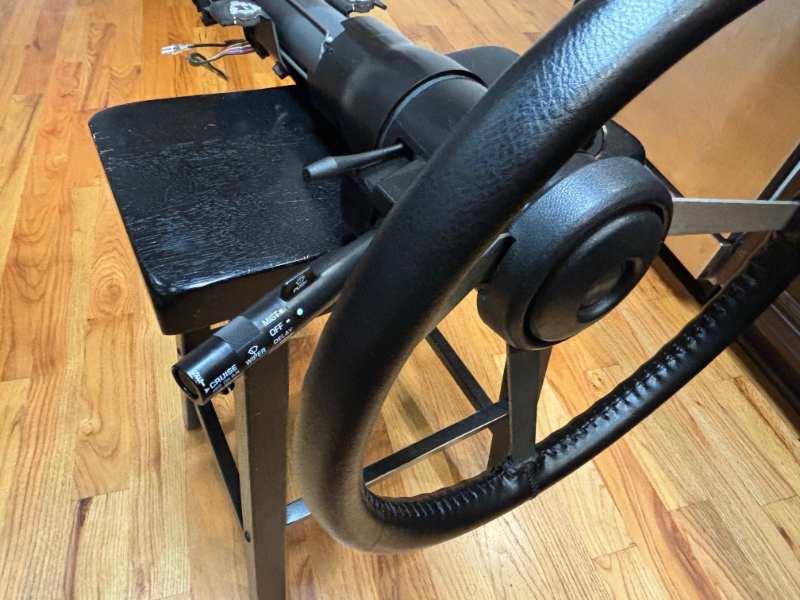
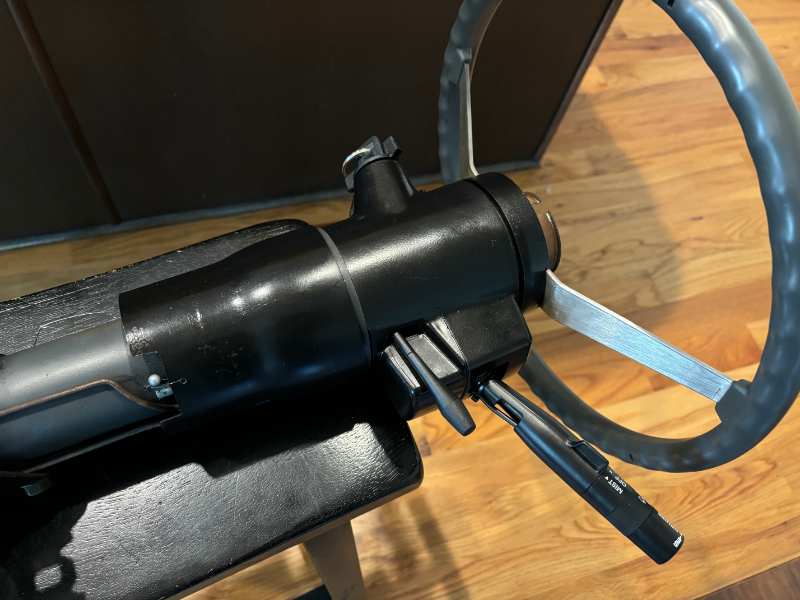
Fade to black... I took apart the column for one more good go-through and painted the bowl assembly plastics black. No more gray. Except that wheel... I really thought I'd take the wheel to a local interiors and tops shop in Raleigh to have it wrapped. Meantime, I wondered how hard it would be to do with a DIY leatherette kit from Autozone. Video on YouTube of a guy doing a YJ wheel identical to this one convinced me to give it a try for $15 on Amazon. I was surprised that it's actually real leather. Anyone wants to try it, the kit size for the 3-spoke wheels is M2. Fully dressed column glamour shots lol:
-
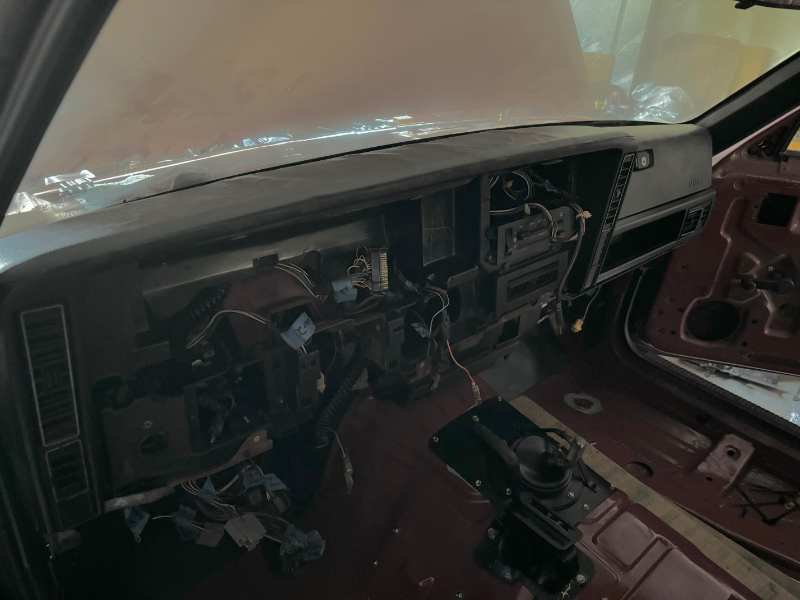
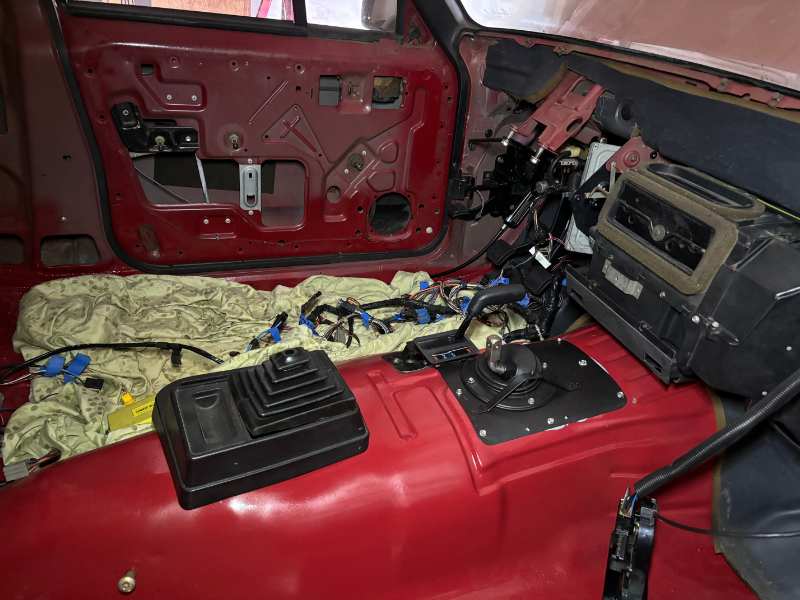
Dash is really roached. I glued up a number of semi-structural cracks. I'll be looking for a replacement as time goes on, pulling one of these is cake compared to most other cars I've done. Meanwhile, the deep and I mean deep cracks in the pad I just flattened, filled with cotton and taped over with HVAC foil tape. Then glued a piece of marine vinyl over it for now. Meh. Bothers me that it's a detail I can't get like I want it right now, but I'm starting to get in a hurry to just get on with it and drive it by Memorial Day.
-
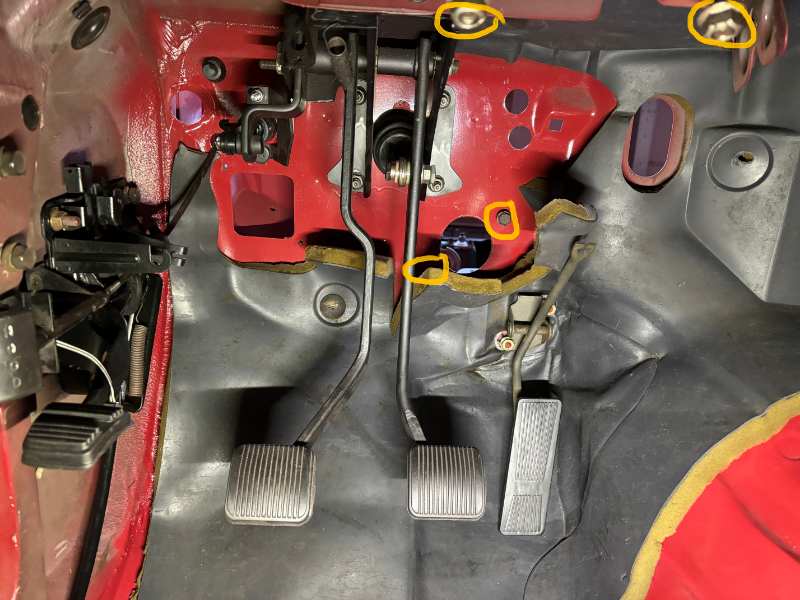
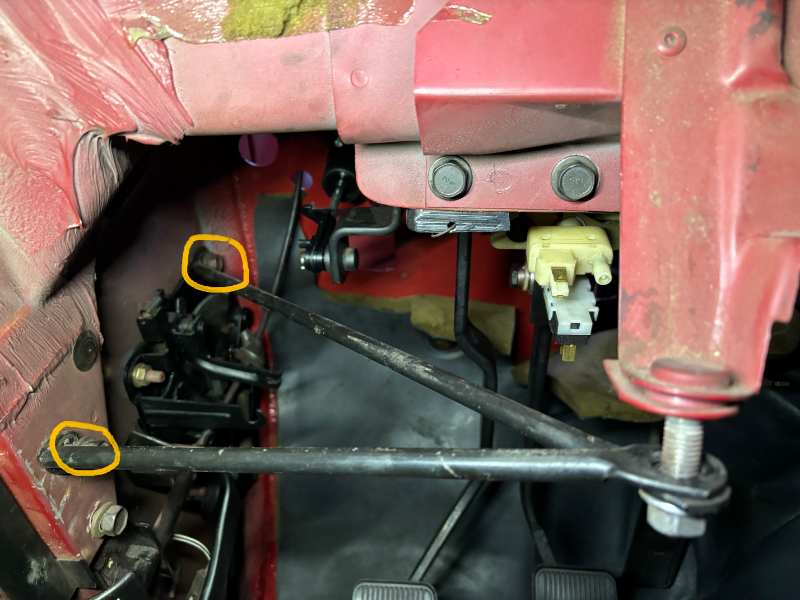
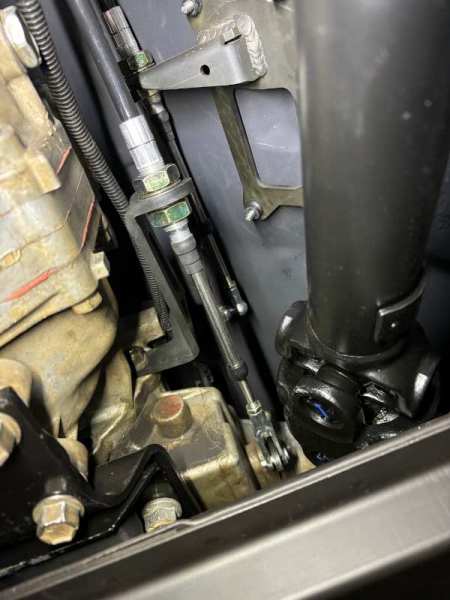
Loosen the steering shaft to column shaft coupling on the engine side of the firewall first. Then tackle the stuff inside. Last, uncouple the steering shaft from the steering gearbox. Inside, the column flange to firewall bolts are 14mm 13mm if I recall correctly. The prevailing torque nuts for the upper column support are 15mm. The brace bolts are also 15mm. Just loosen them enough to drop them out of the way. Rest the column/ steering wheel on the seat while you disconnect the old/ connect the new shaft at the steering gearbox end. It helps to have an extra pair of hands getting the column and steering shaft together next, but can be done by yourself if necessary.
-

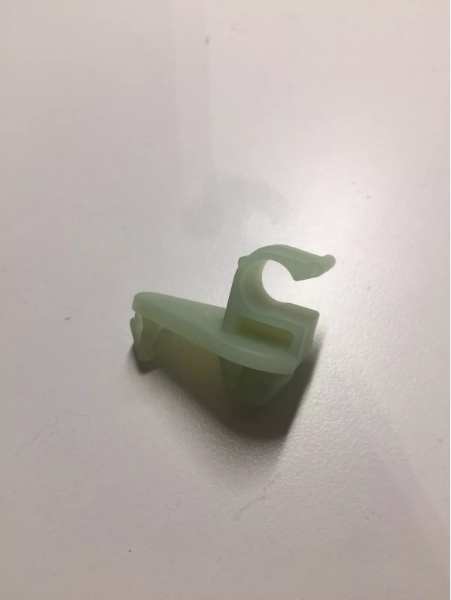
Hood Prop Clip 34202710/ 55027404
Gojira94 replied to Gojira94's topic in MJ Tech: Modification and Repairs
I harvested a few of those at the boneyard. I fiddled with it for a while and couldn't quite get it situated. I'll try again to see if I can make that work temporarily. The pic helps. I think the changes in the holes in that panel over the years is why it's not quite intuitive how to use the later clip, staring at an 87 panel. -
Hood Prop Clip 34202710/ 55027404
Gojira94 replied to Gojira94's topic in MJ Tech: Modification and Repairs
This gives me an idea for a little L bracket, drill a hole, and pop in a replaceable plastic clip. Thanks! -
Hood Prop Clip 34202710/ 55027404
Gojira94 replied to Gojira94's topic in MJ Tech: Modification and Repairs
Would love to see that, much appreciated! -
Only one I see out there is in Germany. About $30 with international shipping. Anywhere else I MIGHT be able to find one?
-
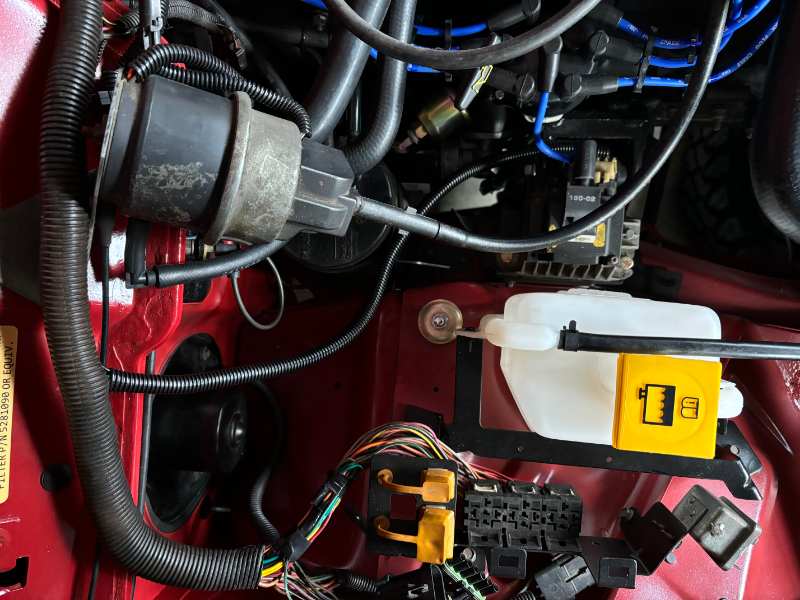
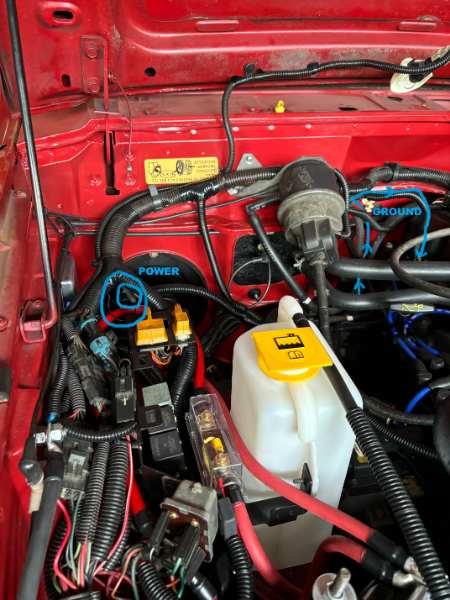
Front bumper is on, fender flares have new backing brackets. Part Time light wires tucked inside the engine control harness. Ground side I just added to the ECH ground pack at the passenger side of the engine. Power side is from the original C300. I'm using a later 2-pin switch from a spare 98 t-case. Headlight harness update installed. Next order of business, the dash and interior wiring so carpet and interior can go back in...

-
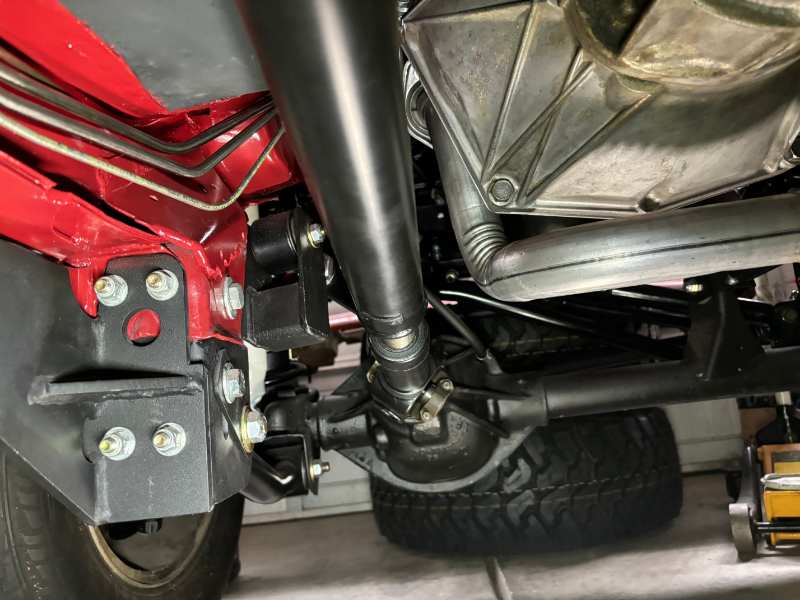
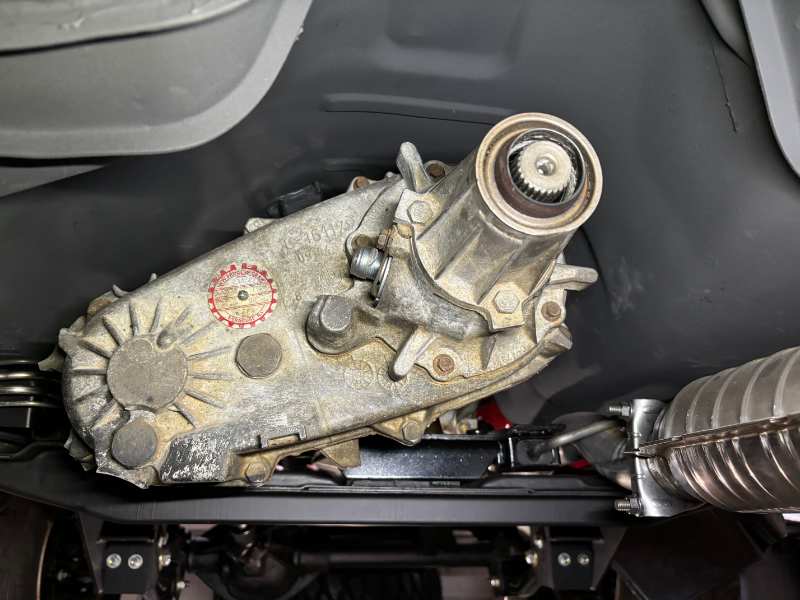
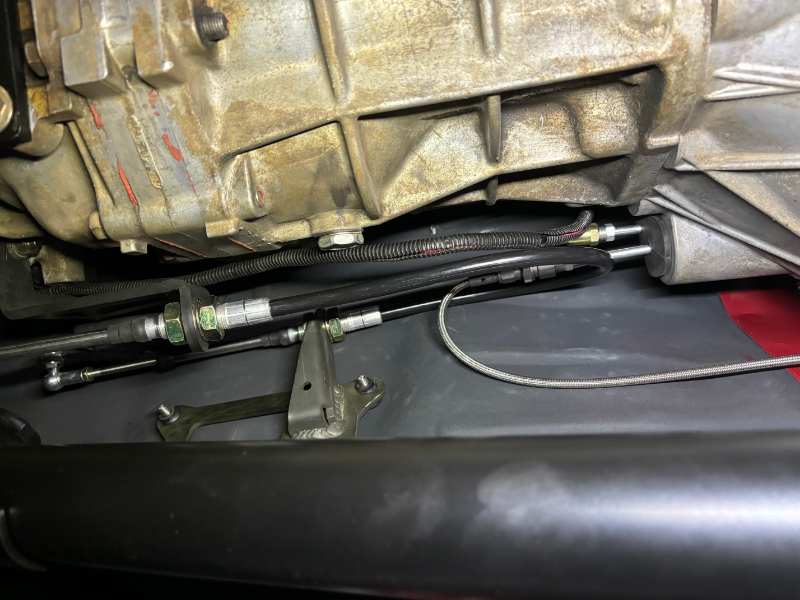
Transfer case yoke swapped, front shaft is in. Part Time light switch wires routed along the driver's side and then crosses over top of the trans and joins the wire pack for the reverse light switch, up to the main body of the engine control harness. Novak cable shifter is in, works great. I did have to re-shape 2 of the ears on the tunnel side bracket to fit flush: Speedo cable housing and new gear for the 33s in place:
-
Transfer case is in and Part-Time light is wired. However... I've remembered that the 93 YJ it came from had CAD. Turns out ALL YJs had CAD. And the 231 yoke on the YJs used straps instead of bolts. I do have a 231 from a 98 XJ that's for parts (locked up solid, haven't taken it apart yet). I can swap the yoke but man, that would have been easier to do on the garage floor. Last gift of the YJ case is this little factoid I remember from early project research. No big deal, just something to keep in mind for now. The early NP231 transfer case used in conjuction with vacuum controlled front axle hub disconnect on early XJ & YJ Jeeps did not have a true neutral disconnect between front and rear axles when the 231 is shifted into neutral, as controlled by crown in the sector plate on the left. The later 231's did have true front / rear disconnect, as controlled by the valley in the sector plate, right.
-
~HAPPY 38TH BIRTHDAY TO MY MJ~ 1JTHS641XHT137765 Build date 3/30/87 Body code TL61 Sold by CROSS COUNTRY MOTORS, INC, WILSON NC (Long gone, was 25 minutes east of where she sits now) *X1 -Y1 APA MONOTONE PAINT PACKAGE CBA BENCH SEAT - STRAIGHT BK CGX Head Restraints-Outboard Seating, RR DCB Transmission - 4-Speed Manual EPD ENGINE - 2.5L I4 TBI GAS HCC HEATER W/UPR LEVEL VENTIL - TYPE II LAP FUEL ECONOMY SHIFT INDICATOR LIGHT LMA HALOGEN HEADLAMPS MBJ Bumper - Front, Black MDA FRT LICENSE PLATE ATTACH REQUIRED NAA ESA W/CATALYST (EXC CALIF SYSTEM) PE4 Colorado Red QE4 Colorado Red SBA POWER STEERING TBG SPARE TIRE - COMPACT WMC BASE WHEEL DRESS - UP (INCLS TRIM RING)
-
Ordered one just now. H3lls y34h...
-
Charcoal Canister and vent line parts
Gojira94 replied to J33ps's topic in MJ Tech: Modification and Repairs
If any of that hard line can be saved, the less rubber or vinyl hose you end up using, and the better off you'll be. Any pics of what's left of the hard line? I had to clean mine out with acetone and some patience but it was worth saving. Just had a little rust to clean off of the engine side end of it, the rest was in good shape. I realize that not everyone might be as fortunate. -
Charcoal Canister and vent line parts
Gojira94 replied to J33ps's topic in MJ Tech: Modification and Repairs
The inner diameter of the hard line is very small, maybe 3/32". That said, you could certainly use 3/16" brake line to make a copy of the current, rotted one. At the tank, there are 2 vent/ rollover valves that join together near the fuel inlet/ outlet from the tank via 7/32" emission hose and connect to the EVAP hard line at/ near the fuel hard lines by the tank. The vent valves are still made by a few companies, including Dorman. The grommets that hold the valves in the top of the tank are also readily available. At the canister end, I used whatever I could find in my toolbox/ parts drawers for emissions connectors to make it happen. the large HDPE pipe that runs from the air filter box over to the canister goes on the larger port toward the front of the truck, the one marked 'purge' is capped, and the middle one goes to the hard line. The hard line terminates above and inboard of the brake booster. From there, 5/32" or 7/32" emissions hose to get to the canister.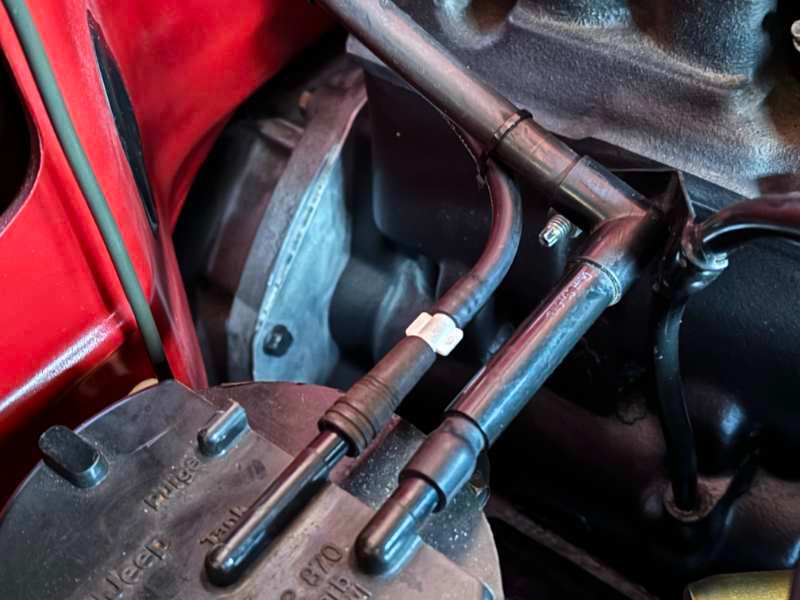
-
Thank you! It’s a long road… to the road lol.
-
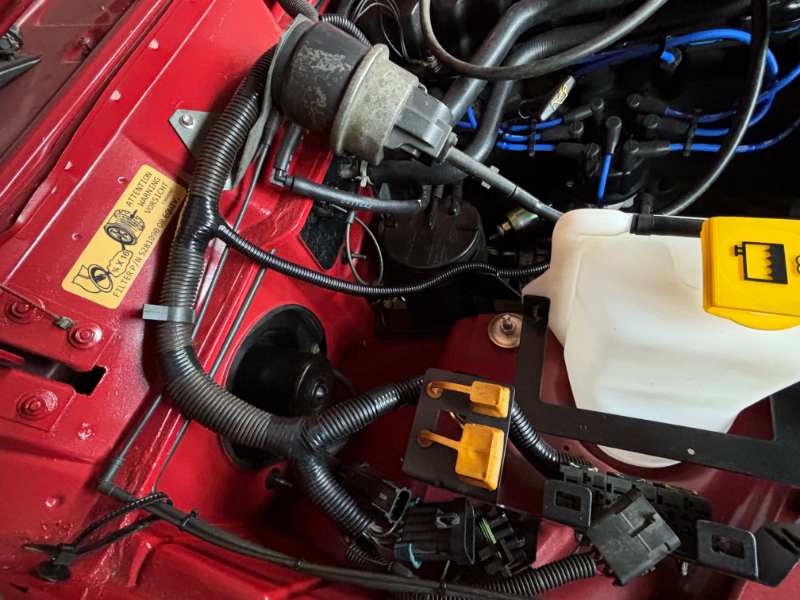
Wiring work, and everything else under the hood, complete. Now, onto the interior wiring and dash. Also need to clean the header panel and reinstall it, along with the front bumper.

-
link for donating to help fund CC
Gojira94 replied to Pete M's topic in MJ Tech: Modification and Repairs
One month's worth of operations sent. -
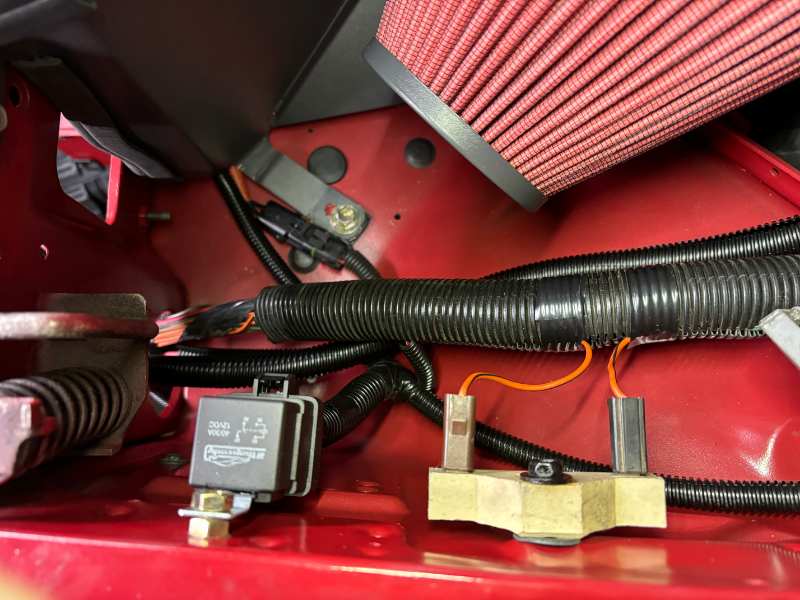
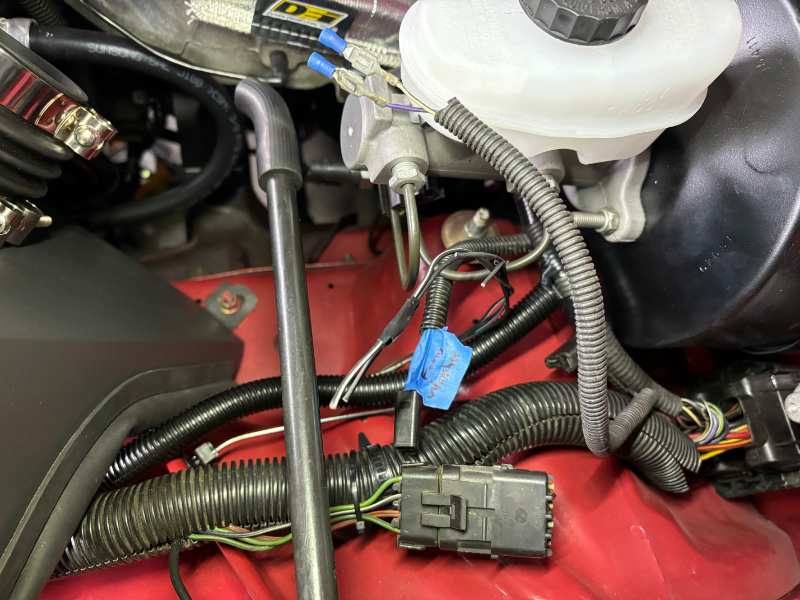
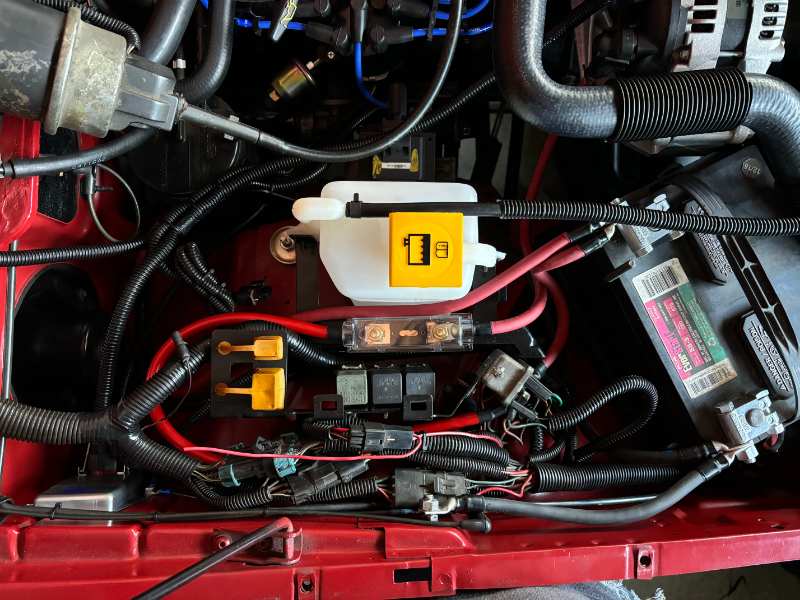
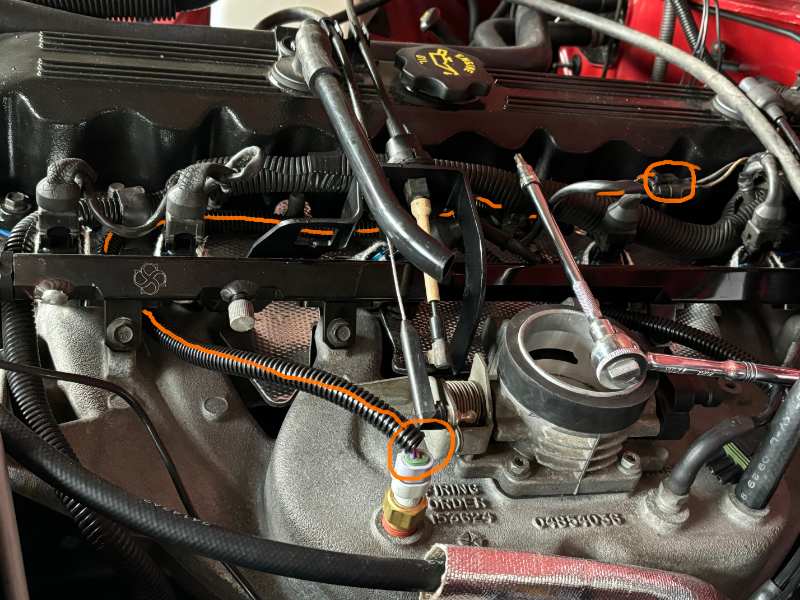
Minor update- I got the fan relay arrangement buttoned up and loomed, ballast resistor hung. I still need to terminate the power connection for the fan motor, I'm out of zip ties long enough to piggyback on the engine harness crossover under the chin. I've got the washer line plumbed and wires loomed. Just need to make the connections. For the low washer lamp I'm missing Pin 15 on C204, like most if not all pre-HO MJs. I'll tuck in the connector for C168 for now. I need to go harvest a pin for the instrument cluster soon so I can pretty much do what @Airborne Janitor did for his.
-
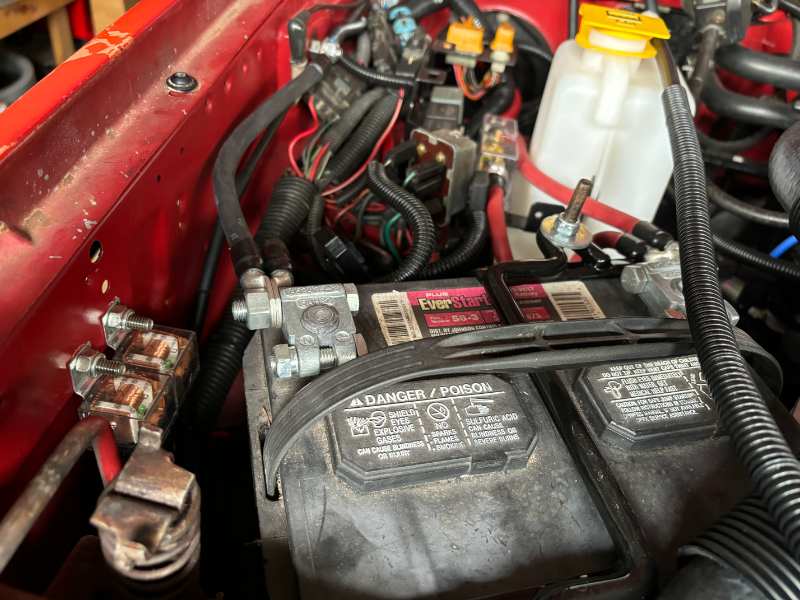
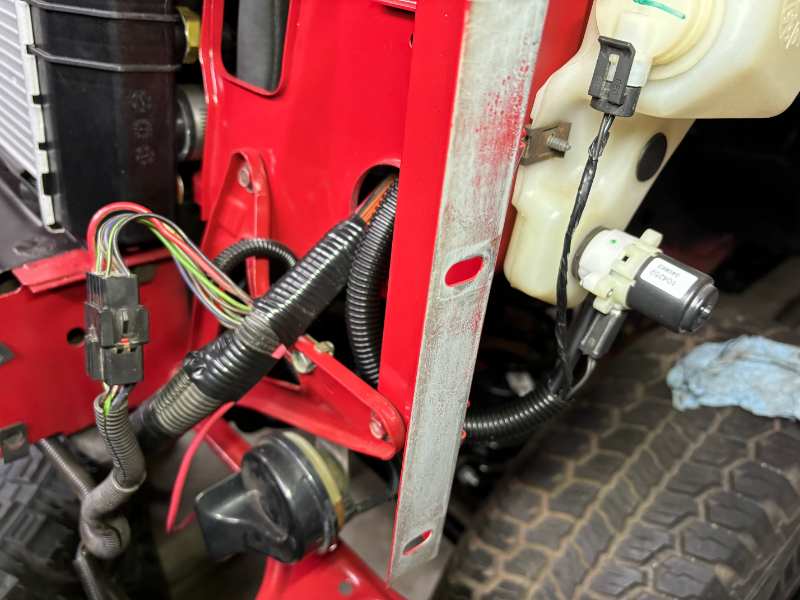
System wiring under the hood nearing completion. Alternator and external regulator wired. Big ground point added in RH fender panel. Tied into original alternator's yellow wire for switched 12V for the regulator, then zip tied and tucked the original alt connector. Power distribution about buttoned up. 200A alternator fuse (160A alt). Mockup battery is from 2016 according to the sticker on it lol. Good core for when I'm ready. The starter relay is backwards and upside down for fitment.

-
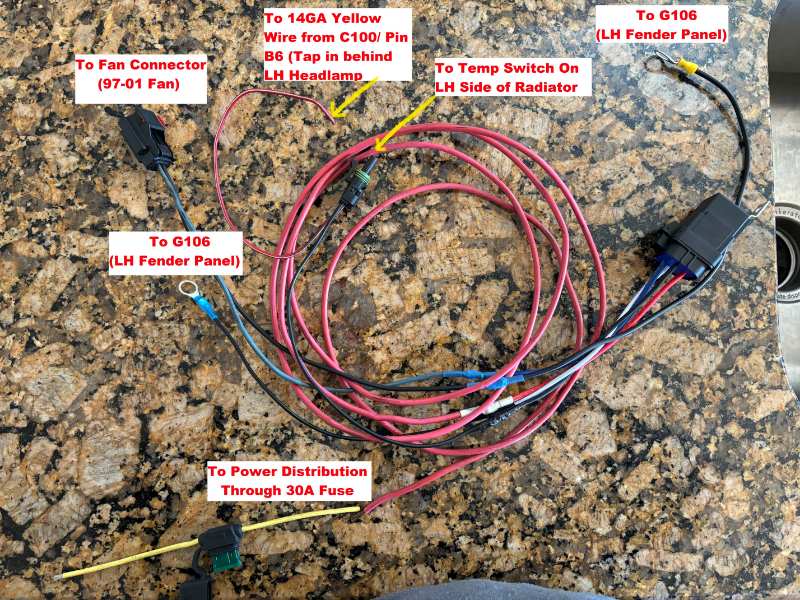
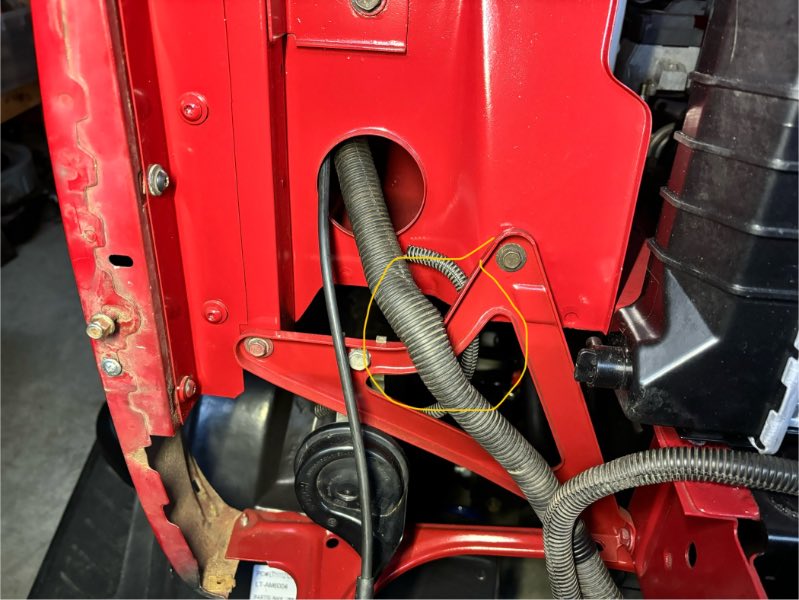
Home brew fan control harness, missing on my rig:

-
Quick Wiring Harness Routing Question
Gojira94 replied to Gojira94's topic in MJ Tech: Modification and Repairs
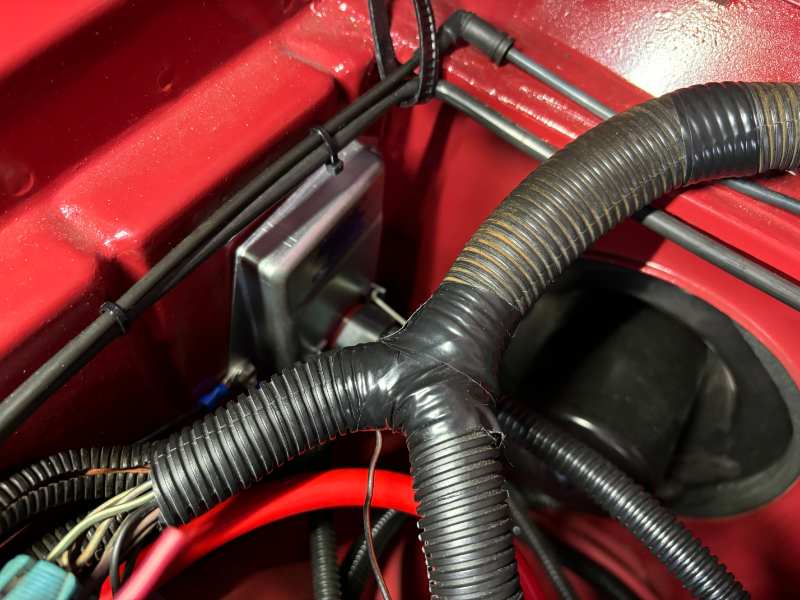
Thanks, I will be dressing things up before it’s all done. Just in the fitting stage right now. I found an old pic from 2022 where I’d just taken off the header panel and it was just like this. That doesn’t mean it hasn’t been moved since 1987 though my concern was getting the header panel on without a struggle. I think I’ll be ok either way. -
In front of, or through the middle of the fender braces?
-
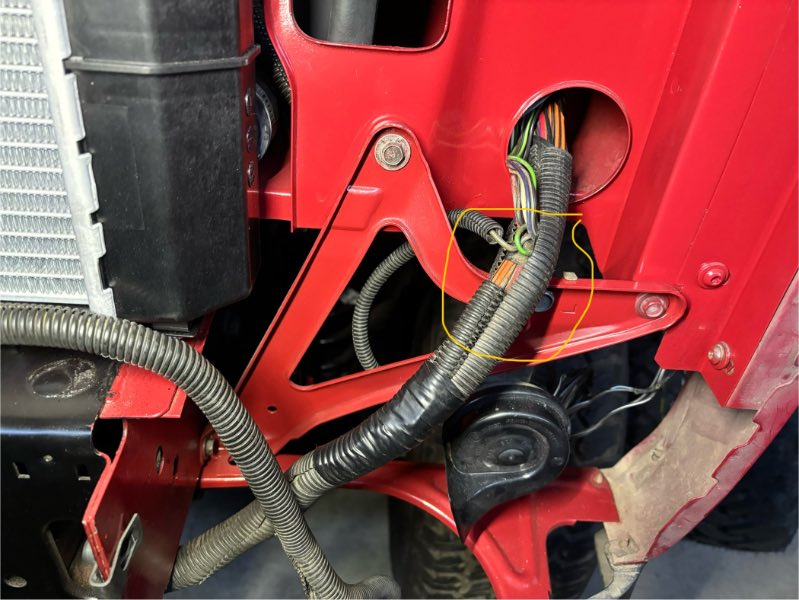
Little bit of work done on lunch break after working in Raleigh the last 2 days. I made the extension for the IAT sensor and got it tucked in the way I want it. Also tidied up the passenger side end of the Engine Control Harness.
-
Ho iac with renix harness
Gojira94 replied to ja_racing's topic in MJ Tech: Modification and Repairs
That’s exactly what I’m doing. No splices needed, IAC and TPS connectors and pinouts are the same. But the IAC and TPS wires in the Renix ECH need to be pulled out from the main portion of the harness and moved back toward the cowl about 4-5” so they can reach. Again, IAC pin out is the same. TPS is too, just need to make or buy an adapter for the Renix TPS to HO throttle body. My build thread is pretty in-depth on putting Renix control on an HO engine. -
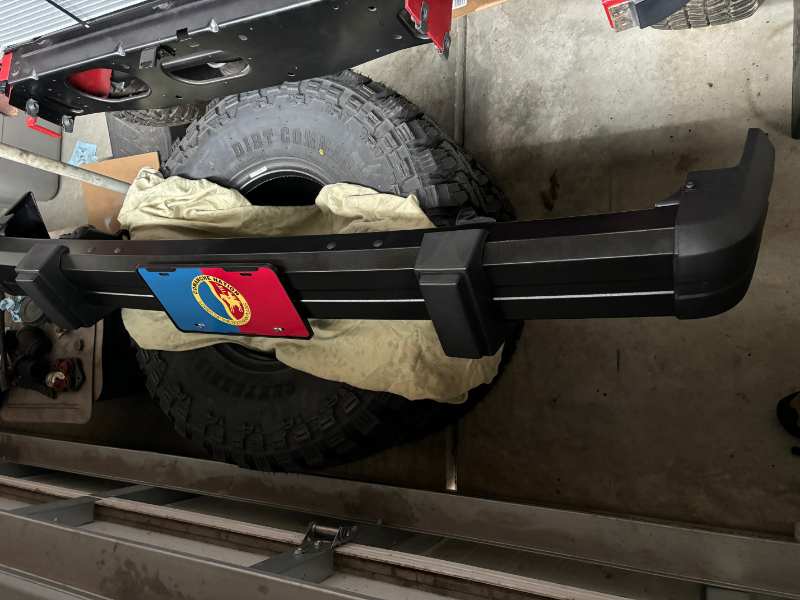
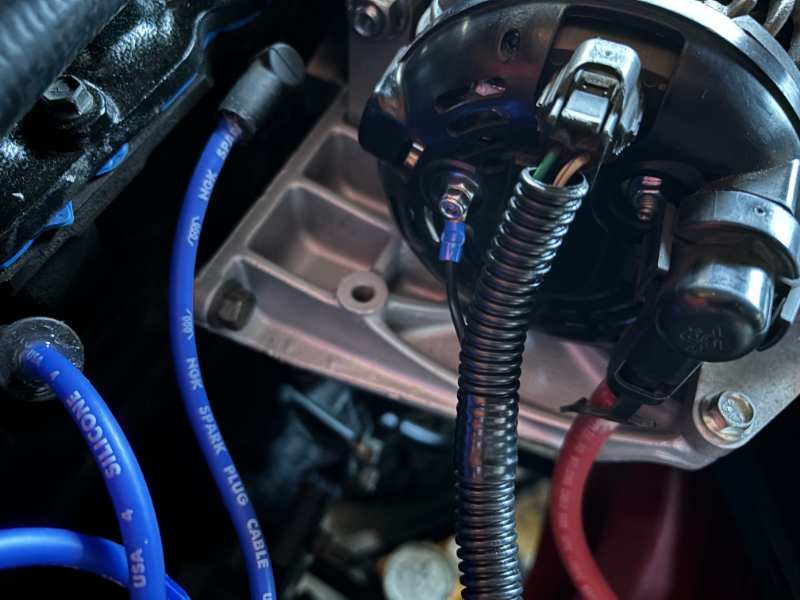
Coil and module move is done. I need to fix up the loom by the diagnostic connectors, though. In other news, the bumper is done and reassembled.