


Torq_Shep
-
Posts
921 -
Joined
-
Last visited
Content Type
Profiles
Forums
Gallery
Everything posted by Torq_Shep
-
 https://www.facebook.com/share/1JBMyc56G6/ It's rough but rare and the guy is only asking $100
 -
This may help.
-
I saw this. It is a great condition bumper! Someone else was selling a solid rear glass in Vancouver recently.
-
I struggle so much with this. My 4.7 stroker is a dog but it's tuning and exhaust I think. It's starting to make noises that I would hope are top end but I am nearly certain are bottom end. The unbeatable low end torque of the 4.7 is awesome. It's so good. But it's not a revver. Basically useless after 3.5-4k. An LS would be great but I worry that it would ruin the nostalgia of driving the i6.
-
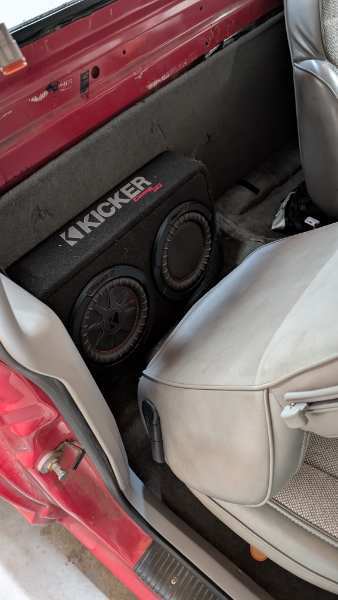
It sounds excellent. Gets into true sub bass which I wasn't getting with a small powered sub I had before. I made a bracket out of 1" angle that the subs sit on and then I just have one bolt going into the cross bar on the back of the cab. I am running it at about 1/4 power but it can do more bass than I would ever want =P You can come hear it if you are ever in south Seattle. I end up in Mt. Vernon for work every few months but I am usually not driving the truck up there. I played around with a lot of locations and forward facing behind passenger seat I thought sounded the most balanced. Granted that experimentation was with the old small powered sub. There is still plenty of floor space for jumper cables or whatnot below it.
-
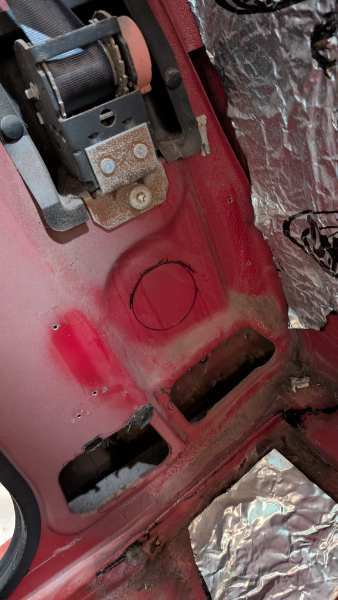
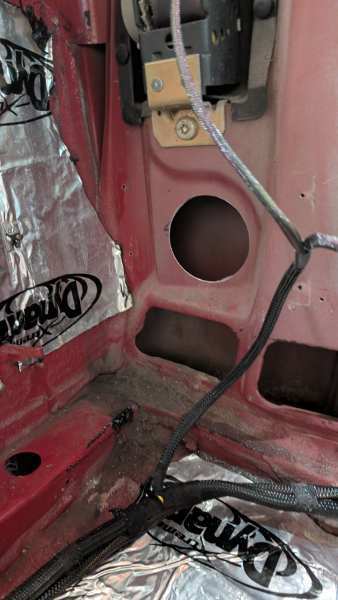
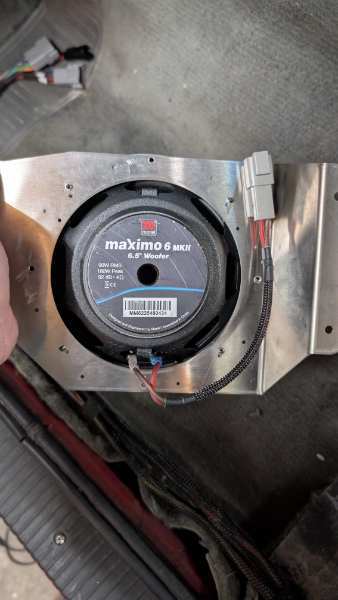
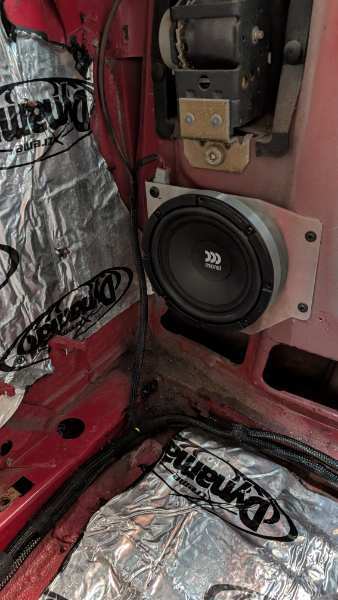
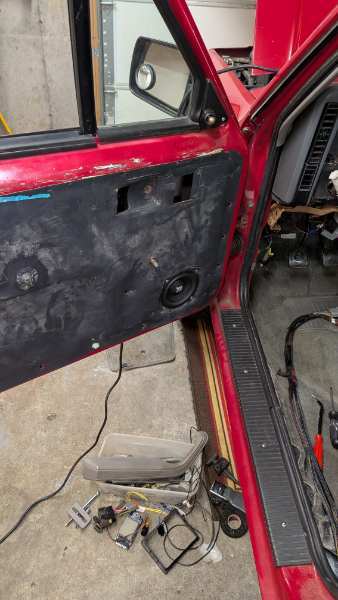
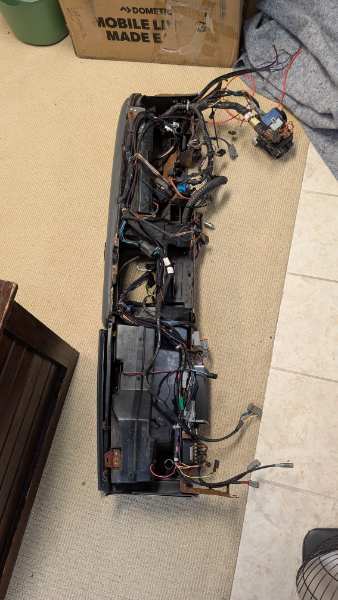
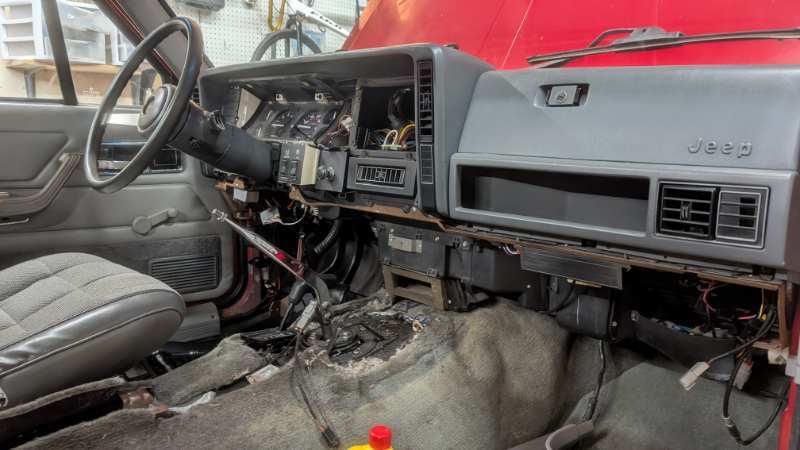
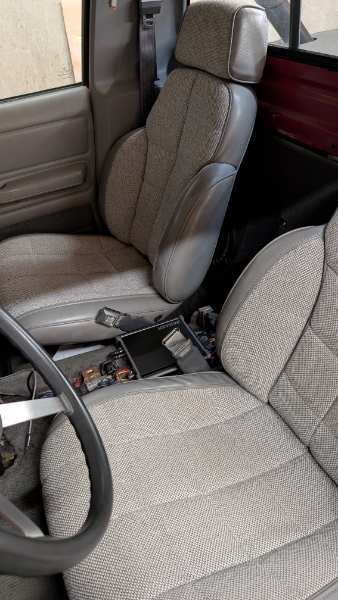
I finally finished rewiring the cab from kickpanel back and wiring all of the new sound system in. For the wiring itself it is all sized up one size from factory (18ga from 20ga and 14ga from 16ga). I ditched most of the factory connectors in favor of Deutsch connectors everywhere (solid pin type). For the audio wiring, I ran 18ga GXL for high level inputs to the 4 channel amp and to the rear subwoofer mono amp. All speakers have 16ga audio wire. I put the 4 channel essentially where the auto trans controller would go but mounted on the dash side. Mono amp sits under the center console. Crossovers are also mounted on the bottom side of the dash. Tweeters in stock location, @boxyjeep's 6.5" woofer adapters in the back. Front components are Morel Maximo MKii, rears are the same except I didn't run crossovers and excluded the tweeters. Read sub is a Kicker 8" passive radiator comp RT. 4 channel amp is the Kicker KEY200.4 with built in auto DSP. Rear amp is the Kicker KEY400.1. RX173 and I redid all of the lighting, ran the aux cable, and tuned down the AM signal to not interfere with Aux per @ghetdjc320
-
I hate the "parking brake" on my disc swapped D44. Can't ever get it to work right. Currently, it locks up tight in reverse and basically does nothing in the forward direction.... Honestly considering converting back to drums. I didn't install the swap kit but it annoys me so much. All that being said, maintained rear drums are perfectly fine and discs aren't necessarily an upgrade.
-
Pry carefully between the lens and the chrome surround putting inward pressure on the lens side until it pops out of the socket. You only need to get one side loose and the lens will come off. Left and right side is where the retaining sockets are, do not pry on the top or bottom sides. The lens rarely breaks. It is the chrome surround and other plastics that fall apart so when in doubt put pressure on the lens.
-
I personally committed to the Euramtecs they look close enough to the originals and aren't made of dust but I didn't enjoy trimming the 1/4" out of the one side.
-
Be aware, the factory housing are insanely fragile. Only try and take the lens off if you are checking the bulbs, do not try to pry out the whole assembly or it will break.
-
No problem! There were a bunch on eBay for insane prices but someone posted an XJ specific one for $50 free ship so I snagged it.
-
120mph full custom OE gauge cluster - $350 NW Arkansas
Torq_Shep replied to ghetdjc320's topic in For Sale
I have the entire UK set of gauges in my LHD cluster. Was a PITA to find years ago and had to have a friend in the UK buy the cluster and ship me just the gauges. -
I know it's a weird part but there is a bracket that the Renix ECU mounts to. If anyone has one around I would be interested!
-
Got one! Thanks!
-
K Suspension headlight relay harness
Torq_Shep replied to jodawill's topic in MJ Tech: Modification and Repairs
When you check the resistance between the battery ground lug and the ground pin on the drivers headlight connection, what is your reading? It should be <1 Ohm ideally. Checking it at the battery ensures that you are including the ground path through the screw itself as well. Did you make a new ground for this or did you use an existing location? -
K Suspension headlight relay harness
Torq_Shep replied to jodawill's topic in MJ Tech: Modification and Repairs
IIRC these work by taking the headlight switch input and routing that into 1 relay for low beams and another relay for high beams. Is there a brightness issue on the driver light with high beams and low beams or just on low beams? You need to check resistance of the low beam power connection at the headlight back to the relay. Likely pin 87 on the relay connector side. You should also check to make sure that you have very close to battery voltage between the low beam power light and ground on the drivers connection. -
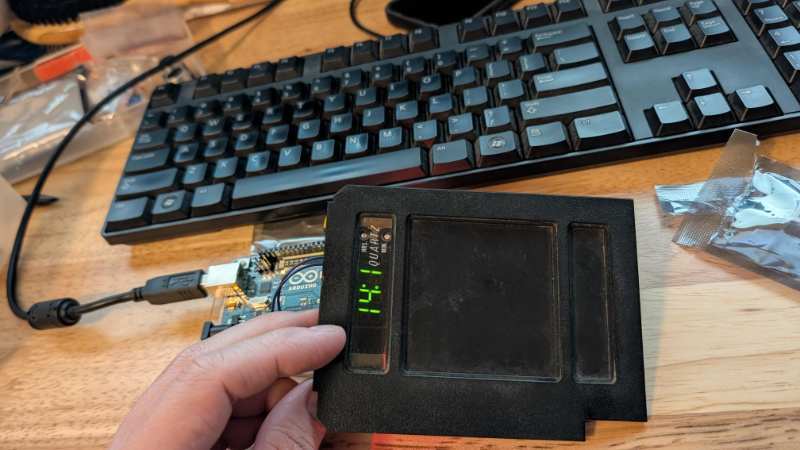
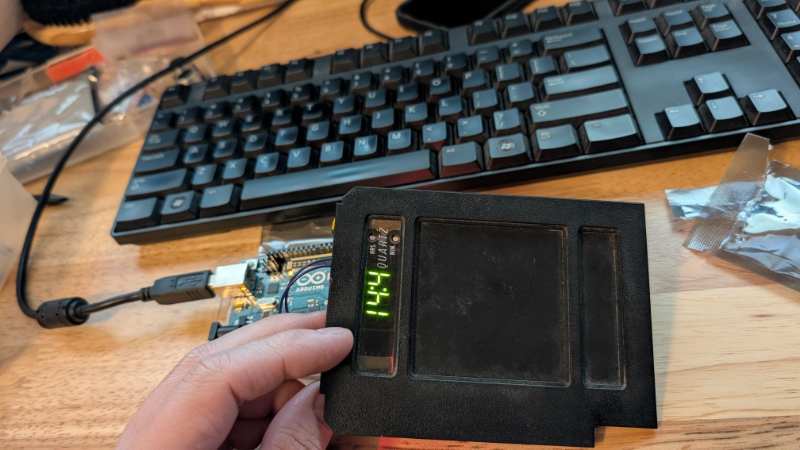
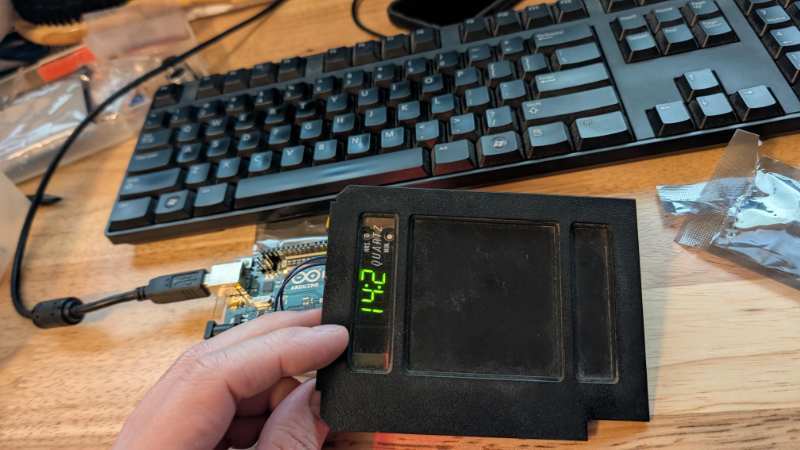
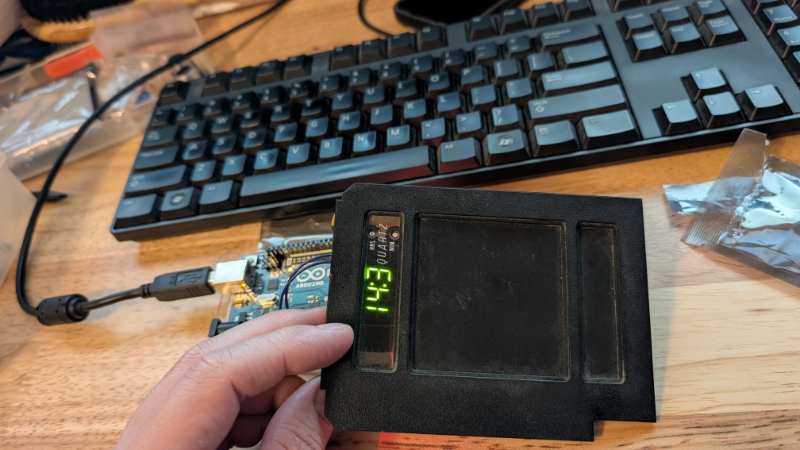
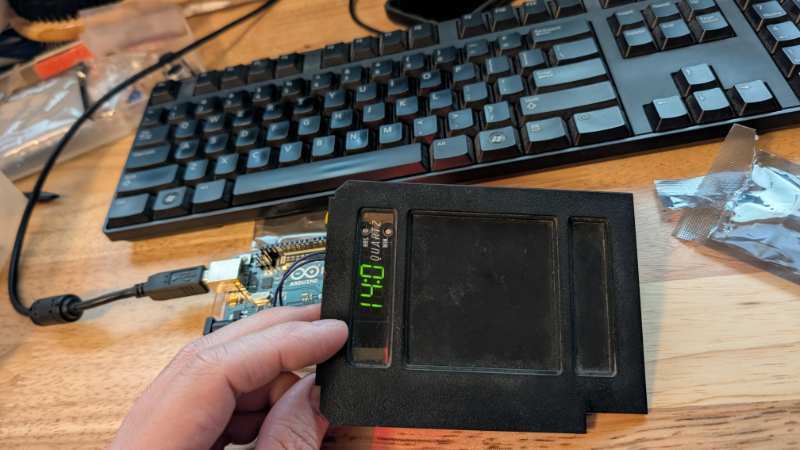
Only 5 years later and I am contemplating this same project. I am older and lazier and have found that the very standard TM1637 Arduino displays in green are not a perfect replica for the old VFD displays but they are 100 times easier to control and are not going to require a full custom circuit board (although I might do one anyway). The 14.0 is the lowest brightness. The 14.4 is the highest brightness option I am showing (from 0-7) as anything higher than 4 is essentially the same as 4. It is "too sharp" compared to the original VFD but the size is right and the implementation time if I ever actually do this will be much much lower.
-
Definitely interested. I can likely find (and may even have) an XJ/MJ shift lever but I for sure do not have the lower assembly.
-
Modified OEM Radios “Feeler”
Torq_Shep replied to ghetdjc320's topic in MJ Tech: Modification and Repairs
Yes please. I keep trying to convince myself to do all of this myself but I would vastly prefer to just get a built one. If you do another batch of HVAC controls... I have a good RX-173, and 2x parts RX units. -
I am looking for a full shifter assembly for an AX-15. My truck came with an aftermarket short throw and I want to try a factory one as I think I would prefer that. If someone has the shifter, shifter plate, and preferably shift console boot. I would be happy to buy it.
-
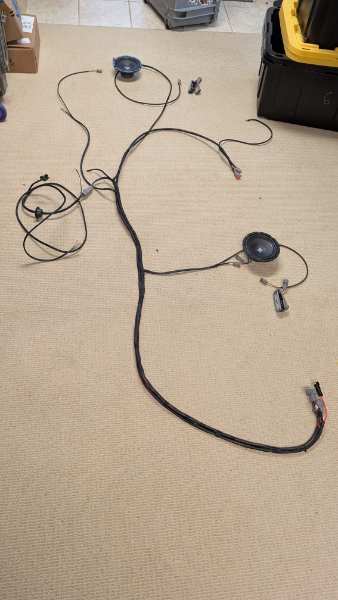
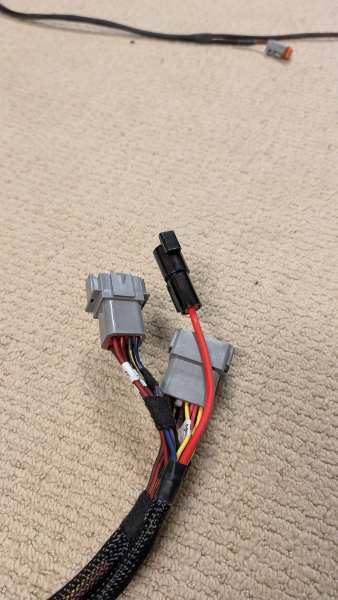
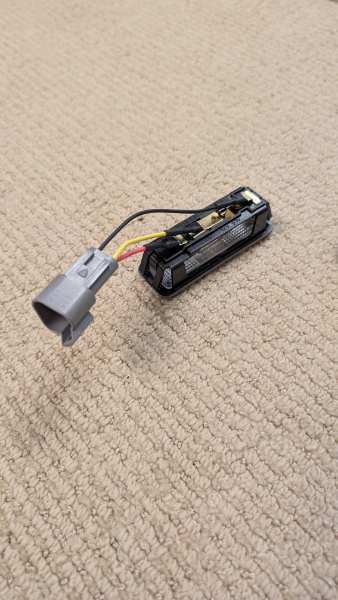
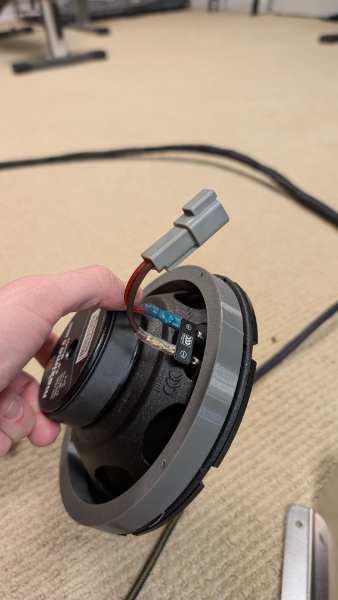
Okay so what has been done... Random fixes here and there. Had a burning smell in the cab that I thought might be electrical. Pretty sure it's my driver door speaker but that prompted me to start building more of the replacement harness. All of the harness from the kick panel back has been made. The new harness is all one gauge higher per wire, GXL sheathed. I kept all of the original wiring colors. Used Deutsch DT series with solid pins/sockets anywhere it made sense to do so. I moved the fuel pump ground to be inside the cab. All of the outer harness sheathing is mostly expandable sleeve instead of split loom. I have 16ga audio grade wire for the rear speakers that will eventually connect to an amp under the dash. I have an overlay harness for running a small powered subwoofer behind the passenger seat (25A of power, non-amplified speaker level inputs, and ignition trigger wire). Dedicated grounds.
-
This is a very good point. With that being said, I moved my hideaway pioneer to behind the passenger seat facing forward and I find it is a better experience for me in that location than it was under the drivers seat. Pioneer no longer offers that but Alpine offers something close to the same size and performance. Alpine-PWE-S8 Although if you don't care about fitting it under the seat and you are planning on a forward mounted sub... The biggest thing I would run in the cab would be. https://www.crutchfield.com/p_20651HS10/Kicker-51HS10.html Both of these components are pricy and there are cheaper alternatives that are good but not as punchy. https://www.crutchfield.com/p_109BASPRON/JBL-BassPro-Nano.html
-
I had a literal book written here and I re-read your post and I one comment and a few questions. Almost any head unit is not "powerful enough" to get the full range of most aftermarket speakers. This is a true statement. However, what is it that you feel you are missing from your sound right now? Would you otherwise be happy with the speakers and head unit if there was just a little bit more bass? If so, have you considered just adding a small sub and seeing if that makes you happy? There are two easy paths you can take here that are much less intrusive than a full amp and sound system wiring job. It also is something that can be re-used if you decide that you really do want to add an amplifier to your speakers. To add a sub, because you already have an aftermarket radio, regardless of what sub, you will need to run a set of RCA cables from your head unit. I assume that you installed the head unit correctly and didn't cut the factory wiring, in which case you would have a pigtail between the aftermarket radio and the factory plug. You will also need to connect a wire in the pigtail on the "Switched 12v" wire. Both of those wires will go back to your amp or powered sub. You will still need to run a power wire back to the battery with a fuse and you can pass that wire through a number of areas to get it into the cab. If you use a sub that is less than 250W you will only need a 10ga or maybe even a 12ga wire for smaller subs and that is MUCH easier to route in than a power wire for a bigger sub. For the sub itself, for a Comanche, if you don't want crazy bass, you can use a sub that is less than 200W and get more than enough bass to supplement. You can either run a 1 channel amp and a small dedicated sub or they sell "powered subs" which have the amplifier built in and you do not need to have both an amp and a sub. Some may disagree but the powered subs are fine for small cabs... They are also easier to wire and install for someone who isn't 100% confident. Any powered 8" or powered 10" sub under 200W is probably going to work well and my recommendation would be entirely on budget. The Crutchfield sales reps aren't magic but I wouldn't be afraid to ask them about which one they recommend for your budget if you give them these parameters.
-
What CC knows about stock Jeep radios
Torq_Shep replied to NickyV's topic in MJ Tech: DIY Projects and Write-Ups
This is awesome. I am getting ready to do this on mine with a stealth setup. Mind sharing what set of shielded cabling you used? -
I am actively building a rear cab replacement harness and new door harnesses. This experience is telling me it is time to get off my butt and actually fix the electrical from the cab back. I am nearly done with the rear cab harness and just need to make the fuel pump and rear extension harness that matches and I will put it all in at once in a few weeks. All 20ga bumped to 18ga GXL, 16ga power for Fuel pump bumped to 14ga GXL. Deutsch terminated on most connectors. All sleeved with mostly solid expandable sleeving. The wiring on this truck has been a bit of a known issue from years of random accessories tapped in. From the kick panel back has always been the most problematic so I guess I just got annoyed enough to fix it =P