
Dzimm
-
Posts
3580 -
Joined
-
Last visited
-
Days Won
11
Content Type
Profiles
Forums
Gallery
Everything posted by Dzimm
-
Both breakers on Circuit 1 box to stove is 4.6v Circuit 1 box to neutral is 4.6v Circuit 2 box to stove is 2.3 v Circuit 2 box to neutral is 2.3v
-
Circuit 1 breaker on Circuit 2 breaker off Circuit 1 box to stove is 4.2v Circuit 1 box to neutral is 4.2v Circuit 2 box to stove is 0.3v Circuit 2 box to neutral is 0.3v Both breakers off Circuit 1 box to stove is 0.1v Circuit 1 box to neutral is 0.1v Circuit 2 box to stove is 0.1v Circuit 2 box to neutral is 0.1v Circuit 1 breaker off Circuit 2 breaker on Circuit 1 box to stove is 0.7v Circuit 1 box to neutral is 0.7v Circuit 2 box to stove is 2.0v Circuit 2 box to neutral is 2.0v The only thing plugged in as far as I know is the fridge on circuit 2. We moved it from 1 to 2 because we left 1 off overnight.
-
Ok so it's circuit 2 that's the problem? Since the boxes are tied together it makes it seem like it's circuit 1?
-
Stove to 1st circuit neutral = 0 Stove to 1st circuit box =.1v
-
.1v
-
Zero.
-
-
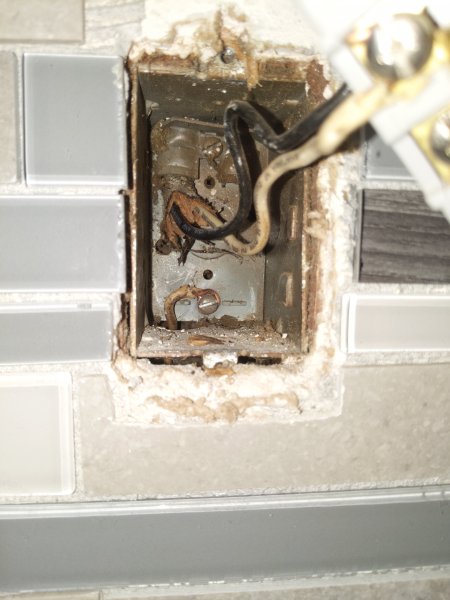
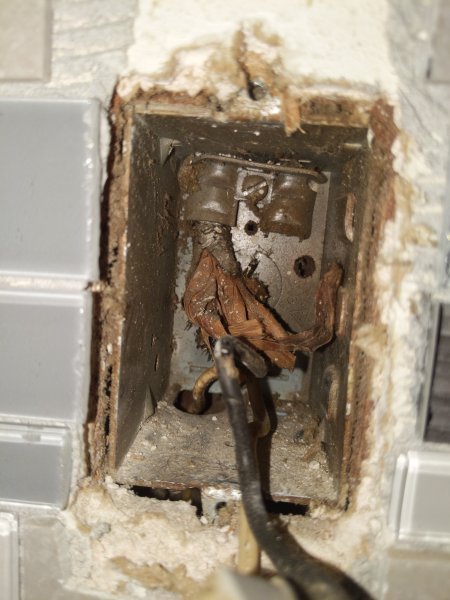
Definitely no knob and tube, it was built in 1967. The wires are a black and white in the black/silver insulation. In the picture you can see the random white wire coming into the bottom of the box.
-
I did this for all the kitchen breakers but when I turn one off, it's boxes no longer are energized but another circuits boxes are. I suppose I could have 2 shorts? I'll go through and try every breaker in the house.
-
It is a new panel with all new everything. The wiring however is subpar at best. The stove only has the normal wires it should going to it but who knows what's behind the wall, the wire comes out of the drywall and there is spray foam around it..
-
Off. I'm using an extension cord from another circuit to test with a separate hot.
-
Back of inside yes. And bottom of underside of another, pried the bottom of the box up to see it.
-
Hot to water pipes is 120v though so that's great
-
There are 3 receptacals touching the backsplash, 2 circuits. Just checked and no continuity between the box and the water pipes or any other metal under the sink.
-
They are separate from the other wires. One is white and attached to the underside of the box, the other two are brown and attached to the very back of the box on the inside. I'm used to the typical Romex and organized wiring. So far this house has been a bunch of cobbling and a complete mess of old wiring so I wouldn't be surprised if they ground to a pipe.
-
It is for sure the outlets and yes they are in metal boxes. I actually found the boxes to have a wire attached to them that runs into the wall. I'm assuming this is an attempt at grounding the boxes themselves, which would make them theoretically also neutral. During the project the outlets were in the boxes and mortar only touched the ears of the outlet mounts. The boxes are recessed in the wall due to multiple layers of drywall. I've got 2 receptical circuits in the kitchen and both have power to the mortar. One is only 5-10v, the other is in the 40v range unless the breaker is turned off (leaving that breaker off for now). Another question, is it okay to have a microwave powered from a leg of the stoves 220v circuit? That's how it was wired up (220v plug on the floor, 120v wire runs up to microwave from the plug) but I wasn't sure that's okay and disconnected it during troubleshooting as the microwave had power to mortar too.
-
I'm hoping someone who knows more about house wiring than me can help me out. Our house is old enough it has the bonded ground and neutral bar and I'm almost positive this is the cause of my issue. We put up our backsplash today and I found out that touching the mortar and chassis of the electric stove gives a shock. I put the multimeter between the stove and mortar and it read 140V. I realized the mortar was touching the outlet mounts on the wall. Cleaned the mortar away from the outlets and microwave brackets but am still getting 40V on the mortar. 140V still directly on the outlet mounts. I'm assuming that since the neutral and ground are bonded in the panel, it's causing the ground in the stove to find neutral/ground in the house through the outlet mount. But then again the outlet mounts aren't connected to ground as the wiring in the house doesn't have a ground. I'm utterly confused as to what is going on but I'm worried to push the stove back against the wall and having current flowing through the mortar. I'm hoping it won't be conductive after fully drying. Any help or advice is welcome.
-
I find the more projects I have, the more motivation I have to work on them. For that price, I say make an offer to see what happens, point out anything that takes work to fix but take it even at $1500 if it's not in bad shape.
-
Thank you!
-

Repainting the Comanche...seeking some wisdom
Dzimm replied to Ryno's topic in MJ Tech: Modification and Repairs
I had the same issue with my blue truck. I didn't want to spend an arm and a leg on paint and it was already a rattlecan disaster like yours so I did everything myself and rattle caned it afterwards for a couple hundred dollars all in. In my 97+ build thread (link below) you will find the posts about paint, I believe on page 2. As for the decals, I used a flap disk to take them off. Was the easiest thing I found that worked and I had to do a ton of sanding anyways so it was easier to repair the flap disk marks in the factory paint than it was to deal with pealing the decals. Even with heat I could only peal about half inch pieces. It all comes down to what you want to spend on it and what you want it to look like. Do it "right" and you'll spend thousands of dollars, do it wrong and it'll look bad. Contrary to popular belief, you can get a decent looking rattle can job if you take your time, prep properly, and spray as you would a real spray gun. It won't be a show quality finish, but it won't look bad either. It's all in the prep and make sure you clear with an automotive grade clear coat. I painted mine 2 years ago and still looks like a relatively fresh paint job. Just whatever you do, don't rattlecan flat black because it will show everything no matter what you do. -
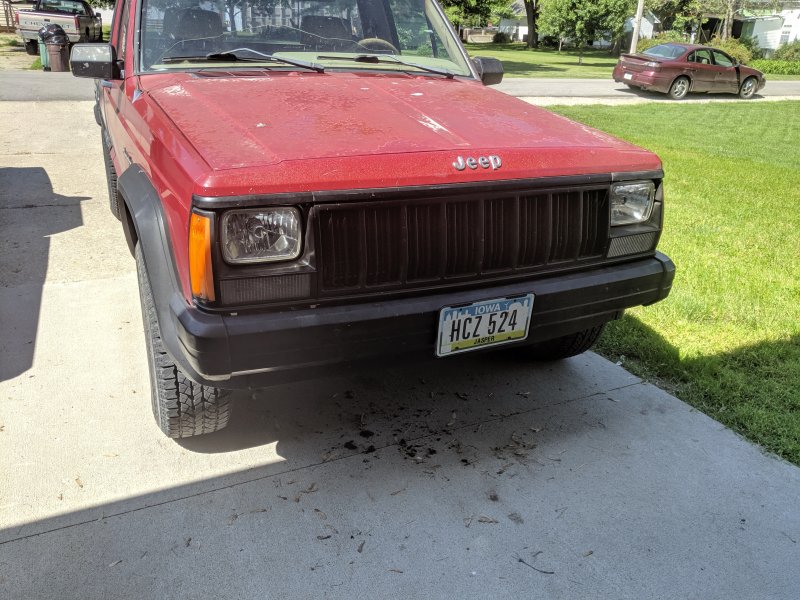
Managed to get the bumper swapped today. Straight and clean.
-
Well thank you sir. I'm so lucky that half of our registry is tools and she actually agreed to it!
-
Time for an update. Not much has changed since the last post, just daily driving the red truck. I ended up getting a message from a guy 2 days after getting the XJ springs, he had a pair of springs in better shape than what I got and only 20 mins away from me. picked them up for $30 for both. Those springs are now separated and waiting to get cleaned. Today I did oil changes on both trucks and did a general check on them and all is well. Decided to pull the H4 headlights off the XJ and the not faded from end as well. The truck looks so much better now. The bumper on the XJ is straight and not faded either so that will eventually be moved also. I've got tons of house projects going on right now, a few trips coming up as well as my wedding along with quite a few other small things I need to do so the trucks are kind of on hold for now. Will update with any progress that is made but it will probably be a while.