Gjeep
-
Posts
1221 -
Joined
-
Last visited
-
Days Won
3
Content Type
Profiles
Forums
Gallery
Everything posted by Gjeep
-
Looks good...I’m running those on my 2001 xj, but know those are 96-98 grand Cherokee zj rims. Tj rims are 15x8 and the slot is more of an angular cut-out.
-
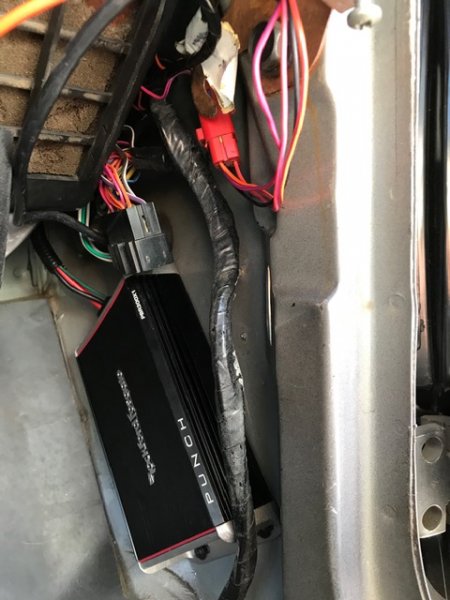
Exactly. These amps need just under an inch breathing space all around to keep cool. Kick panel isn’t a fully enclosed area fortunately. Should be a-ok.
-
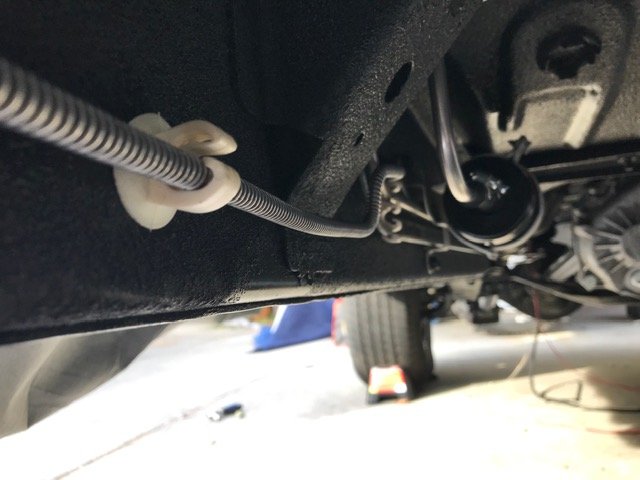
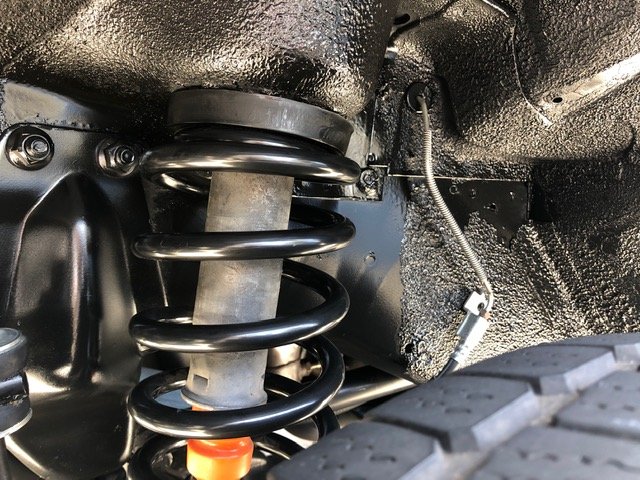
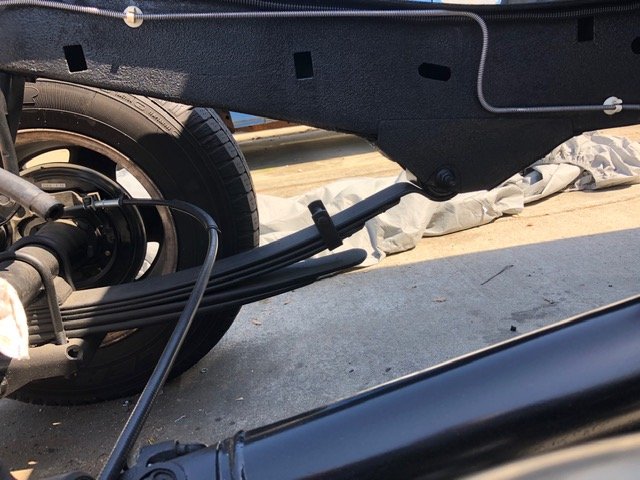
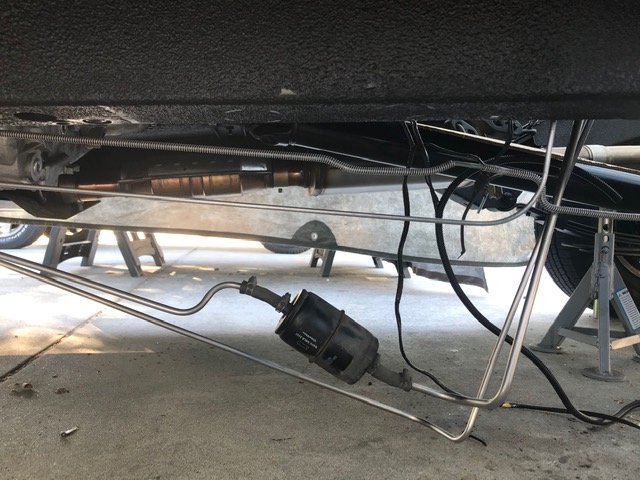
Thanks...I do what I can to make those sound system additions visually subtle. I want my enclosure set up to appear 'factory' Comanche somehow. Finally got the fuel, brake and breather lines in place. Came out nice and clean. I know most people do'n't notice chassis side, but I do. Nuts I know. And axle brake line attached.
-
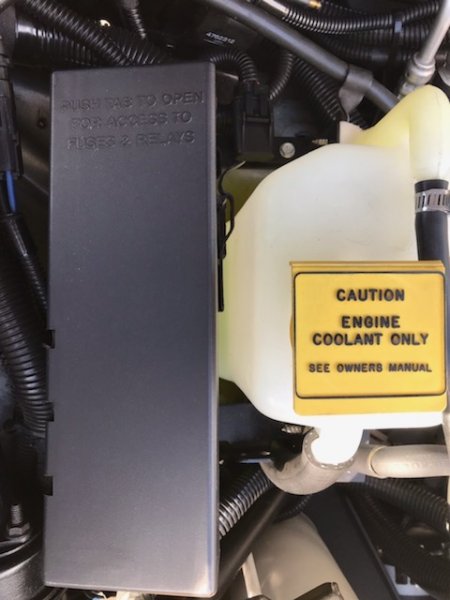
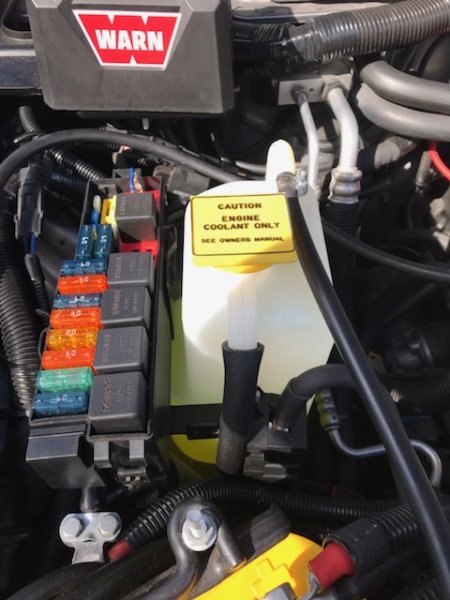
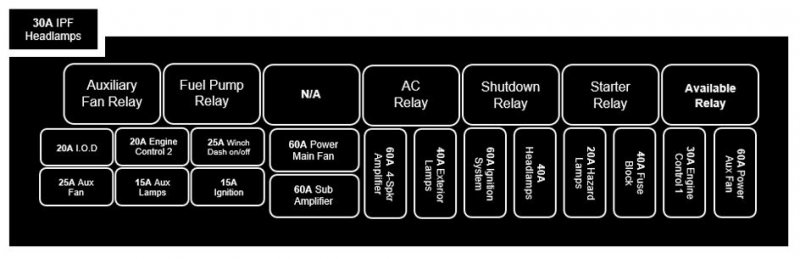
Chipping away and changing a few things as I go...Since I'm going to be running subs behind the seats now, I needed to go in yet again to the PDC and modify things so I could get 60W fused power to run the Rockford amplifier that will power these. With that, I need to bump the IPF relay harness power to just outside the PDC -- about where the cruise control servo cable attaches to the PDC/overflow reservoir bracket -- in a weatherproof fuse holder. Diagram and photo below. The Mega fuse holder for the 270A alternator now resides in front of the coolant jug for easy access (use to be in the mounting area of the DirtBound battery tray -- a nightmare to access). I also added a hose off the overflow so if coolant does flow out, it won't wet/damage any of the electric. With those changes engine-side, I was able to run the wiring inside and install the subwoofer amp opposite the main 4-speaker amplifier -- on the passenger side footwell panel. I needed to move around the power window relays and connector that powers the harness for the inner door passenger side to makes things work, and make sure the amp has enough breathing room. Eventually all loose wires will be organized here too...
-
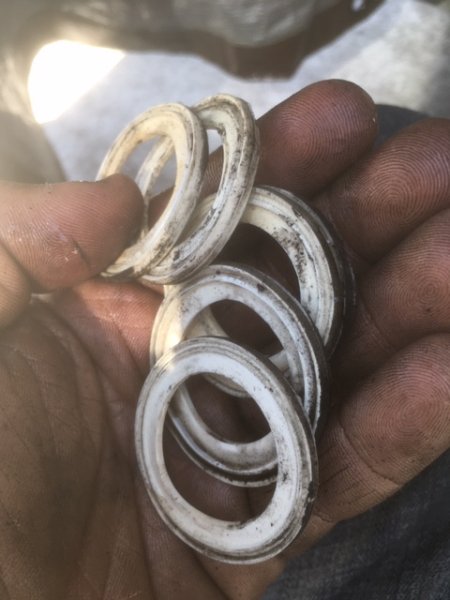
Also been freshening the fuel tank with new hoses, clamps, and roll-over safety valves. I was surprised to find both the seals on mine were cracked. Chances of fuel actually leaking out of these are slim, but while they are sill available from dealers I'm replacing both the seal and valve of both.
.PNG.3ac5058715bf4b00a4d9101bfb120c11.PNG)
-
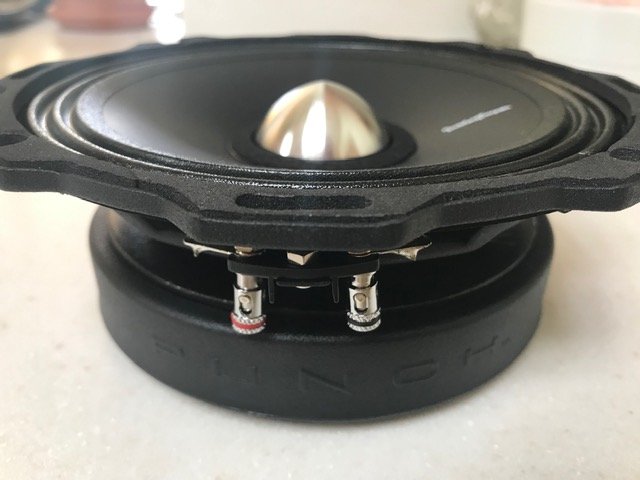
My 6.5" Rockford woofers came today...they're about 2.5" deep and heavy as the 8" sub going in my '97 XJ. Looks like I'm going to need to rethink my subwoofer area. Either going to build a MJ specific fit-to-the-backwall enclosure and/or adapt the first gen XJ separate sound bar to hold those speakers, as that sound bar is plenty deep (unlike the '99+ XJ integrated sound bar). A little project to get to.

-
Broken leaf spring...Standard longbed 4.0 1987
Gjeep replied to DC3's topic in MJ Tech: Modification and Repairs
For what it's worth, my '89 MJ has NOS metric ton leafs installed and my '92 MJ new General Spring metric ton leafs... same amount of lift on each 3.5". -
It depends what kind of condition your current sockets are in...AC Delco# LS7 if you need the entire socket and it's about $25 per socket. Gray in color like OEM. https://www.carid.com/acdelco/gm-original-equipment-side-marker-lamp-socket-mpn-ls7.html?view=236082&gclid=EAIaIQobChMI0NeB8vup6QIVTOztCh3c8g5jEAQYAiABEgIV3fD_BwE Or if you just need the backing, the less expensive way to go is through Wiring Depot. Their socket# 2583F is cream/ yellow color, but only $7 per socket. https://www.wiringdepot.com/store/p/494-JT-T-2583F-3-Wire-GM-Chrysler-AMC-90-Double-Contact-Back-Up-Stop-Tail-Turn-Light-Socket-Pigtail-1977-Newer-1-Pc.aspx Removing the terminals of your current MJ sockets are easy to remove and pop into a new connector.
-
Took a bit, but finally clean.

-
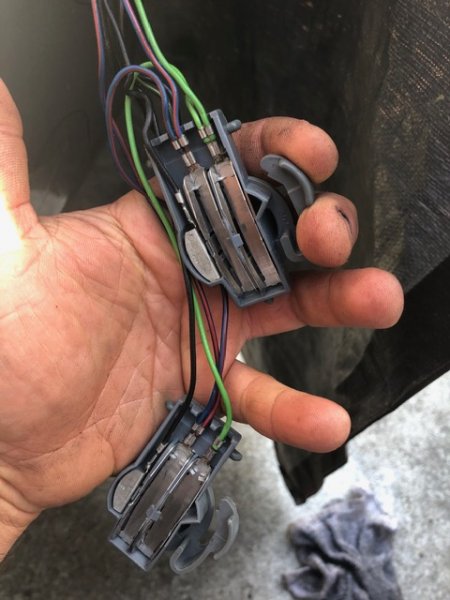
Door light pin connectors. The door pins (of door jamb) connect to the rubber boot side of these and the side you're holding for power/ ground.
-
Project CRD MJ is born:
Gjeep replied to Sir Sam's topic in MJ Hardcore Tech: Epic Journeys to Greatness
Nice attention to detail on in the engine bay/ chassis. Looking good. -
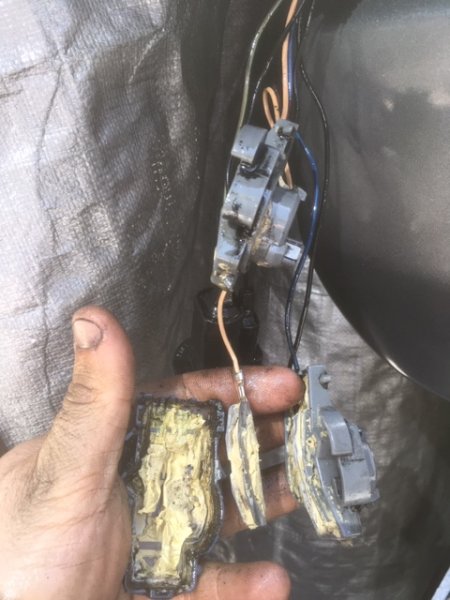
Cleaning crud today -- Tail light sockets are always a mess on MJ's. Disassembling and cleaning them out. The terminals come out easy enough. The clear back side I'm just going to replace versus cleaning... Fill it back up with dielectric grease and replace wire loom with a new. Also, for those who haven't noticed, the turn signal socket gaskets all around on the '97+ XJ are worth swapping over to your MJ. They're a high quality gasket, unlike the foam gasket MJ's and early XJ's.
-
That darker saddle/ tan. I forget the official Jeep name...Honey I think it was?
-
The truck is clean and all original (aside from that strange decal on the side). I looked at it when it was last up for sale as it is about 30 minutes from me. The factory winch is complete and not abused. If i wasn't a long bed, I'd try and snag it for $4000.
-
Front fender wells are painted. Currently drying so loose parts and missing shocks. General clean up to do, but the chassis paint is done. The bump stop tower will be body color.

-
It's back up for sale. https://sfbay.craigslist.org/sfc/cto/d/san-francisco-1987-jeep-comanche-sport/7119640745.html
-
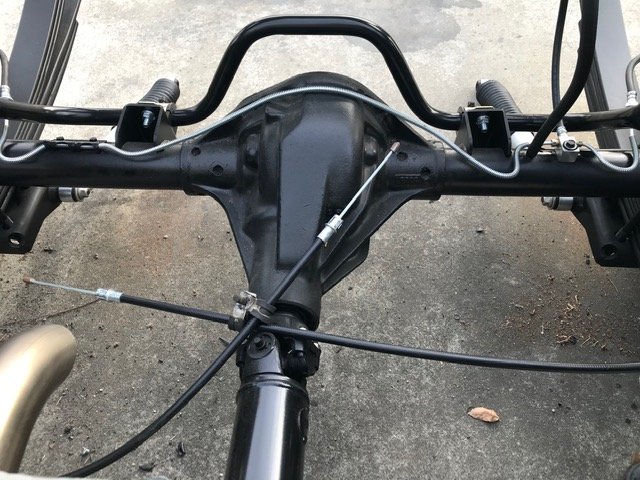
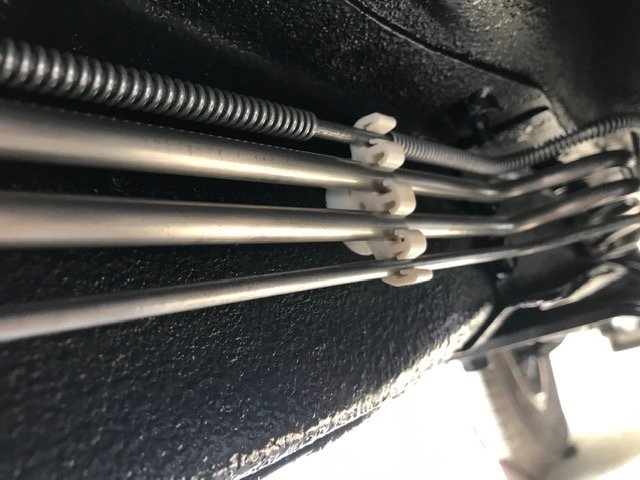
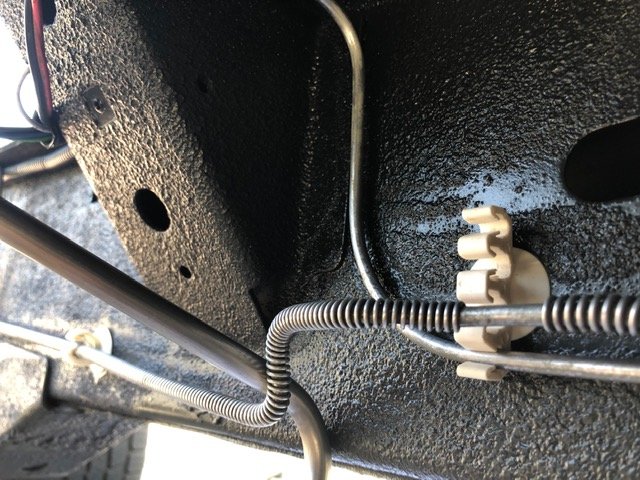
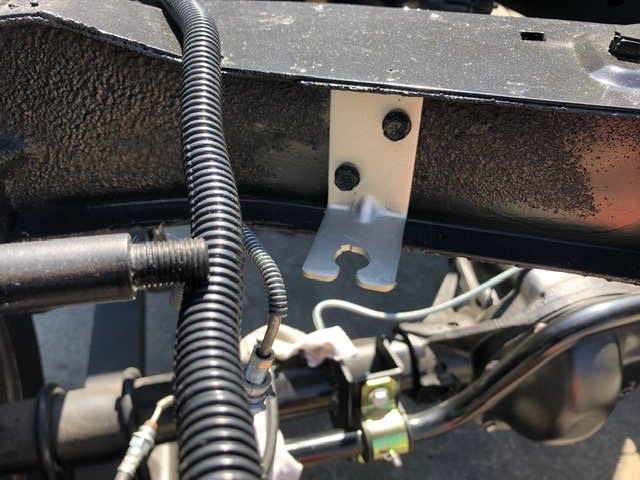
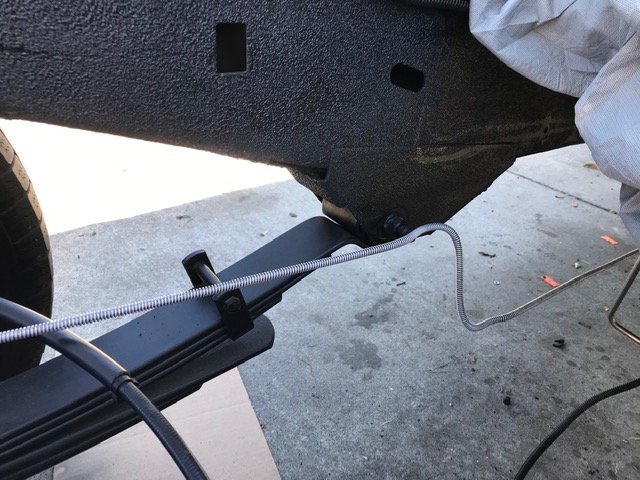
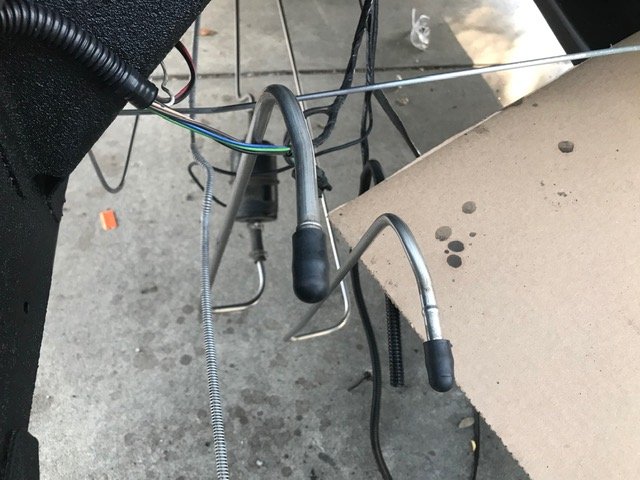
More detail work...Since I removed my axle load sensing valve a while back (because I'm running an XJ brake proportioning valve and have a camper shell with additional weight on the bed) my MJ second chassis brake line was deleted -- so I can run one less channel brake line clips all the way back. Since the XJ/ MJ clips are no longer available, the closest option for a 4-channel frame rail clip is off the Liberty. Only difference is, the newer (OBD2) vehicles don't have 2 fuel lines coming from the tank, so one of the slots needed to be enlarged for my other chassis fuel line (at right in photo). Also, cleaned and painted the bracket for the rear brake line support at the 'X' member under the bed. A new drivers side brake line has been bent for 'T' split on the rear axle so to not get in the way of the sway bar. Currently degreasing the front fender openings so I can spray it satin black as the rest of the 'frame'...
-
Nope -- GooGone Pro Power soak, terry cloth towel scrub/ wipe, then red scuff pad soaked with GooGone Overspray Remover, wiper down, hit with brake cleaner, GooGone ProP Power spray and brush with small soft steel brush, towel wipe down...repeat I don't know how many times until clean. And then cleaned again one last time to be sure.
-
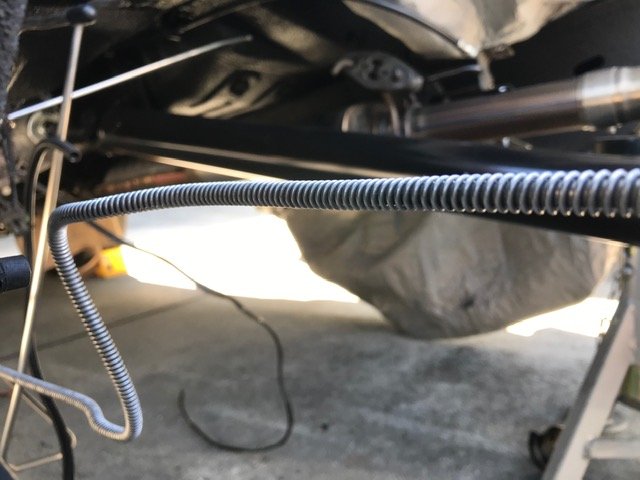
Finally finished detailing all the fuel and brake lines on the truck. The coiled armored ones were the biggest pain, but look the best when clean. As I'm seeing this MJ come together, I'm thinking about a non-metallic silver. Either the factory 1992 Jeep Silver Star color minus the metallic flake...or the newer Toyota Cement color. I've seen both in person and they are surprisingly close to the same color. For the sake of this forum, I grabbed to similarly lit photos of the 2 colors. Will see.
-
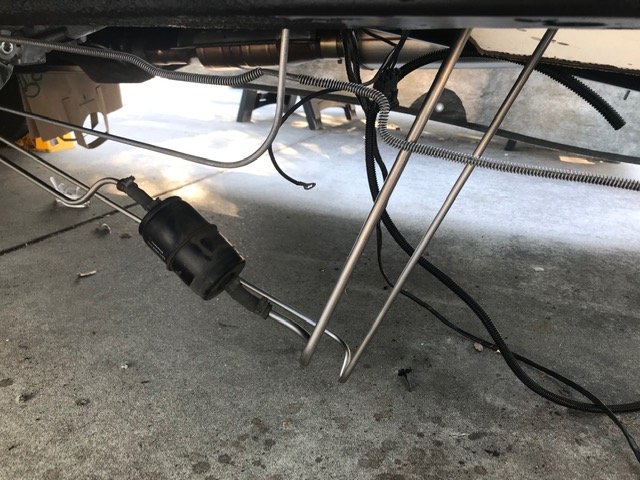
Since I got good at cleaning off excess undercoating this week -- I decided to clean up the fuel, brake, and breather line running down the frame of the MJ. I've got about 75% sparkling...just the bed length of the coiled brake line to go. As you can imagine, cleaning 250K worth of road grime off this particular line is a good time with liberal use of a stainless steel hand brush. A bit nuts, but with the chassis looking good, I know I'd regret not putting this detail time in. And yes, a new inline fuel filter and hoses will be installed. The frame bracket for the filter is being detailed and painted a cast silver.
-
If I didn't think my wife would leave me, I'd buy this... https://sfbay.craigslist.org/sby/cto/d/san-jose-1991-jeep-comanche/7117300131.html
-
Good eyes...that’s just a rough mock up of how it will be set up. There will be 2” between the bar and axle.
-
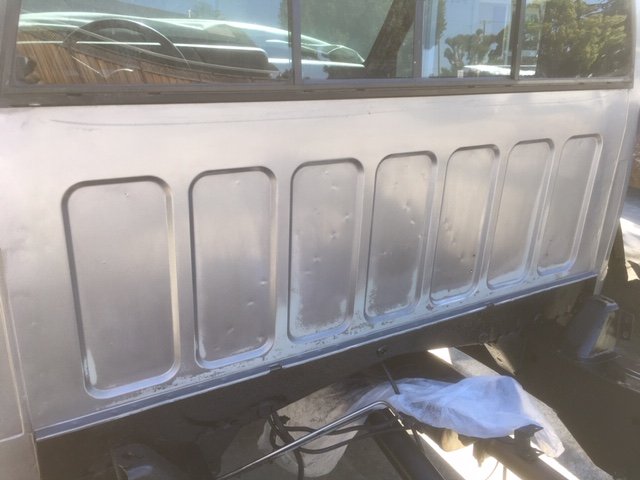
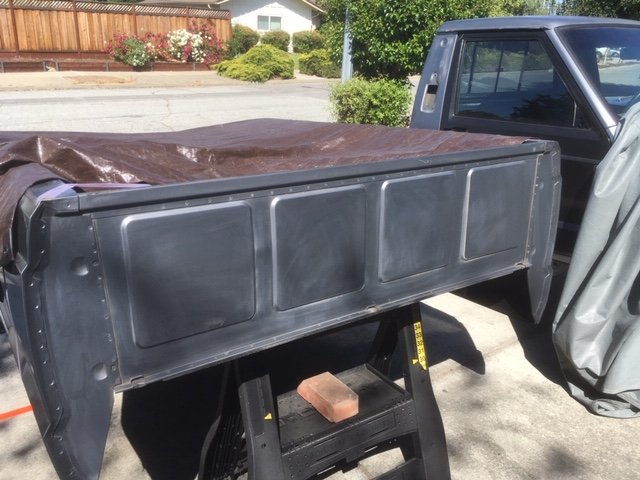
Spent a lot of time (too much time) scrubbing the factory undercoating over-spray off the back of the cab wall exterior side. 1/4 the way up the cab was sprayed with undercoat and didn't want to paint over that. Front of the bed was the same, as was the rocker panels. My '89 MJ had no where near that amount of over-spray. 3 cans of 'Goof Off Overspay Remover' and DONE! There's 4 holes (passenger side) on the back of the cab wall where a CD changer was installed by the PO I need to fill before paint. Also cleaned and refinished the eBrake under bed bracket and spare tire hoist. Next up is to clean dirt and grime off the fuel tank before re-installing.
-
15,800 Miles? in Blacksburg VA
Gjeep replied to Park13's topic in Craigslist/eBay... i.e. Not Your Stuff
Check out that aftermarket velour seating. Era appropriate and fun to clean. Did a good job color matching though. -
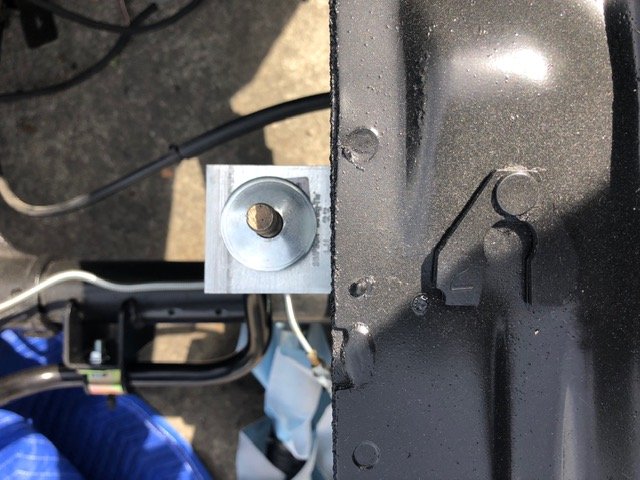
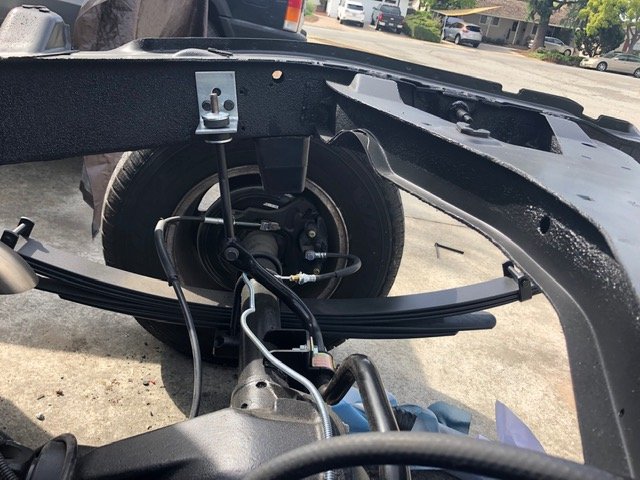
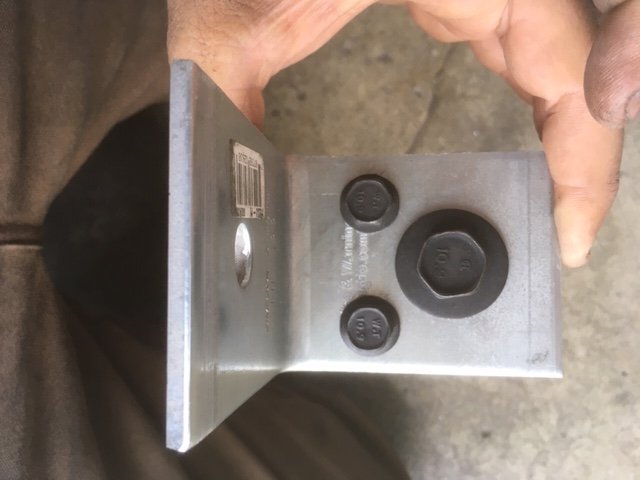
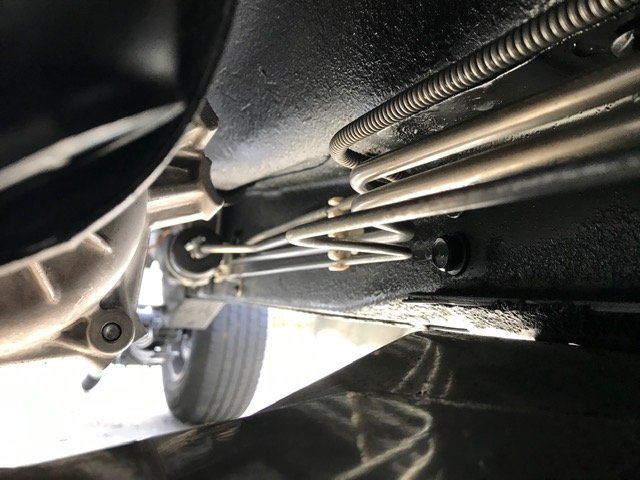
Been cleaning up and painting the underside of the MJ for the past little while. If I were smart, I would have done this when the engine/ trans was out… And after I don’t know how many ‘options’ shipped to my house or pulled from a salvage yard for rear sway bar end link and mount considerations…I stumbled on the perfect bracket at Home Depot while shopping for a house project – Simpson Strong Ties heavy-duty 90* brackets. Brakes lines, shocks, and other rear-end components are loose – and no holes have been drilled into the MJ frame yet, as the bed needs to be in place for final weight/ height adjustments…but if I’ve measured correctly, the top most part of the 90* bracket will be touching the top most part of the MJ frame overhang. Only modifications I made to the brackets themselves was 2 additional lower holes for triangular grade 10.9 attachment to the frame itself. The endlinks I went with are the same I’m running on the front sway bar of the MJ – Tomken 2” XJ/MJ lift endlinks (TMT-4013-X2). I like these because they are beefy and come with over-sized rubber bushings.