

GHayduke
-
Posts
319 -
Joined
-
Last visited
Content Type
Profiles
Forums
Gallery
Everything posted by GHayduke
-
Hayduke's Operation Comanche Repower - 88 To 98 Swap
GHayduke replied to GHayduke's topic in Member Projects: Your Comanches
Snow, Cold & Salt season is here in Chicagoland & I'm tired of removing snow from my bed so I decided to attach the sporttruck cap.... Here's the cap after cleaning, but before my attack/cleanup: The plan is to remove the goofy rear spoiler wing, replace the front window, repaint it, and replace all the screw cover trim. Some people like or stongly dislike truck caps, but for me they are functional- to be run for 3-5 months a year to keep out the snow, ice & rain. For summer the toolbox will go back in. -
I'd like to se pictures too! If I like them I have the technology to make them and might be game to make some extras for folks as well. I just can't picture what they look like done.
-
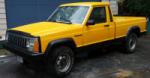
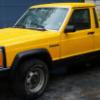
Hi I'm Hayduke & I like in the NW corner of IL & WI. I'm about a mile from the WI border & Lake Michigan.... I've had 5 Jeeps but my current stock is back down to 2 (Both produced Jeep mini-trucks Scrambler & Comanche) .... for now...
-
I'm in the NE corner of IL. on the WI border.
-
Hayduke's Operation Comanche Repower - 88 To 98 Swap
GHayduke replied to GHayduke's topic in Member Projects: Your Comanches
I got my molded carpet from ACC (Auto Custom Carpets, Inc.) and it fit fairly well. I then installed all the interior trim, etc. I also found that there are true vents behind the exterior side panels behind the doors. They originally have rubber baffles, but Mine were all gone but one. I installed a double bubble foil flap behind the vent to insulate them a bit but still let the cab vent. I drove to work today and the cab seems tight & warm enough. The temp here this morning was -15 F. -
Hayduke's Operation Comanche Repower - 88 To 98 Swap
GHayduke replied to GHayduke's topic in Member Projects: Your Comanches
relyt120 - The tubes are about 2&7/8 inch diameter. -
Dude!!!... Thoughs trails have me DROOLING!! :rock on: I would so join you guys with my Scrambler if You were closer.... and now, I understand the extensive cage work...
-
1988 Jeep Comanche Aka The Penny Sniffer ,pic Heavy
GHayduke replied to Zebvance's topic in Member Projects: Your Comanches
You need to paint the kill switch black so it's not seen now. Thats what I did on my CJ. -
Hayduke's Operation Comanche Repower - 88 To 98 Swap
GHayduke replied to GHayduke's topic in Member Projects: Your Comanches
After getting the new tires the alighment needed to be fixed. I painted and installed all new tie-rods, tie-rod ends, trackbar, and steering stabilizer. I then drove it through the snow with much bump steer to a local shop and got the alignment done.... Much better. I also did some of the reworking of my rear bumper. I removed the ball on the bumper and welded on a receiver tube, and custom tow chain mounting points (made out of used cut down square u-bolts. I wired in the trailer converter and wiring as well & decided to run a reciever brake light until I can improve my dim tail lights.... I'll take some decent pics and replace these later..... but it gives you an idea. Step two will be removing the round tubes and adding rectangular tubes with side protection, tow points, and maybe additional lighting (reverse & tail lights). -
Hayduke's Operation Comanche Repower - 88 To 98 Swap
GHayduke replied to GHayduke's topic in Member Projects: Your Comanches
I sanded down the TJ Rubicon / Moab wheels and primed the bare aluminum parts with Aluminum primer. I then used Rustoleum Clean metal primer on the whole wheel surface. Once dry I painted them with Rustoleum "Steel" silver wheel paint. Up close they show a lot of scratches, but on the truck they look acceptable (I'm admittedly pretty picky about my paint jobs usually)... I then Clear coated the wheels with the same brand Wheel clear coat and let them dry. After a few days I waxed them and took them to get tires. I ended up going with a tire brand and type I've never tried, Hancook Dynapro ATM's in the factory TJ Rubicon size. I mounted the spare under the truck in the factory location as it has a rim dent & can't be balanced anyway. There's quite a difference compared to the old wheels... Woo! So far the tires have been good in the snowy weather i've had lately. -
Hayduke's Operation Comanche Repower - 88 To 98 Swap
GHayduke replied to GHayduke's topic in Member Projects: Your Comanches
87Warrior: to test the blend door. There is a small stub shaft that goes between the motor/gearbox unit and the actual blend door. I inserted the stub shaft into the blend door and made sure I could move the door by hand on the work bench. Mine would stick at the full heat side (turned full clockwise) so I ended up trimming the rubber sweep on the blend door because it was rubbing so hard it would stick. I sprayed the inside of the box where the door runs with white lithium grease. I could then see where the door was rubbing and trim a little off. I would close up the box and tighten just the 4 surrounding screws and clips each time after trimming, and test again by hand. It was a lot trial and error until it moved freely by hand. Once you think you have it working, you could possiblly put the heater box on the passenger floor and connect all the wiring and see if the heater control knob actuates the door. You can see the bottom of the shaft on the motor module and see if it's moving or not. -
Hayduke's Operation Comanche Repower - 88 To 98 Swap
GHayduke replied to GHayduke's topic in Member Projects: Your Comanches
I also test fit the Rubi Moab wheels and went out for a drive. Happy to report no rubbing after tucking the front fender well up better. I think I'll go with the stock Rubi tire size, I'd begoing from around a 28" diameter wheel to a 30.5". Looks like I don't want any more tire in those wheelwells right now. The wheels look good from far off, But I'm going to repaint them before getting tires, close-up you see the clearcoat failed & the aluminum is oxidized and stained. I had hoped to strip the clearcoat and polish out the spokes and re-clearcoat, but the spokes just won't come clean. So I'll paint them and clearcoat them in wheel paint. -
Hayduke's Operation Comanche Repower - 88 To 98 Swap
GHayduke replied to GHayduke's topic in Member Projects: Your Comanches
Toolbox Time! As this truck in now my daily driver, I wanted more lockable storage space. So I started reviving a old toolbox I bought for $40 which came off a government surplus truck. When I bought it it had faded paint and was dirty with a broken latch and no keys (so it would not stay closed). Here it is after a good cleaning & paint prep: I ordered a new paddle handle & lock set from DeeZee, filled the old holes, and started painting inside and out..... I need to get some new lid risers because the old ones are leaking oil into the box. My friends all acted shocked / asked me where I got the new box when I installed it, Even the guy who was with me when I bought it. Amazing what some TLC and paint can do. You can see it below as well from the side. The only issue is it's wider than expected, so it won't fit between the rollbars, and least without some serious fab work somewhere. -
Might I suggest some serious tail light protection.... they look very exposed for a trail rig!
-
Hayduke's Operation Comanche Repower - 88 To 98 Swap
GHayduke replied to GHayduke's topic in Member Projects: Your Comanches
I pulled the dash just enough to pull the heater box and fix the stuck blend door.... You can leave the driver side wiring less the trans controller hooked up and the steering column in & swing the dash up enough to get the heater box out. I think the new thicker heater core was causing some case flex or bind? I ended up trimming the rubber sweep on the blend door because it was rubbing so hard it would stick. Once all doors worked by hand I reinstalled the heater box and dash and everything works now! I'm back to daily driving the Jeep until I can find a new (not dented) passeger door. Then I'll get the doors adjusted and I can install Carpet & the rear interior. Currently the door leak a bit, so I'll hold off on carpet..... I also ordered a tool box latch to get the tool box fixed and installed.... -
Alexia's 1987 To 1997 Comanche
GHayduke replied to Alexia's topic in MJ Hardcore Tech: Epic Journeys to Greatness
:thumbsup: -
1990 Rebirth ('97 Conversion)
GHayduke replied to Rymanrph's topic in Member Projects: Your Comanches
I use a power bleeder when doing brakes now as it's easier to get air bubbles flushed out. I did a rear brake conversion on my Scrambler to GM metric brakes with calipers mounted toward the front, putting the brake lines entering the opposite side they originally did. Took a while to realize the lines/caliper trap air and I have to remove the calipers, put a rotor thick block of wood in them, and turn them upside down (really right side up) to get the air bled out! It took us running through a gallon of fluid to realize that.... (I now have a gallon jug of old brake fluid labeled 'Paint Remover'! :brows: ) on my 98' conversion the pedal is hard when off & moderate when engine is on, but the brakes are strong. You would be good the pull you rear drums and do a visual on the brake cyliders, I found I had one seal partially popped out on a side. Any small leak can cause havoc. Are you running the rear axle weight sensitive proportioning valve? I removed mine. -
You guys should put Wanted Ads on your local Craigslist. You never know.... I had a guy text me and offer me what he thought was a MJ Rollbar. I bought it & It seems to sit a little low, but I'll make it work. $75 for the bellow bar.... It fits pretty close, the right width but a little low in the front......
-
Hayduke's Operation Comanche Repower - 88 To 98 Swap
GHayduke replied to GHayduke's topic in Member Projects: Your Comanches
yep, I pulled the motor and tested it & it's working. I then used the stub that goes in between the motor unit & the blend door to try to turn the door by hand. I applied a lot of pressure and it didn't move... I'm guessing it's jammed. Guessing I didn't get the heater box back together right after installing the new heater core. I'll inspect & reassemble & this time make sure all the doors move by hand before intalling the heater box.... Here are some pictures I took this weekend. I still haven't put the new wheels on, and want to replace the passenger door before paint..... http: -
For now i just put my old hood back on... but I have two more nice hoods to try ideas....
-
Hayduke's Operation Comanche Repower - 88 To 98 Swap
GHayduke replied to GHayduke's topic in Member Projects: Your Comanches
Drove the Comanche yesterday & put 55 miles of mainly non-highway on it with no major issues! :banana: Rides pretty nice too. I did find out the heater is stuck on hot, and after troubleshooting, it appears the hot/cold blend door is stuck. Looks like I'll have to pull the heater box which means pulling the dash again...... At least I should know by now how everything goes together! -
Hayduke's Operation Comanche Repower - 88 To 98 Swap
GHayduke replied to GHayduke's topic in Member Projects: Your Comanches
It was a dark and stormy night..... Last night I put in seats, adjusted the hood, & buttoned up the electrical and pulled the jeep out into the driveway under it's own power! Ran it for awhile while I washed off some dust/grease/drill shavings etc. I was waiting to see hot hot it got as it only have water and coolant flush/cleaner in it. It seemed to not overheat. It was a rainy nasty night, without the wife home or freinds around for support, so I decided to go out for the test drive anyway! . :MJ 1: . :banana: Ran well and the steering is only slightly off so the turn signals don't cancel right. After a couple miles around town, I came home and fushed the cooling system and put in new antifreeze. When I put the front end together I thought the radiator drain was in a akward spot, but after doing a JK Wrangler this weekend- it's comparablly in a easy to reach location! I need to seal up some leaks as water got in from washing it, but for the most part it's running great! I'll take some pictures when I get it out in daylight... :rock on: -
Hayduke's Operation Comanche Repower - 88 To 98 Swap
GHayduke replied to GHayduke's topic in Member Projects: Your Comanches
Front Axle seals are replaced! Pulled the axle shafts and unit bearings as one big chunk & set them aside. Used a 3/4 inch metal rod to knock out the old seals and push rags & paper towels through the housing using parts cleaner in between to clean the junk out of the axle tubes. Pulled the carrier as a unit. Bought a 36" long, half inch ratchet extention and feed it in from the outside & put a 36mm socket on it that fit the seals really well & had a friend tap in the new seals as I lined them up inside the diff. Reassembled and no more leaks! I overfilled the diff some, not sure if thats bad on a D30 axle? While apart I rented a spring compressor and added some factory rubber spring isolators below my lift spacers. Now I have a little over 2 inches of lift up front (not counting new factory isolators) and a little less forward rake overall. I still need to go flex the suspension & drive it some to see if anything settles or adjusts to see what I'm left with. I'll take pictures when it leaves the garage. Next I need to align the hood, re-mount the headlight relays as the hood prop rod hits them, and bolt in and wire the seats. Then I can go for my first test drive and flush the cooling system (it currently has water & cleaner in it). Can't wait to drive it, but I think the steering may need adjustment before being driven daily.... . :MJ 1: . -
Nice base truck! Should be fun to see it come together! :popcorn:
-
Alexia's 1987 To 1997 Comanche
GHayduke replied to Alexia's topic in MJ Hardcore Tech: Epic Journeys to Greatness
Nice !!! & I thought you said you have trouble not spinning the tires before.... Looks like you won't need to push down the gas pedal very far in the future!