

GHayduke
-
Posts
319 -
Joined
-
Last visited
Content Type
Profiles
Forums
Gallery
Everything posted by GHayduke
-
Zj_Flexxxer's Manche Build (Ol Greasy)
GHayduke replied to ZJ_flexxxer's topic in Member Projects: Your Comanches
I found a Pick-n-Pull JY set once but they wanted $80 for them. In hindsight maybe I should have bought them... just sounded like a unfair price at the time. What's a normal price? -
I added rancho add-a-leafs which only gained me about 3/4 inch of lift considering I also switched to a larger diameter axle tube Chrysler 8.25 axle. I added some swap meet Shackles likely for a Chevy that were 6-1/2 inches long eye to eye which gained me 2 inches of lift at the rear bumper & around a inch overall. I modified Wrangler JK shocks front & rear.
-
dakota 22 gallon tank and fuel pump
GHayduke replied to 99Manche's topic in MJ Tech: Modification and Repairs
Gas tank update: I ended up putting a hose clamp on the inside if the tank on the rollover valve to assure it can't pop out. I Installed the 98' Dakota sender in the 95' tank and got a 97' plug from the boneyard. The stock vent tube should work, but I ordered a new filler hose which proved hard to find. I ordered a "1-5/8" inch (SOFT WALL) Rubber Fuel Filler Neck Hose (SOLD PER INCH)" made by Thermoid / HBD from Filler Hose Supply Co. This is a marine & automotive quality hose. 1-5/8 looks like it will stretch a little to fit the 95 Dakota filler neck and crush a bit to fit the smaller MJ filler neck. I straightened the XJ gas tank straps and hung them from the frame. I used two sissor jacks to hold the gas tank in place, too figure out the location and gas tank straps. I ended up using dense foam insulation board to space the tank down from the bed. Then happy where the tank was, I bent the first bend in the tank strap. Its hard to get a 90 degree ish bend so I then moved the jacks under the straps and pushed it up tight to the tank & made the next bend up toward the bed. This worked quite well, I then was able to use the MJ factory bolts/rod to bolt up the straps... Thats it! I did one strap at a time. I didn't have to bust out the welder & fabricate anything! The blue arrow points to the section I may still try to heat and bend in a bit to gain some more driveshaft room. -
Ah.. sorry about the Ford axle, but horray for disc brakes! (I'm just not a Ford guy)... :laughin:
-
My interior is gray and black so at least it won't clash too much with anything.
-
Hayduke's Operation Comanche Repower - 88 To 98 Swap
GHayduke replied to GHayduke's topic in Member Projects: Your Comanches
Last night I PB Blastered the rear spring main eyes & loosened the bolts & spun them. I also put a prybar in between the springeye and hanger and moved it. I now know the springes are not stuck and under tension. Re-torqued to spec. :thumbsup: The rear end overall seems much stiffer and less sloppy. It will be interesting to see how it feels with a load of wood, or towing a trailer now. -
Hayduke's Operation Comanche Repower - 88 To 98 Swap
GHayduke replied to GHayduke's topic in Member Projects: Your Comanches
Shackle Time ! Sunday night I decided to see if I could get the shackle lift done. The springs didn't want to move down away from the frame with shackles removed and the truck jacked up. In hindsight I should have tried loosening the front spring mounts and lubing them.... What I did was used small sissor jacks to push the springs way from the frame. Then I installed the bottom shackle mounts & swung the top end up into the frame mount & tapped them into place with a small hammer and put the bolts in and snugged them a little. Once the jeep was back on the ground (and bounced/jostled a bit), I torqed the bolts to spec (109 ft pds). Now I'm wondering if the spring main eye ever even moved & if thats a issue. Do you think I should loosen the front spring bolts and shoot some lube in there and see If they move at all? and see if I can get them to move a bit... :dunno: Here are the shackles installed and torqed after completion. Eye to eye the new shackes measure 6-1/2 inches. I gained two inches of lift at the rear bumper and about a inch of rake overall. I'm happy with the lift now. You can also see one of the JK shocks I installed. Here's the lift seen at the rear bumper. -
Hayduke's Operation Comanche Repower - 88 To 98 Swap
GHayduke replied to GHayduke's topic in Member Projects: Your Comanches
Saturday I found shackles and some other stuff at the Jefferson Wi auto swap meet. When I got home some small treasures had arrived! :banana: Let the front end reconstruction commence!!! Sunday I went back to work and mostly (less front lighting) completed putting the nose back on. Part of the struggle with the trans line install was the proximity of the aftermarket radiator adapter line to the body. I ended up removing the line and adding some additional bend to it so the connector could click on all the way. I installed the remaining lines and electrical, and filled or topped off all the fluids. Filling the cooling system is very slow and annoying unlike old school top fill CJ radiators. Next I will spice the old XJ and MJ front lighting harnesses. I'll also do the headlight wiring upgrade (more power) and putting in new Halogen Conversion headlights! I'm excited to see it going together. So far some electric accessories are not working (horn & wipers), but I have not checked fuses or done troubleshooting yet.... maybe grounds??? -
91 Comanche (97+ Swapped) Thinking About Selling It
GHayduke replied to North4x4's topic in Member Projects: Your Comanches
Your right about it not being painted yet! I once spent a whole summer on the body of a S-10 & repainted the whole thing. Then my brother backed into the drivers door. I was heart broken. It might be easier to just replace to outer fenders & clip if you can find a nice donor. -
I'm thinking of two different paint ideas.. Blue or brown with wood grain panels like a Waggoneer... Or the below 1986 stripes. I think I'd have the stripes made in variations of orange on Brown like my old Scrambler colors....... So sort of like the colors below... maybe another color or two in the same family... What do you think????
-
I found some shackles at a swap meet (Jefferson WI) that did the trick. Factory eye to eye shackle length is about 4-1/4 inches, I found shackles that are about 6-1/2 inches and installed them. This gives me about a inch of rake overall and two more inches of hieght at the rear bumper (at least empty w/o gas tank). I think these were Chevy drop shackles. I had to grind the frame eye sides down a bit to fit the frame. I'm a bit concerned that I don't think the leaf spring main eyes moved in the frame during the install, as I used jacks to push the spring eye away from the frame to install the shackles..... :???: Do you think I need to loosen the main eye bolts or will that not do it? They may be so stuck they still don't move... New (to me) Shackle pictured.
-
Alexia's 1987 To 1997 Comanche
GHayduke replied to Alexia's topic in MJ Hardcore Tech: Epic Journeys to Greatness
Nice, Soon those doors will be ready to pick! Primer looks good to! Greenify It !!! -
Hayduke's Operation Comanche Repower - 88 To 98 Swap
GHayduke replied to GHayduke's topic in Member Projects: Your Comanches
Update: I searched for the needed clip but no one local has it, so I ordered two packs of them from RockAuto. That will give me two more chances at getting it right as a pack it one 3/8 and one 5/16 clip.... I'm also waiting for a new set of headlight plugs I ordered to do the headlight upgrade. Gas Tank: Friday, I didn't have the parts so decided to switch gears and work on the gas tank some more. I straightened the XJ gas tank straps and hung them from the frame. I used two sissor jacks to hold the gas tank in place, too figure out the location and gas tank straps. I ended up using dense foam insulation board to space the tank down from the bed. Then happy where the tank was, I bent the first bend in the tank strap. Its hard to get a 90 degree ish bend so I then moved the jacks under the straps and pushed it up tight to the tank & made the next bend up toward the bed. This worked quite well, I then was able to use the MJ factory bolts/rod to bolt up the straps... Thats it! I did one strap at a time. I didn't have to bust out the welder & fabricate anything! I can use the factory vent hose, but need a new 1-5/8 fuel filler hose. I tried making the stock one fit, but it's just too small & after 25 years does not want to stretch without cracking. I ordered a "1-5/8" inch (SOFT WALL) Rubber Fuel Filler Neck Hose (SOLD PER INCH)" made by Thermoid / HBD from Filler Hose Supply Co. This is a marine & automotive quality hose. 1-5/8 looks like it will stretch a little to fit the 95 Dakota filler neck and crush a bit to fit the smaller MJ filler neck. I didn't yet try to heat and compress the tank in to be farther away from the driveshaft. As I don't yet have a driveshaft, I don't know how much clearance I'll have. It's not a good place to try to compress. I drew a silver square on the tank indicated by the blue arrow. Thats were the tank would need to be pushed in.... So it looks like the tank may be done once the filler neck hose comes in & I install it.... We'll see how the driveshaft fits! -
Hayduke's Operation Comanche Repower - 88 To 98 Swap
GHayduke replied to GHayduke's topic in Member Projects: Your Comanches
Added the fan, A/C drier and lines & lower radiator hose in preparation for the nose install.... It took awhile to figure out the new aftermarket radiator and condenser mating, the fit in not the best with two different aftermarket pieces, but should work ok. The new set-up looks like it will take up most of the nose interior space where before it was largely empty with the 2.5L set-up. Connected the A/C lines with new gaskets & Trans lines, but the new Trans line to radiator line won't clip in. The metal retainer clip tangs inside the metal fitting bent and won't 'click' or catch the flange. I found them online Dorman 800-025 "Fuel Line Retaining Clips". I'll be stopping at Advanced Auto to see if they have these tonight. You can see the line in center circle below. The line that connects to it is partially hidden by the front clip. Annoying when a tiny part stops the build progress........ Hopfully I'll get the clip and can finish the front end assembly tomorrow night... Then I need to figure out the nose wiring & I plan the do the Headlight power upgrade at the same time........ -
ZJ prop Valve??? I take it your going to rear disc brakes then?
-
Very cool Bumper! Good to hear it's on the road! Woo
-
Ask your cage guy how many rolls he'll guarantee that cage for. I bet your good for quite a few continuous rolls! haha
-
I removed my Dana 35 rear axle and installed the Rancho Add-a-leafs with the Chrysler 8.25 axle. The C8.25 is a half inch bigger axle tube so it will lower the suspension a small bit as it's a spring under axle. I also don't know in the new axle perch may have been taller... It looks like in the end I maybe gained a inch total or a little less in the rear ..... I'll still be needing to add lift shackles to raise the rear another inch or inch & a half.... not impressed with the lift the springs gave me, but hopefully I'll be better ready to tow now.
-
What do you guys think about brown with wood trim? They did make FS Waggoneers in that combo. I'm thinking maybe a deep Brown like AMC Chestnut Brown Metallic with light wood grain & trim graphics....
-
Hayduke's Operation Comanche Repower - 88 To 98 Swap
GHayduke replied to GHayduke's topic in Member Projects: Your Comanches
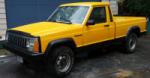
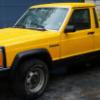
I bought the axle shaft from a guy doing a 95' Chero part out, I also got a new passenger fender & hood. I painted the fender to match for now (As I think a paint job will wait till next season. I'm eager to start puting the nose back together tonight.... New (to me) Fender! -
Hayduke's Operation Comanche Repower - 88 To 98 Swap
GHayduke replied to GHayduke's topic in Member Projects: Your Comanches
For the front axles I got a new side for the frozen drivers side with about 5000 miles on the ujoint, Front axle now has new unit bearings, rotors, pads, & a brakeline. The whole thing is back together with fresh oil, but after a few days the driver side developed a bad axle leak.... Looks like everything will need to come off again to do seals... boo. It was looking so ready... -
Hayduke's Operation Comanche Repower - 88 To 98 Swap
GHayduke replied to GHayduke's topic in Member Projects: Your Comanches
Hi Guys, I've been sick so haven't posted in awhile & progress has been slow. I did get the Axles closer to done though. The rear Axle is now done. I got a kit to drill out the broken carrier center pin bolt in the diff. In the end, heat from a map gas torch was a big help. I then changed the axle seals, and refreshed the rear brakes, using new brake & parking brake hardware kits, new brake cylinders, the bearings looked good, the axle shafts were cleaned and painted and installed. New flex line and hard brakelines are installed. The axle is bolted in and ready to go now. I do still plan to add new rear shackles to level or give the truck some rake to the front. -
Alexia's 1987 To 1997 Comanche
GHayduke replied to Alexia's topic in MJ Hardcore Tech: Epic Journeys to Greatness
Cool, will be interesting to see! I think you might have a thing for green Jeeps just FYI...... :laughin: -
Alexia's 1987 To 1997 Comanche
GHayduke replied to Alexia's topic in MJ Hardcore Tech: Epic Journeys to Greatness
Are you painting & bedlining? Or bedlining everything? -
Hayduke's Operation Comanche Repower - 88 To 98 Swap
GHayduke replied to GHayduke's topic in Member Projects: Your Comanches
I ended up just pulling the whole thing- unit bearing attached. I then just cut the u-joint to keep the good half of the shaft. I'll go get a another shaft from a u-pull-it yard. Thanks for the ideas, but I don't have a big enough breaker bar to fight it. My half inch bars were bending just shy of breaking & I wouldn't re-use that stub shaft without threads even if I got it apart. My front driveshaft and axle shafts were quite crusty from salt and sitting so I soaked them all in bucket filled with a mixture of PB Blaster & Biodiesel overnight..... Biodiesel is acidic and a great lubricant all in one.