Exxon Valdez Jeep Posted September 29, 2011 Posted September 29, 2011 RCV shafts, the ones that used to be made by Longfield. :D
reson46 Posted September 29, 2011 Author Posted September 29, 2011 RCV shafts, the ones that used to be made by Longfield. :D Do you have an extra $1K to donate to the project? :thwak: They've always been made by RCV, to Longfield's design. Willy
Exxon Valdez Jeep Posted October 1, 2011 Posted October 1, 2011 RCV shafts, the ones that used to be made by Longfield. :D Do you have an extra $1K to donate to the project? :thwak: They've always been made by RCV, to Longfield's design. Willy Hey you asked for suggestions, just trying to help out!!!! Just go to 4WP and pick them up next time your there! :dunno: yeah I wouldnt them either!!!!
reson46 Posted October 3, 2011 Author Posted October 3, 2011 Installed the high steer arm. Track bar and drag link are close to the same angle, but it looks like I may want to look into a drop Wagoneer pitman arm eventually. Made sway bar mounts. I had to get creative on the passenger side. Shock mounts. Added a gusset to the passenger sway bar mount. Top half painted. Willy
reson46 Posted October 10, 2011 Author Posted October 10, 2011 Had the driveshaft shortened. Started installing the axle. Shafts should be here today, but while waiting I at least wanted to get it on the ground and drive around a little. Brakes and hubs installed. Drove it around last night and put in some fresh gas. Hopefully I'll get the shafts in tonight to get ready to go wheeling this weekend. :clapping: Willy
Exxon Valdez Jeep Posted October 11, 2011 Posted October 11, 2011 did you just get some Yukons or some other kind of alloys?
reson46 Posted October 11, 2011 Author Posted October 11, 2011 did you just get some Yukons or some other kind of alloys? I ended up with Ten Factory.....and they arrived today. :banana: Willy
Exxon Valdez Jeep Posted October 14, 2011 Posted October 14, 2011 now youre going to forget to lock the hubs when you go wheeling!
reson46 Posted October 14, 2011 Author Posted October 14, 2011 now youre going to forget to lock the hubs when you go wheeling! A nuisance I'll be happy to live with. :banana: So far it has at least held together long enough to get it on the trailer. :yes: Willy
Blue88Comanche Posted October 14, 2011 Posted October 14, 2011 awesome trailer! :clapping: are you interested in a 36 foot fifth wheel camper? lol
BryGuy Posted October 16, 2011 Posted October 16, 2011 I just read through your whole thread...... WOW :bowdown: Great job on all aspects of your build. I'll definitely be checking back for tips during my build. Great pics too.... especially the one looking down over the cliff... that's a definite pucker factor of 10 :ack:
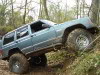
reson46 Posted October 17, 2011 Author Posted October 17, 2011 Finally got back out on the trail! The axle worked great, we had beautiful weather, and I remembered to engage the hubs. :jump: Saturday we ran Naches Pass both directions. Had to test the locker. :D Sunday we just barely started the Kaner trail when we had a major steering problem. :hmm: We were able to find a bolt good enough to get him off the trail. Then we were lucky enough to find an open Ace that had the correct bolt to get him home. More pics here. Willy
Boots Posted October 27, 2011 Posted October 27, 2011 Let me get this straight... Your running a Ford HP dana 44 narrowed to the same width as a JK Rubicon dana 44. That way you don't have to have custom shafts made. Right? Then you've got Chevy knuckles, spindles and calipers with ford hubs and rotors? Why did you mix and match parts? By going with the T&T truss, you basically just need to get that in the right spot and all of your mounts will be in the right spot (except the lower control arms and sway bar)? Sorry for so many questions, just trying to understand... Thanks Chad
reson46 Posted October 27, 2011 Author Posted October 27, 2011 Your running a Ford HP dana 44 narrowed to the same width as a JK Rubicon dana 44. That way you don't have to have custom shafts made. Right? Then you've got Chevy knuckles, spindles and calipers with ford hubs and rotors? Why did you mix and match parts? I narrowed it to use TJ Rubicon D44 inner shafts, not JK. '72 - '76 Chevy D44 knuckles are the only commonly (somewhat) available knuckles that can be machined to accept high steer arms. I wanted to end up with a 5 x 5.5" bolt pattern so that required the use of the Ford hubs and rotors. By going with the T&T truss, you basically just need to get that in the right spot and all of your mounts will be in the right spot (except the lower control arms and sway bar)? Exactly. The T&T truss even makes it incredibly easy to locate the lower control arm mounts. There are two notches on each end of the truss that are used for aligning the lower control arm mounts. Willy
reson46 Posted October 27, 2011 Author Posted October 27, 2011 Some final measurements on the axle. WMS to WMS ended up at 62 3/4". If I remember correctly the overall width from the outside of each tire ended up about 1/2" wider than the D30. I'll have to measure again to verify. Previously the width was 74 1/4" with the 35"x12.5" R15s mounted on 15"x8" rims with 3.75" of backspacing. The current set up uses the same tires mounted on 15"x7" rims with 4" of backspacing and the beadlocks adding 3/4" of width to each wheel. This makes me about 1/2" narrower on each side just in the rims. If I would have used rims with the same backspacing, width, and no beadlocks I would have ended up 1" wider. Willy
Boots Posted October 27, 2011 Posted October 27, 2011 Are you planning to put a hi steer arm on the other side and move the tie rod up or are you going to run it how it is? Thanks Chad
reson46 Posted October 27, 2011 Author Posted October 27, 2011 Are you planning to put a hi steer arm on the other side and move the tie rod up or are you going to run it how it is? Thanks Chad No, there isn't enough room for the tie rod to clear the coil springs in that location. Willy
reson46 Posted October 27, 2011 Author Posted October 27, 2011 We had a couple new WOHVA banners made. Willy
reson46 Posted October 31, 2011 Author Posted October 31, 2011 Went wheeling in the Naches area again this weekend. We also moved a lot of rock for some trail repair. The wife didn't come so there aren't many pictures. Sunday was again cut short, this time by an ER visit. After many delays our buddy was finally able to go camping in his camper. Saturday night he ran the furnace in his 40 year old camper. Apparently it needs some work as he ended up with carbon monoxide poisoning. Luckily it didn't get too severe and a few hours on oxygen at the hospital cleared him up. He will be adding an carbon monoxide and LP detector before his next camping trip. :thumbsup: The only pic I took of the MJ, at Chinook Pass. The rest of the pics are here. Willy
89Comanche4x4 Posted October 31, 2011 Posted October 31, 2011 i love that setup with the trailer camper/jeep on it how do you like the long bed? i went wheeling for the first time in mine the other day (long bed) and was hitting it everywhere!
reson46 Posted October 31, 2011 Author Posted October 31, 2011 how do you like the long bed? Long beds are great! Willy
reson46 Posted November 28, 2011 Author Posted November 28, 2011 I've been continually fighting the old pin style Rubicon Express sway bar disconnects since building this MJ. New disconnects have been on the list but I just never got around to it. After borrowing a friend's TJ with JKS quick disconnects for our Montana trip, I finally got serious about finding a replacement. I researched JKS, Rubicon Express, and several others, but I just couldn't bring myself to spend $100 to $150 on any of them. Then I tripped across a picture of Darren's (goblazers_6) home made disconnects on NAXJA. This gave me some new ideas. :idea: I decided to make my own. I started with some 5/8" rod ends, misalignment spacers, some old shock bushings, some 5/8" solid round rod, and miscellaneous hardware and round tubing. I wanted to be able to adjust the length without uninstalling so half the rod ends are left hand thread, plus a matching left hand thread die. For the top attachment to the sway bar I had some rectangular tubing that had an inside width that matched the misalignment spacers. A couple cuts, a few holes, shock bushings, and some 1/2" hardware made up the top mount. I threaded the 5/8" rod and attached the rod ends to it. I drilled out the threads of a 5/8" nut and welded it to the rod to give me a spot for a wrench. I used some 1/4" wall, 1/2" inside diameter tubing to properly space the lower mount. I tapped some 5/8" outside diameter tubing, welded up the end, and ground it down to approximately the shape of a bullet for ease of sliding on the bottom rod end. Cut a couple of tabs to use for keeping the sway bar out of the way when disconnected. All the finished parts. The end result. I had the chance to use them on black Friday. They worked much better than the old disconnects and they are much quieter since I don't have the pins clicking on the coil springs with every bump. Willy
reson46 Posted November 28, 2011 Author Posted November 28, 2011 I avoided all the crazy people on black Friday and did something productive, I went wheeling! Spent the day at Evan's Creek. It was cold, but the weather was actually great. The sun was out most of the day, no wind, and fresh snow. It packed pretty well and we had a blast. We kept climbing until one of us broke an axle shaft and another blew a bead. Yes, this is the trail. The snow weighed down the branches so much that you could have easily missed the trails if you didn't know they were there. More pics here. Looking forward to our Christmas tree run this weekend. We should have plenty of snow this year! Willy

Recommended Posts
Create an account or sign in to comment
You need to be a member in order to leave a comment
Create an account
Sign up for a new account in our community. It's easy!
Register a new accountSign in
Already have an account? Sign in here.
Sign In Now