billyblankss Posted June 11, 2020 Author Posted June 11, 2020 Here we go. It was hell even getting the wheel off, it had seized and rusted to the rotor. Over the past month I've been intermittently spraying pb blaster or liquid wrench on anything i thought may need to come loose for this job. Got the shock off... Got the rear shackle off, Bout to drop the leaf springs: I've been really pleased with how simple it's been to remove bolts so far... Ok now i have the leaf spring off and removed the u bolts. Now, reading the directions I need to: "Disconnect the parking brake." - gonna go youtube this... embarassing... next instructions are: "Extend your rear brake line. If you do not have experience with this or are unsure, enlist the help of some who knows how to bleed a braking system. Clamp the top of the stock brake line with some vice-grips to minimize fluid leakage. Undo the bottom of the brake line from the axle. Mount the new brake line extension to the end of the old one. As quickly as possible, mount the extended brake line to the axle to minimize fluid leakage. Please see a service manual for proper bleeding of the brake system. Do not drive the vehicle without properly bleeding the brakes." I will try to take pictures as i go.
Pete M Posted June 11, 2020 Posted June 11, 2020 MJs have a very particular bleeding procedure. should be in the link in my sig. or you can delete the rear prop valve. should be a writeup about that in there too.
billyblankss Posted June 11, 2020 Author Posted June 11, 2020 6 minutes ago, Pete M said: MJs have a very particular bleeding procedure. should be in the link in my sig. or you can delete the rear prop valve. should be a writeup about that in there too. Hey I noticed that the proportioning valve arm thing is totally disconnected, you know just there loose. You think it's a sign this thing might be corroded or should i go ahead and connect and go through with it? You don't happen to know how to disconnect the parking brake do you? Man you are a wealth of knowledge, i appreciate it!
Pete M Posted June 11, 2020 Posted June 11, 2020 also in the link in my sig is a thread with PDFs of some of the factory shop manuals. it's a slippery slope with brake upgrades. before long you'll want to do them all. a dual booster with traditional cherokee prop up front, delete the rear valve stuff for a simple line, and rear ZJ disks and you will be a much happier owner.
jdog Posted June 11, 2020 Posted June 11, 2020 Don't clamp the line, that can cause damage to the internal part of the line. You have to bleed the system anyways its not gonna be much different
mjben Posted June 11, 2020 Posted June 11, 2020 Parking brake disconnect - Loosen the nut until the 2 cables can be slipped out of the equalizer bracket. if the cables need to be removed, depress the tabs at the end of the cable housing where they hold it into the cable bracket. For the life of me, I can't figure out why they want you to disconnect the parking brake cables though. (Pic stolen from another user's thread and edited for illustration.)
billyblankss Posted June 11, 2020 Author Posted June 11, 2020 1 minute ago, mjben said: Parking brake disconnect - Loosen the nut until the 2 cables can be slipped out of the equalizer bracket. if the cables need to be removed, depress the tabs at the end of the cable housing where they hold it into the cable bracket. For the life of me, I can't figure out why they want you to disconnect the parking brake cables though. (Pic stolen from another user's thread and edited for illustration.) Great point - thanks for this infographic. I'm not sure why but the instructions mention it as a step. I'm thinking maybe they mean remove it from the wheel/rotor? Is that even possible? I don't know why.
mjben Posted June 11, 2020 Posted June 11, 2020 If you loosen that same nut to relieve tension on the cables, the opposite end (wheel end) can be removed in the same way. You will have to pull the drum off.
billyblankss Posted June 11, 2020 Author Posted June 11, 2020 Here's what I see Sorry for potato quality... looks like in this picture there's the line coming down but also the line coming from the axle there... also just noticed it looks like a vacuum hose has been zip tied but isn't in use... sorry for nooob posting but i'm still getting acclimated while putting this lift in ha
jdog Posted June 11, 2020 Posted June 11, 2020 The line super stretched is the brake line, the "vacuum line" is a vent hose from the diff
billyblankss Posted June 11, 2020 Author Posted June 11, 2020 1 minute ago, jdog said: And the first picture is the e brake cable Got it, thanks man. Does the vent line just stay like that or was it supposed to be plugged somewhere? I'll look at the manual i have. This rocky road lift kit said they shipped me the following: - RRO MJ Parking Brake Ext Tube - RRO MJ Parking Brake Bracket - RRO MJ Proportion Valve Riser - Brake line Extension, YJ rear, CJ Now i just have to figure out which parts are which in that picture haha
billyblankss Posted June 12, 2020 Author Posted June 12, 2020 Damn so i saw on another thread - i didn't even realize but my grill was upside down of course... Before: after Also, I managed to extend the brake line. Not sure how tight but i got it as wrench tight as i could. I thought about putting anti seize on it but i figured that was not gonna work.
billyblankss Posted June 19, 2020 Author Posted June 19, 2020 On 6/11/2020 at 11:25 AM, Pete M said: the parallelogram brackets near the bottom are swap bar spacers. longer swaybar links are preferred, especially if your truck is rusty because those bolts are super prone to snapping off. If you install the spacers, soak the bolts in PB Blaster or other penetrant for like days. Thought you should know - you were right. I had to disconnect the sway bars to drop the axle to put in the new springs. Well one side was fine i disconnected the bolt on the axle. The other i tried to get fancy and remove the nut on the top of the sway bar connect. Sheared it right off. I did douche it with PB blaster but i should have known. Any recommendations on replacements? I like the look of Rusty's but man would i like to spend less than 100 since i already shelled out tons on the rest of the lift. Then again if they're that important i don't want that to be the weak link in the whole suspension. Pun intended i guess.
Pete M Posted June 19, 2020 Posted June 19, 2020 are you using the drop brackets? if so a stock replacement should work fine. I remember something about an F-350 link working but can't remember if it was just because it was beefier or if it was also longer. you'd best ask in Tech to be sure.
billyblankss Posted July 12, 2020 Author Posted July 12, 2020 Forgot to post this but while I was in the middle of the lift install I decided to put in hood louvers from rod louvers... They come raw and with a ton of stainless screws and nuts. Had the truck all jacked up while working on the lift but needed a break from the suspension work while I waited for the new iron rock track bar to come in. Here I measured and taped in place, then drilled pilot holes, but before drilling all the holes I installed some of the hardware along one edge to hold them in place for drilling the rest of the holes. Once I got the holes drilled I measured half an inch in from each hole and put a dot. Then I took a straight edge and traced the dots to mark the cutout. After using the angle grinder to cut the shape I knew I needed to paint to prevent rust. I was thinking about what color I would eventually want to paint the truck and I like military /desert tan. I also know from working on my custom motorcycles that I like being able to touch up a ding or scratch here and there. Rustoleum has this truck bed paint in tan. Truck bed liner hides imperfections well and I thought id see what it looked like. I painted the louvers bed liner in black.
billyblankss Posted July 21, 2020 Author Posted July 21, 2020 Trying to clean this rig up and hopefully cut down on the oil and sludge leaks I got the fel pro valve cover gasket. I figured while I was doing this I would do one of cruiser54s tips and hack up the valve cover tubes that suck oil. But first I had to clean this nightmare. In my kitchen sink because it fit. I actually responded to a fire call and the wife ended up taking over and cleaning all the sludge I couldn't get. Dawn dish soap. Got these valve flute things clean. Marked an inch down to cut them Deburred on the grinding wheel. Gently. Went back over them by hand with a file. Then put them in the drill press and drilled out the half inch hole. Primed the valve cover. Then painted it gold. Like the old mack trucks.
billyblankss Posted July 30, 2020 Author Posted July 30, 2020 Doing some electrical upgrades. Picked up the headlight wiring harness from K suspensions. Also got the jeep cables package and even ox-gard per cruisers' recommendation.
billyblankss Posted July 30, 2020 Author Posted July 30, 2020 I also had a tiny leak from the rear diff on this super sweet Dana 35... So I changed the gear oil. Got it cleaned up Also decided why not paint this turd of an axle Looks fine
billyblankss Posted July 30, 2020 Author Posted July 30, 2020 I finished the lift and neglected to show the results I'm weird and decided to rust coat the leaf springs since they're older than me...
billyblankss Posted October 9, 2020 Author Posted October 9, 2020 I've been bad about posting recently since I only use the site from my phone. Here's what it looks like now. IMG_0263.HEIC IMG_0262.HEIC IMG_0261.HEIC IMG_0260.HEIC IMG_0259.HEIC IMG_0271.HEIC
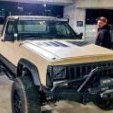
billyblankss Posted October 9, 2020 Author Posted October 9, 2020 Let me try this again. Got my new decals from jeepstickers.
billyblankss Posted October 9, 2020 Author Posted October 9, 2020 IMG_0264.HEIC IMG_0262.HEIC IMG_0261.HEIC IMG_0260.HEIC IMG_0259.HEIC IMG_0271.HEIC IMG_0268.HEIC

Recommended Posts
Create an account or sign in to comment
You need to be a member in order to leave a comment
Create an account
Sign up for a new account in our community. It's easy!
Register a new accountSign in
Already have an account? Sign in here.
Sign In Now