

drcomanche
-
Posts
445 -
Joined
-
Last visited
Content Type
Profiles
Forums
Gallery
Everything posted by drcomanche
-
I've looked for some references for this on here, but most of what I've found is outdated codes for products that are no longer available. My question is, does anyone have a link or an idea of a site where I can get a set of leaf springs for my truck? And more importantly, one that won't cost me $350+ to get two of them? I've only found a couple sites and they range from 350 to 500 just for 2 of them. I need new leaf springs, but I don't want to shell out half a grand for them just because there's only a few companies that produce them.
-
I'm keeping it just like it is, so no worries there. Just the fixing the small stuff that breaks on all of them(I'm looking at you, b-pillar lights) and probably getting a new clear coat and some light body work.
-
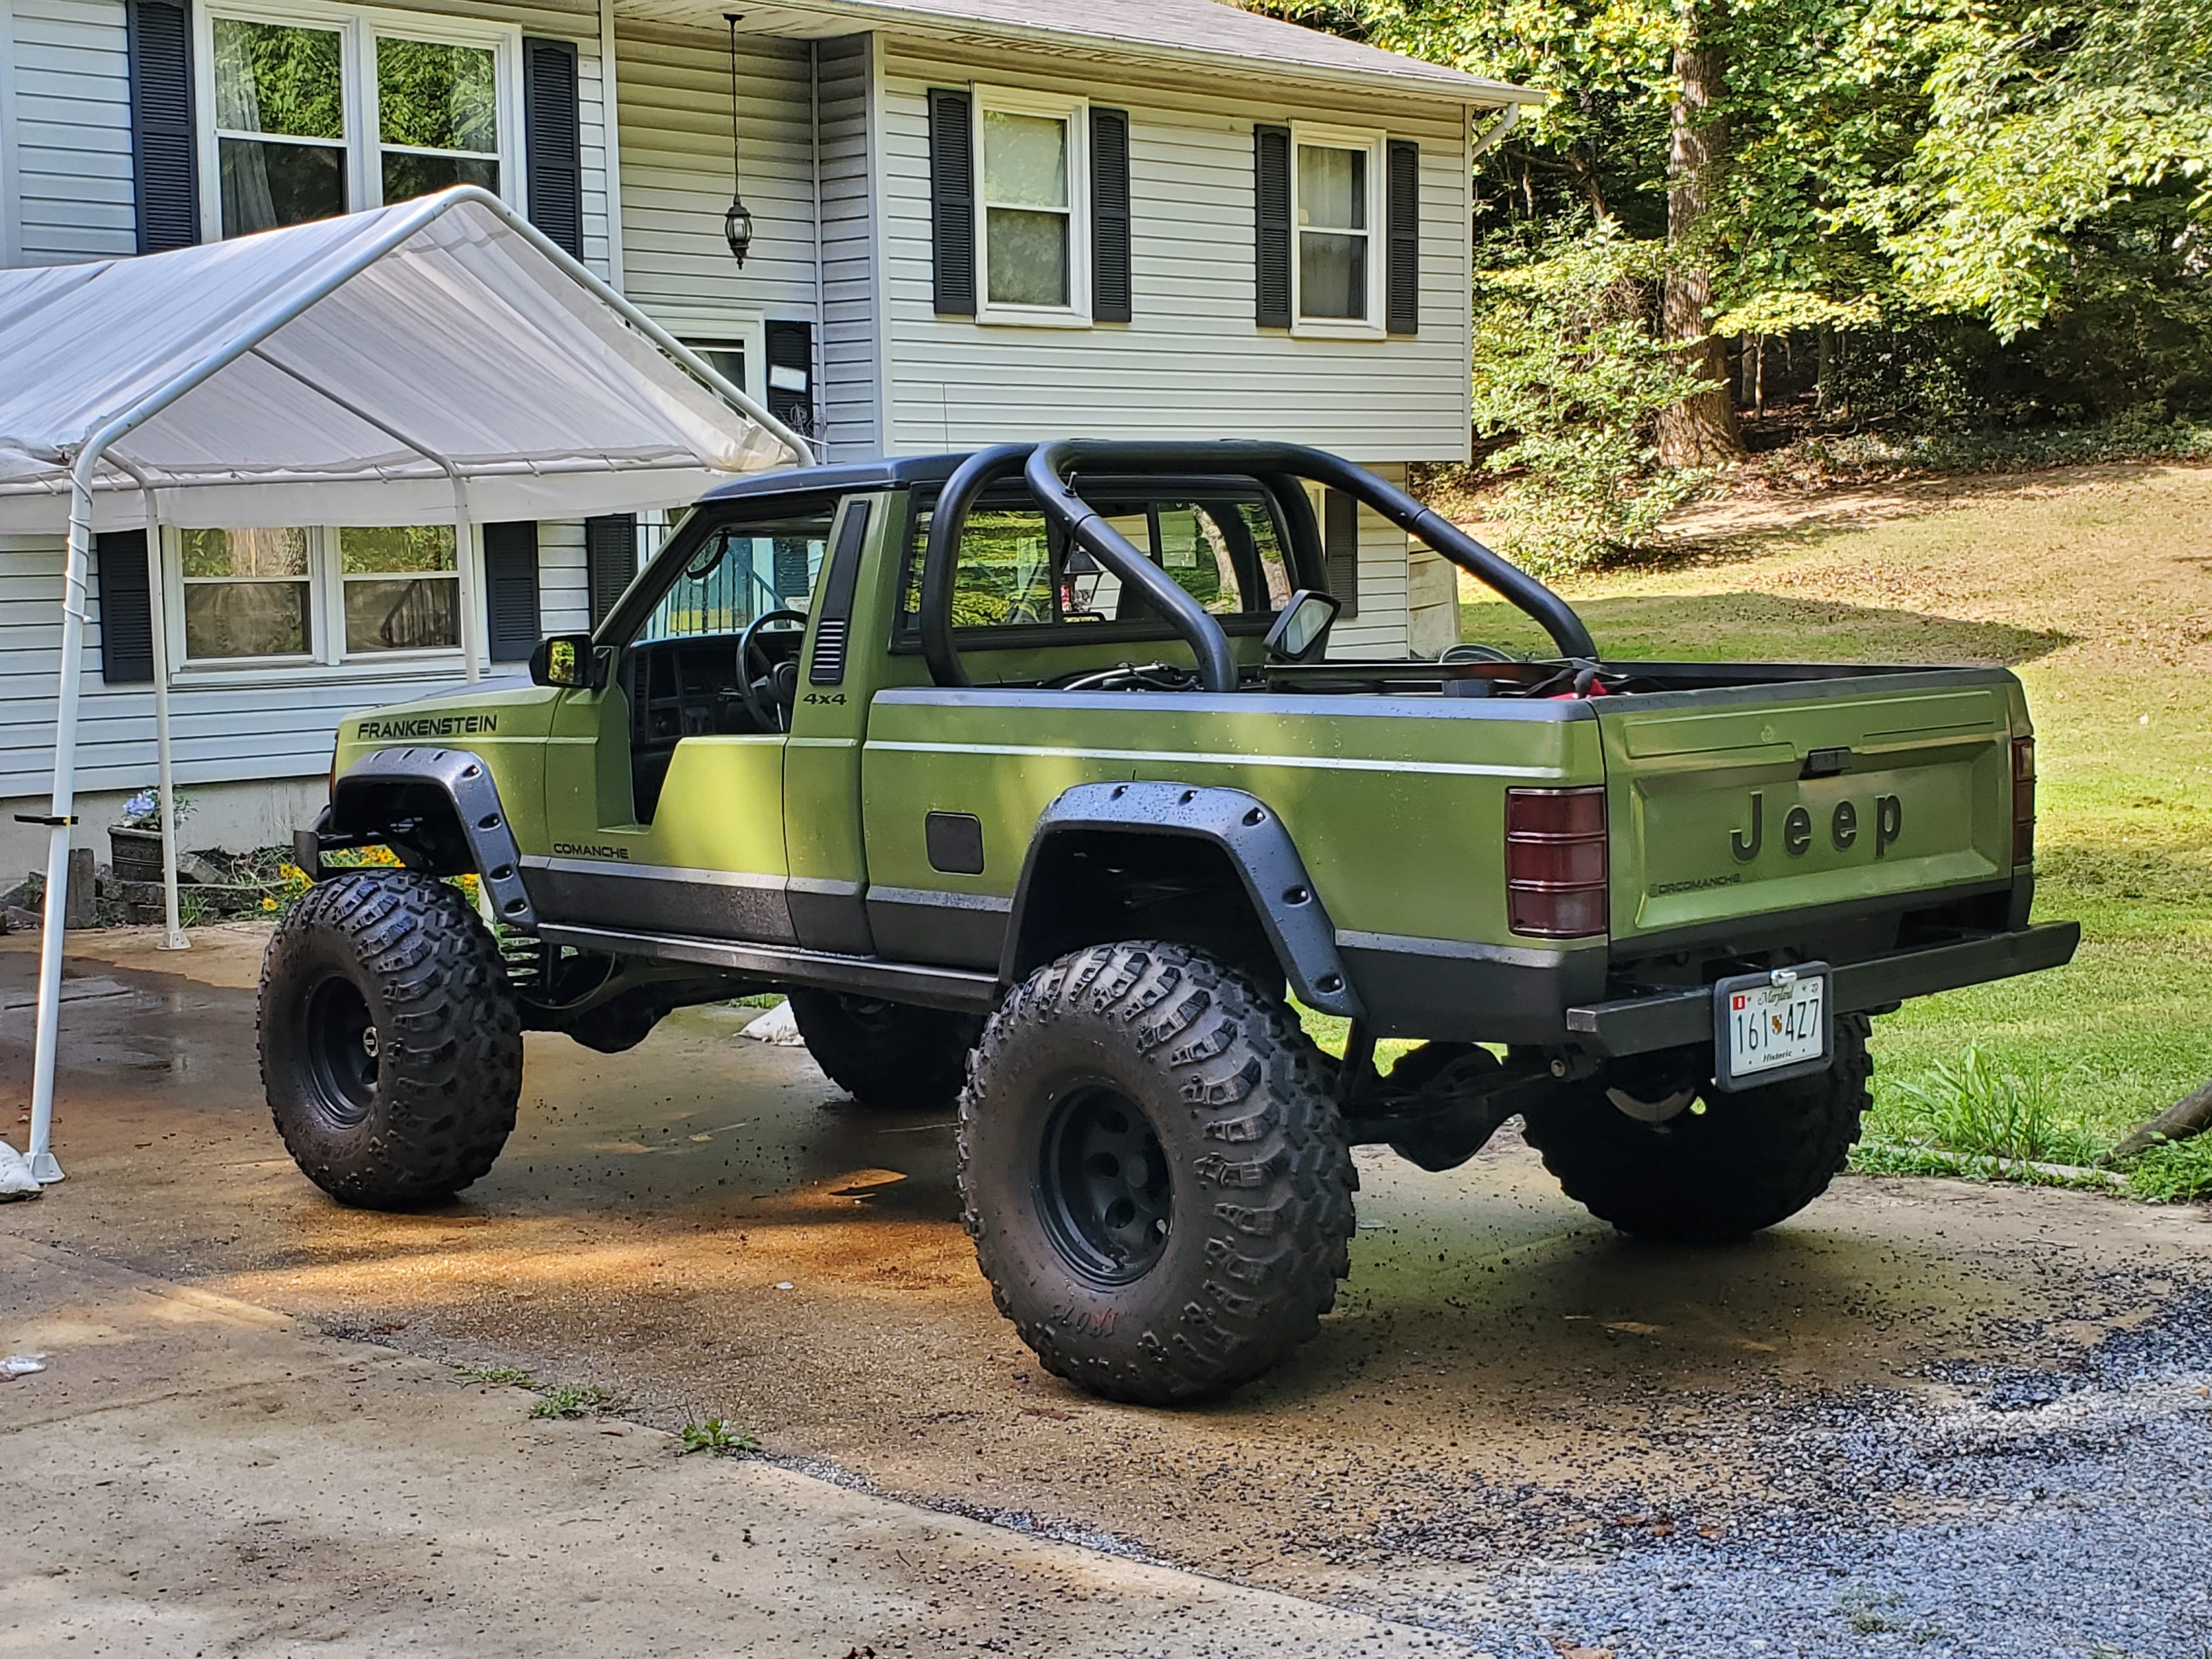
So last year I purchased another Comanche I had seen around my area. The owner was an elderly gentleman who bought it off the line in 1987 and garage kept it it's entire life. It came with a huge pile of receipts from EVERY repair it ever had. Otherwise, all the original manuals were with it, too. It is all original. So my goal for this one isn't as extreme as Frankenstein. This will be a relatively light build of taking care of the simple fixes it needs to bring it back to show quality. The only mods I will make are probably the radio, bedliner, and some slightly larger tires(with the possibility of a small lift to accommodate). The truck itself is a 2 wheel drive auto inline 6. It's gold inside and out, thus the name. It's in such good condition that I don't want to do heavy mods to it, and besides, I already have my beast in Frankenstein. Bonus of Frankenstein in the background before most of its work. And also, this truck was entered into a Jeep contest and won!(In the XJ category, since they didn't have an MJ one) Here's some pics of that
-
DrComanches Project "Frankenstein"
drcomanche replied to drcomanche's topic in MJ Hardcore Tech: Epic Journeys to Greatness
With the slight daylight I have after each work day, I've been gradually pulling it together and tying up loose ends. The hood is mounted up and the front clip is attached. Today I put the new handles on(I got them for a steal at $5 each). I started handling the wiring for the headlights, which is a new(to me) wiring harness, since my old one was rusted out and unable to replace bulbs. I got the headlights in, but stopped at the fog lights as the sockets are starting to rust. I'm going to give them a coat of rust reformer to save them a bit. I'm still in the process of adjusting the doors to fit flush again, and I put new door weatherstripping on, but it needs to be worn in(the doors are difficult to close). I have some new exterior window sweeps coming in for both trucks from a post 97 Cherokee that I'll customize to fit. I ground out the bottom of my bed to hit it with a coat rust preventer. I have my new leaf springs shipping in, so hopefully they work, since I wasn't sure what ones were on there before. I also ground out more on my tail gate to see the real extent of the damage. I need to plan something out for it... In addition, I found some pics of the truck when I first got it back from the rail repair so I'm tossing them up too as a bonus. I also realized I never posted a pic of the front axle under the truck, so I'm throwing it on here too. It was getting dark so it's hard to see too much. Some of the tailgate damage. And the other side The axle under it, but without the steering link or panhard. It's an old pic The knuckles and all mounted up. And that's all the old poser shots I have until she's ready to go again. -
DrComanches Project "Frankenstein"
drcomanche replied to drcomanche's topic in MJ Hardcore Tech: Epic Journeys to Greatness
More work than most would consider it's worth, haha. But I've come to peace with the fact that it won't ever be worth what I invest. In any case, here is another update(took me a while, but I have been doing a lot) In the time I was gone, I ground everything down smooth. I originally taped off the doors and windows and all that, but the more I looked into it, the worse I felt about slacking off with the work. So I ended up stripping EVERYTHING. I took the doors completely apart, all the window trim, the quarter window, the handles, and even removed the doors from the chassis. While I had them off, I did the removeable doors mod, so I can freely take them on and off(which will be great when I finish my trail doors). I eventually removed the hood to have better access to the cowl panel and remove the seal on there for paint. After everything was removed, I began the sanding and priming(and then sanding and priming, and then etc.). It turned into a huge process getting a smooth finish after a few attempts. Then, the weather got cold.... Which really restricted my days to paint. I finally got a chance with some warm days and I took it. I painted everything in one swipe with about 4 coats and let it dry a bit. Sadly, overnight, there was a large fog that rolled through, introducing a bunch of condensation to my nice new, not fully cured paint. The long and the short of it is, it ruined the entire paint job, costing me a bunch of time and money in the process. The icing on the cake was that after that, it was nothing but cold days for 2 weeks. I worked sparingly, sanding when I could and just trying to prepare for the day when I could paint. And just last week, those days came. I did a repaint on it and, for the most part, it got a decent coat. The unfortunate thing was that the unseasonably warm weather brought about the bug apocalypse and I could not for the life of me get a coat without 2 dozen bugs finding their way into it and killing it. I think I managed to go through three separate painting cycles before I pulled off a relatively clean coat. The roof was always littered with bugs so rather than the regular green, I took a bit of a more aggressive approach to the painting, which you can see in the pics below. I still need to put the lot of it back together, but that's the easy part. Here it is before I finally decided to remove everything on the doors for a cleaner coat. I was in the process of doing some light body work to repair some trail rash I had received before. The fenders and hood all set out and sanded smooth. (Due to the frustration of the multiple coats I had to do, I don't have any in between shots of the failed paint jobs and the resanding on those). Also visible is my rotting bedsides. Here's where it jumps straight to the successful paint jobs. I went with a bedliner black coat for the lower quarter and the roof. The doors are all reassembled too now. Here it is with a fender mocked up to see how it looks(the fender was new off of a stock rig so I still have to trim the front bit up higher). You may also notice that the rockers are still green, and that's because they are not much longer for this world(being replaced with 2x6 steel tube) A good pic with the doors off And the doors themselves. And the hood I just finished today. I used contact paper to stencil out a custom design I made and then removed it once the paint tacked up a bit. I have an in progress shot of it, but it seems I didn't upload it. The hood is still in the process of drying here, so it looks a little mottled Now, all I need to do is get my leaf springs and toss everything back together(and paint the bed a bit more, but that's not crucial since it's on its last legs). I'll be steadily reassembling this week so I'll add more update pics when I complete more. -
Hell, I think I got 2 sets off of here a few years ago for 50 bucks... The prices sure have inflated.
-
DrComanches Project "Frankenstein"
drcomanche replied to drcomanche's topic in MJ Hardcore Tech: Epic Journeys to Greatness
A few new updates as I've been working on the truck. The frame rails are primarily done. I need to finish the coating a bit more on the interior, but after that, they should be good to go for many years to come. Another part of this whole process was to dismantle the body pieces and repaint everything since the old green was cracking and failing. I managed to get the brakes and rotors back onto the painted axle and the e brake parts reassembled(with a lot of effort). So to pass the time, I jumped to sanding the old paint coats off and getting it all cleaned up. The axle all painted up with 5 coats(a bit extreme, but I really don't want rust) The frame all painted in POR 15 A look at the horror that is the bottom of the bed. I've lost 4 of the 8 mounting points on it, so this'll be a bit of work. A pic of the "tool" I created to clean the inside of the framerail. I took a braided wire cable with a plastic wrap and stripped the plastic about 4 inches back on one end. Then frayed the strands a bit and, voila, attach it to a drill, thread it into the frame and let her rip. I took the opportunity to grind the very ugly welds down on my rear bumper so they were relatively flush A pic of the rocker damage... It's the same on the other side too. The tailgate had some bulges under the paint at spots so I sanded it all down to take a look. Someone did repair work to it before, but didn't properly prep the metal afterwards and it rusted through again. I also removed my driveshaft since it was immediately available to wire wheel and repaint. A different angle of the rail paint. It isn't exactly pretty, but it will protect like no tomorrow. The axle with the brakes reattached. It to a while to get the rotors seated correctly. Started taking apart the front end to repaint. I don't want to do a superficial job on it so I'm removing panels and painting everything. All stripped except for the hood All the pieces removed and ready for sanding The entire body sanded and I painted the fender wells and hood support beam black. A coat of black on the backside of the fenders, the front clip bottom and the wiper arms Goodbye skull logo!(It'll be back) Now I'm just waiting for good sunny days to actually paint it and put it back together! -
DrComanches Project "Frankenstein"
drcomanche replied to drcomanche's topic in MJ Hardcore Tech: Epic Journeys to Greatness
As promised, here are the pics with some captions for detail. The very beginning, taking off the tailgate and the electrical components A pic of the repair that was done for the frame splice. It has another fish plate on the inside as well. My nightmare of a wiring harness. Need to build one or find a new one. Bonus picture of my workbench project. Before I started any more work on the truck, I needed work space, and this is the first house I've been in with a garage, so I made the most of it. After the bed was removed. The axle after being broken away from the suspension components. The bed itself, which will require its own heavy work days. A bunch of the pieces I pulled, sanded and started repainting with POR The axle before sanding. Broken leaf spring that I'm having trouble identifying. It doesn't look like any Comanche spring out there. The axle after full sanding, grinding, and washing, ready for paint -
DrComanches Project "Frankenstein"
drcomanche replied to drcomanche's topic in MJ Hardcore Tech: Epic Journeys to Greatness
Been a while since I've updated, but a lot has happened with the truck. Now when I last left off, the axle was planned but not finished. Maybe a month later, I finished the rebuild on it and got it all bolted up. I ended up having to replace every SINGLE part up front. That in and of itself, was a nightmare. The plus side is that it meant all fresh parts. It took a while to get it together but eventually I got it back on the road(I'llbeit for a very short amount of time before it went for major surgery). So now the biggest issue was the frame. The passengers side leaf had collapsed into the frame by an inch and was quickly becoming worse. To the point where the whole hanger was separated from the frame. I tried for many weeks to find someone who could do the frame splice, but no company was willing to do it. I rummaged through various contacts and nothing panned out. Eventually, however, a local group here called SOMD Jeepers got me in contact with some guys who were very proficient in welding and had done frame splicing work in the past. I contacted them and after about a month, I had my truck back with a new lease on life. After that ordeal, and getting a peak into the newer, less rusted frame rail, I could see the tell tale signs of rust starting in the new ones. It isn't much at all, but enough that I jumped into the next stage of my plan. So after a few weeks of driving it, I parked it and stripped the whole back off of it to grind out the frame rails and properly coat them to prevent future rust issues. In addition to this, since the equipment was already removed, I am also grinding the suspension components, brakes, and axle out and hitting them with a few coats of POR 15. The passenger side leaf spring, when it was detached, was found to be broken in half at the top piece. The u bolts holding it on were beyond removable, so I cut them off with an angle grinder(cheap replacement). I disconnected all parts to the axle and have since ground it down to base and coated it with POR 15. I also sanded the calipers, rotors(centers), shackles, tailgate latch handle, and spring plates down to be painted. My goal in addition to getting the rear up to standard is to repaint the truck while I have the bed off as well. The paint has been really fading and cracking for a while, so while I have access to the rear cab panel, I'm going to sand and repaint. I have to figure out how to sand out the interior/fender section of the bed that has started to rust, but hopefully, I'll come up with something for it. I will also be bedlining it and my other gold Comanche. All in all, it will be finished pretty soon and then it's on to getting the clutch replaced. I would post more pictures, but they are all too big since I can only upload 1.9mb. I uploaded a pic of when it first got back on the road before its surgery. I'll try to post more pics later once I figure out how to dumb them down a bit.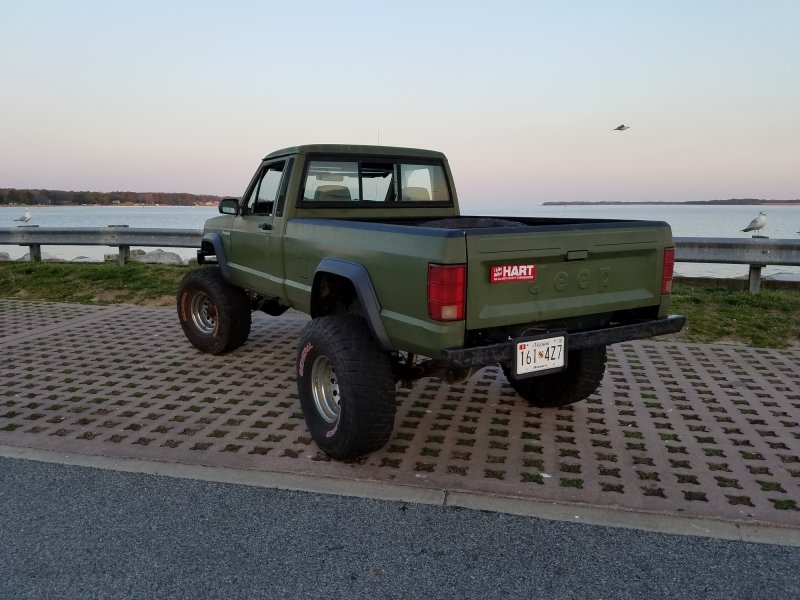
-
That's the one! Don't know why it didn't come up in my searches on ebay...
-
While it is the fog lights that are the issue, it's the actual bulb holders/twist locks themselves that have rusted to nothingness. Can't even get the bulbs separated.
-
Good point. Sometimes I forget it's all the same up front.
-
As the title says, I'm looking for a renix Era tail light harness, but either will work. Also looking for the headlight assembly since my fog light connectors rotted away.
-
I recently had a truss installed on my old school D44 axle that blocked out my old breather vent on the diff. I put a bolt in to seal it, but now I need a relocation. My question is, where is a good place to relocate it to? Could I possibly put it on the bump right there? It's out of the way of both gears, but would it just cause diff fluid to enter it? The old one is hard to see here, but it's pretty much right behind that lip and between the two bolts.
-
DrComanches Project "Frankenstein"
drcomanche replied to drcomanche's topic in MJ Hardcore Tech: Epic Journeys to Greatness
It's been a long while since I've posted on here, but that doesn't mean I have stopped working on it. In the end, I decided not to sell the truck, since I started a new job with a higher pay grade, and went for the full repair on it. It's been very slow going and most of it is just gathering parts necessary to work on it. I'll try to give a brief overview of what all has happened. I pulled the front axle and ground all the brackets off. Had to order another truss for the axle(because the company sent the incorrect one) and there was a local Jeeper who welded it up for me. All the front end parts went to paint and I chose gloss black for the axle housing and the army green for the suspension components and the knuckles. It was hell to find parts for the thing that fit since so many companies claimed it would work for the older D44 but later revoked that claim. Eventually, I found the lot of the parts, but every time I went to work on the axle, something else would be messed up and I had to order more parts. In the end, I ended up having to replace almost all of the components. I started to piece it back together by reinstalling the gears and torquing down the diff bearing caps. It took a while to find a set of bearing cap bolts that actually worked, so now it has studs on it. I have a new Riddler Diff cover for the whole deal that I've loosely installed until I can get the vent hole figured out. I installed new brake calipers since the old ones were very worn out. What I have left to do for it is to relocate the breather vent, get a ball joint press, and reinstall all the suspension components. Once it is mock mounted I can get measurements for a panhard bar and she should be ready for the next stage. Now if anyone remembers when I wanted to sell it, you may recall that it had a lot of body rot to it. So this axle rebuild is only a stepping stone to the next part. I ended up getting a frame rail set from the middle of the cab back and currently have that in waiting to replace my rusted out rear rails(in addition to some doors that I will later turn into trail doors). But the best part of the whole deal here is that, despite how unusual and costly a Comanche is, I managed to find someone in my area selling one. The truck itself is all original, since I bought it from the original owner. It comes with literally every receipt from repairs and it is in fantastic condition (garage kept it's whole life). So the plan once I get the old up and moving is to transfer all the parts over to the newer better condition one and systematically restoring parts as I go. I hope to get underway with that before the end of the year. The axle all bolted up After installation of the gears Some of the rust that's on the rails From blue to green My extra frame rails The new Comanche -
Just Got My First Mj
drcomanche replied to ryanatrocks@yahoo.com's topic in Member Projects: Your Comanches
I loved reading the build for this truck. Glad to see it back in action and it looks better than ever. -
I'll try to mock it up with flat flares and see what happens.
-
It seems to be on and off with the pic. It works for me on everything, but sometimes people can't see it. Not sure what's wrong.
-
I'm keeping the fronts army green. The only color change I'll be doing is undercoating the lower edge of all the body panels. And I don't need the rear flares, I just like the look. But it's hard for me to envision how it would look mix and matched like this. Even the Photoshop didn't do much to give me an idea.
-
It's working for me on phone and online... I'm not sure why it wouldn't be showing...
-
What hornbrod said. That brake fluid weakens the plastic and brass and makes it flake away under even the slightest pressure. And yes, my mistake on the order of events. Leak comes first, otherwise you'll ruin another good fuse panel. I was too focused on the power issue at hand.
-
Ask anyone here, we know the feeling of walking the tightrope. Look into some fuse panel, maybe post on the forums, to see if you can't find a used one in good condition and replace it when you can. When it comes to power issues, I would say that is most likely your problem. And even in the off chance that it isn't, it is a necessary replacement that will save you a headache in the future. As for the flooring; rule #1 with these trucks is check the floors. It is the most reputable place to rot(aside from maybe the rockers and cab corners). Fortunately, with floor pans and a decent welder, it shouldn't present much issue to fix.
-
You may want to take the fuse panel itself out and see if you have some wiring/brake fluid issues. IIRC some MJ's had an issue with the brake booster leaking onto the panel. In any case, at least it's narrowed (relatively) to the fuse panel, although I don't think its directly related to the hazard relay. Pay particular attention to fuse 3 in the diagram that hornbrod provided as that's the most closely related with your issues, it seems. Someone with more electrical experience may chime in as to why the relay is causing some symptoms to go away.
-
I once made a wrong turn while driving near Baltimore and ended up on a 75mph road. With 36 tires and 5.13 gears all built on a fairly odd setup, it was one of the more terrifying experiences of my life. It was all shakes at that speed and very close to redline. Needless to say, I got off that road very quickly.
-
I've been looking over the Zone Offroad Comanche for a while and really like the stance and appearance. The one thing I really don't like is the fiberglass front fender flares(say that five times fast). They come up higher than the rear wheel well and I'm just a fan of uniform matching heights and appearances. The fronts work for their low lift setup on those 40's, but mine is higher than that. On the contrary, I really like the rear flares from Hannemann. So I was thinking, to keep that same height but not have the odd front flares, of combining the bedsides from Hannemann and then putting some Bushwacker flares up front. I mocked up a photochop real quick to demonstrate the look(a bit messy on some edges, but gets the point across. Given more time, I'm sure I could make it convincing). Any opinions? Better options?
